Last Updated: 2025-06-27
Purpose
The purpose of this article is to provide a clear, step-by-step guide for integrating Microsoft Teams with Portal using a webhook, and how to configure notifications to deliver information efficiently to the Teams channel.
Introduction
The integration involves creating a MS Teams workflow to generate a webhook, configuring this webhook in Portal as an integration. After the integration, the new webhook is linked to a notification with a specific trigger and a JSON Adaptive Card. The JSON allows users to select among the available variables, to then display the desired information in a Teams channel posted as a user. The correct information and numbers will automatically be represented in the card when it has been triggered to send, giving the variables in the JSON are written correctly.
This integration delivers tailored notification updates directly in the MS Teams channel, which means the information is easily accessible for everyone on the channel so that actions can be made effectively. Multiple notifications can be sent to the same webhook, meaning different kinds of important information can be sent to the same MS Teams channel as adaptive cards.
Prerequisite
The workflow app need to be installed on in Teams
To install:
-
Open Microsoft Teams.
-
Click on + Apps

-
Search for Workflows in the search bar to the left.
-
Click on add and follow the instructions to install.
Set Up a Microsoft Teams Workflow
To set up a Teams Workflow:
-
Open Microsoft Teams.
-
Click on + Apps
-
Search for “Workflows” in the search bar to the left.
-
Click on Open.
-
Navigate to Create.

-
Click on Create from blank.

-
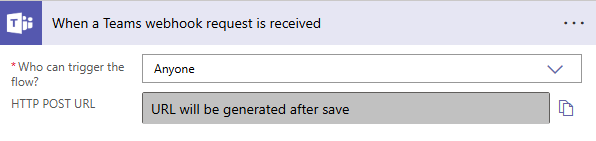
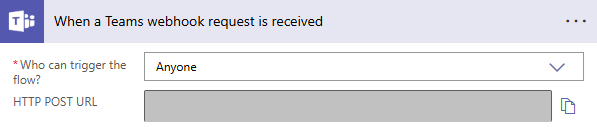
Search for the trigger “When a Teams webhook request is received“.
-
Click on When a Teams webhook request is received.

-
Set Who can trigger the flow? to Anyone.
-
Click on + New step.
-
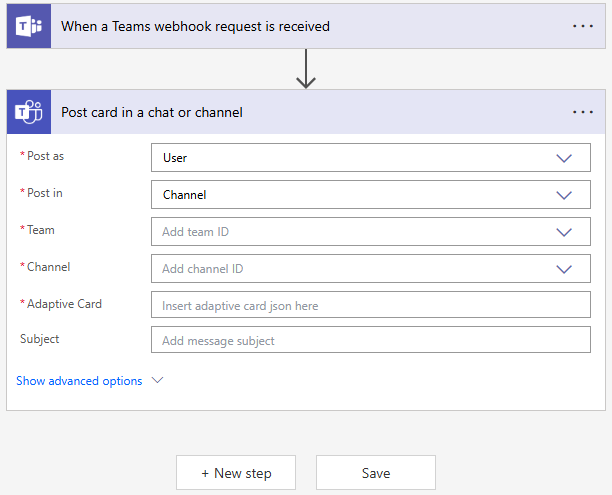
Search for the operation “Post card in a chat or channel”.

-
Click on Post card in a chat or channel.
-
In Post as, select User from the drop-down menu.
-
In Post in, select Channel.
-
In Team and Channel, Add the respective ID from the drop-down menu.
-
Write a temporary text in the Adaptive Card field.
Due to how teams functions, selecting a data source for the Adaptive card does not work when creating a new workflow.
-
Save the workflow.
-
Navigate to Home.
-
Click on the newly created workflow.
-
Click on Edit.
-
Click on Post card in a chat or channel.
-
Erase what is written in the Adaptive Card field.
-
Click on Add dynamic content.
-
Search and select Body for Adaptive Card.
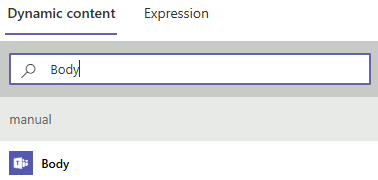
Since there are two cards available, Body and body, select the one with a capital B.
-
Save the workflow.
-
Copy the HTTP POST URL for use in the Portal.
Create the Integration in Portal
To create the integration:
-
Navigate to Configuration > Integrations in the Main Menu.
-
Click the green
-
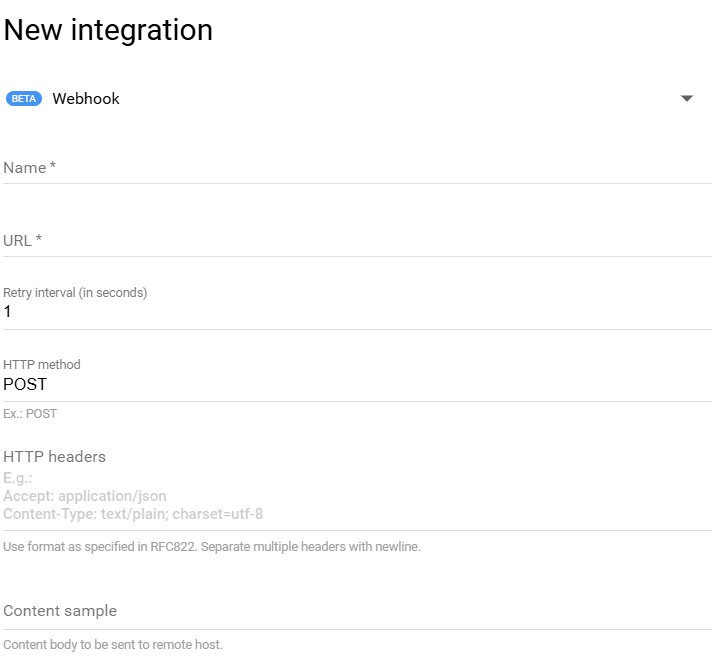
Select Webhook from the drop-down menu.
-
Name the integration.
-
In the URL field, paste the copied HTTP POST URL from step #24 in Set Up a Microsoft Teams Workflow.
-
Write POST in the HTTP method field.
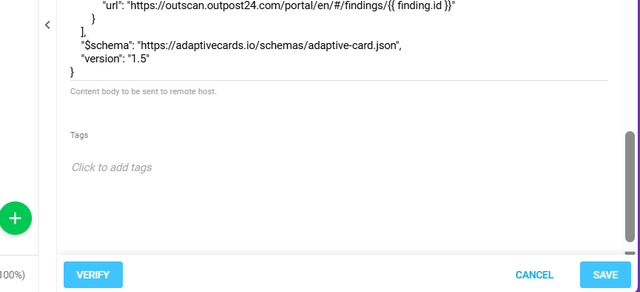
-
Write a JSON to test the integration in the content sample field.
Use the Microsoft Teams JSON use case for quick testing. https://kb.outpost24.com/kb/event-notification-use-cases
-
Click on Save to create the new integration. The card is posted in the selected channel, which means the integration works.
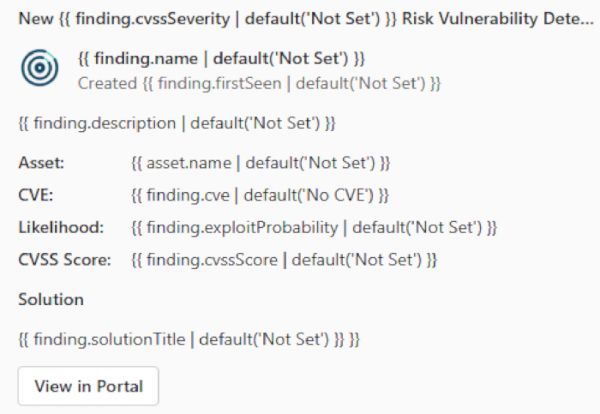
Example card that is posted in the selected channel.
-
Click Verify to run a verification.
Create a Notification Card
To create a notification card for the Teams channel:
-
Navigate to Configuration > Notifications Settings in the Main Menu.
-
Click on the green
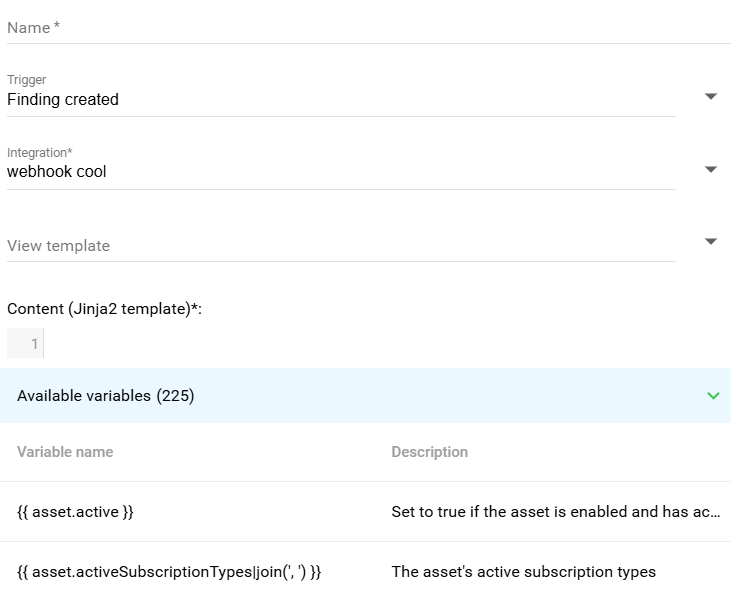
-
Select desired trigger from the Trigger list.
-
Name the notification.
-
Select the webhook integration from the previous section Create the Integration in Portal.
-
Optional: Select a view template to filter what it should trigger on.
-
Write a JSON containing the desired elements for the notification card in the Content field.
For writing a JSON, go to https://adaptivecards.io/designer/ provided by Microsoft to create adaptive cards. A preview of what the card looks like is displayed while making changes to the card.
If not sure which variables are supported for the card, see the list of available variables after choosing the trigger.
-
Click on Add to create the new notification.
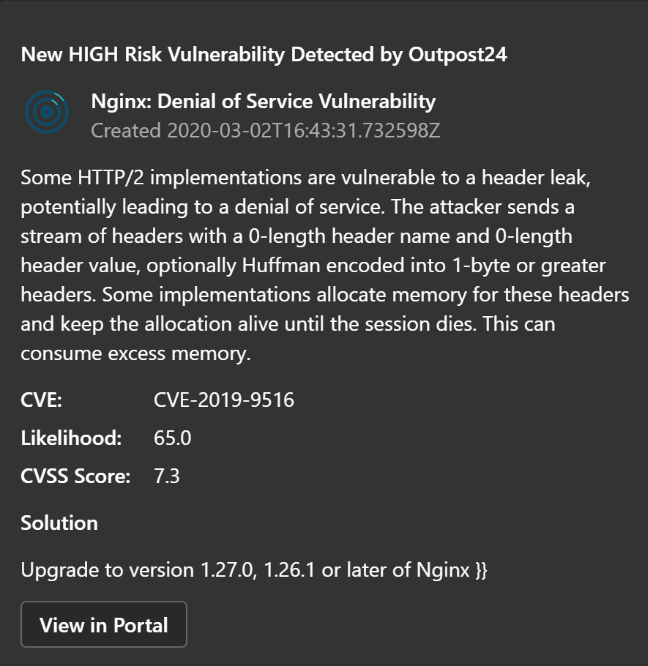
Example of what the notification looks like.
Related Articles
- General Information about SMB/WinRM Scanning
- CyberArk Integration
- Webhook Integration with OAuth v2
- Webhook Integration with JIRA
- Overview
- Delinea Integration
- Portal Integration with ServiceNow Incidents
- Tickets Quick Start Guide
- SNMP Integration
- Webhook Integration with Microsoft Teams
- Webhook Integration
- Syslog Integration