Last Updated: 2025-08-28
Purpose
This article describes how to check the result of an agent scan after a scan is finished.
Introduction
In Outpost24, the Read Agent Scan Result feature allows you to review the outcomes of scans performed by the Outpost24 Agent. This agent is designed for mobile employees who are rarely office-based but still require vulnerability scanning of their assets. When working remotely, often via a VPN, it is not possible to run a remote vulnerability scan of these assets as it can have a serious impact on network performance. Using the Outpost24 Agent makes it possible to get these results with no impact on network capacity and is designed to run the equivalent of an authenticated network scan, providing details of missing patches, updates, and hotfixes for both the operating system and common business software. After a scan has completed, the results are presented under the "scan result" section in the portal, allowing you to assess the security posture of remote assets efficiently.
Agents
Requirements
-
Your account needs to have an agent license.
-
You need to be logged in on the Portal.
Check Scan Result
After a scan has completed, the results are presented under scan result in the portal.
-
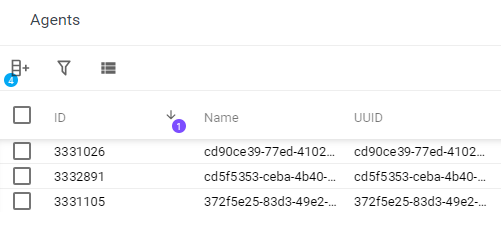
Navigate to Assets > Agents.
-
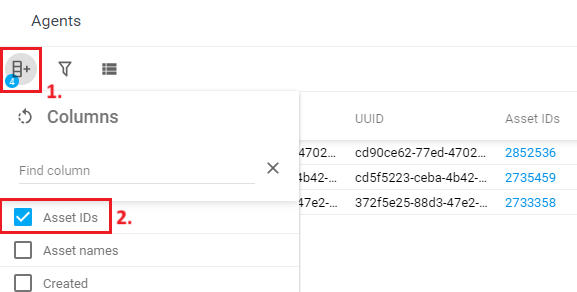
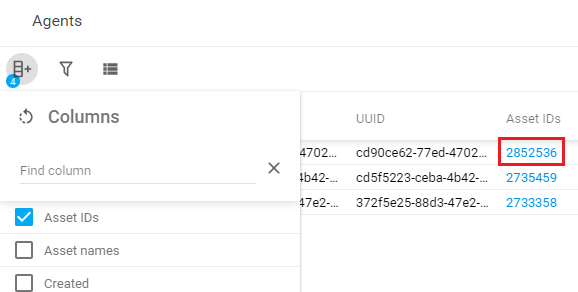
Click on the filter icon and select Asset IDs.
-
Click on the Asset ID. The Assets display appears.
-
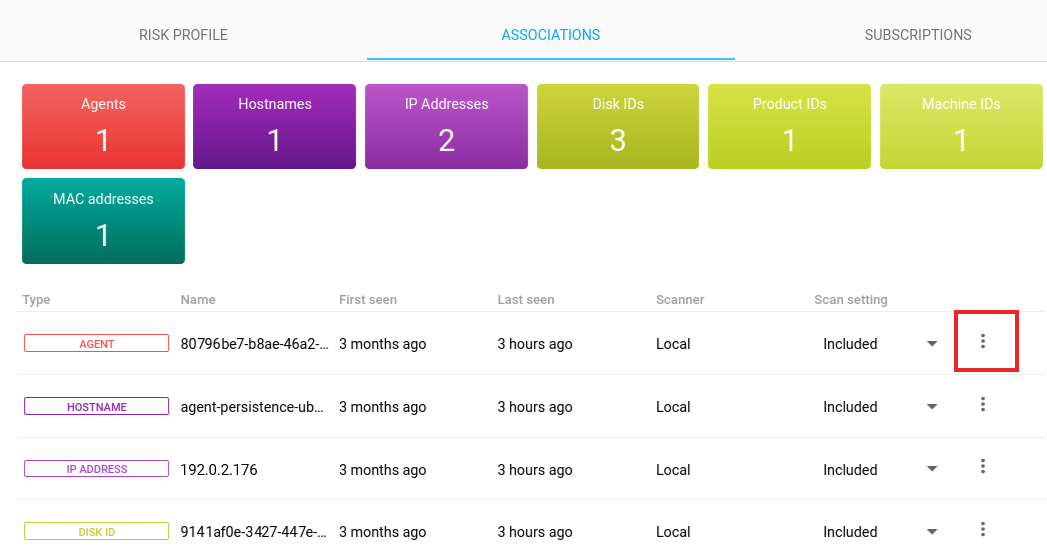
Click on the asset name, select Associations tab. Asset identifiers related to this agent are displayed on the right hand side.
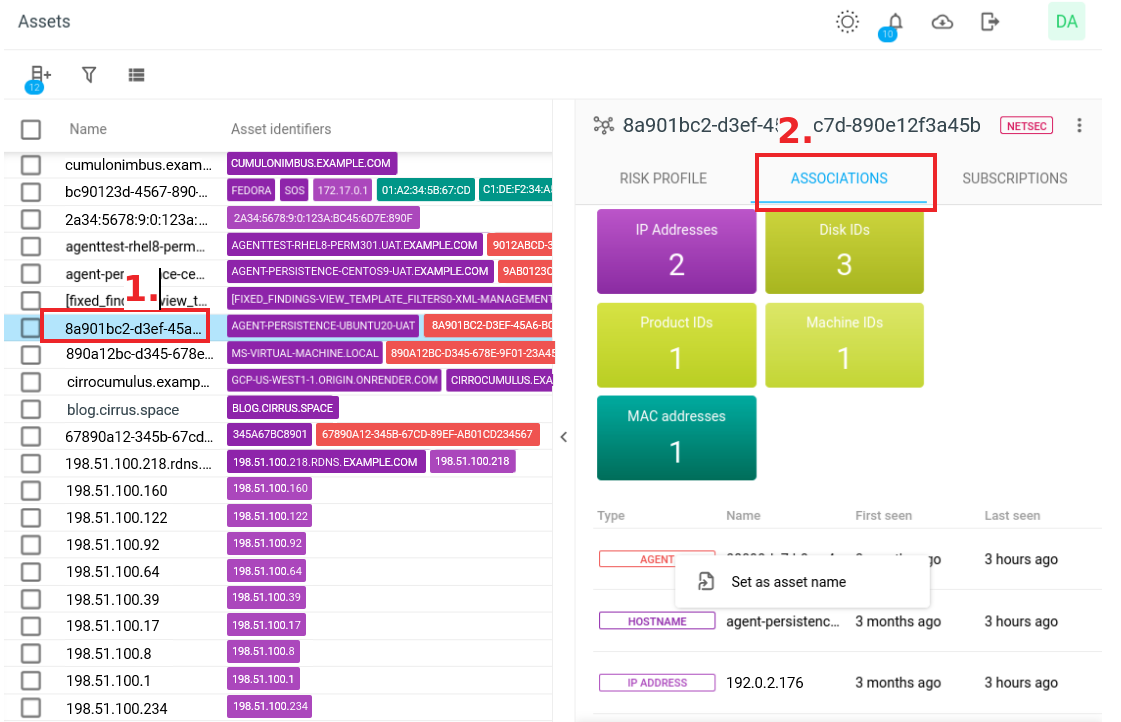
The result contains these asset identifiers presented with information about Name, First Seen and Last seen:-
Agent.
-
Hostnames.
-
IP Addresses.
-
Mac addresses.
-
Disk IDs.
-
Machine IDs.
-
Product IDs.
-
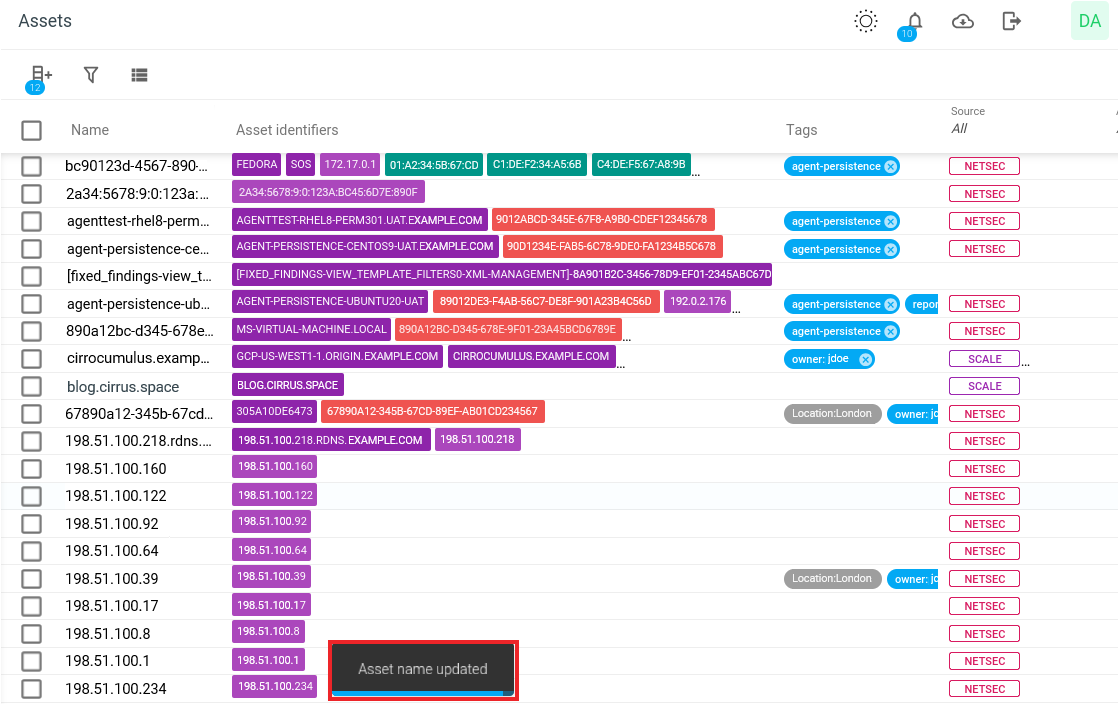
Set Asset Identifier Name as Asset Name
-
Click on the three-dot

-
Select the Set as asset name option to assign the asset's identifier name as its asset name.
Related Articles
- Windows 10/Windows 2019 Server
- General Information about SMB/WinRM Scanning
- Windows 8.1
- Scan Blueprint
- How to Test SMB Authentication
- Docker Image Assessment
- Windows 2016 Server
- How to Scan AWS ECR Images
- Scanning-Less Scanning
- Scan Scheduling Errors
- Network Host Assessment
- Core Installation
- Windows 2008 R2 Server
- Scanning Range
- SMB Authentication from OUTSCAN/HIAB