Last update: 2023-09-04
Purpose
This article describes how to create a user on HIAB/OUTSCAN.
Introduction
The Create Users feature in Outscan allows administrators to create and manage individual user accounts within the system. Through the Manage Users interface, administrators can define account details, configure login credentials, and assign roles and permissions that determine what actions a user can perform. User accounts can also be organized within a hierarchical structure, where parent accounts can manage subordinate users and control their access to resources such as targets and scanners.
Using dedicated user accounts is an important part of secure identity and access management. By assigning specific roles and permissions to each user, organizations can enforce the principle of least privilege and maintain clear accountability for actions performed within the platform. This approach improves operational security, supports auditability, and ensures that users only have access to the resources and capabilities required for their responsibilities.
Prerequisites
User Roles need to be created before the user to be available for selection.
See User Roles for more information on how to create roles.
Create a User
To create a user:
-
Click Main Menu > Settings > Manage User.
-
In the Manage User Accounts window select User Accounts tab.
The buttons at the top center of the screen ids used to create, delete, or import users from LDAP/AD.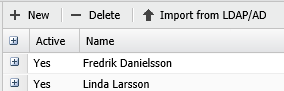
The Import from LDAP/AD function is only available on HIAB. See LDAP/AD user guide for more information on setting up and mapping users in LDAP.
-
Click + New to create a user.
-
In the Maintaining User Account window, fill in the Account Details and Login Details.
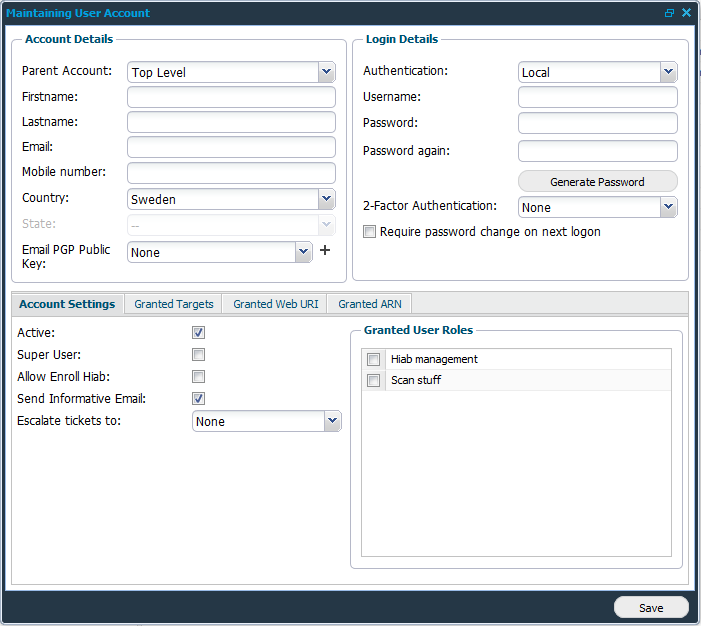
In the grid on the lower half of Maintaining User Account window, the account access and rights can be further set up in the different tabs. Note that the tabs differs depending on your license.
Account Details
|
Option |
Description |
|---|---|
|
Parent Account |
Sets the parent account, could be used to create hierarchy structures. |
|
First name |
The first name of the user. |
|
Last name |
The last name of the user. |
|
|
A valid email address to the user. |
|
Mobile number |
The mobile number of the user. |
|
Country |
The country of the user. |
|
State |
The state of the user (Active if Country is United States). |
|
Email PGP public key |
Select PGP public key or click the + sign to upload a PGP key.
|
Login Details
|
Option |
Description |
|---|---|
|
Authentication
(HIAB Only) |
Choose if the user credentials should be verified against the local database or the defined LDAP or Active Directory server. |
|
Username |
Enter a username. |
|
Password |
Enter a password, or generate a password using the password button. Passwords are generated according to the password policy located in the Security Policy tab under Main Menu > Settings > Account. See section Password Policy in Account Settings document for information on how to set password policies. |
|
Password again |
Confirm the password by re-typing in this field. |
|
Require password change on next logon |
If enabled, forces the user to change his/her password the next time they log in to the system. |
|
2-Factor Authentication |
If enabled, you may set up the mode of authentication from here. Mobile Security Code or Google Authenticator can be used for authentication. The method used for authentication can be limited, depending on the options configured for two factor authentications in the security policy. When Google authentication is selected, you will be asked to enter the credential ID which is used to set up the account. |
-
In Account Settings tab you can deactivate an account and set the users notification.
|
Option |
Description |
|---|---|
|
Active |
Activate or deactivate account. |
|
Super User |
A user with Super User enabled will have the same rights as the main account (which is unrestricted). |
|
Receive System Notifications |
When Super User is active, the user can receive system notifications, or have it deactivated. |
|
Allow Enroll HIAB |
Allow the user to enroll HIABs. |
|
Send Informative Email |
If Send Informative Email is activated, then the system will send an email to the sub user when their account has been changed. |
|
Escalate tickets to |
The Escalate tickets to drop down menu allow you to define who should receive any tickets which has not been resolved prior to its due date (which were assigned to this specific user). |
-
Assign the user with one or more Granted User Roles otherwise the user will not be allowed to perform any actions in the system.
For more information on how to create user roles, see User Roles.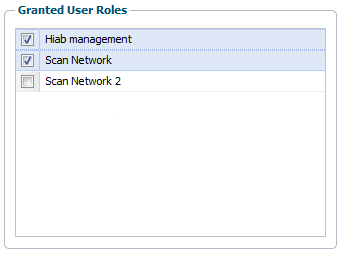
-
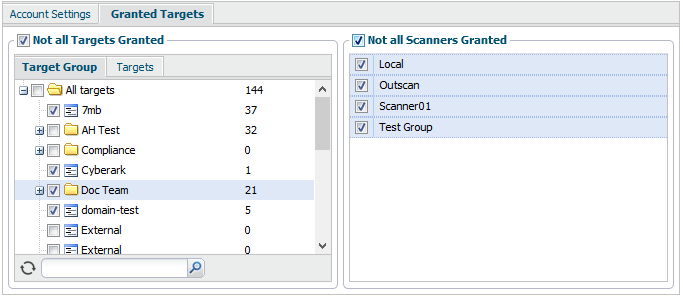
In the Granted Targets tab, you can define which targets and scanners (if enabled) the user should have access to.
-
Not all Targets Granted limits the target groups and targets a user can see and administrate. The target list feature should be used sparsely since it create an overhead when it comes to administrative task in the long run. The only time you should use this feature is when you would like to grant access to a whole IP range without having to define all targets within the system.
-
Not all Scanners Granted works in a similar way as Not all Target Granted and limits the scanners a user can see and administrate.
-
-
Once the user has been set up, click Save.
Related Articles