Last Update: 2026-03-17
Purpose
The article provides an overview of the Outpost24 Portal UI interface, serving as a quick start guide for users.
Introduction
The article outlines prerequisites for running scans, including access to an OUTSCAN/HIAB or Appsec account, and emphasizes the importance of avoiding the private IP range 10.88.0.0/16 to prevent scanning issues. Users can log in and out of the portal, with a toolbar displaying tools specific to selected items, and a main menu offering various views such as Asset Groups, Findings, and Configuration. The guide also covers notifications related to vulnerability management and the process for selecting rows and using tools within the interface.
Prerequisites
To run scans in Outpost24 Portal, the reader needs basic access to an OUTSCAN/HIAB or Appsec account.
Make sure that the private IP range 10.88.0.0/16 is not used in your environment, since this is used to communicate with a restricted container on the scanner. Having targets in this range while using the side scripts feature may cause issues while scanning them.
Login
There are several ways to login to the Outpost24 Portal UI:
-
From OUTSCAN
-
From a HIAB
-
or directly to the Outpost24 Portal
Log In Through OUTSCAN and HIAB
-
To launch the OUTSCAN application, open a browser and navigate to
https://outscan.outpost24.com/. -
To connect to a HIAB, open a browser and enter the assigned network address
https://your-appliance-ip.
Always use the HTTPS protocol when accessing OUTSCAN or the HIAB.

-
Log in using your credentials.
-
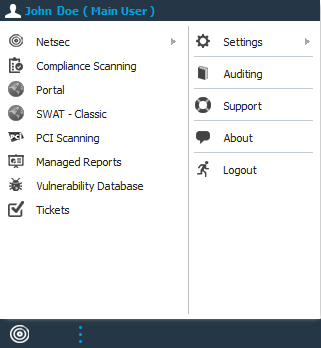
To access the Outpost24 common Portal , go to Main Menu > Portal.
Log In Directly to Portal
Open a browser and navigate to https://outscan.outpost24.com/portal.
The Portal is only reachable via HTTPS.
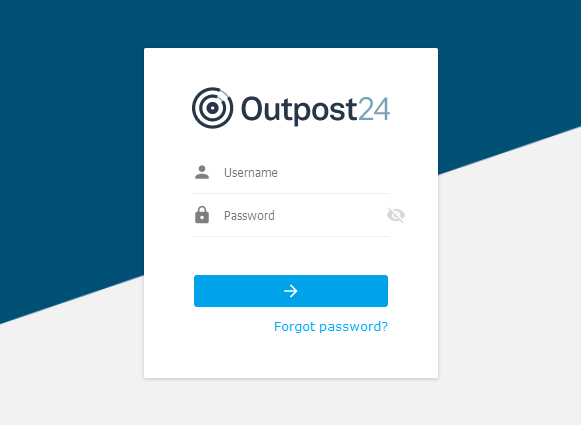
Enter your credentials and click on the blue arrow button to log in.
Logout
To log out from the Portal:
-
Click the account icon in the upper right corner of the window.
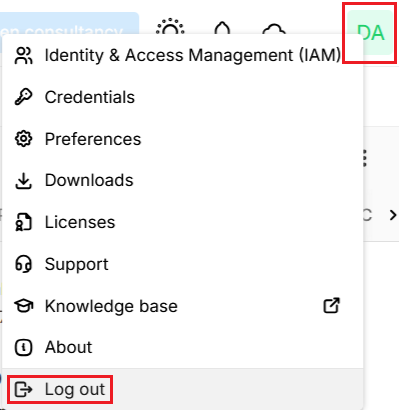
-
Select the Log out from the menu.
-
The logout confirmation window is displayed.
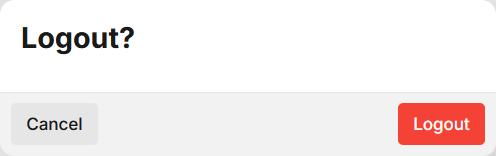
-
Click on the red LOGOUT button to log out from the Portal.
Toolbar
When selecting an item in a table, a toolbar is displayed at the bottom of the screen showing the available tools for that specific view.
The tools vary between different views, tables and subscriptions.
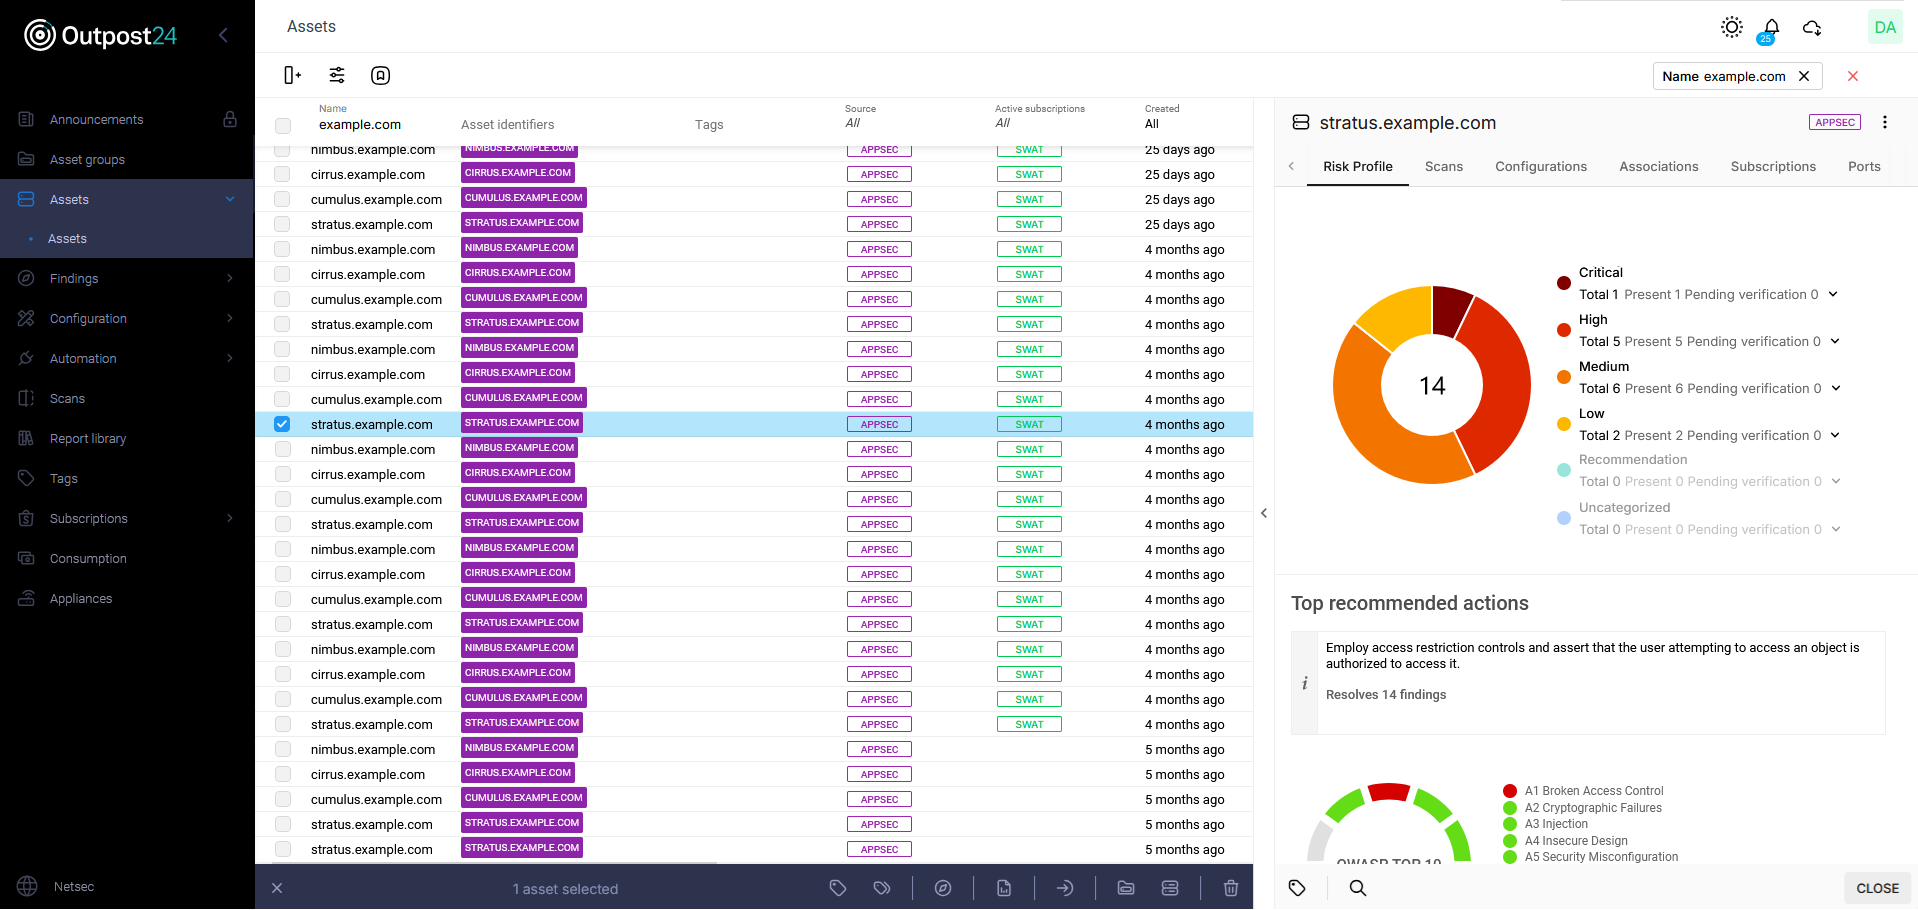
The tools can also be accessed by right clicking on an item which provides an context menu for that specific item.
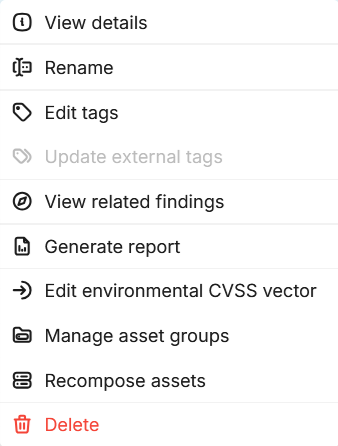
The context menu vary between different views and tables.
Tooltip
By hovering with the cursor over a tool, a tooltip popup is displayed.
Main Menu
The Main Menu is located in the column on the left side of the screen.
The content of the Main menu may differ between user depending on user roles and subscriptions.
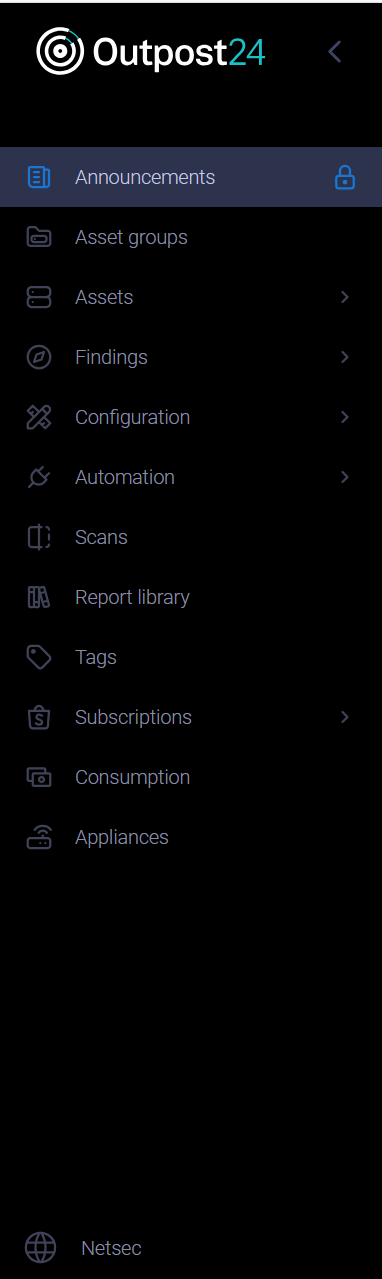
Some of the available views in the Portal main menu are:
-
Announcements
-
-
Informational
-
Compliance
-
Catalog
-
-
Rules
-
-
Subscriptions
-
Appliances
At the bottom of the toolbar there is a Netsec entry that links to the Netsec UI.

On the top right side of the toolbar:
-
Notification
-
All downloads
-
Logout
-
Accounts
The letters in the Account icon varies depending on the name of the account.
Filter Toolbar
The filter toolbar contains functions for configuring the columns in the view, filter configuration for the content of the columns, and view templates.
To the left:
The Column ![]()
The Filters ![]()
The View Templates ![]()
The Asset Groups and Assets ![]()
To the right:
On the right hand side the active filters are displayed which can be individually switched off or the red cross ![]()
Loading Time
Loading took: At the bottom of the frame there is an indication of the time taken by the server to return the list of items visible inside the table, the timing is updated when filtering or vertically scrolling inside the table.
Refresh the page by clicking on the ![]()

Notifications
The Notification provides you with knowledge about changes to vulnerability management program. For example, when the scanner is updated, when alterations are made, and when scanning occurs unsuccessfully.
See Notifications and Notification Settings for more information.
New Version Notification
When a new version of the Portal is deployed, a notification toast is displayed to inform that an update is available. The toast includes two options:
-
Reload: Immediately refreshes the application and applies the latest version.
-
Later: Postpones the update. The notification will reappear after 1 hour to remind the user about the available update.

Selecting Rows
You can select a row by checking the corresponding box, this activates the blue toolbar at the bottom of the view and enables you to use tools within on the select row. The same tools can be accessed by right clicking the item and activate context menu which contains the same tools as the toolbar.
Multi Select
You can select several rows by checking multiple boxes at a time. This enables you to use the tools from the blue tool bar beneath the table on all the selected rows simultaneously.
For example, to use the tagging tool on three rows at once, select the rows an click the edit tags icon and fill in the tag name. The three selected will get the same tag.
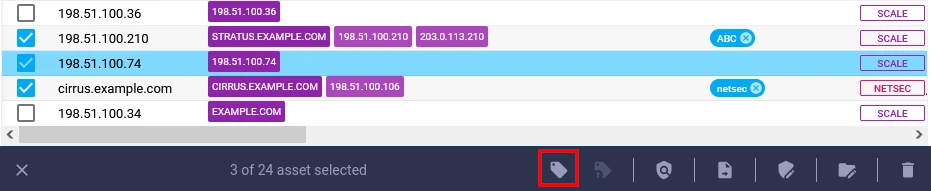
The toolbar varies between different views. For example, the Asset toolbar contains different tools than the toolbar in the findings view.
Related Articles
- Log In Using LDAP
- HIAB Server Settings
- Common Settings Panel
- Portal Icon List
- Licensing Consumption
- Agent Introduction
- HIAB Console
- Column Configuration
- Getting Started with the Portal
- Logging in to the Portal
- HIAB Enrollment
- HIAB Remote Support
- Log In Using Single Sign-On (SSO)
- Virtual HIAB Appliance
- Testing Target System for Open TCP Ports