Last Updated: 2024-10-09
Purpose
This article describes how to accept a risk, to prevent it from appearing during the scans.
Introduction
The Accepting a Risk feature allows users to acknowledge a vulnerability that cannot be immediately mitigated, thereby preventing it from reappearing in future scans. This functionality is particularly useful when compensating controls are in place, or when the risk is deemed acceptable due to specific circumstances. Users can specify the duration for which the risk is accepted and provide a rationale for the decision. This approach helps maintain an accurate and manageable vulnerability management process by distinguishing between issues that require attention and those that are intentionally deferred.
Accepting a Risk
To accept a risk:
-
In the Portal, go to Findings > Vulnerabilities.
-
Select a vulnerability and right click it to open the context menu.
-
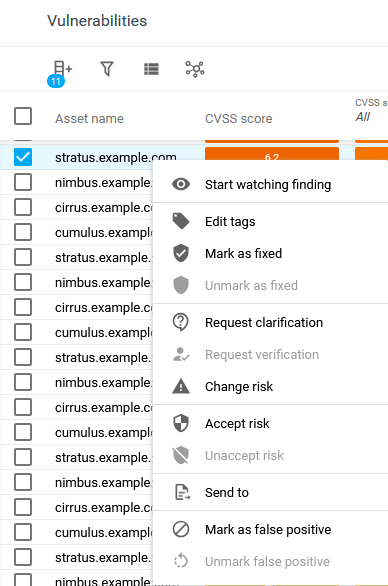
In the context menu, select Accept Risk.
-
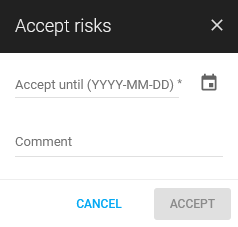
Fill in the date for how long the risk should be accepted to and a comment.
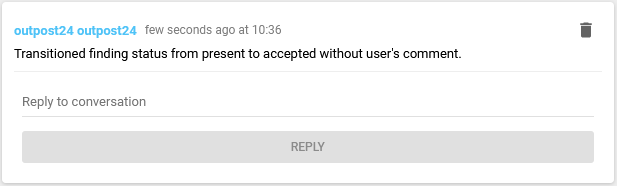
If no comment is given, a default message/comment stating “Transitioned finding status from <original status> to <new status> without user's comment." is saved as a activity log to assist with the reviewing of the finding’s history.
The customer can also transition non-SWAT findings from other status like FALSE_POSITIVE, FIXED or ACCEPTED.
Example:
-
Click Accept.
Related Articles
- Notifications
- Delta
- Solutions
- Accepting a Risk
- Getting Started with the Portal
- Licensing Consumption
- Column Configuration
- Filters
- Common Settings Panel
- Discussions and Commenting
- Managing Tags
- Tags
- View Templates
- Scan Configuration Settings
- Scan Credentials
- Account
- Schedules
- Scans View
- Scan Policies
- Scan Assessment Configuration
- Discovery Scan Configuration
- Vulnerabilities
- Report Library
- Reports
- Identity and Access Management (IAM)
- Basic Credentials
- Assets
- Asset Discovery
- HIAB Console
- HIAB Deployment Guide
- Technical Specification
- HIAB Distribution Settings
- Scan Stages
- Scanning Range
- Using the Agent Info Command
- Checking if Agent is Running
- Removing an Agent from Windows
- Setting Up an Agent Using System Proxy
- Agent Latest Version
- Agent Call Home
- Agent Introduction
- Firewall Rules
- Understanding Scanner and Scheduler
- Supported Browsers
- Check Connectivity to Agent Server
- API Examples
- Retrieving a REST API Token From XMLAPI
- REST API Interface Technical Document
- XML API Interface Technical Document
- Object Identifiers
- DNS Lookup in UI and in Console
- Scan Blueprint
- Scan Scheduling Errors
- Troubleshooting checklists
- Importing Tags for AWS Discovery
- Removing an Agent from Linux
- Workflows
- HIAB E-mail Whitelisting
- Event Notification - Use Cases
- Subscriptions Overview
- Notification Settings
- Scheduled Reports
- Marking as False Positives
- Vulnerability Database
- Installing a macOS Agent
- Generate Reports
- Event Notification - Integration
- Portal Icon List
- Log In Using LDAP
- Log In Using Single Sign-On (SSO)
- Logging in to the Portal
- PGP on User Accounts
- 2FA on User Accounts
- Resource Group Management
- Role Management
- User Management
- Products
- Certificates
- Ports
- Services
- Products Database
- Download Agents
- Agent Installation Introduction
- Installing a Linux Agent
- Installing a Windows Agent
- Managing Agents