Last Updated: 2025-06-18
Purpose
This article describes how up setup Jira as a recipient for issues created in the Outpost24 platform using Webhook.
Introduction
Most SaaS organizations use Enterprise-grade tools for tracking Bugs and Security Fixes. One such solution is Atlassian Jira, a common project management tool used by developer teams to prioritize work. The Outscan platform helps to identify risks that need to be addressed in a timely manner by those developers, so automating the transfer and notification of high, critical, and other risks can often lead to superior time-to-close and meeting robust security deadlines. In addition, this significantly limits the need for developers to have access to the Outscan platform or to manually copy and paste data into Jira tickets, saving time on administrative tasks.
Using built-in Jira text templates, we can highlight the Impact, Recreation, and Solutions to make resolution of risks as easy as possible.
Requirements
-
Access to the Atlassian developer console
-
Access to the Admin role in Outscan (or equal rights)
Steps:
-
Create App in Atlassian Developer Console
-
Create Integration Configuration within Outscan
-
Create Notification within Outscan
-
Test
-
Done!
Step 1: Atlassian Developer Console
-
Navigate to the Atlassian Developer Console:
https://developer.atlassian.com/console/myapps/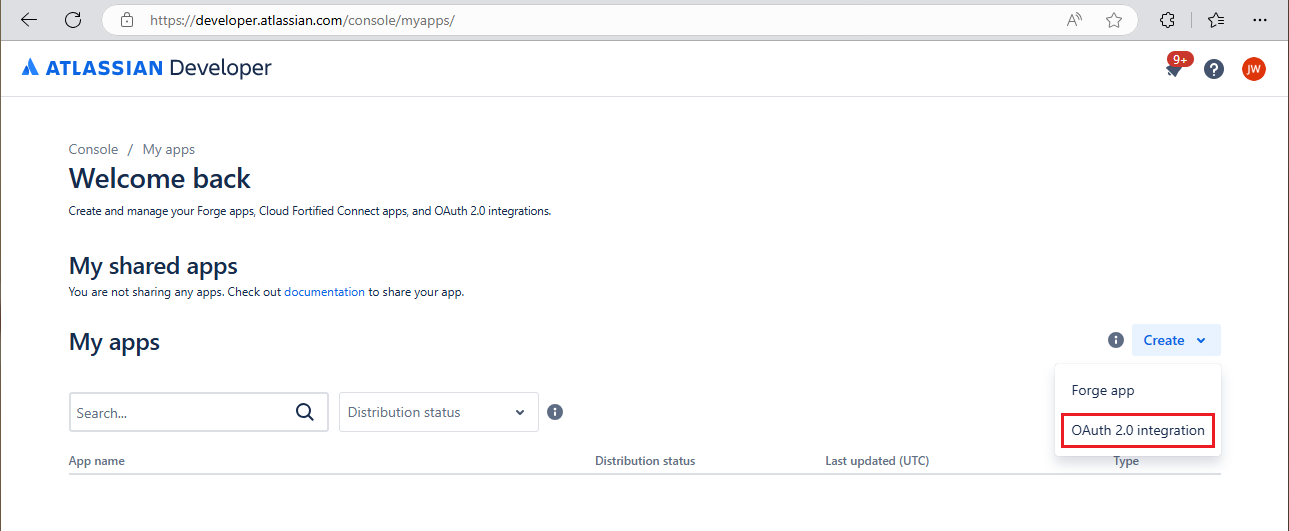
-
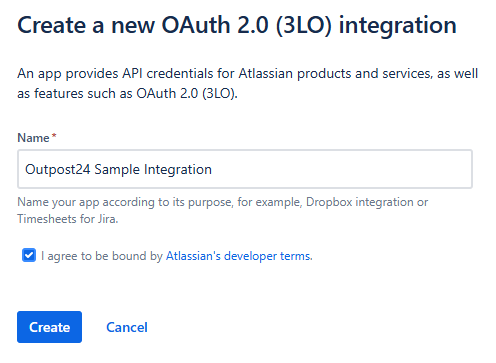
Create an application and give it any name you want.
-
Click Create.
-
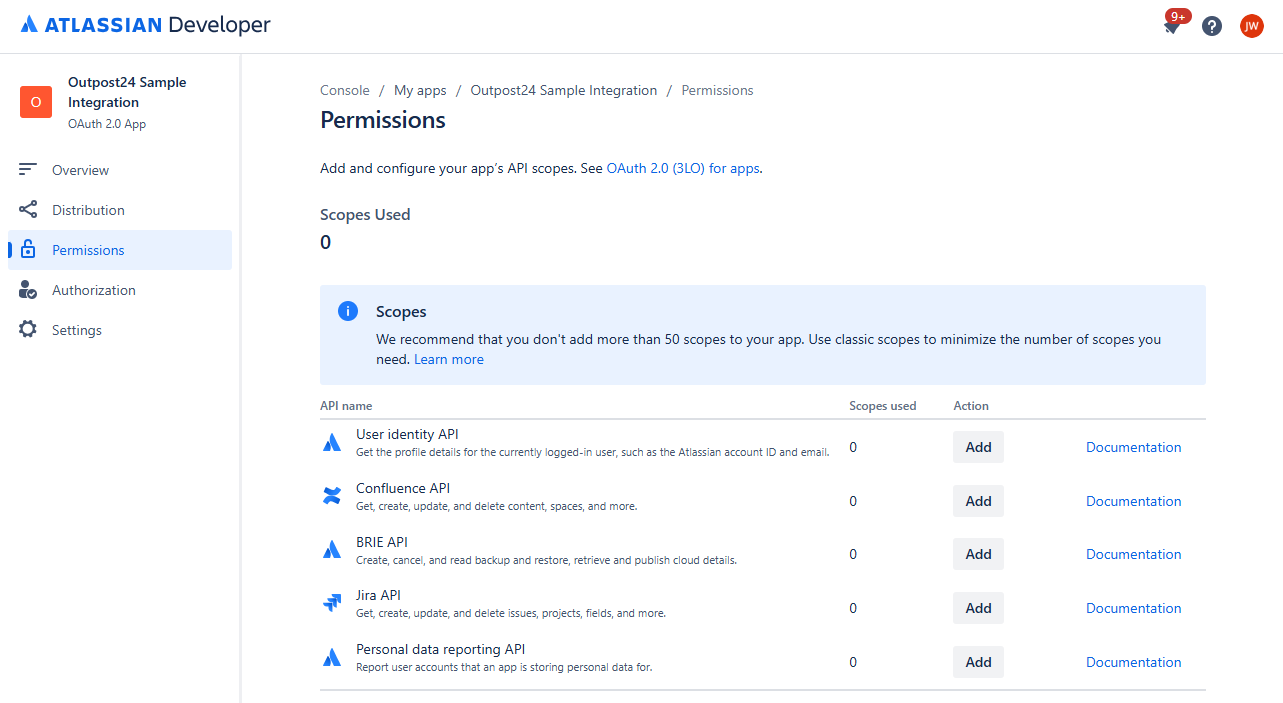
Click Permissions in the left-hand menu.
-
Click Add for Jira API.

-
Click Configure.

-
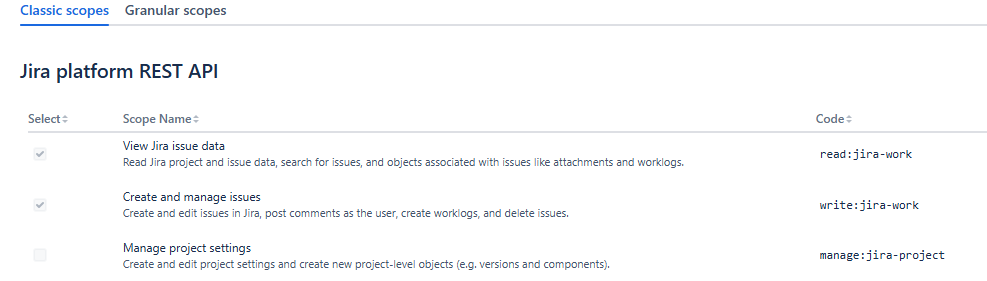
Click the Edit Scopes button to add
read:jira-workandwrite:jira-workand click Save.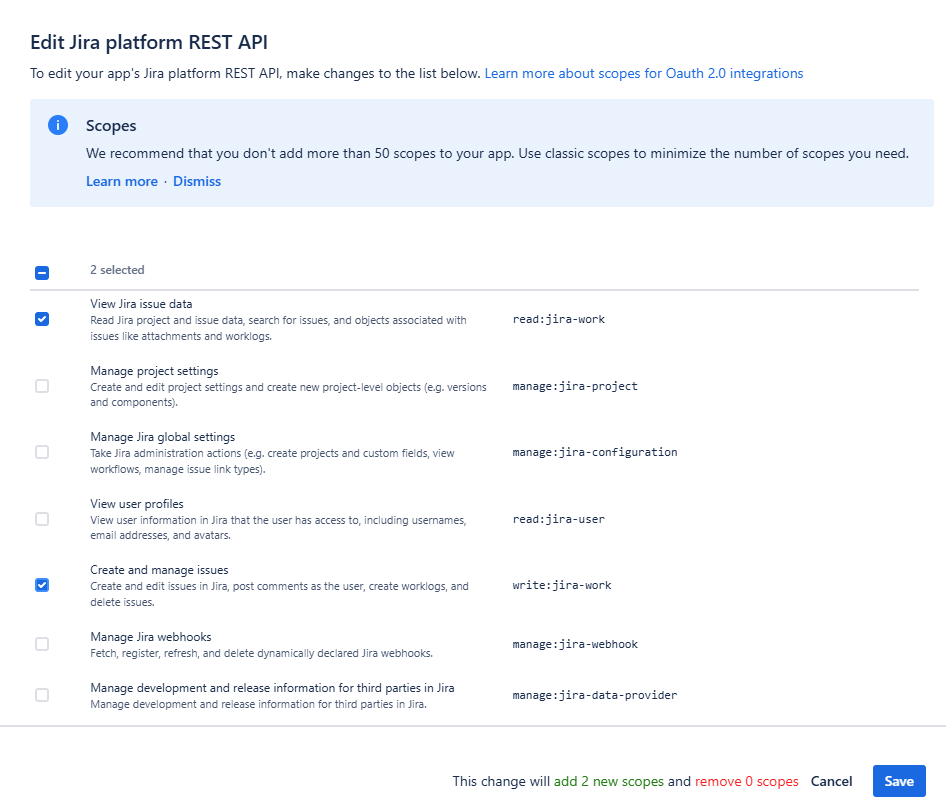
-
The new scopes have now been added.
-
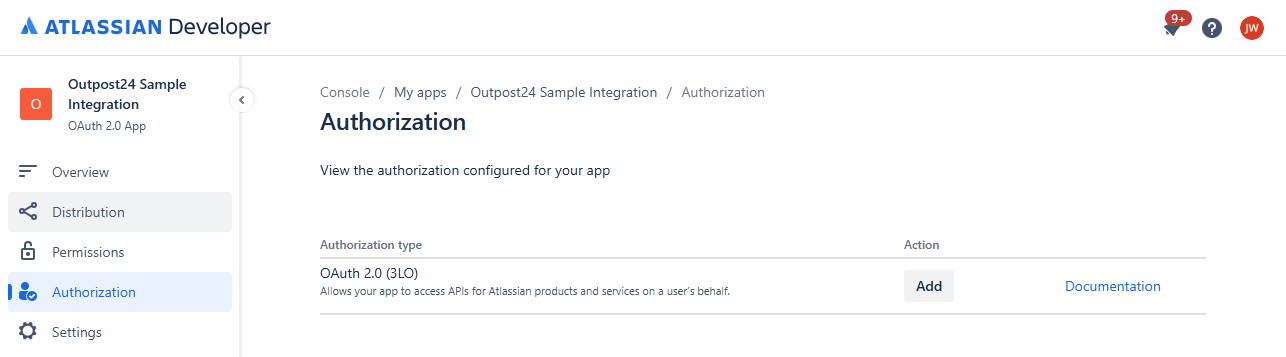
Next go to Authorization.
-
Enter Callback URL
https://outscan.outpost24.com/portal/oauth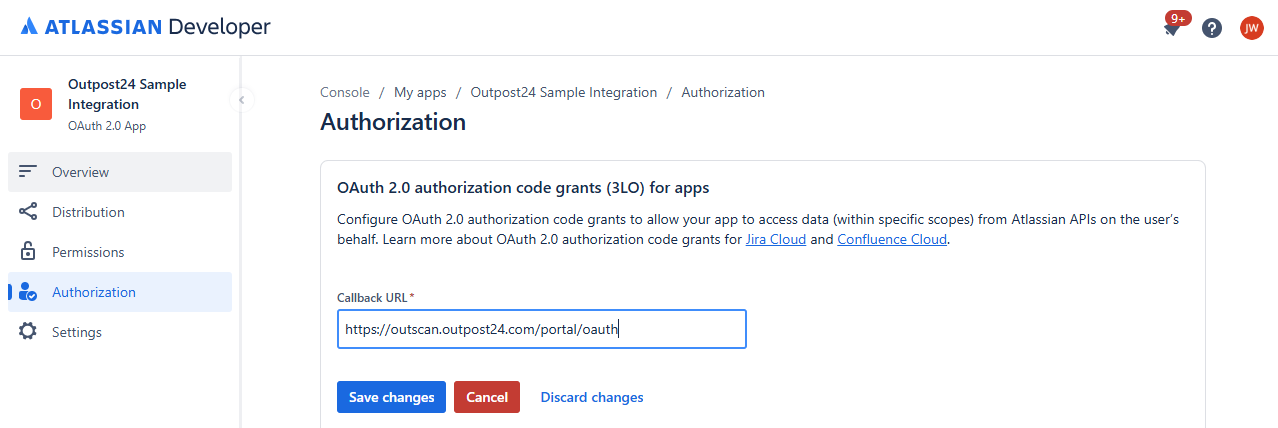
-
Click the Save changes button.
-
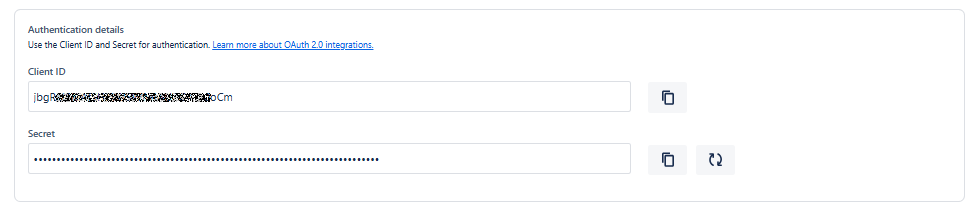
Go to Settings and note the Client ID and the Secret which will be used later in the process.
Step 2: Outpost24 Portal Integration
-
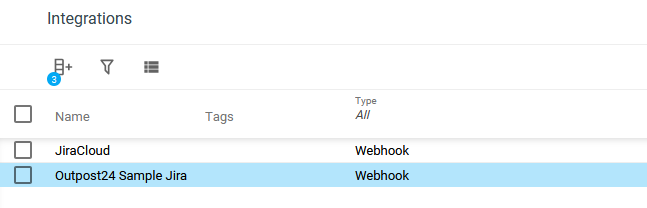
Go to Portal > Configuration > Integrations.
-
Click the green
-
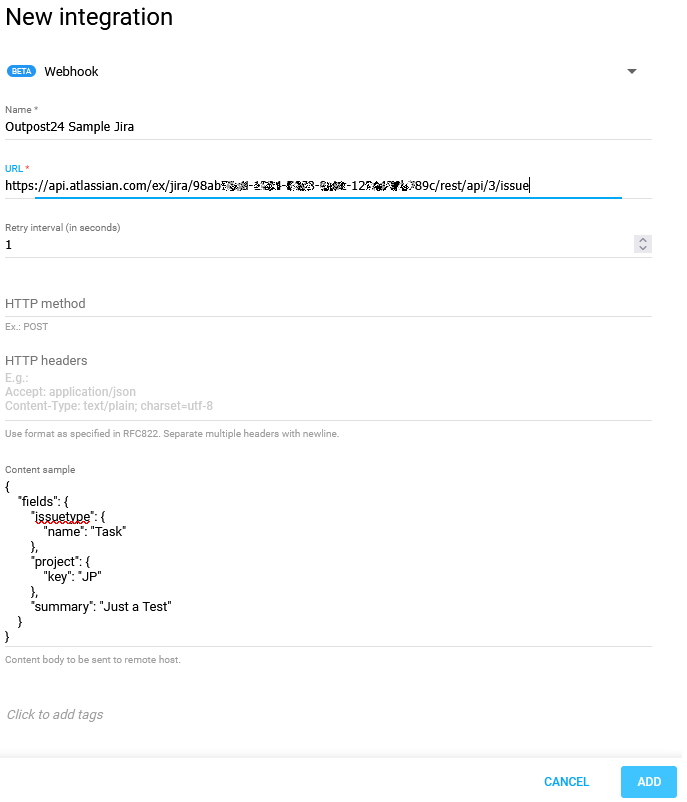
Select Webhook in the drop-down menu.
-
Select a name.
-
For the URL you will need a cloudId from atlassian.
To get the cloudId:-
Open a browser and navigate to
<youraccount>.atlassian.net/_edge/tenant_info -
You will receive a cloudId string which will be part of the URL.
{
"cloudId": "98ab76cd-1234-5678-9abc-123a456b789c"
}
-
-
Fill in the URL together with the cloudId from the previous step.
<https://api.atlassian.com/ex/jira/<your_cloudId>>/rest/api/3/issue
Example:
https://api.atlassian.com/ex/jira/98ab76cd-1234-5678-9abc-123a456b789c/rest/api/3/issue
It is important to get this URL correct.
-
Proceed to fill in the Content sample.
{
"fields": {
"issuetype": {
"name": "Task"
},
"project": {
"key": "JP"
},
"summary": "Just a Test"
}
}
Note the Project Key and IssueType must match one of your Projects. Some projects may use a different key or IssueType.
-
Should look something like this.
-
Click ADD to save.
-
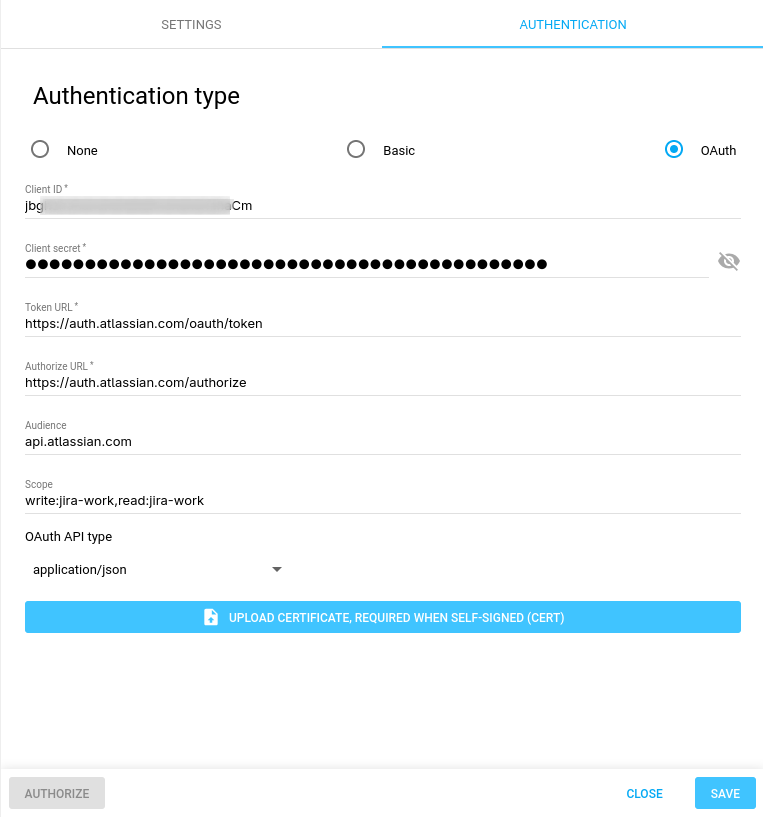
Once Integration is added, select it again and select the Authentication tab.
-
Edit the Authentication settings and fill in:
Client ID & Client Secret:
Both come from JIRA Developer Console. See Step 1: Developer Console #12 earlier in the document.
Token URL:
https://auth.atlassian.com/oauth/token
Authorize URL:
https://auth.atlassian.com/authorize
Audience:
api.atlassian.com
Scope:
write:jira-work,read:jira-work
-
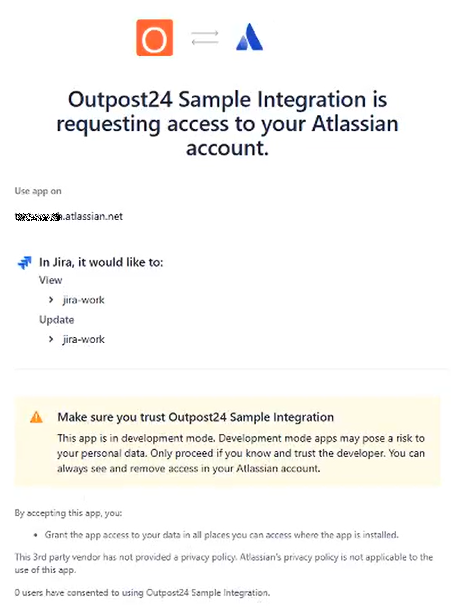
Click Save and then click Authorize.
-
Go back to Settings tab and click Verify to test the verification to Atlassian. A pop up is displayed in the lower left corner indicating if the verification was successful or failed.
Step 3: Outpost24 Portal Notification
-
In a browser, navigate to Portal > Notification Settings.
-
Select Automation on the left-hand side menu.
-
Select Notification Settings.
-
Create new Notification configuration by clicking the green
-
Fill in the required Fields:
Name: Select a name for the new configuration.Trigger: Finding Created, Finding Status Transitioned, etc.
From-To: Set as needed.
Integration: Select your newly created Integration in the list.
View Template: Not required; can be used if scope of notifications is limited. For View Templates, look in the Findings section.
Content: See below Example to copy and paste. Ensure your
IssueTypeandProject Keymatch your environment.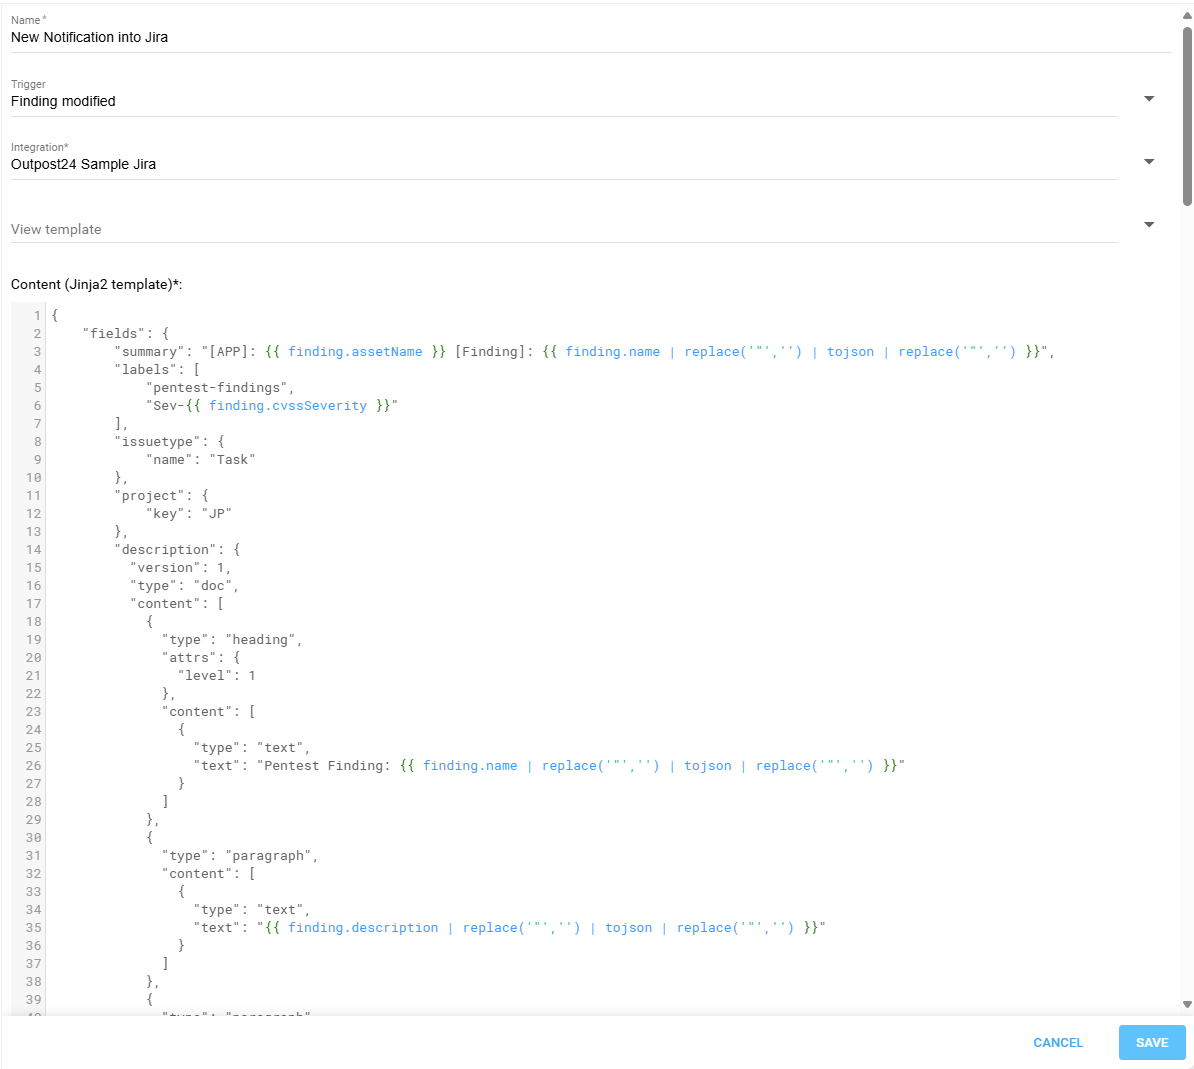
Example:
{
    "fields": {
		"summary": "[APP]: {{ finding.assetName }} [Finding]: {{ finding.name | replace('"','') | tojson | replace('"','') }}",
		"labels": [
			"pentest-findings",
		    "Sev-{{ finding.cvssSeverity }}"
		],
        "issuetype": {
            "name": "Task"
        },
        "project": {
            "key": "JP"
        },
		"description": {
		  "version": 1,
		  "type": "doc",
		  "content": [
			{
			  "type": "heading",
			  "attrs": {
				"level": 1
			  },
			  "content": [
				{
				  "type": "text",
				  "text": "Pentest Finding: {{ finding.name | replace('"','') | tojson | replace('"','') }}"
				}
			  ]
			},
			{
			  "type": "paragraph",
			  "content": [
				{
				  "type": "text",
				  "text": "{{ finding.description | replace('"','') | tojson | replace('"','') }}"
				}
			  ]
			},
			{
			  "type": "paragraph",
			  "content": [
				{
				  "type": "text",
				  "text": "Web App Name",
				  "marks": [
					{
					  "type": "strong"
					}
				  ]
				},
				{
				  "type": "text",
				  "text": ": {{ finding.assetName }}"
				}
			  ]
			},
			{
			  "type": "paragraph",
			  "content": [
				{
				  "type": "text",
				  "text": "First Seen",
				  "marks": [
					{
					  "type": "strong"
					}
				  ]
				},
				{
				  "type": "text",
				  "text": ": {{ finding.firstSeen }}"
				}
			  ]
			},
			{
			  "type": "paragraph",
			  "content": [
				{
				  "type": "text",
				  "text": "Last Seen",
				  "marks": [
					{
					  "type": "strong"
					}
				  ]
				},
				{
				  "type": "text",
				  "text": ": {{ finding.lastSeen }}"
				}
			  ]
			},
			{
			  "type": "paragraph",
			  "content": [
				{
				  "type": "text",
				  "text": "CVSSv3 Score",
				  "marks": [
					{
					  "type": "strong"
					}
				  ]
				},
				{
				  "type": "text",
				  "text": ": {{ finding.cvssV3Score }}"
				}
			  ]
			},
			{
			  "type": "paragraph",
			  "content": [
				{
				  "type": "text",
				  "text": "Risk Level",
				  "marks": [
					{
					  "type": "strong"
					}
				  ]
				},
				{
				  "type": "text",
				  "text": ": {{ finding.cvssSeverity }}"
				}
			  ]
			},
			{
			  "type": "paragraph",
			  "content": [
				{
				  "type": "text",
				  "text": "Exploits?",
				  "marks": [
					{
					  "type": "strong"
					}
				  ]
				},
				{
				  "type": "text",
				  "text": ": {{ finding.exploitAvailable }}"
				}
			  ]
			},
			{
			  "type": "panel",
			  "attrs": {
				"panelType": "info"
			  },
			  "content": [
				{
				  "type": "paragraph",
				  "content": [
					{
					  "type": "text",
					  "text": "Recreation",
					  "marks": [
						{
						  "type": "strong"
						}
					  ]
					}
				  ]
				},
				{
				  "type": "paragraph",
				  "content": [
					{
					  "type": "text",
					  "text": "{{finding.recreation | replace('"','') | tojson | replace('"','')}}"
					}
				  ]
				}
			  ]
			},
			{
			  "type": "panel",
			  "attrs": {
				"panelType": "warning"
			  },
			  "content": [
				{
				  "type": "paragraph",
				  "content": [
					{
					  "type": "text",
					  "text": "Impact",
					  "marks": [
						{
						  "type": "strong"
						}
					  ]
					}
				  ]
				},
				{
				  "type": "paragraph",
				  "content": [
					{
					  "type": "text",
					  "text": "{{ finding.impact | replace('"','') | tojson | replace('"','') }}"
					}
				  ]
				}
			  ]
			},
			{
			  "type": "panel",
			  "attrs": {
				"panelType": "success"
			  },
			  "content": [
				{
				  "type": "paragraph",
				  "content": [
					{
					  "type": "text",
					  "text": "Solution",
					  "marks": [
						{
						  "type": "strong"
						}
					  ]
					}
				  ]
				},
				{
				  "type": "paragraph",
				  "content": [
					{
					  "type": "text",
					  "text": "{{ finding.solution | replace('"','') | tojson | replace('"','') }}"
					}
				  ]
				}
			  ]
			},
			{
			  "type": "paragraph",
			  "content": []
			},
			{
			  "type": "paragraph",
			  "content": [
				{
				  "type": "text",
				  "text": "All details about finding can be found in the Outpost24 Platform "
				},
				{
				  "type": "text",
				  "text": "Here",
				  "marks": [
					{
					  "type": "link",
					  "attrs": {
						"href": "https://outscan.outpost24.com/portal/en/#/findings/{{ finding.id }}/details"
					  }
					}
				  ]
				}
			  ]
			}
		  ]
		}
    }
}
Step 4: Test
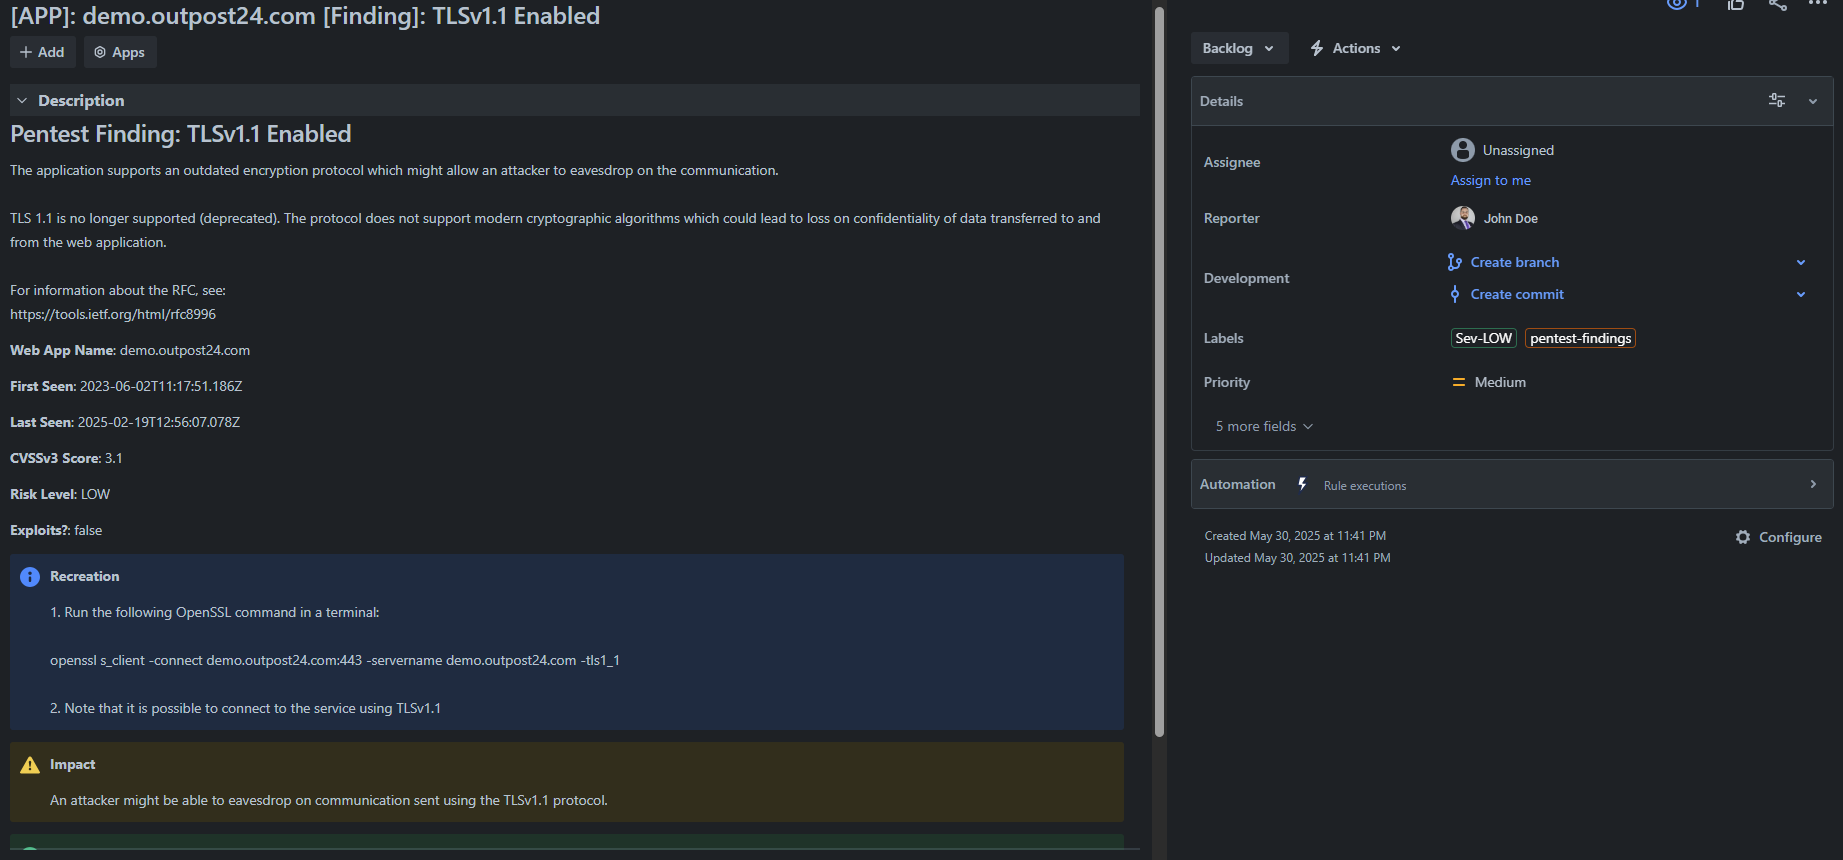
A great and easy test is to add any Tag to a Finding and then view the appropriate project in Jira to view the Issue created by the webhook.
If you’ve mimicked the configuration above, then this webhook will trigger upon the “Finding Modified” condition. This applies to most user interactions on a Finding.
Using the template above, your Issues should look something like this:
If your project is not creating the Issues as expected, try these steps:
-
Review your configuration. Make sure your IssueType and Project Keys match your environment.
-
Trigger the Webhook on multiple Findings in Outscan. If you find that some work and some don’t, please notify Outpost24 Support at https://support.outpost24.com
Step 5: Done!
If you have questions or would like to offer additions to the provided example code, you can always open a case with Outpost24 Support at https://support.outpost24.com
Related Articles
- CyberArk Integration
- Delinea Integration
- SNMP Integration
- Syslog Integration
- Webhook Integration
- Tickets Quick Start Guide
- Overview
- Webhook Integration with OAuth v2
- Portal Integration with ServiceNow Incidents
- Webhook Integration with JIRA
- Webhook Integration with Microsoft Teams
- General Information about SMB/WinRM Scanning