Purpose
This document describes how to mark a finding as a false positive.
Introduction
When you want to mark a finding as a false positive because you do not know why the scanner is finding a risk that it is not supposed to pick up on.
Report a False Positive
Prerequisites
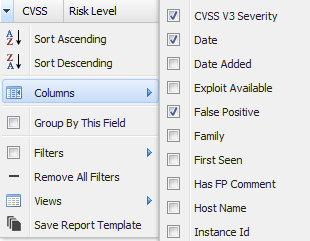
Before you start make sure that the False Positive column is activated to show the status of the findings.
To activate the column:
-
Click on the down pointing arrow in any column heading.
-
Select Columns > False Positive in the displayed menu.
Reporting
To report a false positive:
-
Go to Main Menu > Netsec > Reporting Tools.
-
Select a group in Target Group.
-
In the Findings tab, select the finding to mark as false positive.
Multiple findings can be selected by pressing the CTRL or the SHIFT key while clicking on the findings. -
Right click on finding or groups of findings and select Mark as False Positive.
-
The Mark False Positive window is displayed.

-
Select if this mark should cover Only this scan or All future scans.
-
Select Disable the script in scan policy, if you do not want the script to run again.
-
In the Internal Comment window leave comments as to why you think it should be marked as false positive.
-
If this comment should be shown in future scans select the Show comment on future findings.
-
Comment in Additional information to Outpost24 if you want to inform Outpost24 Vulnerability Research team. This information will be used to further improve the vulnerability database.
-
Include blueprints for the Outpost24 Vulnerability Research team.
-
And select Send email using external email client.
-
Once all of the information is filled out, click Save.
A False Positive will still be listed in the results, but will be marked as a false positive in the exported report.
To unmark an entry as a false positive, select Unmark as False Positive.
Related Articles