Last updated: 2019-11-12
Purpose
This article provides setup information for the Amazon integration.
Introduction
The Amazon integration feature lets you configure authenticated access for scanning and discovery of AWS cloud instances from both OUTSCAN and HIAB. Within the Amazon settings, administrators can enable the integration, create an IAM role with the appropriate Amazon Resource Name (ARN), and save this configuration so that discovery and vulnerability scans can be performed against cloud assets. This integration is essential because Amazon targets must be added via API discovery using authorized credentials, and OUTSCAN holds pre-approval from Amazon to perform safe scanning, helping you extend your vulnerability management program into AWS environments with controlled access and visibility.
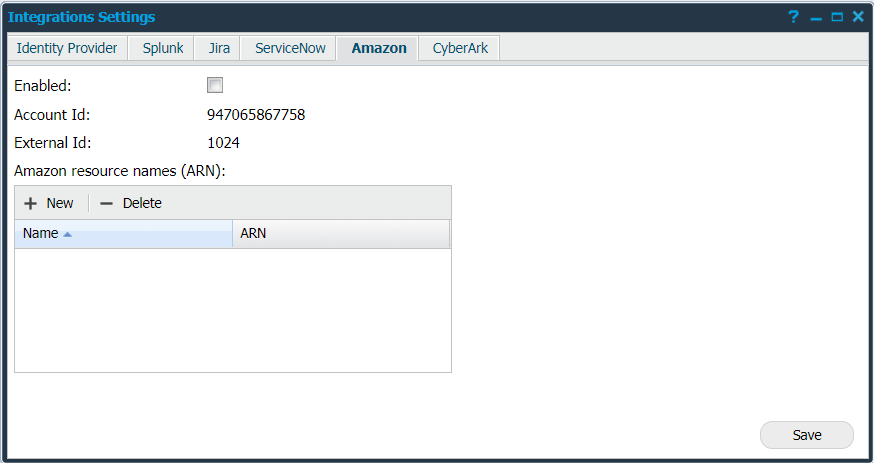
Under the Amazon tab you can set up the integration on OUTSCAN and HIAB to run scans against instances in the Amazon cloud. It also enables the option to run discovery scans using ARNs added in this setup. Amazon service is implemented in both OUTSCAN and HIAB.
Amazon targets can only be added to OUTSCAN/HIAB via discovery scans. Only OUTSCAN is Whitelisted by Amazon as an authorized scanner, and scanning from HIAB may require additional authorization from Amazon.
Set Up Amazon
To set up Amazon:
-
Go to Main Menu > Settings > Integrations to open the Integration Settings window.
-
Select the Amazon tab.
Follow the below procedure to scan instances:
-
To enable this feature, select the Enabled box.
-
Create a new user role with the Account Id and External Id noted.
-
Apply IAM policy given below for the role on Amazon cloud to grant access to the targets.
{
   "Version": "2012-10-17",
   "Statement": [{
      "Sid": "Stmt1400711494000",
      "Effect": "Allow",
      "Action": [
         "ec2:DescribeInstances",
         "ec2:DescribeRegions",
         "elasticloadbalancing:DescribeLoadBalancers",
         "elasticloadbalancing:DescribeTargetGroups",
         "elasticloadbalancing:DescribeTargetHealth"
      ],
      "Resource": ["*"]
   }]
}
Any role which gives you read-only access to the required Actions listed in the policy will work.
-
Enter the Amazon Resource Name (ARN) for the newly created role in the table using + New button.
-
Click Save to save the current settings.
References
Related Articles
- ServiceNow - Legacy
- Identity Provider Settings
- Okta Identity Provider Configuration
- Database Connector (HIAB only)
- Microsoft Entra ID (Azure AD) Identity Provider Configuration
- SNMP (HIAB only)
- ADFS Identity Provider Configuration
- Splunk
- Amazon
- Atlassian Jira
- Syslog (HIAB only)
- Thycotic
- OneLogin Identity Provider Configuration
- CyberArk
- LDAP/AD