Purpose
This document provides a complete technical procedure for Authenticated Scanning Using WinRM on OUTSCAN and HIABs
Technical Preview
This article is a technical preview of a feature that is currently under development. Some features are hidden behind a feature flag.
Introduction
Windows Remote Management (WinRM) is the Microsoft implementation of the WS-Management protocol, which is a standard Simple Object Access Protocol (SOAP)-based, firewall-friendly protocol that allows interoperation between hardware and operating systems from different vendors.
Requirements
Use SMB-based authenticated scanning in Outpost24 to access Windows hosts using provided credentials with remote registry for deeper security assessments.
Run-Time Requirements
WinRM is part of the operating system. However, to obtain data from remote computers, you must configure a WinRM listener. For more information, see Installation and configuration for Windows Remote Management. If a Baseboard Management Controller (BMC) is detected at system startup, then the Intelligent Platform Management Interface (IPMI) provider loads; but even if not, the WinRM scripting objects and the WinRM command-line tool are still available.
Installation
For WinRM scripts to run, and for the Winrm command-line tool to perform data operations, WinRM has to be both installed and configured.
However, WinRM is automatically installed with all currently-supported versions of the Windows operating system.
These elements also depend on WinRM configuration.
-
The Windows Remote Shell1 command-line tool, Winrs.
-
Windows PowerShell 2.0 remoting.
For more information about WinRM installation and configuration, see Installation and configuration for Windows remote management.2
Configuration
By default WinRM uses Kerberos for authentication so Windows never sends the password to the system requesting validation. To get a list of your authentication settings, type the following command:
winrm get winrm/config
The purpose of configuring WinRM for HTTPS is to encrypt the data being sent.
WinRM HTTPS requires a local computer Server Authentication certificate with a CN matching the hostname to be installed. The certificate must not be expired, revoked, or self-signed.
For more information about WinRM configuration, see How to configure WINRM for HTTPS.3
Certification
For WinRM over HTTPS, the connecting system must be able to validate the TLS certificate presented by the target machine. This requires that the issuing Certificate Authority (CA) is trusted by the system performing the connection.
If the issuing CA is not already trusted, it is required to provide the relevant Root Certification Authority certificate so the certificate chain can be validated.
In many enterprise environments, certificates are issued by an internal PKI (for example, Active Directory Certificate Services using auto-enrollment). In such cases, trust is typically established through the enterprise root CA rather than a publicly trusted CA. For more information, see: How to export Root Certification Authority Certificate.4
The detailed step-by-step guidelines for setting up certificate chains on Windows Server is available here: Setting up a Chain of Certificates on Windows Server.
HIAB/OUTSCAN Setup on Classic UI
To set up OUTSCAN/HIAB to use WinRM on Classic UI, follow the steps outlined in this section.
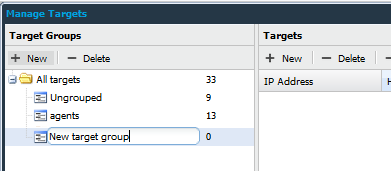
Create Target Group
To create a target group:
-
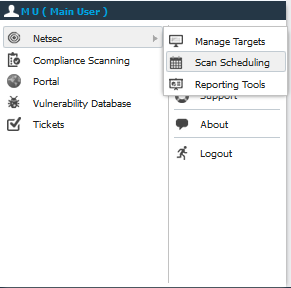
Go to Main Menu > Netsec > Manage Targets.

-
Click on + New in the Targets Groups field and name the group.
Create Target
To create a target:
-
Open the Manage Targets module in Main Menu > Netsec > Manage Targets.
-
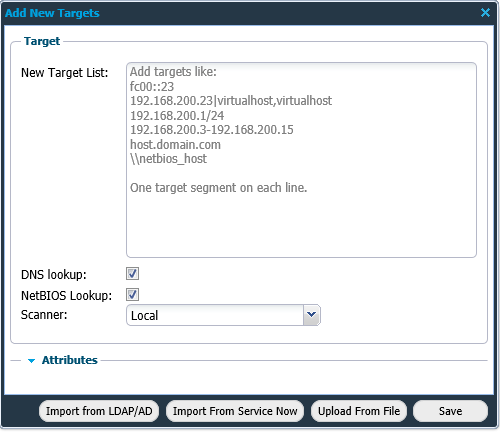
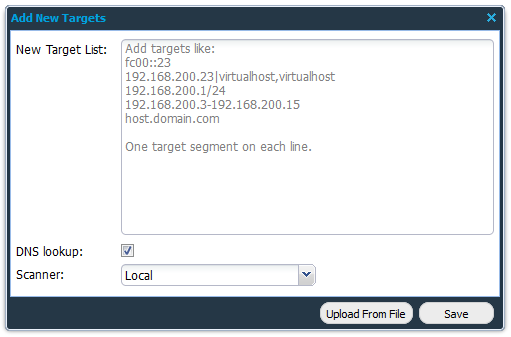
Click on + New in the Targets field to display the Add New Targets window.
|
Format |
Description |
|---|---|
|
fc00::23 |
IPv6 |
|
192.168.200.23|virtualhost,virtualhost |
IPv4 |
|
192.168.200.1/24 |
CIDR |
|
192.168.200.3-192.168.200.15 |
IP range |
|
FQDN |
|
|
\\netbios_host |
netBIOS hostname |
-
Fill in the required information in the form fields and click Save.
Targets can also be imported from a Comma Separated Values (csv) file, LDAP/AD, or ServiceNow by clicking on respective Import/Upload button.
|
Option |
Description |
|---|---|
|
New Target List |
Add one or multiple targets using the presented help text. Private IP addresses cannot be added when using OUTSCAN.
|
|
DNS Lookup |
Select if a DNS look-up should be performed when adding the IP addresses to the system to get the host name in the system. |
|
NetBIOS Lookup (HIAB only) |
Select if a NetBIOS look-up should be performed when adding the IP addresses to the system to get the host name in the system. |
|
Scanner (HIAB only) |
Set which scanner that should scan the defined targets. Default is set to local and that is referring to the machine that you are logged on to. If you have a distributed network with multiple scanners that is accepted by the scheduler, you will be able to choose which scanner to use in the drop-down menu. If you have a HIAB External license, the OUTSCAN scanner is also available in the drop-down and should be used if public IPs are to be scanned from the OUTSCAN SaaS solution. |
|
Attributes |
This option is used to add additional information about the target. This is displayed as a column with the given field name in the Managed Targets grid. |
|
Upload From File |
Import a previously exported target group file or custom Comma Separated Values (csv) file. |
|
Import from LDAP/AD |
Import targets from LDAP/AD. |
|
Import From ServiceNow |
Import targets from ServiceNow. |
Certain tasks like adding a large/multiple networks can take a long time. When it takes more than 90 seconds, the progress can be viewed in the Task Viewer tab located at the bottom right of the task bar. Task Viewer appears for a user only if there is at least one task in the list. The three possible states for a task appearing in Task Viewer are:
-
In Progress
-
Done
-
Error
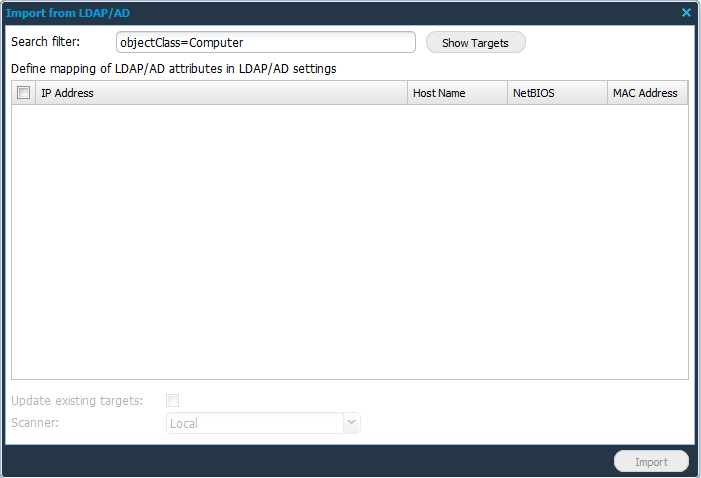
Import from LDAP/AD
The Import from LDAP/AD button displays a window where you can select which targets to import into the HIAB.
|
Option |
Description |
|---|---|
|
Search Filter |
Standard LDAP search filter. See Search Filter Syntax on Windows Dev Center for more information. |
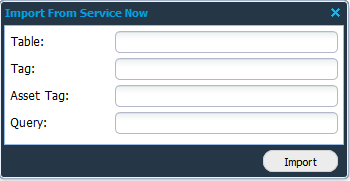
Import From ServiceNow
The Import from ServiceNow button displays a window where you can select which targets to import into the HIAB from ServiceNow.
|
Option |
Description |
|---|---|
|
Table |
Table name containing the targets in ServiceNow. |
|
Tag |
Tags are text labels in ServiceNow associated with items such as records and pages. |
|
Asset Tag |
The Asset tag refers to assets in ServiceNow Asset Management system. |
|
Query |
Search query to retrieve the ServiceNow targets. |
Upload From File
Adding targets from a CSV-file.
-
Click the + New button in the Targets view.

-
Click the Upload From File button.
-
Import the exported target group file or custom Comma Separated Values (csv) file by clicking the + button to select a file.

|
Option |
Description |
|---|---|
|
Upload From File |
Select a file to import. |
|
Separator |
Define what separator is used in the file.
|
|
Text Delimiter |
Define what text delimiter is used in the file.
|
|
Skip First Line |
Select this to skip the first line.
|
-
Click Next to continue.
-
Once uploaded, continue with mapping the files information to the target by selecting the appropriate subject in the drop-down menus.
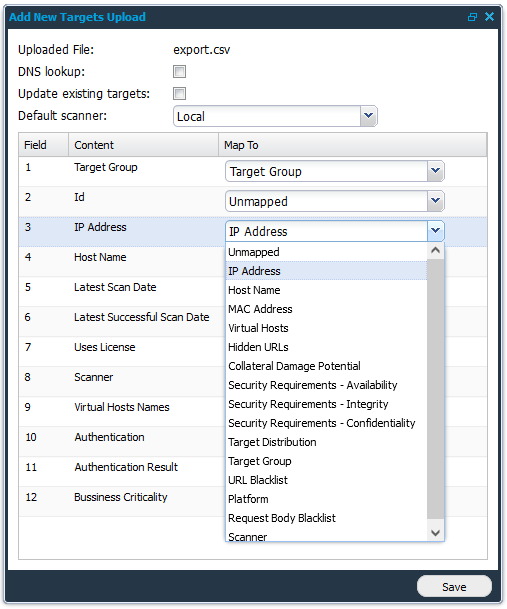
-
Finish by clicking the Save button.
Create New WinRM Scan Policy
The “Test credentials” displayed in the policy is only functional for SMB and should not be used to validate Winrm authentication.
-
Go to Main Menu > NetSec > Scan Scheduling.
-
Select the Scan Policy tab.
-
Click + New to create a new policy.

-
In the SSL tab, if the Windows Server requires a certificate for authentication, upload the Root CA file and select it as the Trusted CAs file.

-
Configure the SMB/WinRM credentials and the Port Scan settings. Select your CA file (use the same file you selected on the SSL tab) if the Windows Server requires.

-
Click Save.
-
Go to Main Menu > NetSec > Scan Scheduling.
-
Create new Scan schedule by clicking on + New.
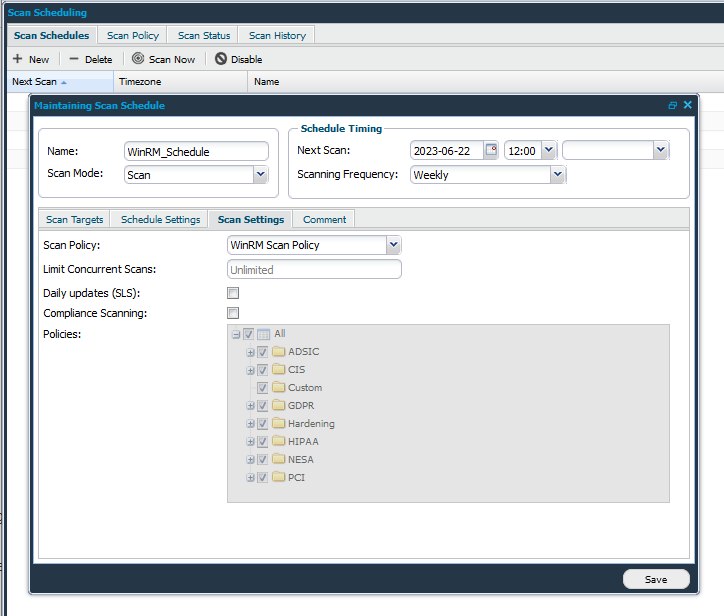
-
and trigger it (choose the correct scan policy in Scan Settings)
-
Check the scan process/status in the tab Scan Status

Verify scan results
After the scan has been completed, go to Main Menu > Reporting Tools to view the findings from your scan:
-
Check whether there are vulnerabilities in port 5986.

-
Look for any findings with Script Id 1440939. This finding is a Windows test rule that indicates WinRM authentication was successful:
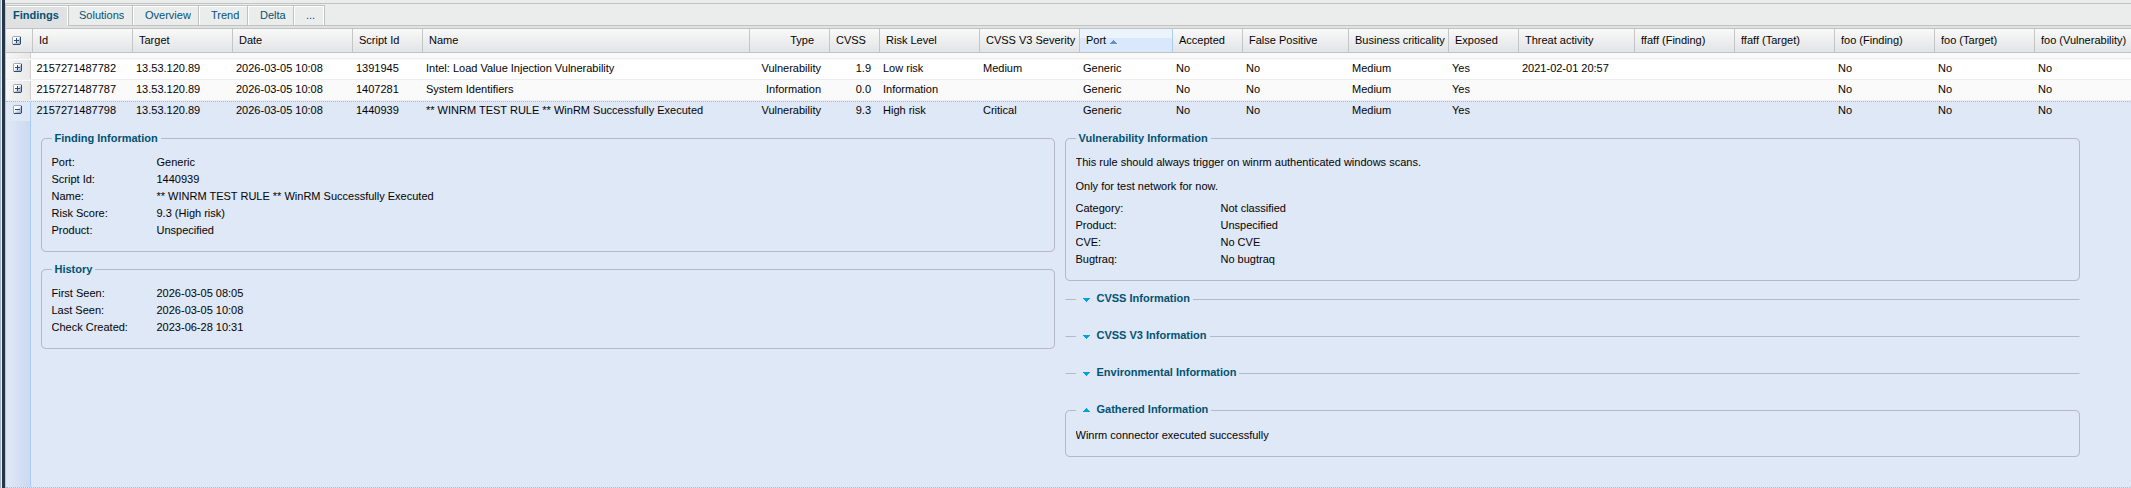
-
Look for any findings with Script Id 200827. This finding provides all the information regarding to the certificate chain from the server:
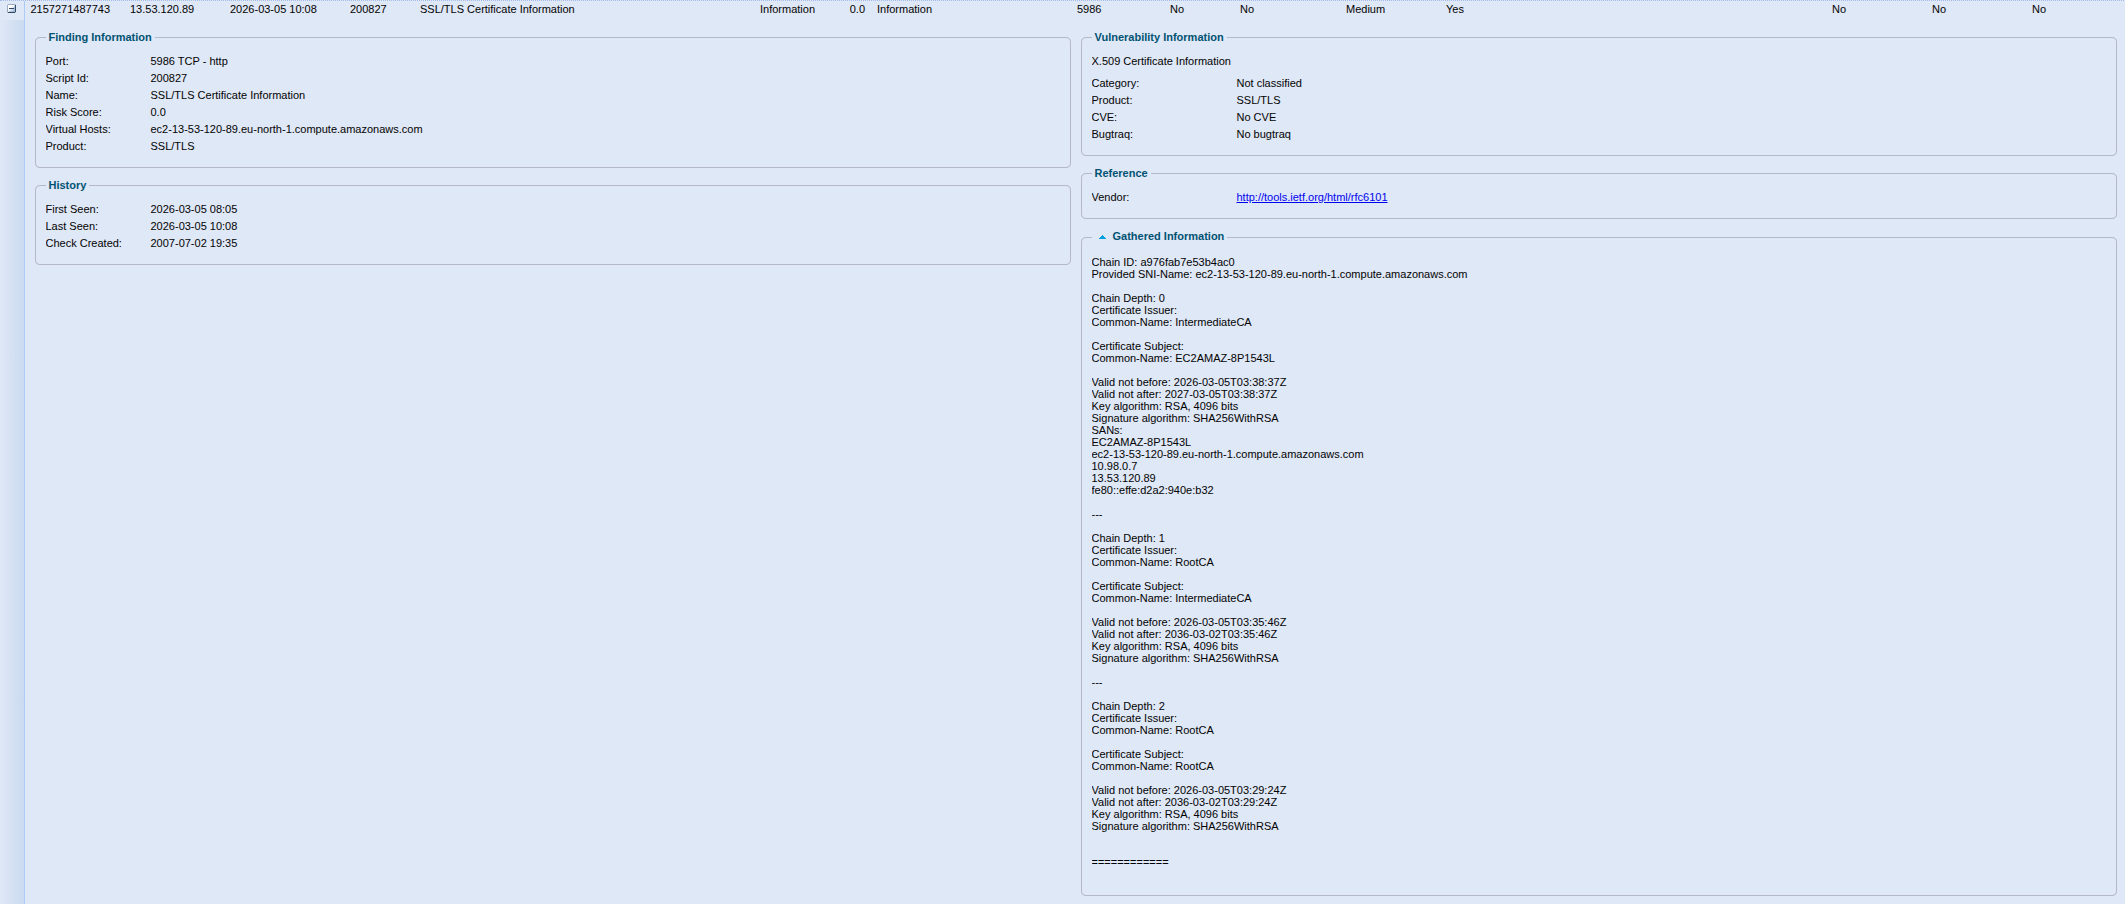
The full chain of certificates is returned from the server [Root CA → Intermediate CA → leaf certificate]
When performing authenticated scanning against Windows hosts, the scanner creates and starts a service called O24 Auth on the target machine.
This service is used to execute commands on the target and send the results back to the scanner.
Do not remove the service during scanning, it will stop and remove itself after it is done.
HIAB/OUTSCAN Setup on Portal
To set up OUTSCAN/HIAB to use WinRM on Portal, follow the steps outlined in this document https://kb.outpost24.com/kb/authenticated-network-scan.
References
Related Articles
- Windows 10/Windows 2019 Server
- Windows 8.1
- How to Test SMB Authentication
- Windows 2016 Server
- Core Installation
- Windows 2008 R2 Server
- SMB Authentication from OUTSCAN/HIAB
- Supported Platforms for Authenticated SSH Scanning
- Authenticated Scanning Using WinRM
- Windows 7
- Authenticated Scanning Using SSH
- Troubleshooting SMB Authentication
- Windows 2012 R2 Server
- O24AUTH
- Complementary Authenticated Scan on Default Credentials