Last updated: 2026-03-10
Purpose
This article describes how to set up Google Cloud Platform (GCP) credentials in the Portal.
Introduction
Google Cloud Platform (GCP) is a suite of cloud computing services that runs on the same infrastructure that Google uses internally. Alongside a set of management tools, it provides infrastructure as a service, platform as a service, and serverless computing environments.
The Google Cloud Platform Credentials feature lets you securely register a GCP account by uploading a service-account JSON key. This enables the platform to authenticate with Google’s APIs and access your GCP resources for discovery and scanning. By using this feature, you maintain secure, credential-based access to your cloud environment rather than relying on network scanning, which improves visibility and integration while reducing network overhead.
Adding Credentials
-
Log in to OUTSCAN. See the Logging in to the portal article on how to access the Portal.
-
In the Portal menu view, click the Configuration → Credential.
-
Click the Create credentials button to open the create credentials form.

Set up GCP Credentials
-
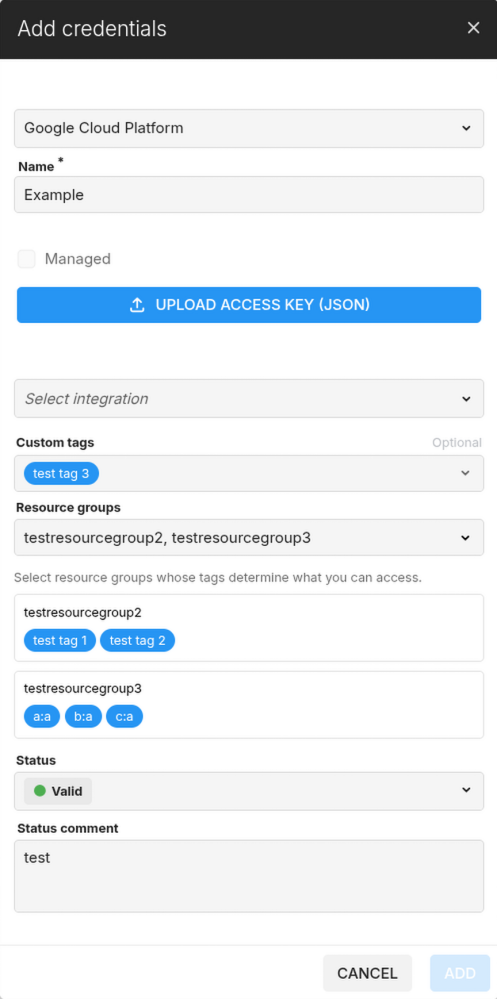
In the drop-down menu select Google Cloud Platform.
-
Add the name of your GCP account.
-
Click the blue UPLOAD ACCESS KEY (JSON) button to select your access key file.
-
Custom tags that help categorize and organize the credential. Tags can be used to group resources and control access.
Resource Groups represent sets of tags Users are authorized to use when creating credentials. Selecting a resource group will automatically apply its associated tags to the credential. Users with limited access must select at least one resource group to ensure the credential is created with tags they are permitted to use. Users may also add additional custom tags if needed. -
Click the blue ADD button to create the credential.
Related Articles