Last Updated: 2026-04-14
Purpose
This document provides users with an overview of the Configuration in the Outpost24 Portal UI.
Technical Preview
This document contains parts that are technical previews of features that is currently under development. These features may be hidden behind a feature flag.
Introduction
Scan Configuration Settings defines how scans are run against assets, what parts of your system are assessed, and under what conditions. It lets you link configurations to targets or assets, set boundaries like IP or port ranges, apply authentication methods, tailor scope via seed URLs or filters, and decide when and how often scans should run. Using this feature ensures that your vulnerability assessments are efficient, relevant to your environment, and aligned with access privileges, reducing false positives or unnecessary load while maintaining thorough coverage.
Overview
The Configuration view consists of the target information that links to an asset, and the scan settings.
Scan settings include Automated scanning process, allowing restriction of scan duration and its impact on the scanned asset.
For Scale:
-
Scope definition of scans to cover the desired functionality available on limited number of hosts, either through certain expressions that match the response body, or by mapping a host towards certain IPs.
-
Initial state of the web application, usually in the form of an authentication procedure.
For Netsec:
-
Host discoveries and vulnerability scans are limited to host and port range definitions, expressed as either IP addresses or FQDNs.
-
Applicable scan policy which can be limited to authenticated scanning only through SSH when custom credentials are configured and selected.
For Cloudsec:
-
The cloud account and the compliance policy.
Requirements
It is assumed that the reader has basic access to the OUTSCAN/HIAB account with an Appsec or Cloudsec subscription.
Groups
To access the Scan Configuration groups:
-
Navigate to Configuration > Scan configurations.
-
Click the group tree icon as shown in the image.
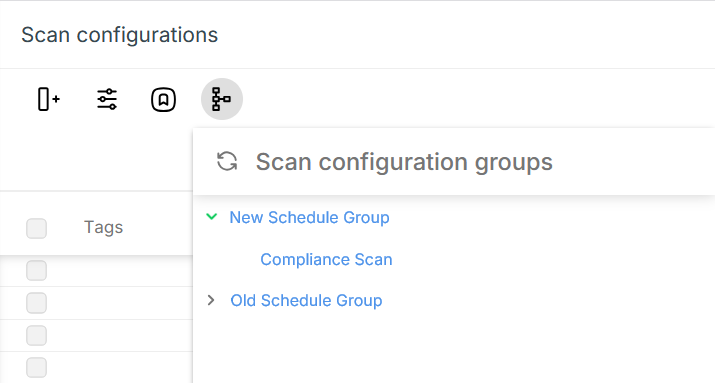
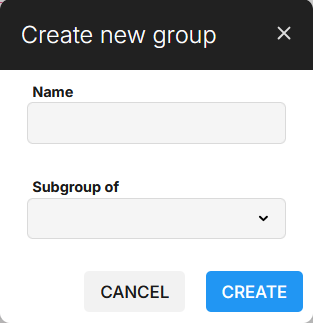
To create groups:
-
Click the blue CREATE NEW GROUP button at the bottom of the Group Tree panel.
-
In the Create Group form, enter a name for the group.
-
Select a sub-group if the new group is part of a main group.
-
Click the blue Create button.
Add a Scan Configuration
To add a Scan Configuration:
-
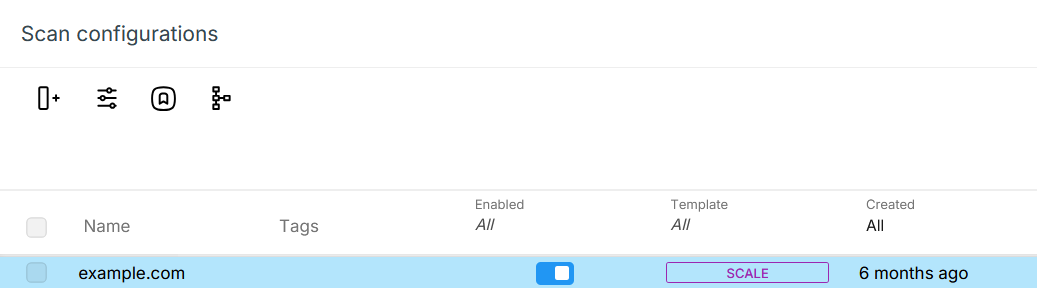
Navigate to Configuration > Scan configurations.

-
To create a new configuration click on the green plus
icon down on the right hand side.
-
Select a Asset discovery to perform a discovery scan.
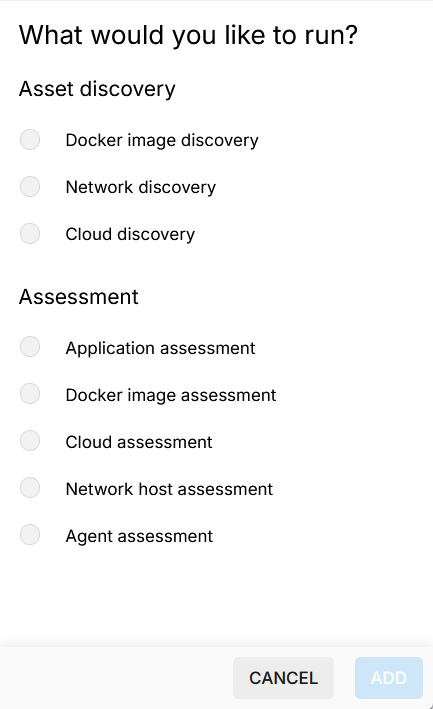
or select the type of Assessment to perform. -
Click on the blue Add button in the lower right corner to add the configuration.
See Scan Assessment Configuration for more information about each assessment choice and how to configure them.
Edit a Configuration
Select the configuration you want to edit by clicking on it.
The configuration panel is displayed to the right side of the window. It consists of several tabs, which vary depending on the selected template:
-
Settings (Template: Scale, Cloudsec, Cloud Discovery, Docker Scan, Docker Discovery, Network Discovery, Network Scan, Agent)
-
Schedules (Template: Scale, Cloudsec, Cloud Discovery, Docker Scan, Docker Discovery, Network Discovery, Network Scan)
-
Request Filter (Template: Scale)
-
Authentication (Template: Scale)
-
Host Maps (Template: Scale)
-
Reporting Settings (Template: Cloud Discovery, Network Discovery)
Settings
The Settings tab allows you to configure the scope of the scan.
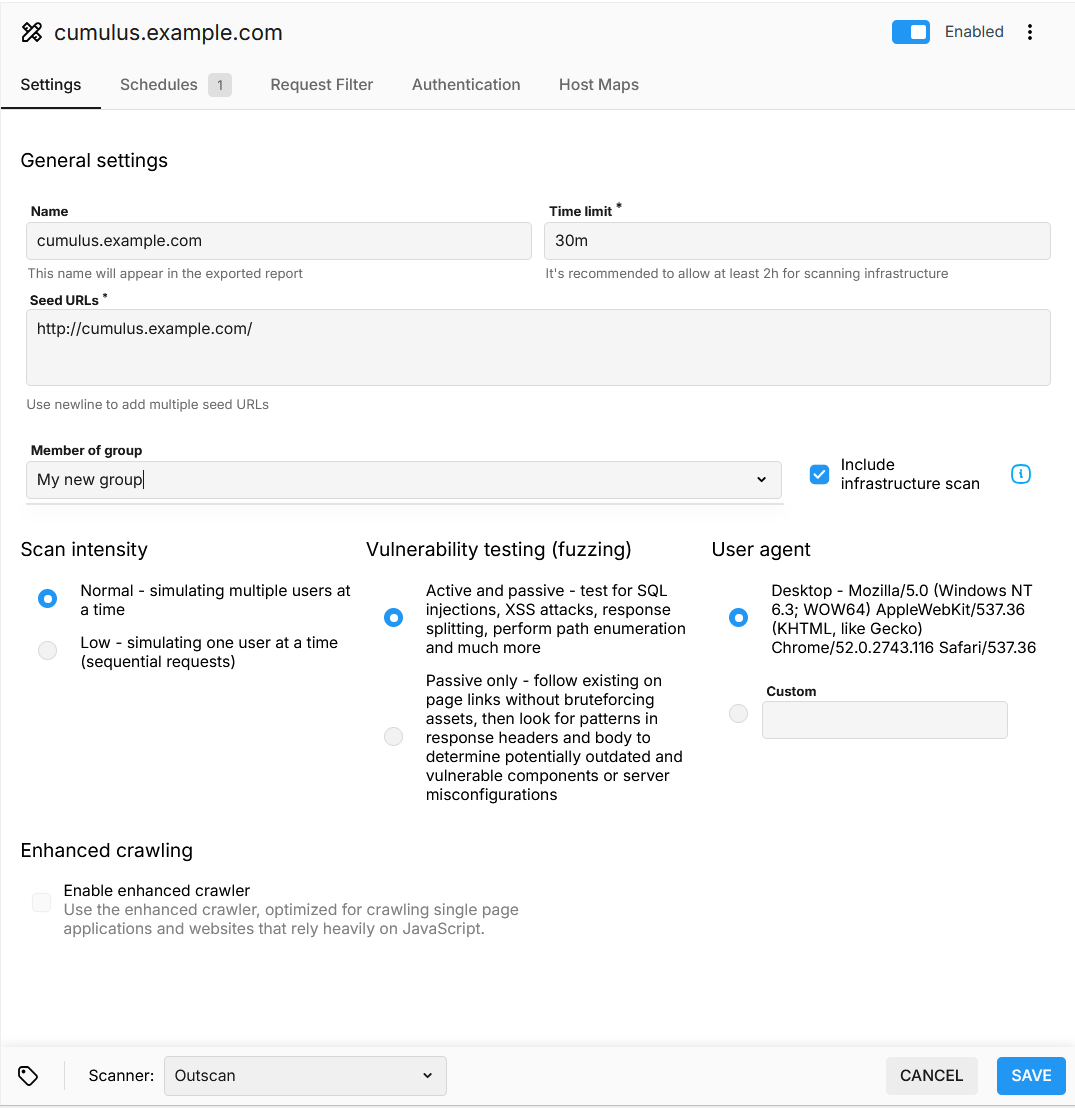
General Settings
|
Option |
Description |
|---|---|
|
Name |
Provide the name that should be displayed in the exported report. |
|
Time limit |
Set a time limit for how long the scheduled scan should run. Use format: 2h50m. (Only applies to Network Host Assessment, Network Discovery, Network Scan, and Scale templates) |
|
Seed URLs |
Provide the seed URL of the target. Use newline to add multiple seed URLs. |
|
Member of group |
Select a group from the list. The default group is All. |
|
Include infrastructure scan |
Check this box if you want to conduct an infrastructure scan. |
|
Enable enhanced crawler |
Check this box if you want to enable the enhanced crawler for broader coverage on complex, Javascript-heavy sites, such as single-page apps. |
Infrastructure scanning is a process where other ports are checked for available services. If any active ports are found, they are tested for vulnerabilities, which are then displayed in the findings section. It is recommended to allow at least 2 hours for the port scan to finish, as otherwise the scan can terminate early leading to missing some of the open ports and services running on them.
The enhanced crawler has been tested with web applications running Vue/Angular/React. While it may work with other JavaScript frameworks, you might experience inconsistencies in crawling behavior if you are using a framework outside of our tested set.
Scan Intensity
The Scan Intensity determines the behavior and the impact of the scanner on the target application.
|
Option |
Description |
|---|---|
|
Normal |
Simulates multiple users at a time. |
|
Low |
Simulates one user at a time, sequential requests. |
Vulnerability Testing (Fuzzing)
Select one of the options, depending on type of scan that needs to be performed on the target application.
|
Option |
Description |
|---|---|
|
Active and passive |
By enabling this option, the scanner performs checks for common application vulnerabilities like tests for SQL injections, XSS attacks, response splitting, performs path enumeration, and much more. |
|
Passive only |
In this mode, the scanner follows existing links on the page without brute-forcing assets, then looks for patterns in response headers and body to determine potentially outdated and vulnerable components or server misconfigurations. |
User Agent
|
Option |
Description |
|---|---|
|
Desktop |
Mozilla/5.0 (Windows NT 6.3; WOW64) AppleWebKit/537.36 (KHTML, like Gecko) Chrome/52.0.2743.116 Safari/537.36. |
|
Custom |
Create a custom User Agent using format shown in Desktop option. This can be an arbitrary text as long as it is valid in the HTTP header context following the https://tools.ietf.org/html/rfc7231#section-5.5.3 standard, it is recommended to follow the convention as described here:
|
Schedules
In the Schedules tab, schedules can be created when a scan should run. The number in the tab name indicates the number of schedules that have been set on the scan configuration. The schedule is also accessible through Automation > Schedules in the main menu to the left.
For more information see the Schedules article.
Blocked Time Slot can not be set in Scan Configuration. To set Blocked Time Slot, open the schedule in Automation > Schedules.
Request Filter
Request filter is used to limit the scanner from visiting resources which can disrupt normal behavior of a web application, or to limit the scan scope within given parameters. The request filter can, for example, disallow all POST based requests to avoid sending too many repetitive requests which in turn could affect availability of the web application.
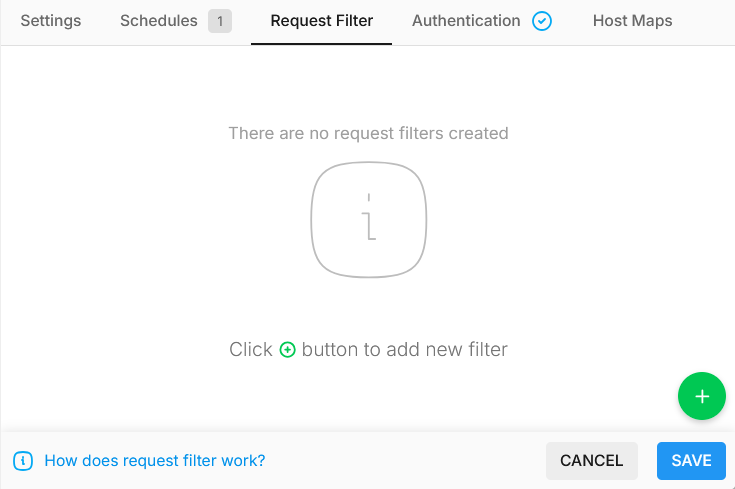
To add a filter click the green plus icon in the lower right corner to display the filter configuration.
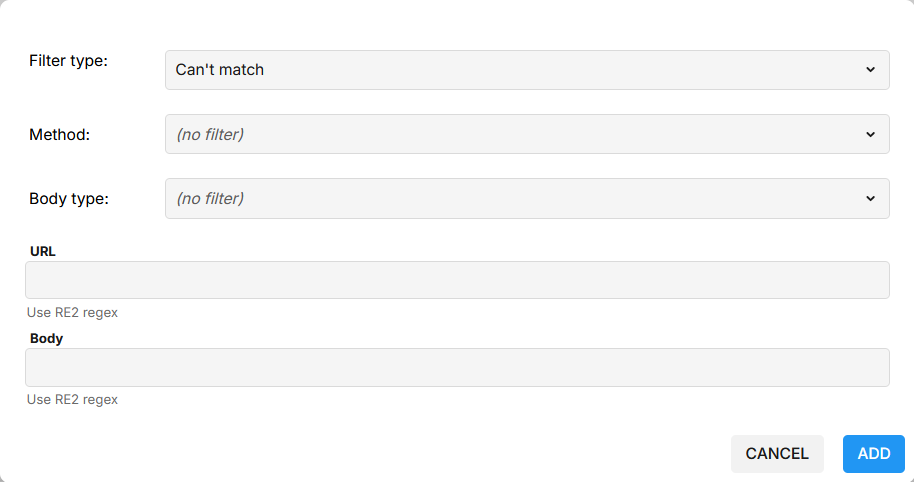
Filter Type
Can't match - Requests that are excluded from the scan. If any of the options are empty, like Method or Body type, the filter matches all types of methods and body types. The more granular the filter is, the narrower the filter is, thus potentially leading to more requests getting through the filter and being visited during crawling stage.
This type of filter applies to both directly visited resources like links within web application scope, as well as resources required to properly render the web application.
The latter is not in direct scope at the crawling phase such as:
-
Externally hosted images
-
Media players
-
Widgets
-
JavaScript libraries
and other resources included in the web application.
Use the Can't match filter when the scanner needs to be limited visiting certain pages or performing certain types of requests such as:
-
Checking out in web-shop
-
Finalizing booking
-
Preventing sending logout request when authentication procedure is defined
-
Avoiding web activity trackers and analytics from logging scanner's activity
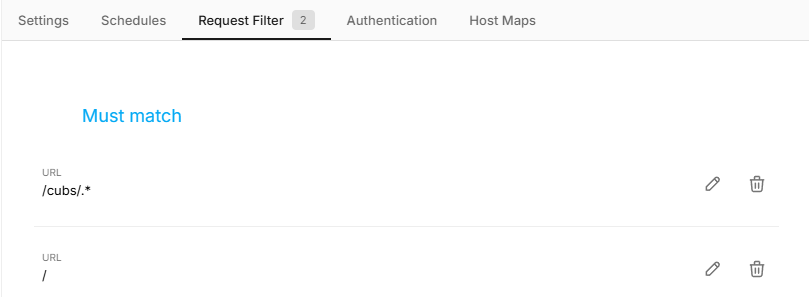
Must match - Requests that must match the specified rules to be included in the scan. Any requests not matching the given rules are considered out-of-scope at crawling phase and thus never visited. This type of filter is useful whenever a scan must be performed at certain depth or path within the scanned web application.
Must match filter applies only to resources directly found in the rendered web application such as links and buttons. The filter does not limit external resources required to properly render the web application like:
-
JavaScript libraries
-
Externally hosted images
-
Widgets
and other indirectly requested resources.
To limit requests of that nature, use a Can't match type of filter instead.
If ¨\.php\??¨ is provided as must match, it means the scanner scans only pages of ¨.php¨ file type and excludes other pages.
HTML can’t match - Exclude HTML content from the scan given the provided CSS selector.
HTML can’t match filter applies only to resources directly found in the rendered web application such as links and buttons.
Use the HTML can’t match filter when there are elements on the rendered web application that the enhanced crawler shouldn’t interact with.
The provided selector can be any valid CSS selector, as generic or specific as the use case requires. Examples:
-
Block an element via id:
#my-id -
Block an element via CSS class:
.my-class -
Block all elements of a certain html type, in this case all buttons will not be interacted with:
button -
Block an element with more complex CSS rules, in this case all direct child button elements of a parent selector with id “menu“ will not be interacted with:
#menu > button
In most modern browsers it is possible to get a selector for an element by:
Right click the element > Inspect > Right click the element marked by the browser > Copy > Copy Selector
HTML can’t match filter is only available with the enhanced crawler which can be enabled from the Settings view.
N-matches - With an N-matches filter, you can specify a numeric limit for a particular regular expression match. This means, the crawler only crawls n instances of your regular expression that it can match. In principal, n-matches filters work the same way as must-match filters do, except with the additional limit field.
Order of the filter types - Filter types are always matched sequentially with Must-match filters being matched first, followed by Cannot-Match, HTML Can’t Match, and n-matches. That means, if there is an overlap between your match-filters, then that order will be followed. For example, if your website has access to these URLs:
https://example.com/
https://example.com/cubs/
https://example.com/cubs/1
https://example.com/cubs/2
https://example.com/cubs/3
https://example.com/cubs/4
https://example.com/adults/
https://example.com/adults/1
https://example.com/adults/2
https://example.com/adults/3
https://example.com/adults/4
and you save the following request filter:
Must match
URL
/cubs/.*
Can't match
URL
(/$)|(/cubs(/.*)?$)
then, the crawler will crawl these pages
https://example.com/
https://example.com/cubs/1     <- Cubs page matched by the must-match filter
https://example.com/adults/
https://example.com/adults/1
https://example.com/adults/2
https://example.com/adults/3
https://example.com/adults/4
Method: Optional
Select any of the supporting HTTP request methods or leave the field empty (unspecified).
The available methods are:
-
GET
-
POST
-
DELETE
-
PATCH
-
PUT
URL
Provide the URL to which the filter settings must be applied (RE2 regex matching).
Heading 2 http://example\.com
Escape characters: Include appropriate escape characters. Incorrect escape characters can lead to unexpected crawling.
Regular Expression Examples for Filter Types
Cannot match filter - if your web application has the following endpoints:
https://example.com/
https://example.com/cubs/
https://example.com/cubs/1
https://example.com/cubs/2
https://example.com/cubs/3
https://example.com/cubs/4
https://example.com/adults/
https://example.com/adults/1
https://example.com/adults/2
https://example.com/adults/3
https://example.com/adults/4
and you set the following cannot-match filter:
Can't match
URL
(/$)|(/cubs(/.*)?$)
then our crawler will crawl the following URLs:
https://example.com/                 <- base endpoint also matched by the regular expression
https://example.com/adults/
https://example.com/adults/1
htt43t3ps://example.com/adults/2
https://example.com/adults/3
https://example.com/adults/4
Must match filter - Building on the previous example, if you set a must-match filter as follows:
Must match
URL
(/$)|(/cubs(/.*)?$)
then the crawler will scan the following URLs:
http://example.com/
http://example.com/cubs/
http://example.com/cubs/1/
http://example.com/cubs/2/
http://example.com/cubs/3/
http://example.com/cubs/4/
http://example.com/cubs/5/
http://example.com/cubs/6/
Accidental exclusion of seed URLs
Seed URLs are not exempt from matching rules. When defining must-match filters, do ensure that your seed URL(s) are covered by at least one of the provided patterns.
HTML can’t match filter - You can use CSS-style query selectors when creating HTML can’t match filters. For example, assume we have a web application running on http://example.com that only contains anchor tags and with the following request filter.
HTML can't match
Selector
body > a
the crawler will crawl the seed URL
https://example.com/
and will avoid matching any anchor tags.
N-matches filter - If your website has a lot of repeating pattern URLs, such as the following,
http://example.com/
http://example.com/index.html?firstIndex=1&lastIndex=0
http://example.com/index.html?firstIndex=1&lastIndex=10
http://example.com/index.html?firstIndex=1&lastIndex=100
http://example.com/index.html?firstIndex=1&lastIndex=1
http://example.com/index.html?firstIndex=1&lastIndex=1000
http://example.com/index.html?firstIndex=1&lastIndex=10000
http://example.com/index.html?firstIndex=1&lastIndex=10000
http://example.com/index.html?firstIndex=1&lastIndex=10000
http://example.com/index.html?firstIndex=1&lastIndex=100000
http://example.com/index.html?firstIndex=1&lastIndex=1000000
http://example.com/index.html?firstIndex=1&lastIndex=10000000
http://example.com/index.html?firstIndex=1&lastIndex=100000000
http://example.com/index.html?firstIndex=1&lastIndex=1000000000
... and so on
and you have the following n-matches filter,
n-match filter
URL
/index\.html\?firstIndex
then you can expect the crawler to visit the following URLs
http://example.com/
http://example.com/index.html?firstIndex=1&lastIndex=0
http://example.com/index.html?firstIndex=1&ylastIndex=10
http://example.com/index.html?firstIndex=1&lastIndex=100
http://example.com/index.html?firstIndex=1&lastIndex=1
http://example.com/index.html?firstIndex=1&lastIndex=1000      <- only matched 5 URLs with the yeet patter
Body Type: Optional
Select the desired content type from the drop-down menu, so that the request body also use the same format as query string. If you leave the field empty, it matches all the requests.
-
application/json - https://tools.ietf.org/html/rfc4627
-
application/x-www-form-urlencoded - https://tools.ietf.org/html/draft-hoehrmann-urlencoded-01
-
multipart/form-data - https://tools.ietf.org/html/rfc7578
-
multipart/mixed - https://tools.ietf.org/html/rfc2046#section-5.1.3
-
text/plain - https://tools.ietf.org/html/rfc2646#page-4
Body: Optional
Provide the body to which the filter settings must be applied (RE2 regex matching).
/login_example\.php
After filling the desired settings into filter configuration dialog, click the ADD button.
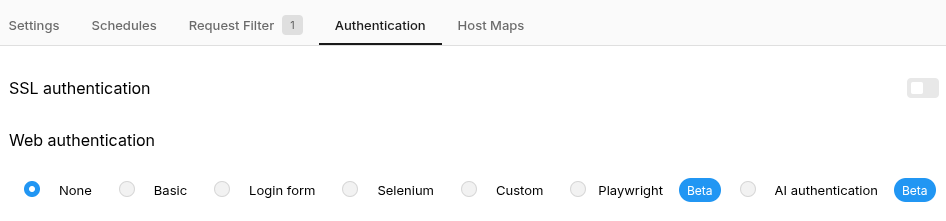
Authentication
Here you can configure authentication for an asset.
SSL Authentication
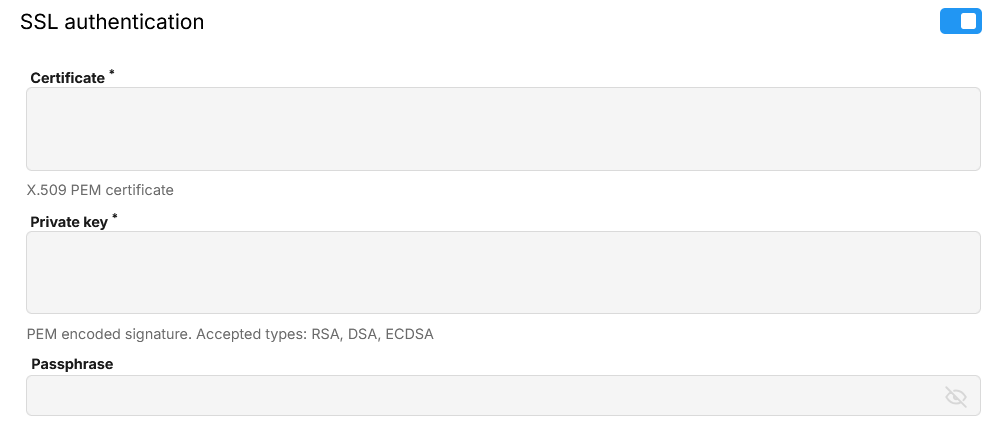
Certificate
X.509 PEM certificate
The PEM extension is used for different types of X.509v3 files which contain ASCII (Base64) armored data prefixed with a “---BEGIN …” line.
Private key
PEM encoded signature. Accepted types: RSA, DSA, ECDSA
Starting with: -----BEGIN RSA PRIVATE KEY-----
Passphrase
Passphrase used for private key.
Web Authentication
None
Choose None if you wish not to have any authentication.
Basic
Choosing Basic authentication is appropriate when establishing initial state of the crawled application using the WWW-Authenticate HTTP header as specified in RFC1945.
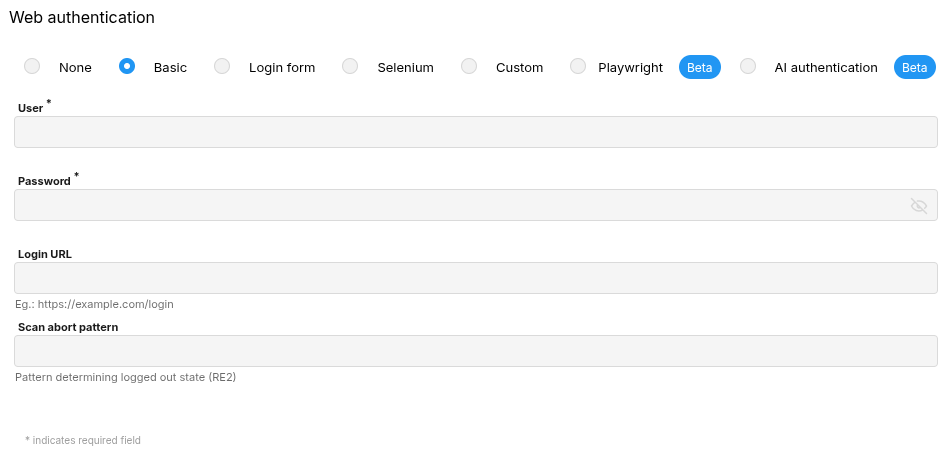
To terminate a scan due to logged out state, it is recommended to specify Scan abort pattern. The pattern should be in RE2 format or as simple text matching the response that indicates logged out state of the application to the scanner. The pattern is being matched against all responses coming from the scanned application, both headers and body, and if the response matches the specified pattern, the scan stops. This is used to prevent crawling of application outside of its desired state and to make sure that reported findings belong to correct application state.
Login Form
This configuration allows to set up an authentication procedure based on a login form present on the website:
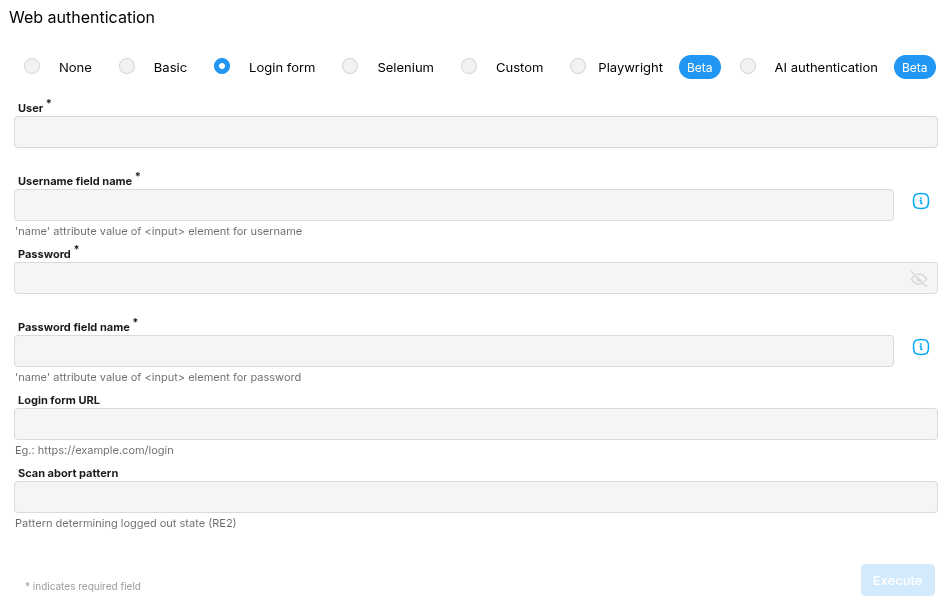
Review the rendered HTML of login page to locate the form input element. This can be done by right clicking on the page and choosing Inspect or Inspect element. See the example guide for Firefox for more information.
Below you can see an example code snippet and where the required value would be found:
<form action="/user/login" method="post" id="user-login" accept-charset="UTF-8">
    <div>
        <div class="form-item form-type-textfield form-item-name">
            <label for="edit-name">Username or email <span class="form-required" title="This field is required.">*</span></label>
            <input type="text" id="edit-name" name="user" value="" maxlength="60" class="form-text required">
       </div>
        <div class="form-item form-type-password form-item-pass">
            <label for="edit-pass">Password <span class="form-required" title="This field is required.">*</span></label>
            <input type="password" id="edit-pass" name="pass" size="60" maxlength="128" class="form-text required">
        </div>
        <div class="form-actions form-wrapper" id="edit-actions">
            <input type="submit" id="edit-submit" name="op" value="Log in" class="form-submit">
        </div>
    </div>
</form>
In this example, the name of the username input field is user.
<input type="text" id="edit-name" name="user" value="" maxlength="60" class="form-text required">
and password input field is pass and that's what should be submitted in the authentication configuration.
<input type="password" id="edit-pass" name="pass" size="60" maxlength="128" class="form-text required">
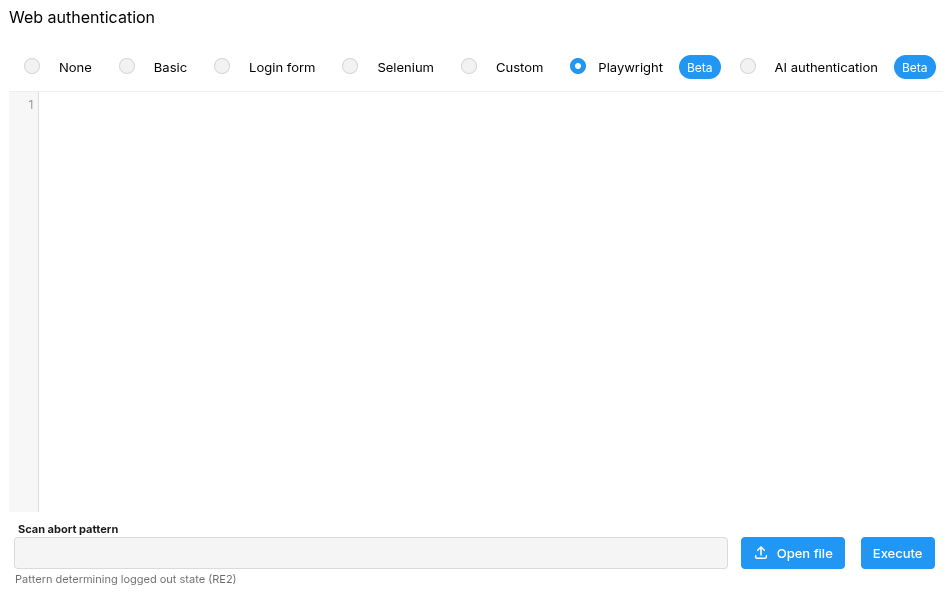
Playwright
This functionality allows you to add a Playwright script that is executed during the scan.
By default, the authentication routine runs in an English-language environment. Playwright records interactions from a “real” browser session and often captures visible text as selectors, which may fail if the browser language differs between recording and playback. To avoid this issue, record the script in English so that playback aligns with the runtime browser language.
In general, we recommend updating the script to use language-independent selectors, such as HTML attributes, instead of relying on visible text. This ensures the script works consistently regardless of the browser language.
Follow the below procedure to get started with playwright:
Install the Main Tool (Node.js)
Before using Playwright, the program Node.js needs to be installed on the computer. Node.js is the engine that runs Playwright and comes with a special installer program called npm.
-
Go to the official Node.js download page: https://nodejs.org/en/download/
-
Of the different download options, we recommend the "LTS" version. (LTS stands for "Long-Term Support," which is the most stable version.)
-
Download and run the installer program. During the installation, click "Next" and accept the default settings.
After installation, you may need to close and reopen your terminal program for the changes to take effect.
Install Playwright
-
Open a terminal,
-
In Linux, open a terminal.
-
In windows systems press Windows + R and type cmd for command prompt, or powershell for Windows PowerShell.
-
-
To download and install Playwright, copy and paste the
npm init playwright@latestcommand into the terminal and press Enter. The process takes a few minutes. -
During the installation, the process will ask a few questions which can be answered by pressing Enter to accept the default options.
-
The installation creates a new folder with your project files in your current location.
-
The official Playwright documentation is available at: https://playwright.dev/docs/intro
Recording Your First Script
Once Playwright is set up, you can start recording your actions.
-
Run the recording command
npx playwright codegenin the terminal. -
Two new windows is displayed:
-
A Playwright Web Browser window where you will perform your actions.
-
A Playwright Inspector window where your code will be automatically written as you interact with the browser.
If not already chosen, choose the target: Test Runner.
-
Perform Actions in the Browser
Go to any website in the Playwright Web Browser window and start clicking, typing, and navigating.
As you perform these actions, the Playwright Inspector window automatically fills up with lines of code. This code represents the steps you just took.
Use the Script
-
When you are done, close the Playwright Web Browser window. The script will remain in the Playwright Inspector window.
-
To use the script, copy all the code from the Playwright Inspector window and paste it into the Playwright Editor.
-
If you want to test your script press the Execute button.
-
If you want to save your script press the Save button.
Success verification
To make sure the script has logged in it is advised to check for an element that is only visible after having been properly authenticated.
The java script code can look something like the code below, but will of course be unique for each page:
    // --- Success Verification ---
    // Verify a successful login by asserting the visibility of an element
    // that is unique to the authenticated state. For instance, a profile icon,
    // a "Logout" button, or a main dashboard component.

    // Get a locator for the element that should appear after login
    const dashboardElement = page.locator('#dashboard-main');

    // Assert that the element is visible. This action will wait for the element
    // to appear (up to a default timeout) and then check its visibility.
    // If the element doesn't become visible, the assertion will fail,
    // which is the expected behavior for a failed login.
    await expect(dashboardElement).toBeVisible();
Handling Popups and Consent Dialogs
Many websites display popups that can interfere with the authentication flow. Examples include cookie consent banners, privacy notices, Terms and Condition dialogs, welcome tours, newsletter prompts, and regional or language selection dialogs.
If a popup blocks access to login fields or buttons, your Playwright script must handle it before continuing with the authentication steps.
Record the popup interaction
The easiest approach is to record yourself accepting or dismissing the popup while creating the script.
For example, if you click an Accept All Cookies button while recording, Playwright may generate code similar to:
await page.getByRole('button', { name: 'Accept All Cookies' }).click();
This ensures the popup is handled before the login process continues.
Make the Popup Handling Optional
Some popups only appear for first-time visitors or under certain conditions. In these cases, the script should handle the popup only if it appears.
    const acceptButton = page.getByRole('button', { name: 'Accept All Cookies' });
    if (await acceptButton.count() > 0) {
        await acceptButton.click();
    }
This allows the script to dismiss the popup if it appears, while continuing normally if it does not.
Verify That the Popup No Longer Blocks Authentication
After updating the script, execute it and confirm that:
-
The login fields remain accessible.
-
Authentication completes successfully.
-
The success verification step passes.
-
The script works consistently across multiple test runs.
For popups that are controlled by cookies, such as cookie consent banners or onboarding dialogs, it is often more reliable to prevent the popup from appearing altogether. This can be achieved by pre-loading the appropriate cookies before navigating to the site.
Pre-loading Cookies
To make your Playwright script more efficient, you can "pre-load" cookies so the browser remembers specific states—like accepting a popup, dismissing a banner, or setting a site theme—before the page even opens.
When you visit a site normally and perform an action, the website stores a small file called a cookie in your browser to remember that choice. Because Playwright starts with a completely fresh profile every time, it doesn't have that memory, which is why popups reappear or configuration screens show up on every test run.
It is important to realize that this technique works for anything a cookie controls: from bypasses for "Terms of Service" screens to setting a specific language or regional currency preference.
To enable this, you first need to mirror the exact state from your own browser. Visit the site, perform the action, and open the Developer Tools (F12) to the Application tab. Under the Cookies section, you need to copy every relevant detail for that specific entry to ensure the "handshake" between Playwright and the website is identical to your manual session.
In your Playwright script, you will use the page.context().addCookies() method to manually inject this information. This command must be placed specifically after you initialize the browser but before the page.goto command.
By doing this, you are essentially "handing" the browser its preference card before it walks through the door. This allows the script to bypass repetitive interactions, making your automation faster and much more reliable.
Replace the placeholder values below with the actual data from your browser's table. To represent the state as accurately as possible, ensure you copy the Name, Value, Domain, Path, and SameSite status exactly as they appear.
The below code is what you manually need to add to your script:
// Add this block BEFORE your page.goto() command
await page.context().addCookies([
  {
    name: "UserPreference",            // From 'Name' column
    value: "Region=Europe|Theme=Dark", // From 'Value' column
    domain: "www.example-site.com",    // From 'Domain' column
    path: "/",                         // From 'Path' column
    expires: Math.floor(Date.now() / 1000) + 31536000, // Matches your browser's 'Expires' (sets for 1 year)
    secure: true,                      // From 'Secure' column (usually Checked/True)
    httpOnly: false,                   // From 'HttpOnly' column
    sameSite: "Lax",                   // From 'SameSite' column (e.g., Lax, Strict, or None)
  },
]);

// Now the page will load with all your preferences already active
await page.goto("https://www.example-site.com");
Once the cookie is set to match your browser's state, the website will treat the automated session as if it were a returning user who has already configured their experience.
You can use this to skip on-boarding tours, force the site to show a specific currency, or pre-set legal "Terms and Conditions" as accepted to avoid splash screens that interrupt your script.
Understanding test execution results
A successful test run confirms script completion and authentication file generation but does not verify the underlying validity of the captured authentication data. This means the test is context-agnostic; while the intent is to capture credentials, the script will still report a 'Pass' even if run against unauthenticated links where no authentication data exists.
This is how it looks when a script passes:

A failed attempt can stem from various sources. It can be that you cant reach your target, target has been updated without updating the script, network instability etc. The following image represents just one example of a failed run:
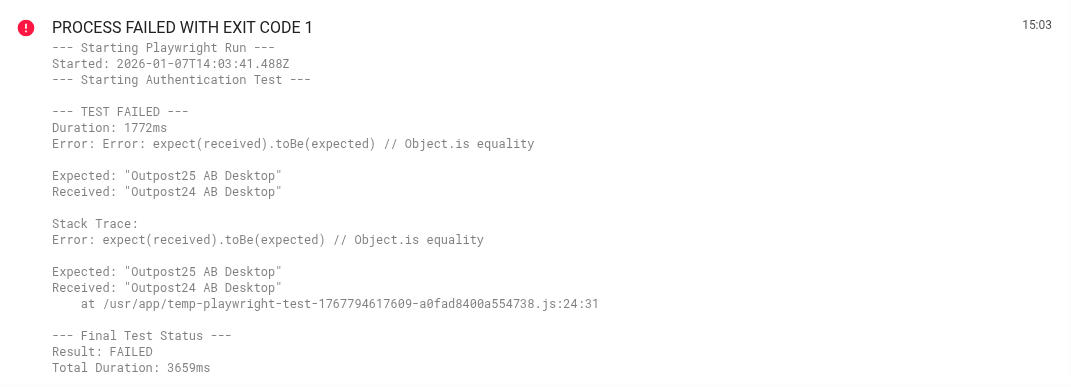
The above image is an example where it expects the page title to be “Outpost25 AB Desktop” but the received page title is “Outpost24 AB Desktop”. In this case the obvious fix is to remove the typo from the script.
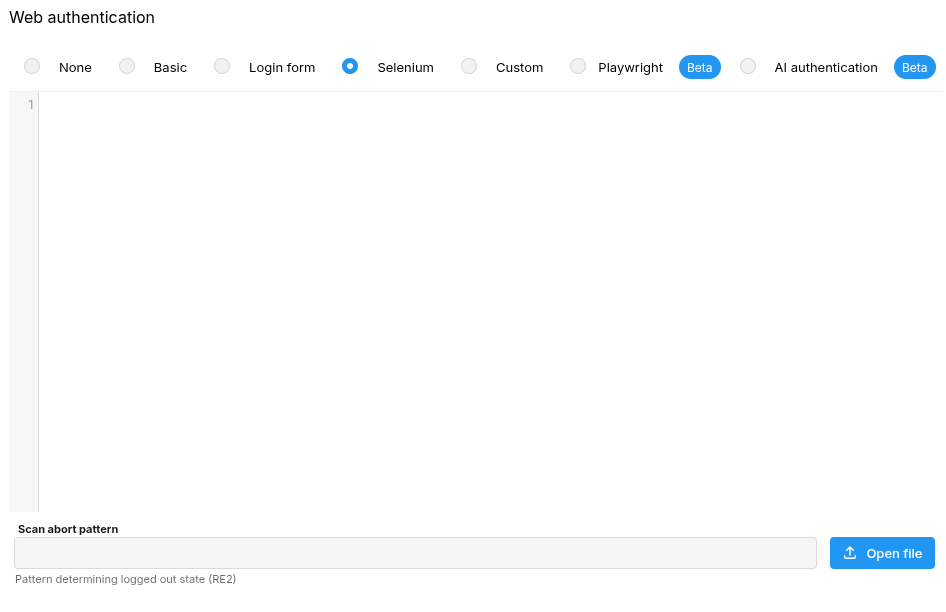
Selenium
This functionality allows you to add a Selenium script that is executed during the scan.
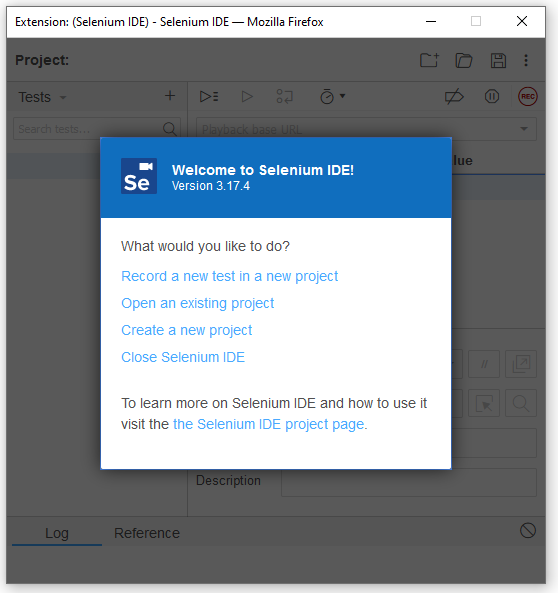
Install the Selenium IDE plugin to record scripts in the web browser.
Follow the below procedure to install Selenium IDE plugin:
-
Select "CHROME DOWNLOAD" or "FIREFOX DOWNLOAD".
More information about installing and using the Selenium IDE plugin is available on https://www.seleniumhq.org/selenium-ide/docs/en/introduction/getting-started/ .
To record a script:
Important
Before recording a test (and before a test run ), make sure that the browser is completely clean of any cookies or other saved data for that webpage. In other words, clean web cache before each recording/run of selenium.
-
Open the plugin by navigating to the Selenium IDE in your web browser:

-
Select Create a new project.
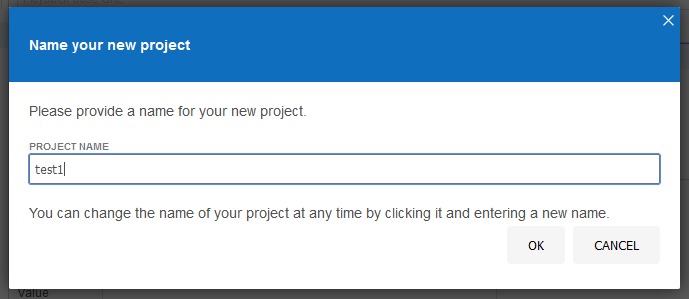
-
Enter the project name and click OK.
-
Click the Start recording (REC) button.

-
Enter the URL of the app you want to login to.
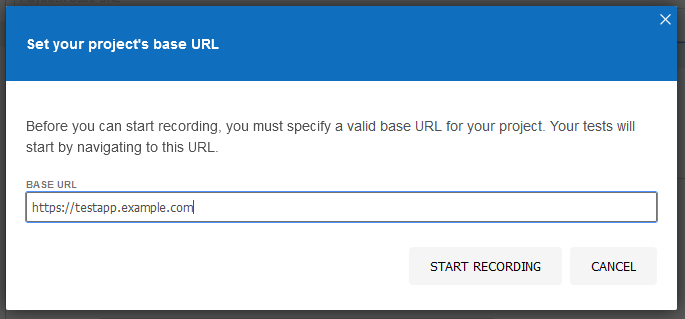
-
Click START RECORDING.
-
The plugin now opens the URL in a new web browser window.
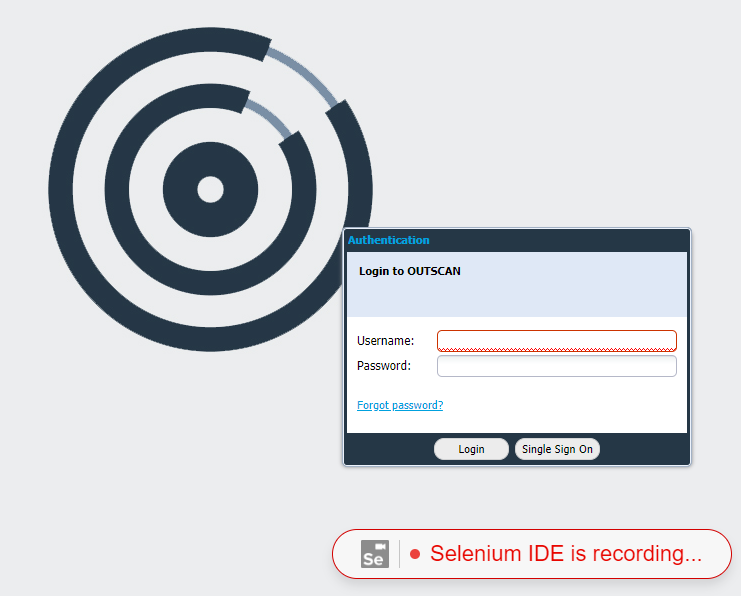
You can see the Selenium IDE is recording notice at the bottom of the page. -
Follow the necessary steps to log in to that web application.
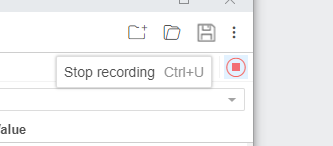
-
Once authentication is succeeded, click the Stop recording button.
-
The script appears in the Selenium IDE console:
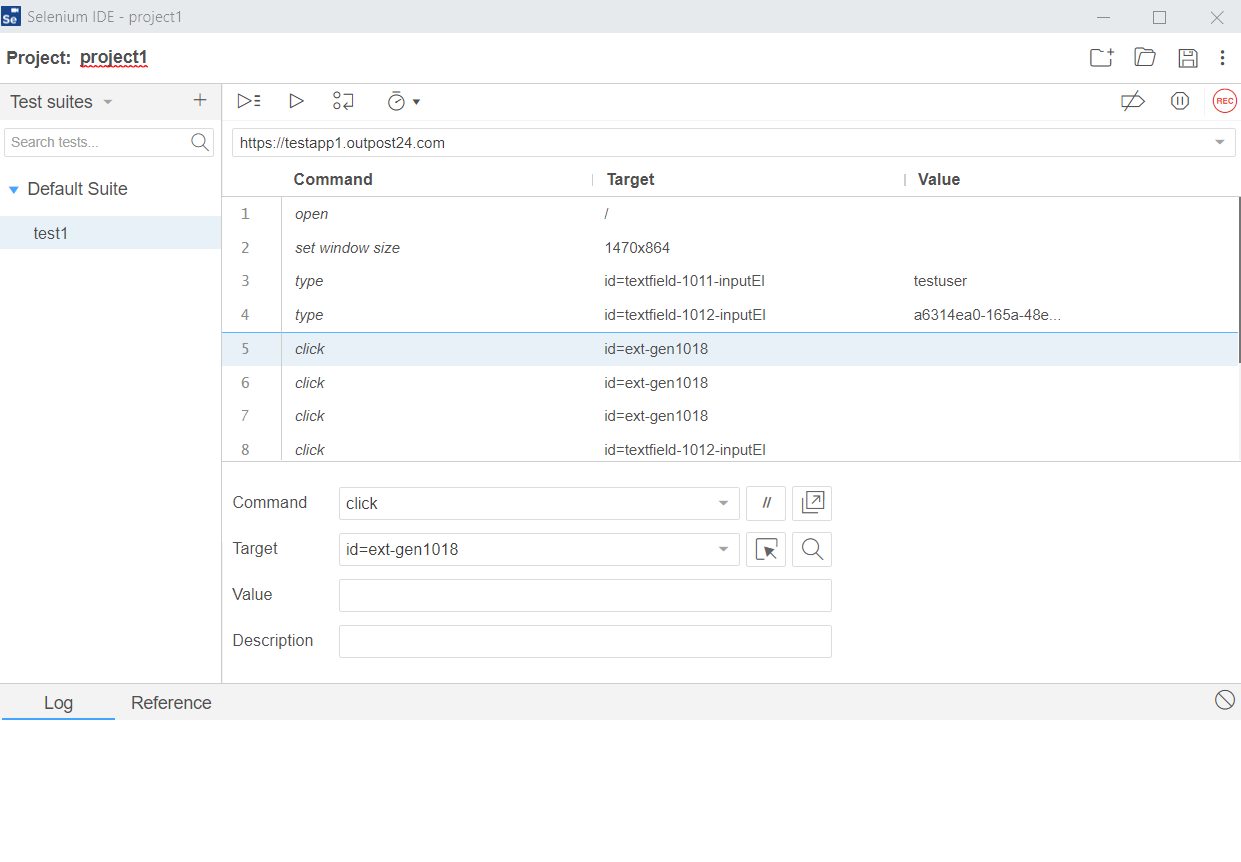
The script must be automatically added to the Default Suite upon its creation. Otherwise, follow the instructions on https://www.seleniumhq.org/selenium-ide/docs/en/introduction/getting-started/ to add the test suite and organize your tests.
-
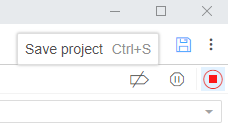
Click the Save project button to save the script as a .side file:
It is recommended to add a verification in the script to make sure that the script was successfully logged in. By adding a command to check for an element to be accessible will verify if that the login procedure has finished and was successful and the scanning can proceed, else the script will start scanning the login page.
Example of useful test commands.
-
Wait for element editable
-
Wait for element visible
-
Wait for element present
To add a script to Scale authentication:
-
Log in to the new Outpost24 portal.
-
Go to Configurations > Scan configurations.
-
Select Authentication from the menu on the left-hand side.

-
Select Selenium.
-
Open the .side script file previously saved in Selenium IDE:

-
Click SAVE.
The saved .side script is executed before scan starts and the output from the script is used to establish authenticated state.
Make sure that the private IP range 10.88.0.0/16 is not used in your environment, since this is used to communicate with a restricted container on the scanner. Having targets in this range while using the side scripts feature may cause issues while scanning them.
Custom
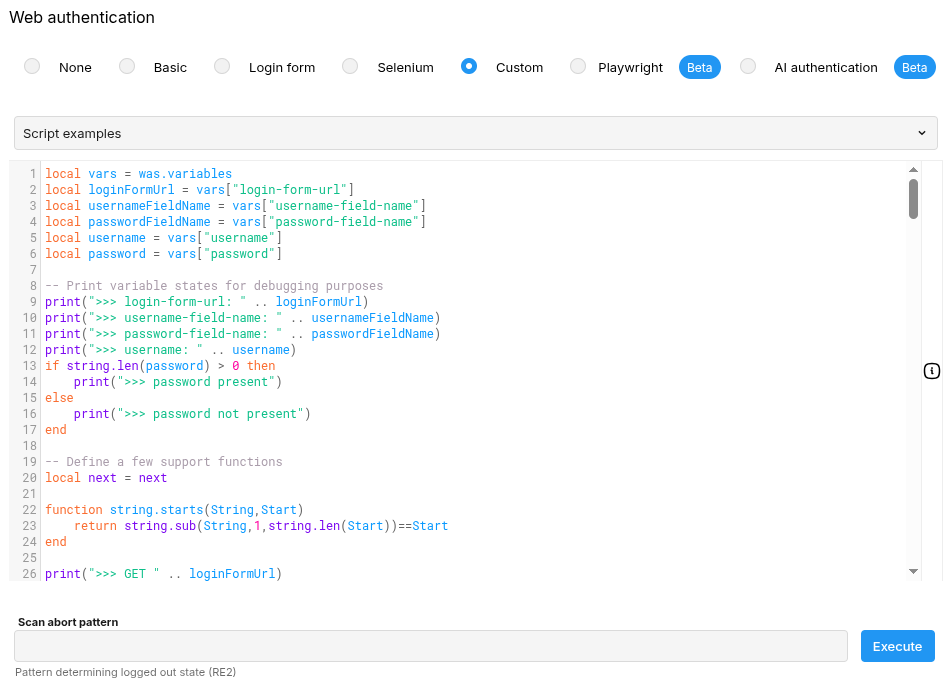
The basic concept of a Custom authentication flow is to create instructions for the scan to follow so it can establish a desired initial state before an actual scan starts on application specified Seed URLs. The custom authentication flow provides an environment for executing Lua scripts for exchanging HTTP messages over the network, recording cookies and providing dynamically generated seed URLs.
Some script examples are added to make it easier with Lua custom authentication script. The script input is populated depending on the chosen example from the drop-down.
The available examples include:
-
Cookie based
-
XPath
-
Wordpress
Information regarding Lua can be found at https://lua.org. Web application scanner specific documentation can be found by selecting the Custom authentication radio button.
To terminate a scan due to logged out state, it is recommended to specify Scan abort pattern. The pattern should be in RE2 format or as simple text matching the response that indicates logged out state of the application to the scanner. The pattern is being matched against all responses coming from the scanned application, both headers and body, and if the response matches the specified pattern, the scan stops. This is used to prevent crawling of application outside of its desired state and to make sure that reported findings belong to correct application state.
After selecting the preferred authentication, click SAVE.
AI Assisted Authentication
AI Assisted Authentication lets you describe a login flow in plain text. Instead of configuring fields and selectors manually, you write a prompt that tells the authentication engine what to do — where to go, what credentials to use, and what a successful login looks like.
This is useful when a login page has unusual behavior, multi-step flows, or elements that other authentication methods struggle with.
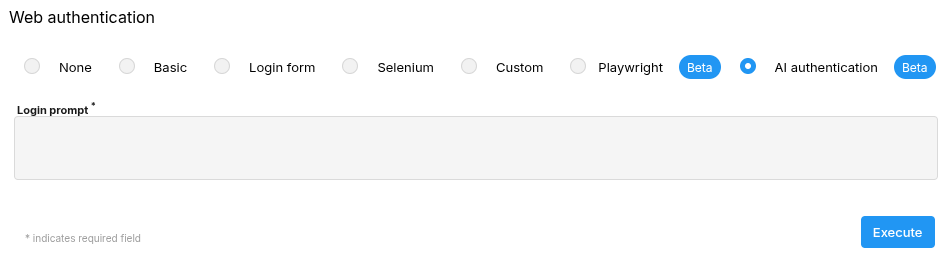
Writing a Login Prompt
A good prompt has three parts:
-
Where to go — the URL of the login page.
-
What credentials to use — the username or email, and password to enter. These must be written directly into the prompt.
-
What success looks like — the URL or page element that confirms a successful login.
Example
“Go to https://example.com/login. Enter the username "user@company.com" and the password "MyPassword123". After logging in, you should land on the dashboard at https://example.com/dashboard.”
Common problems and how to fix them
-
Missing credentials: The AI cannot guess or retrieve credentials on its own. If you do not include a username and password in the prompt, authentication will fail.
Fix: Always write the credentials directly into the prompt field.
-
Multi-step login forms: Some login pages split the flow across multiple screens — for example, entering your email on one page and your password on the next. If you only describe the first step, the AI may not complete the flow.
Fix: Describe each step in order.
Go to https://example.com/login. Enter the email "user@company.com" and click Next. On the second page, enter the password "MyPassword123" and click Sign In. -
No success state defined: If you do not describe what a successful login looks like, the AI will make a best guess — which is not always correct. It may think it succeeded when it hasn't, or keep trying after it already has.
Fix: Tell it what page or element to expect after a successful login.
After logging in, you should be redirected to https://example.com/home or see a page with the heading "Welcome back". -
Pop-ups and overlays before the login form: Cookie consent banners, privacy notices, or promotional overlays may appear before the login form is visible. If the AI is not told to handle these, it may get stuck.
Fix: Mention any expected pop-ups and how to dismiss them.
Before the login form appears, a cookie consent banner will be visible. Click "Accept all" to dismiss it, then proceed with login. -
Two-factor authentication (2FA/MFA): If the account requires a one-time code, the AI will pause and wait. It cannot retrieve codes from an authenticator app or email on its own.
Fix: Either use an account without 2FA enabled for automated authentication, or provide a static bypass code if your organisation allows it.
Tips for Reliable Prompts
-
Be specific about button labels — for example "click the button labelled Sign In" rather than "click the login button", in case multiple buttons are present.
-
If a field label is unusual (e.g. the site uses "Member ID" instead of "Username"), mention that in the prompt.
-
Include the full URL including
https://— a partial address may not resolve correctly. -
If login fails, try adding more detail about each step rather than rewriting the prompt from scratch.
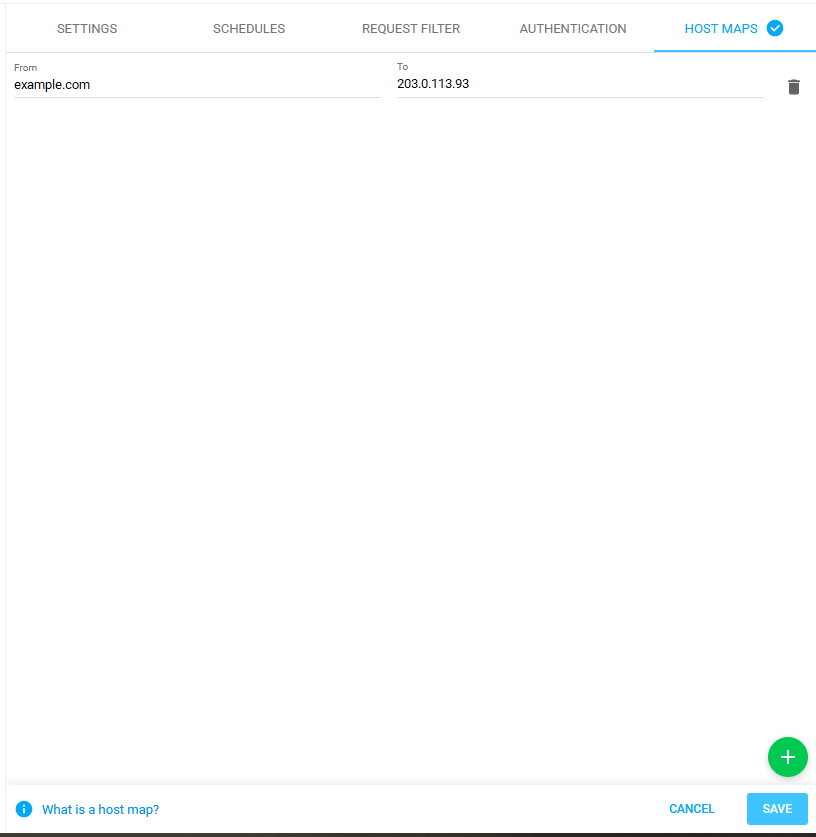
Host Maps
A host map defines a map between names and addresses to a map of other addresses. They can be used to force certain DNS resolutions or to scan vhosts on an HTTP server where there are no DNS records for the vhosts. An entry in the To field must be a valid IPv4/IPv6 address. An IPv6 address must not be enclosed with square brackets.
Examples:
|
From |
|
To |
|
example.com |
> |
203.0.113.1 |
|
internal.example.com |
> |
192.0.2.3
|
|
203.0.113.3 |
> |
198.51.100.9 |
When using multiple entries in the To section, a round-robin selection is applied to these entries.
To add a host map, click on the green plus icon in the lower right corner.
The bin icon next to the To section marks the entered host map for deletion when saving.
After entering the host map, click SAVE.
Reporting Settings
Report settings manage how assets are reported after a scan. They allow the addition of tags to rediscovered, or newly discovered assets, as well as the import of tags from external platforms like Amazon Web Services. They also determine how assets are reported and made visible in the assets view, or whether asset creation should be skipped entirely.
Automatic tagging and tag import simplify asset management and organization by offering a hands-off approach, making it easier to manage assets at scale. In addition to reducing manual effort, these settings provide essential customization options to ensure consistency across scans and systems, enhancing asset accessibility and supporting consistent compliance reporting.
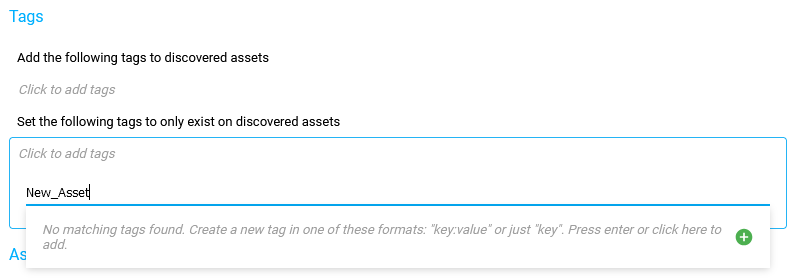
Tags
The tags function automatically adds tags to newly discovered assets, streamlining the management process, reducing manual effort, and enhancing accessibility. By using the automatic tagging functionality, you can assign relevant information to each asset, such as its environment (e.g., production, staging, development), department (e.g., marketing, finance, engineering), or compliance status (e.g., PCI-DSS compliant).
Using tags like production or development enables you to quickly distinguish between different environments, facilitating resource management based on their intended purpose. If an issue arises with resources belonging to a specific department, support teams can easily filter assets by tags, allowing for faster and more effective incident response.
Preset the tag to be added either by selecting one from the expanded list
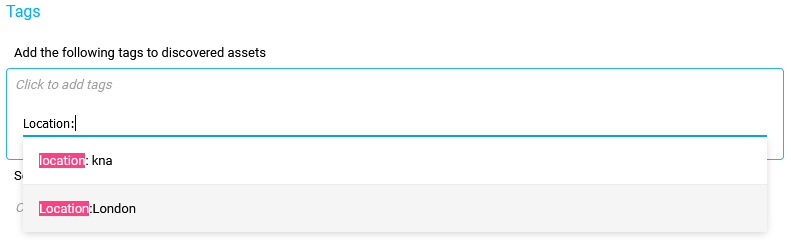
or create a new tag.
Asset Creation
In Asset creation assets can be created automatically when new machines are discovered.
The first option allows users to create assets for found hosts, which streamlines the process of integrating newly identified resources into the existing asset inventory. By automatically creating assets after the scan, organizations can ensure that all discovered resources are accounted for and readily accessible.

The second option provides a useful alternative for scenarios where organizations may want to monitor potential resources without immediately integrating them into their asset management system. This option is particularly beneficial for environments that are undergoing changes or assessments, as it allows teams to gather information about new hosts without overwhelming their inventory. Results will only be visible in the scans view, giving teams the flexibility to evaluate assets before deciding to create formal entries in the asset inventory.

Network Discovery Template
Packet filter (advanced usage)
This feature is for advanced users!
When running a Network Discovery scan, a packet filter can be applied to filter the result of the scan.
Packet filters allows for the ability to capture targeted data, making it possible to specify which packets to collect based on different criteria like IP addresses, protocols, or port numbers. This reduces the amount of irrelevant data and makes it easier to analyze the result.
Filtering packets also reduces both CPU and memory overhead, which is important during scans with a high volume of network traffic. By capturing only the relevant packets, you can speed up the scanning process and avoid delays associated with processing unnecessary data.
Focusing on specific protocols or devices of interest allows you to gain a clearer understanding of your network topology, active hosts, and available services making it easier to capture suspicious activities. Many network scanning tools, support BPF syntax, enabling seamless integration into your workflow.
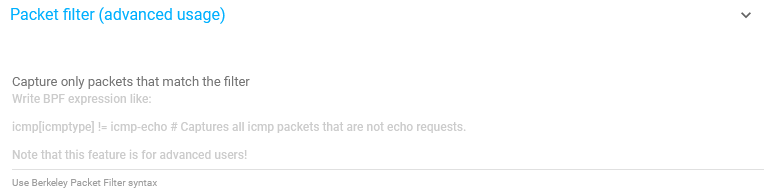
The packet filter uses Berkeley Packet Filter syntax and a BPF expression in the filter looks like:
icmp[icmptype] != icmp-echo # Captures all icmp packets that are not echo requests.
Cloud Discovery Template
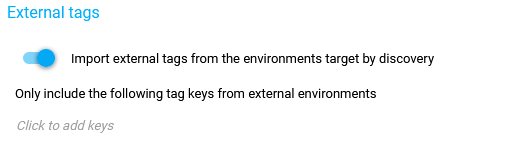
External Tags
Enabling the External tags feature allows you to import the external tags from the source of the discovery scan. You can filter these to only import specific tag keys from the source. This ensures consistency between systems and enables quick filtering options for reporting and compliance, using familiar tags from the external system.
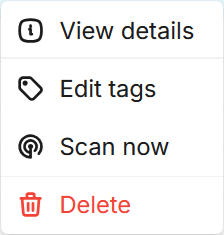
Manage a Configuration
Select one or more configurations, to view the available actions in the bottom tool row:

-
Click on the Edit Tags icon to manage tag on the selected configuration.
See Tags for more information.
-
Click on the Scan Now icon to initiate a scan instantly.
-
Click on the Delete icon to remove the selected configuration.
Removing scan configurations will not remove any other associated data like assets or schedules.
The same tools are available by right clicking the configuration.
Preconditions for a Configuration to Run
-
It is enabled.
-
It has a schedule.
-
The schedule has remaining Occurrences > 0 or not set at all.
-
The seed URLs must pass all request filters.
References
-
https://developer.mozilla.org/en-US/docs/Web/HTTP/Headers/User-Agent.
-
application/json - https://tools.ietf.org/html/rfc4627
-
application/x-www-form-urlencoded - https://tools.ietf.org/html/draft-hoehrmann-urlencoded-01
-
multipart/form-data - https://tools.ietf.org/html/rfc7578
-
multipart/mixed - https://tools.ietf.org/html/rfc2046#section-5.1.3
-
text/plain - https://tools.ietf.org/html/rfc2646#page-4
-
https://www.seleniumhq.org/selenium-ide/docs/en/introduction/getting-started/
-
Playwright, Nodejs download - https://nodejs.org/en/download/
-
Playwright, vendor documentation - https://playwright.dev/docs/intro
Related Articles
- Windows 10/Windows 2019 Server
- General Information about SMB/WinRM Scanning
- Windows 8.1
- Scan Blueprint
- How to Test SMB Authentication
- Docker Image Assessment
- Windows 2016 Server
- How to Scan AWS ECR Images
- Scanning-Less Scanning
- Scan Scheduling Errors
- Network Host Assessment
- Core Installation
- Windows 2008 R2 Server
- Scanning Range
- SMB Authentication from OUTSCAN/HIAB