Last Updated: 2026-06-24
Purpose
This article describes the procedure to manage roles in the portal.
Introduction
In Outpost24’s portal, Role Management provides the framework for defining what actions each user is allowed to perform across the system. Through IAM (Identity & Access Management), administrators can create or modify roles by assigning granular permissions on modules such as assets, scans, tags, reports, and integrations. Roles establish the level of access—whether viewing, managing, or denying functions—so users only see and act on what their position requires. This ensures both security and flexibility by enforcing least privilege while enabling custom authorization tailored to your organization’s structure.
Accessing IAM
To navigate to this section,
-
Log in to the Portal. See the Logging in to the portal article for the different ways to access the Portal view.
-
Click the Account icon in the upper right corner.
Note that the initials in the icon may change depending on username.
-
In the context menu, select Identity Access Management (IAM) to access the IAM page.
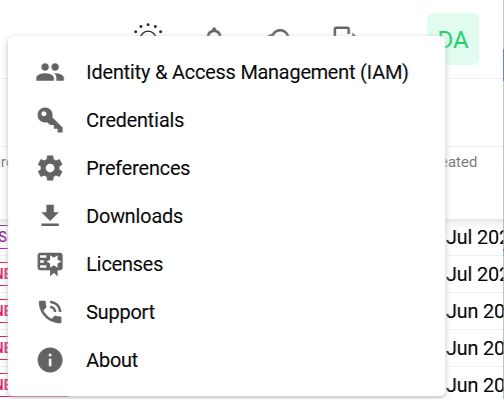
This displays the Identity Access Management page which is divided in three tabs, Users, Roles, and Resource Groups.
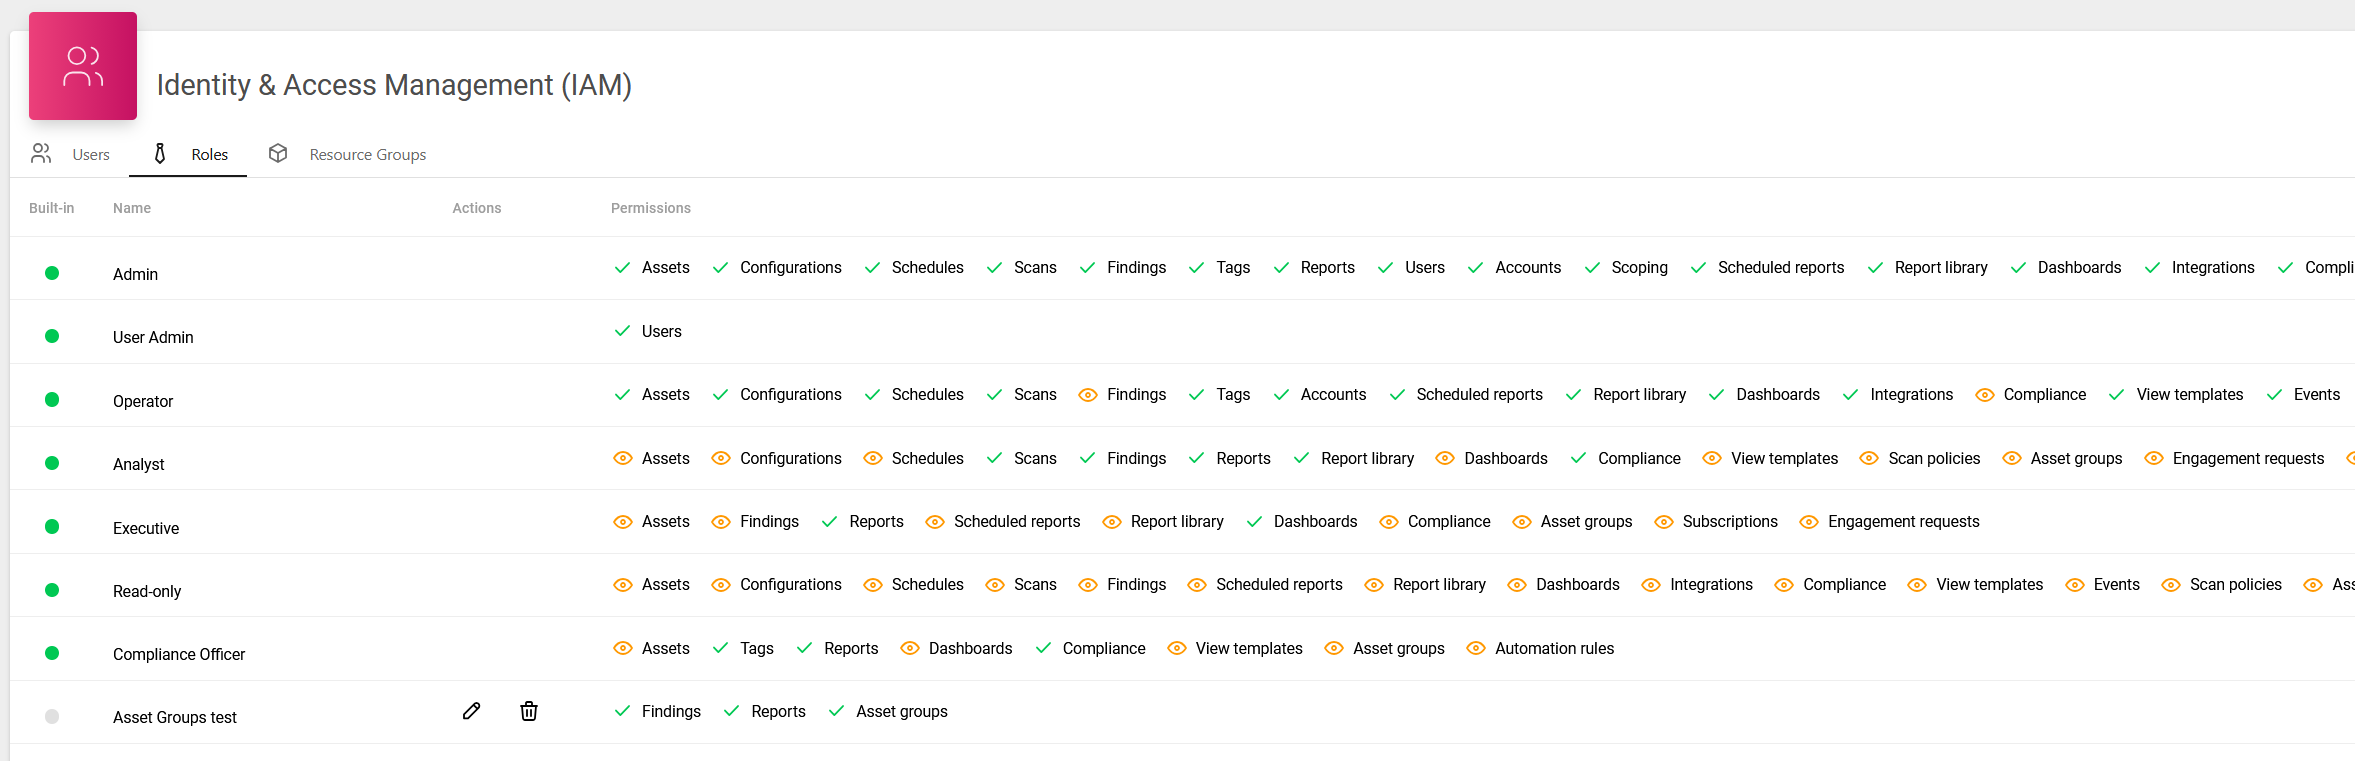
Roles Management in IAM
Technical Preview
This section is a technical preview of a feature that is currently under development. Some features are hidden behind a feature flag.
A user role is a role by which the user is able to operate the resources they have been granted access to. Roles consist of one or more permission, for example, the Analyst role would have Findings permission set to View. For multiple roles, the user is given the highest level of capabilities granted to any role to which they are assigned. For example, if a user is assigned to the role Admin which has the most capabilities, and also to a role Operator with a different set of capabilities, the user will have the capabilities of both roles. A user with no roles would not have any access at all.
The Roles function in the Portal does not correspond to groups in Vulnerability View (Netsec).
This view presents the detailed information about the permissions to access different modules for the available roles.
Available Resources
|
Available resources |
Actions to perform |
|---|---|
|
Login |
Deny, Grant |
|
Asset groups |
Deny, View, View and manage |
|
Assets |
Deny, View, View and manage |
|
Configurations |
Deny, View, View and manage |
|
Schedules |
Deny, View, View and manage |
|
Scans |
Deny, View, View and manage |
|
Scan policies |
Deny, View, View and manage |
|
Findings |
Deny, View, View and manage if View and manage, select the additional actions the users will be able to perform by checking boxes:
|
|
Compliance |
Deny, View, View and manage |
|
Tags |
Deny, Manage |
|
Export reports |
Deny, View and manage |
|
Scheduled reports |
Deny, View, View and manage |
|
Reports |
Deny, View and manage |
|
Users |
Deny, View, View and manage |
|
Credentials |
Deny, View, View and manage |
|
Scoping |
Deny, Submit |
|
Dashboards |
Deny, View, View and manage |
|
View templates |
Deny, View, View and manage |
|
Integrations |
Deny, View, View and manage |
|
Events |
Deny, View, View and manage |
|
Subscriptions |
Deny, View |
|
Finding templates |
Deny, View, View and manage |
|
Engagement request |
Deny, View, View and manage |
|
Appliances |
Deny, View |
Built-in indicates predefined roles in the system. These roles cannot be deleted or modified so Edit and Delete actions are not available for these roles.
Hovering over the column header or the icons in the table, a tooltip is displayed after a short while.
Add Roles
To add a role,
-
Click on the green +Add role button located on the bottom right of the window. It opens the below dialog:
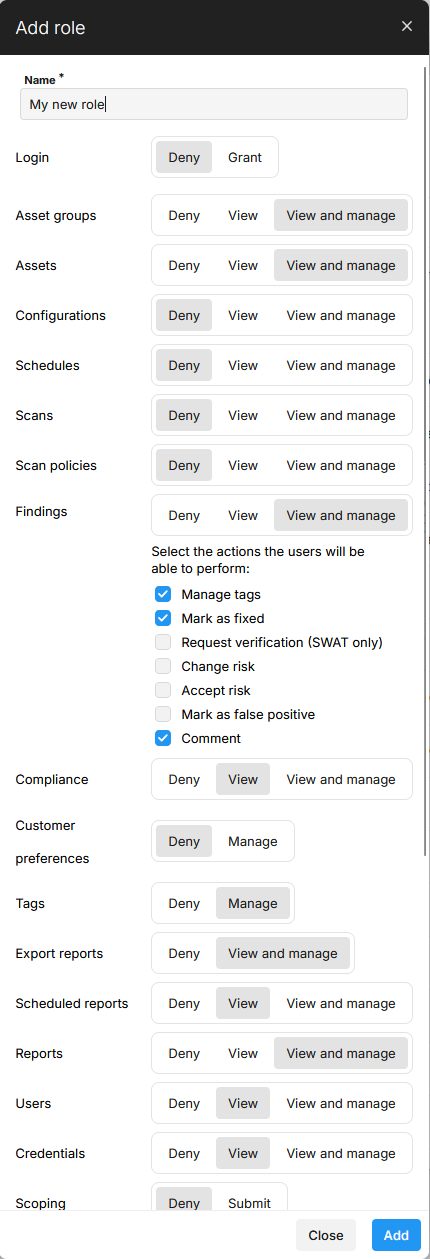
-
Provide a name for the role.
-
Under each category, different permission levels are listed.
Note: The Login permission has two values: Deny and Grant. Set this permission to Grant for any role intended to allow portal sign-in. The built-in Login role grants only this permission and is the recommended way to enable sign-in without granting other capabilities.
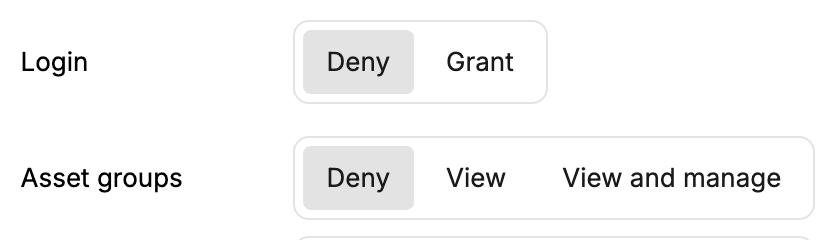
|
Option |
Description |
|---|---|
|
Deny |
Not visible to the user assigned with that role. |
|
View |
Allows the user to only view. |
|
View and manage |
Allows the users to view, add, edit, and delete the associated item. |
|
Manage |
Allows the user to edit or delete the associated item. |
|
Submit |
Allows the user to submit for scoping. |
|
Grant |
Allows the user to sign in to the Portal. Used only by the Login permission. |
View and manage and Manage actions can sometimes contain more granular choices.
-
Select the necessary permission level to grant for that role.
-
After adding all permissions, click ADD.
The newly added role is shown in the ROLES view.
The roles added by the user can be customized or deleted. Select a role and click on the respective icon to edit or delete.
When multiple roles are assigned to a user, the user is given the highest level of capabilities granted to any role to which they are assigned. For example, if a user is assigned to the role "Admin" which has the most capabilities, and also to a role "Operator" with a different set of capabilities, the user will have the capabilities of both roles.
Edit / Update an Existing Role
Clicking on the edit icon opens the below dialog:
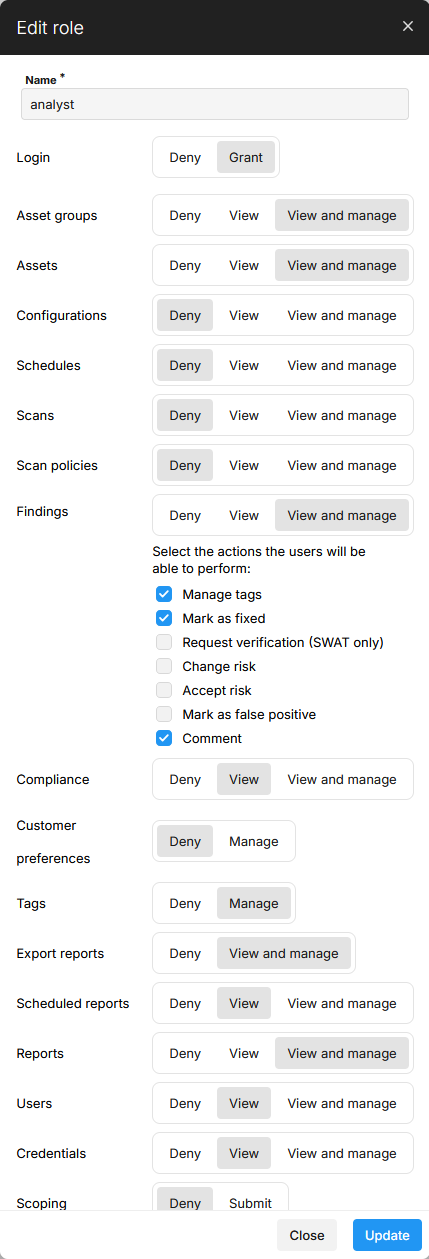
Make the necessary changes and click UPDATE to save the changes made to that role.
Delete Role
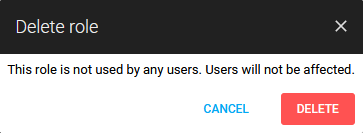
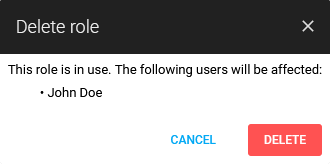
When you click on the Delete icon:
-
If the selected role is not assigned to any user, the below message is displayed:
-
If the selected role is assigned to any user, the below message is displayed:
-
Click DELETE to confirm.
Related Articles
- Account Settings
- Generate Azure Credentials
- Google Cloud Platform Credentials
- Microsoft Azure Credentials
- ADFS Identity Provider Configuration
- SSH Credentials
- Docker Credentials
- Auditing Guide
- Amazon Web Services Credentials
- VMware vSphere Credentials
- Two Factor Authentication
- Account
- Generate AWS Credentials
- Basic Credentials
- SMB Credentials