Last Updated: 2024-09-25
Purpose
This article provides users with a comprehensive overview of the Tickets for OUTSCAN and HIAB.
Introduction
The Tickets Quick Start Guide explains how to use the built-in ticketing system in OUTSCAN and HIAB to manage vulnerabilities and tasks arising from security scans. The guide shows how tickets integrate with scanning events, how automation can assign and close tickets, and how the interface presents key information such as priority, status, and related findings. By understanding and using this module, security teams can streamline their operational workflows, maintain alignment with internal incident systems, and reduce manual overhead in tracking and resolving security issues.
Tickets
Best practice regarding tickets is to have them become automatically assigned from within the tool and thus saving manual workload. If you already have a ticket system that is used within your organization then integrating with that would be a good option since then you can track, compare, and manage tickets there and not forcing users to learn additional software for their job duties.
If the risk levels already are defined, then changing them within the OUTSCAN/HIAB solution is best practice instead of having a mapping or two competing risk levels that may cause confusions in critical situations later.
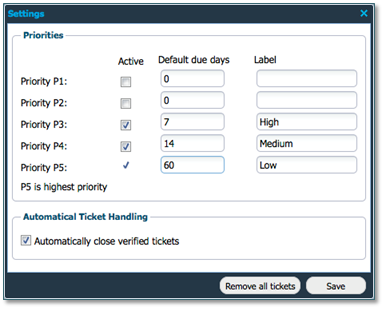
In order to change the levels (both name and priority), click on the settings button in the upper right corner next to the question mark ( ? help) on the Tickets page. Then the following dialog is displayed where you can define your risk levels.
If tickets are handled externally, then check the setting to automatically close tickets once the vulnerability referred to it is resolved. This prevents tickets from staying open after the issue has been resolved.
Ticket Automation
Regarding automatically assigning tickets to a user, this is done in the Event Notification system. There are several events that all start with the name Finding and those can be used to automatically assign a ticket to a pre-defined user. Below you see an example of new risk automatically being assigned to Jane Doe for targets where she is registered to receive high risks for.

The Tickets Interface
The Tickets module is used to manage different assignments with individual users that have access to the ticketing module. Access to the Tickets module can be managed under the Roles tab in the Manage Users module.
To access Tickets, open the Main Menu located in the lower left corner.
Tickets Grid Window
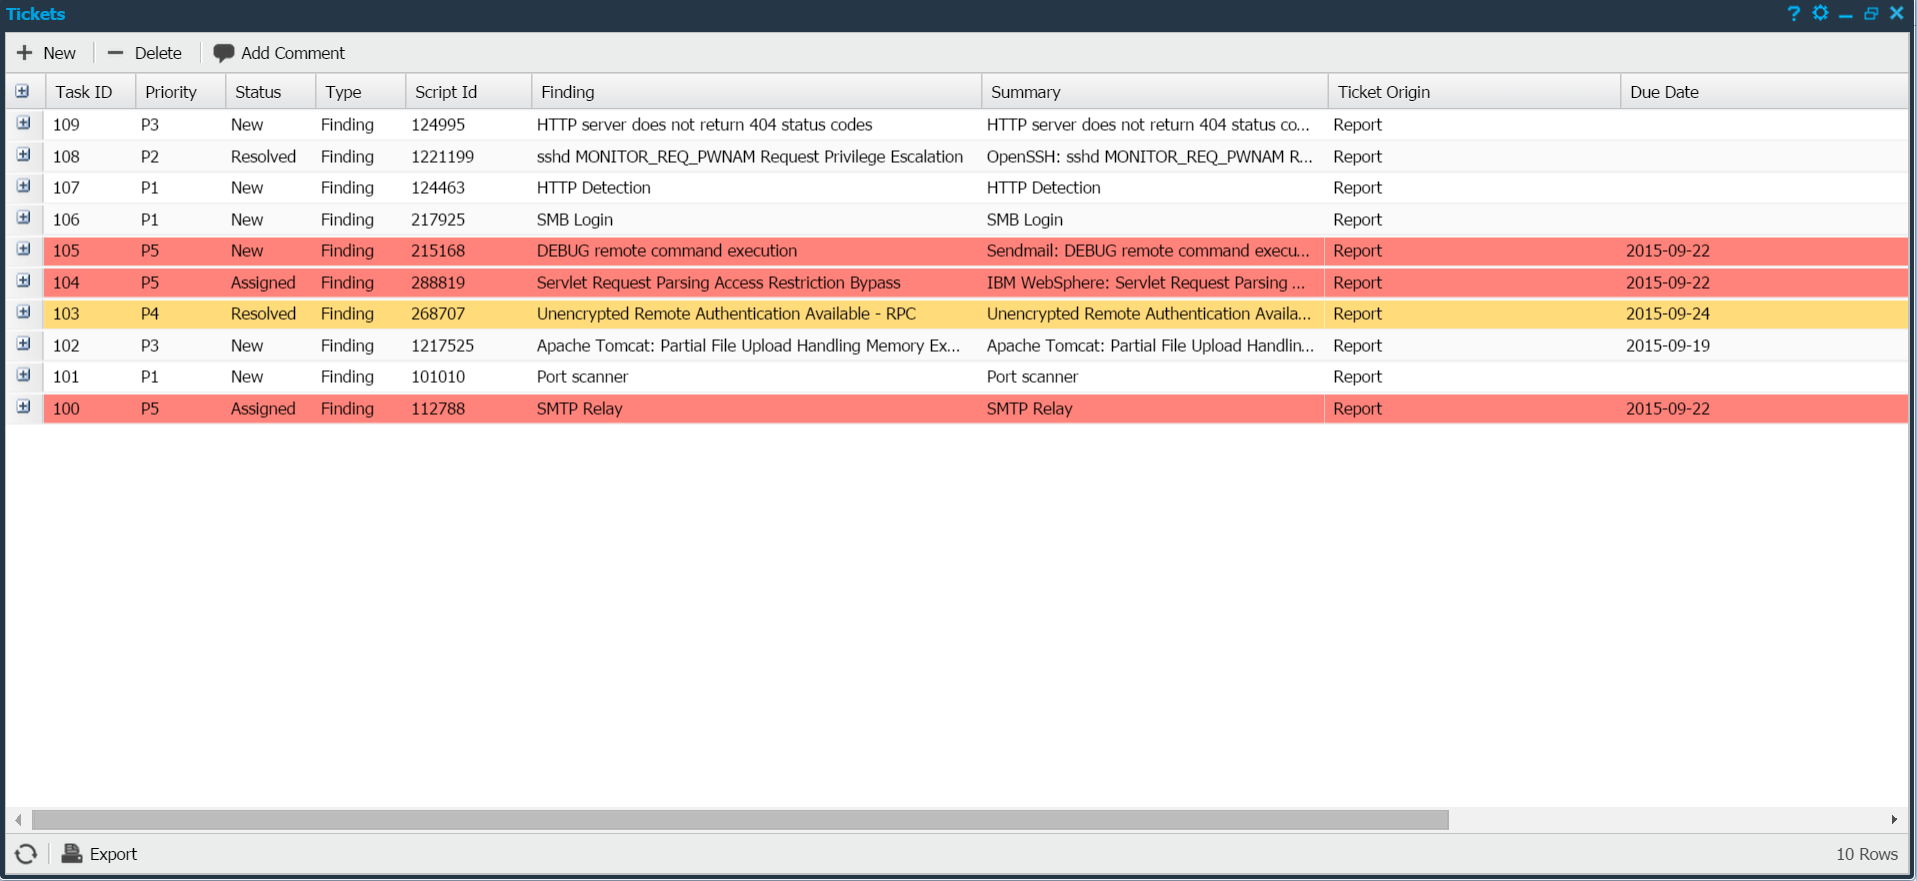

The available columns for the Tickets grids are:
|
Option |
Description |
|---|---|
|
Assignee |
Whom the ticket has been assigned to. |
|
Due Date |
Due date of the ticket. |
|
Finding |
The name of finding for which this ticket was created for.
|
|
Host name |
Name of the host affected. (Empty for custom type.) |
|
Priority |
Displays the priority of the ticket where P5 is the highest.
|
|
Report Date |
The date of the report which the ticket was created from. (Empty for custom type.) |
|
Script ID |
Script ID of the finding which the ticket will trigger for. (Empty for custom type.) |
|
Status |
Status of the ticket.
|
|
Summary |
Summary of the ticket. |
|
Target |
The target which the finding/report was reported/created for. |
|
Task ID |
ID of the ticket. |
|
Ticket Origin |
Where the ticket originated from:
|
|
Type |
The type of the ticket:
|
|
Verified |
Displays the status of the finding which this ticket is created for:
|
Manage Tickets
Assigning new tickets is performed from either Reporting Tools, PCI Reports, or from Tickets.
To create and assign a new ticket from the Tickets grid window press New in the upper left corner. This displays the Maintaining Ticket window where you can edit the Summary, Priority, Status, Due Date, Assignee, and add comment for the ticket.

Right clicking a ticket in the Tickets grid provides different actions to choose between:
|
Option |
Description |
|---|---|
|
Add Comment |
Add comment for the specific ticket |
|
New |
Create a new ticket |
|
Delete |
Delete the specific ticket |
|
Edit |
Edit the specific ticket |
Marking multiple entries by holding CTRL and left click makes it possible to either use Delete to delete multiple tickets or Add Comment to add comments to multiple tickets. These two options are available in the top menu bar of the grid.
Exporting a report from the Tickets grid is done by clicking Export in the lower left corner of the window. The available formats are PDF and Excel. This report includes information about all tickets in the Tickets grid.
Email is only sent if the ticket is assigned to someone other than the one creating/updating the ticket.
Tickets Settings
Clicking the Settings icon in the upper right corner of the window toolbar provides access to the tickets settings:

The priority list can be used to select fewer ticket levels than the original 5.
When a Label is defined on a priority level, it is displayed instead of the default P1-5 name in the drop-down throughout the system.
Default due days is a configuration option that automatically sets the due date based on the setting here and the selected priority upon creation of the original ticket.
|
Options |
Description |
|---|---|
|
Priority P1-P5 |
Able to mark it as active or not, set a value for default due days and rename it. P5 is checked as default and cannot be unchecked.
|
|
Automatically close verified tickets |
It enables the system to close tickets when it has been verified. |
|
Include vulnerability details in email |
Include the details of the vulnerability found in the email for the ticket.
|
|
Send Ticket Notifications |
Enable this option to allow the system to send email notifications when a ticket is created, changes status, and is closed. |
|
Send Ticket Overdue Notifications |
Send a notification to the assignee once a ticket is overdue. |
|
Remove all tickets |
Removes all tickets that are visible in the Tickets grid. |