Last Update: 2025-04-10
Purpose
This article provides instructions on adding a Webhook integration, a process applicable to both Outscan and HIAB. For illustrative purposes, Jira Cloud is used as an example of a Webhook integration using OAuth.
Introduction
This article explains how to set up Webhook integrations with OAuth 2.0 authentication for Outscan and HIAB platforms, using Jira Cloud’s API v2 as an example for secure connections to external systems. It outlines the need for an OAuth v2-compatible system and walks through the setup process: configuring callback URLs (like https://outscan.outpost24.com/portal/oauth for Outscan or a specific HIAB hostname/IP), creating integrations in the portal, and defining details like the endpoint URL, HTTP method, retry timing, headers, and optional self-signed certificates for secure data transfer. For authentication, enter OAuth details such as Client ID, Client Secret, Token URL, and Authorize URL, plus optional fields like Audience or Scope, choosing the request format based on the third-party system’s requirements. After saving, access authorization is done through a redirect flow, then verify the integration to confirm data delivery and system compatibility.
Requirements
An external system implementing OAuth v2 is required.
Set up OAuth Webhook Integration
The process involves the following steps:
Create an application with OAuth 2.0 on the third-party entity (for example Jira Cloud). Refer to the example provided below for Jira Cloud for guidance.
-
Set up the callback URL:
-
For Integration from Outscan:
Callback URL:https://outscan.outpost24.com/portal/oauth -
For Integration from HIAB:
Callback URL:https//<HIABHostName|HIABIPAddress>/portal/oauth
Set to HIAB hostname when defined; otherwise, use the HIAB IP address.
-
-
Login to either OUTSCAN or HIAB
-
Go to Portal > Configuration > Integrations view.
-
Create a Webhook integration by filling in the required parameters and click Save. See Integration Management for more information.
-
Reopen the newly created integration and navigate to the Authentication tab, select OAuth and fill in the required and optional parameters then and click Save.
-
Once saved, run the authorize call flow by clicking on AUTHORIZE, follow the directions and grant access to resources.
-
Once authorized, go to SETTINGS tab and click on VERIFY.
-
Create Webhook Integration
To add a new integration, follow these steps:
-
Click on the green
-
Select the desired integration configuration type from the drop-down menu.
-
Fill in the necessary parameters. See Webhook fields overview.
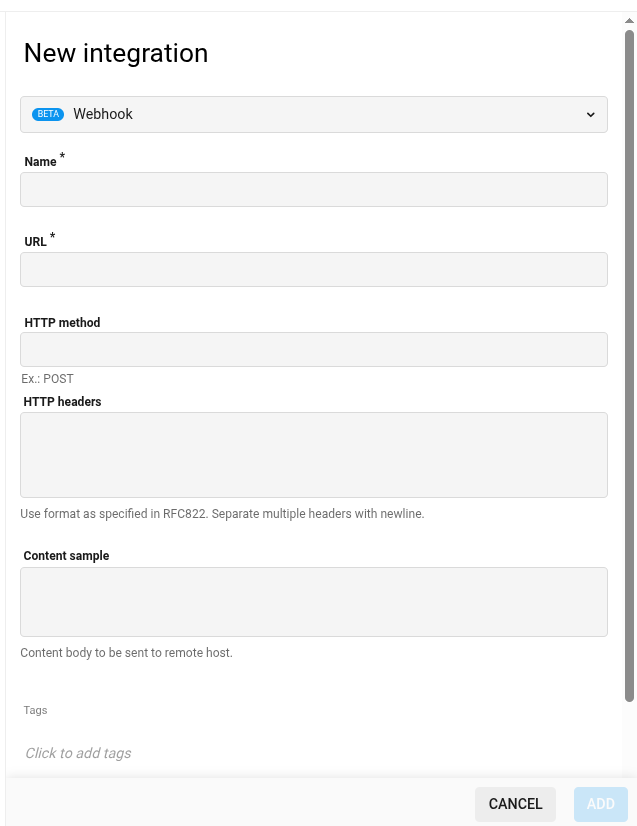
-
Click Add to finish creating the Webhook integration.
Webhook Fields Overview
|
Option |
Description |
|---|---|
|
Integration |
The selected integration type determines the available fields, which vary based on the chosen integration. |
|
Name* |
Descriptive name of the integration. |
|
URL* |
Represents the web address where Webhook data is sent when specific events occur, facilitating communication between systems or applications. |
|
HTTP Method |
HTTP protocol method (e.g., POST, GET, PUT) used for sending Webhook payloads to the specified endpoint, determining the action to be performed when communicating with the remote host. When left empty it defaults to POST method. |
|
HTTP Headers |
Additional information or metadata provided within the HTTP request that accompanies Webhook payloads, conveying details about the data being transmitted and facilitating proper communication and processing between sender and recipient system. |
|
Password* |
Confidential authentication key or secret used in combination with the Username to verify the sender's identity when making HTTP requests to the Webhook endpoint. |
|
Upload certificate |
Digital security credential, often self-signed, that is used to establish a secure and trusted connection between the sender and the recipient of Webhook data, ensuring data integrity and confidentiality during transmission. |
|
Content Sample |
Represents a content sample of Webhook data is used to verify the Webhook integration works. |
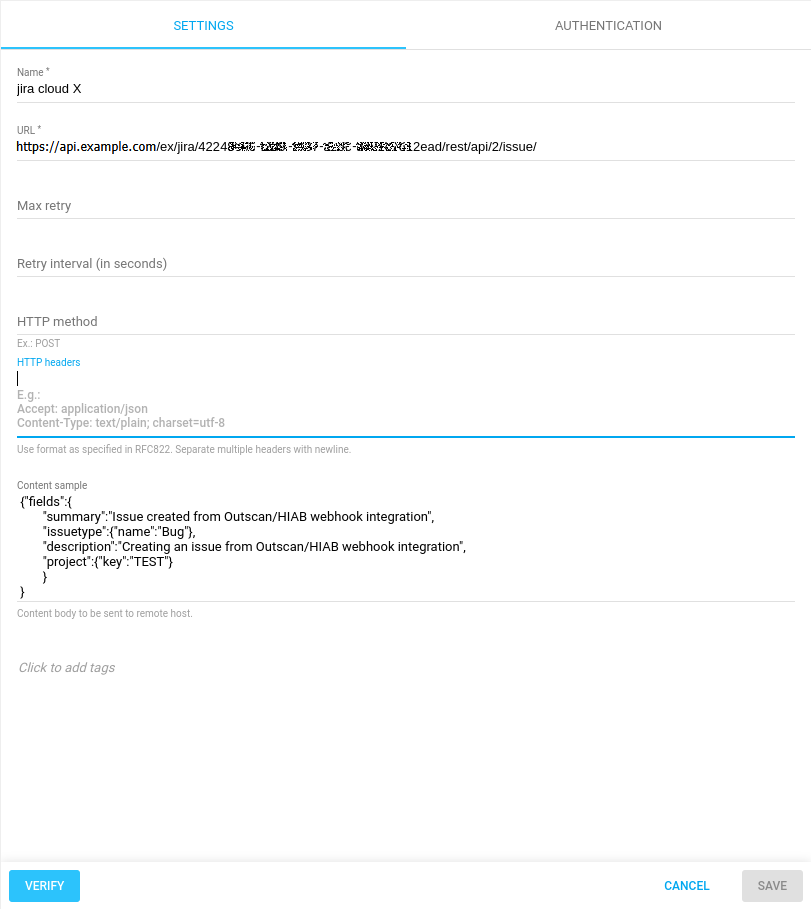
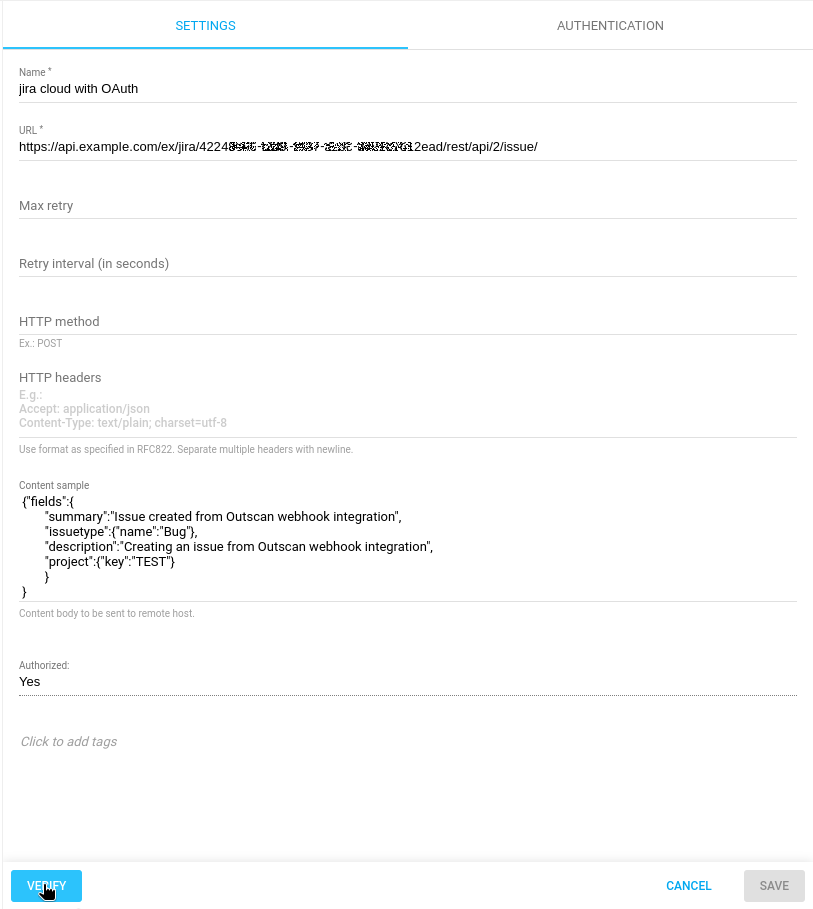
Example with Jira Cloud Webhook for creating issue on a project named TEST. Example base on Jira API v2.
-
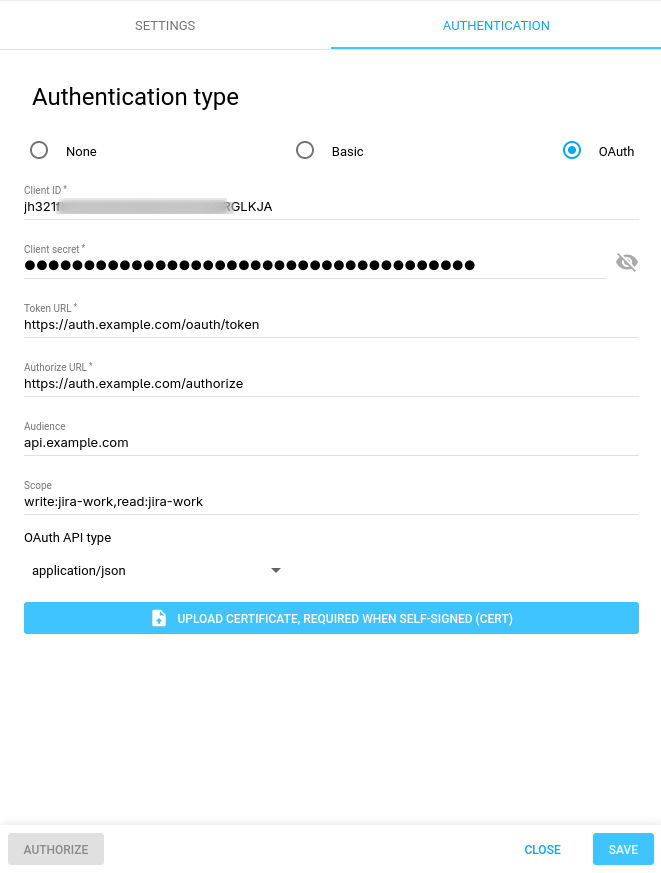
Go to the Authentication tab.
-
Select OAuth and fill in the parameters.
-
Client ID: enter the client ID retrieved from the third party entity that you want to integrate with.
-
Client secret: enter the client secret from the third party entity you want to integrate with.
-
Token URL: insert the OAuth token URL of the third party you want to integrate with.
-
Authorize URL: insert here the OAuth authorize URL of the third party you integrate with.
-
Audience: is optional, check if the third party requires it or not.
-
Scope: is optional, check if the third party requires it or not.
-
-
Set the OAuth API type.
OAuth API type refers to how the authorize and refresh token requests are implemented by the third party your webhook integrates to. It can be set either to application/json or application/x-www-form-urlencoded which respectively either adds parameters at JSON format to request body or adds encoded parameters in the URL. Please refer to the third party documentation to identify which uses case applies. -
Upload the third party server certificate when self-signed.
-
Once done, click on Save.
-
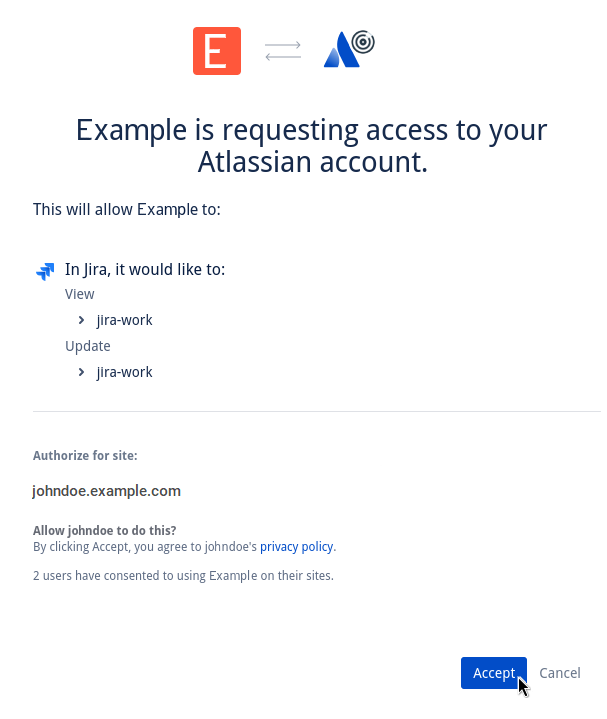
Once saved, run the Authorize call flow by clicking on AUTHORIZE and follow the directions and grant access to resources.
The Authorize call flow continues in getting the authorization to access resources on the third party entity.
The Authorize call flow depends on the third party but works in a similar way:-
A new window is opened and the third party ask for accepting granting access to the resources.
-
Upon accept/deny user action, the windows is closed and you are prompted back to the Integration view where you can see the authorization status on the SETTINGS panel.
-
-
Once authorized, go to SETTINGS panel and click on VERIFY.
Reference
-
OAuth 2.0 (3LO) apps: https://developer.atlassian.com/cloud/jira/platform/oauth-2-3lo-apps
-
Jira Cloud scope: https://developer.atlassian.com/platform/forge/manifest-reference/scopes-product-jira/
-
Jira API v2: https://developer.atlassian.com/cloud/jira/platform/rest/v2/api-group-users/#api-rest-api-2-user-get
Related Articles
- CyberArk Integration
- Delinea Integration
- General Information about SMB/WinRM Scanning
- Overview
- Portal Integration with ServiceNow Incidents
- SNMP Integration
- Syslog Integration
- Tickets Quick Start Guide
- Webhook Integration
- Webhook Integration with JIRA
- Webhook Integration with Microsoft Teams
- Webhook Integration with OAuth v2