Last Updated: 2025-12-03
Purpose
This article describes how to set up Microsoft Azure the App for Discovery on OUTSCAN.
Introduction
Azure Cloud Discovery enables Outpost24 to enumerate and import Azure virtual machine instances by querying the Azure API using provided credentials. It captures identifiers such as tenant, subscription, resource group, and any associated IPs, hostnames or MAC addresses, and applies import tags based on those attributes. This capability enhances visibility into Azure environments and ensures that dynamically changing infrastructure is reliably reflected within the vulnerability management system.
Prerequisites
-
Microsoft Azure account (Home - Microsoft Azure)
-
The Azure account must be at least a Application Developer
Setup the App for Discovery in Azure
Register an Application
To obtain the credentials needed for the azure discovery process, an application must be created.
To register an Application, follow the procedure in this link: https://learn.microsoft.com/en-us/entra/identity-platform/quickstart-register-app
To read more about Microsoft Entra ID applications: https://learn.microsoft.com/en-us/entra/identity-platform/how-applications-are-added
Create a Role
To discover resources, we must create a role in IAM, which is belongs to a subscription, you can read more about it in Organize your Azure resources effectively.
-
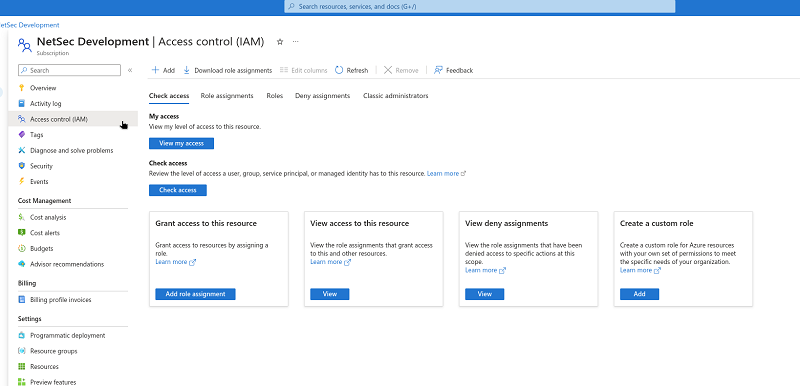
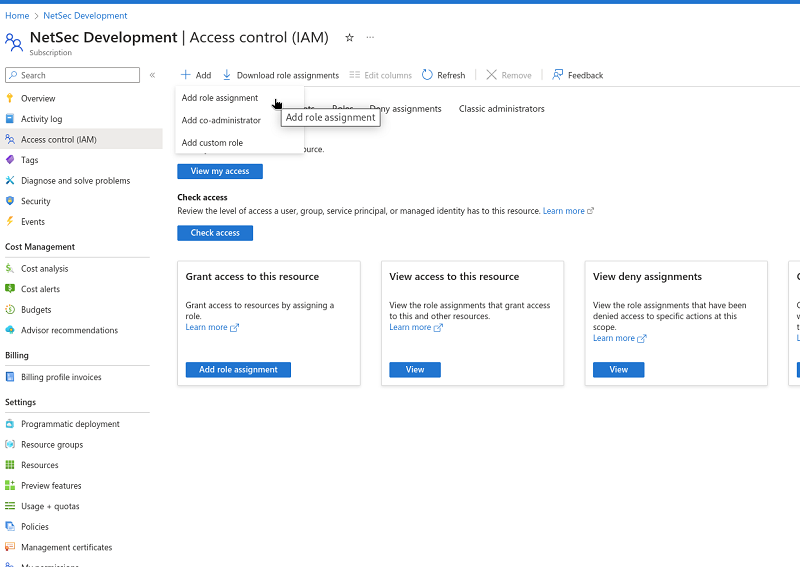
Go to the current subscription > IAM.
-
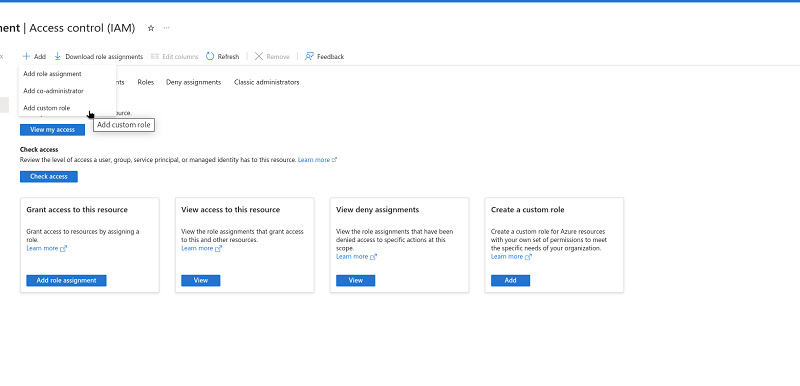
Click Add followed by Add custom role.
-
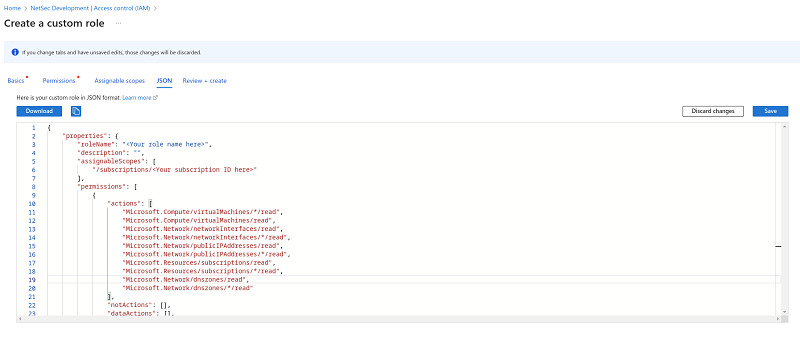
In Create a custom role, provide the JSON with the necessary permissions, replace your role name and your subscription ID.
Create a custom role
JavaScript{ "properties": { "roleName": "<Your role name here>", "description": "", "assignableScopes": [ "/subscriptions/<Your subscription ID here>" ], "permissions": [ { "actions": [ "Microsoft.Compute/virtualMachines/*/read", "Microsoft.Compute/virtualMachines/read", "Microsoft.Network/networkInterfaces/read", "Microsoft.Network/networkInterfaces/*/read", "Microsoft.Network/publicIPAddresses/read", "Microsoft.Network/publicIPAddresses/*/read", "Microsoft.Resources/subscriptions/read", "Microsoft.Resources/subscriptions/*/read", "Microsoft.Network/dnszones/read", "Microsoft.Network/dnszones/*/read" ], "notActions": [], "dataActions": [], "notDataActions": [] } ] } }
-
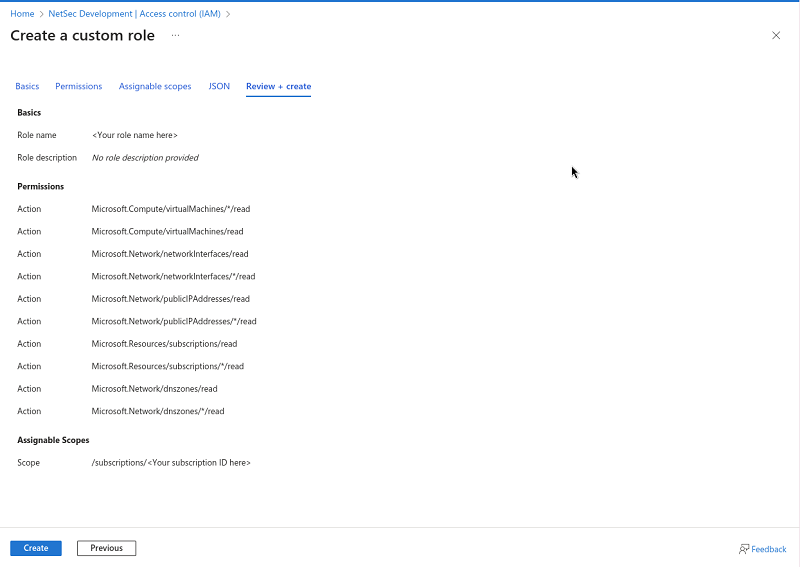
After saving the changes, press Review + Create and create the role with the necessary permissions.
Assign the Role to the App
-
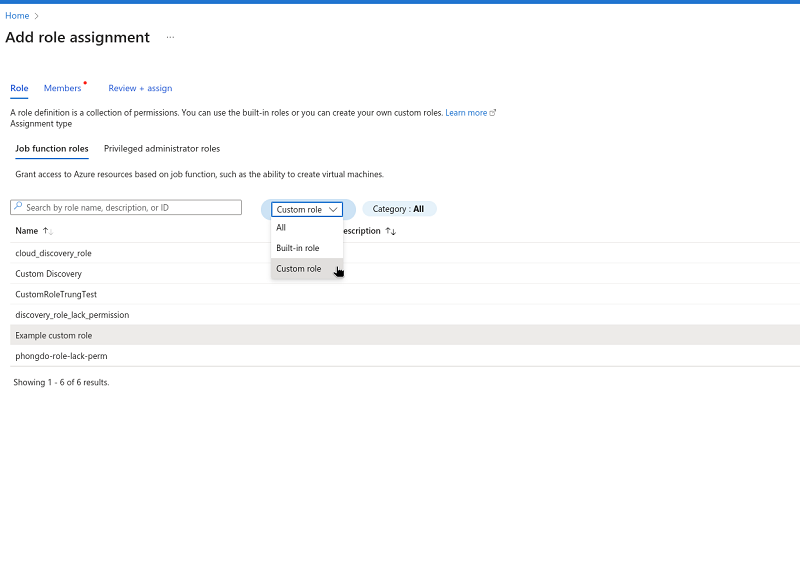
Go to the newly created role in Subscription > IAM > Add > Add role assignment.
-
Filter by type Custom Role and select that role.
-
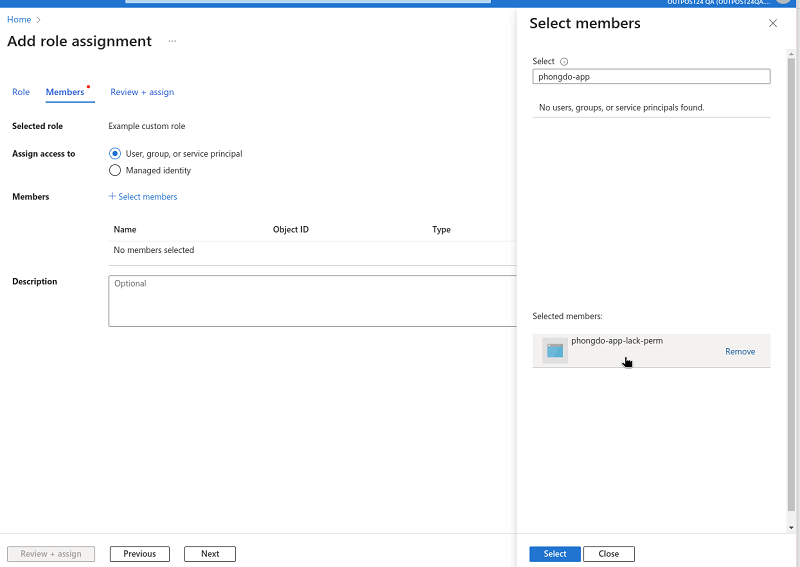
Select a member in Select members, which is the app name previously created.
-
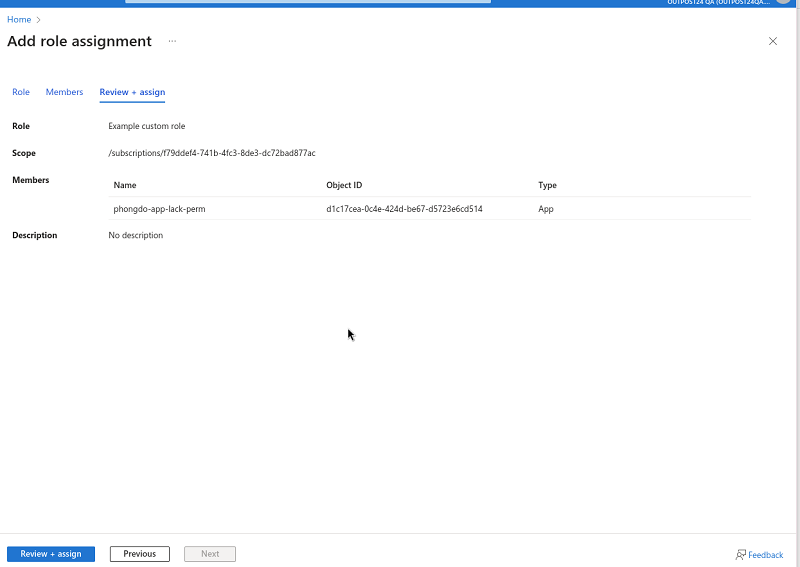
Review + Assign to finish the process.
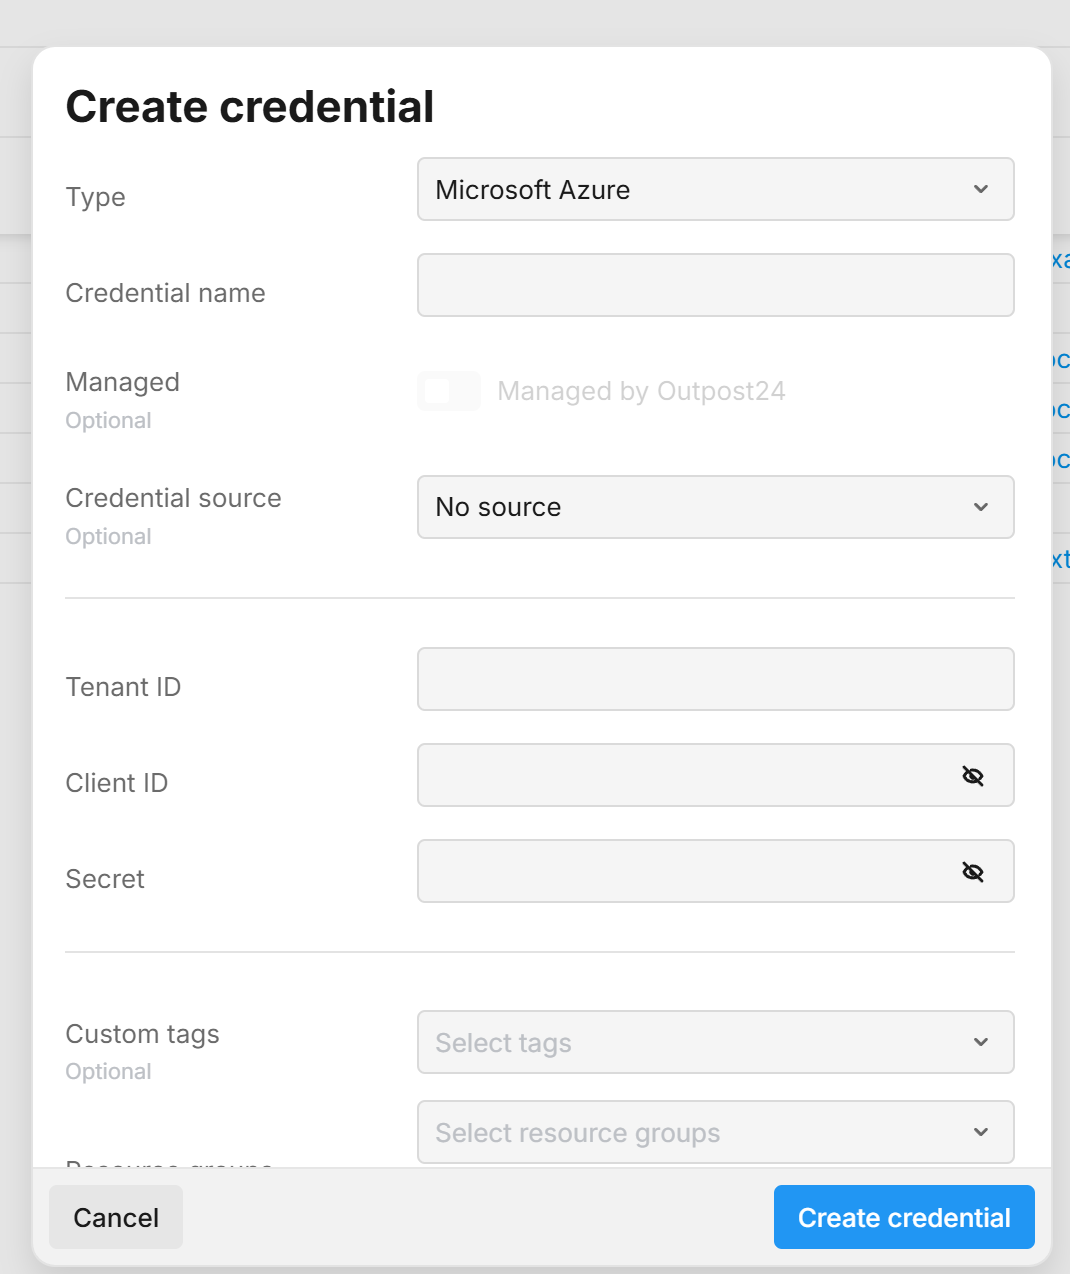
Create Azure Credential in Portal
-
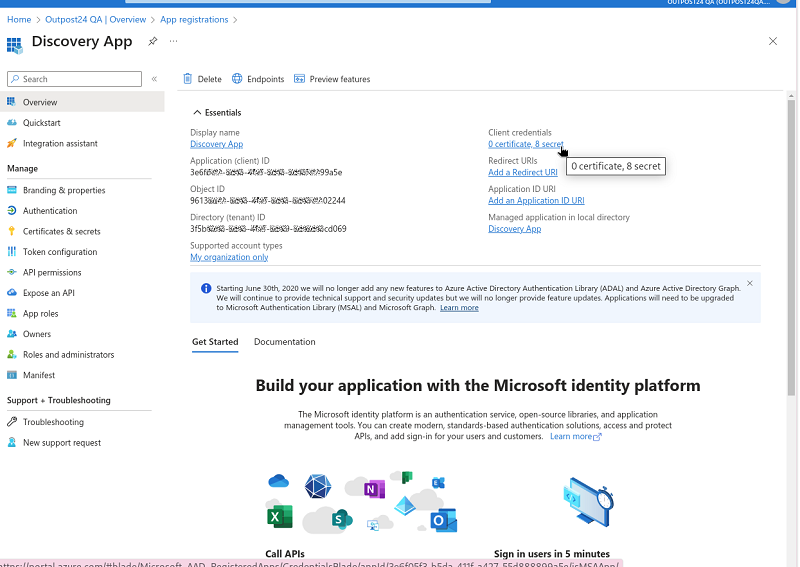
Obtain application’s information in Microsoft Entra ID > Applications.
-
Fill it in the Portal’s new credential. See Generate Azure Credentials for more information.
-
In the drop-down menu select Microsoft Azure.
-
Add the Name of your Azure account.
-
Add the Tenant ID.
-
Add the Client ID.
-
Add the Secret.
See Steps to Find Azure Parameters in the Azure Console for reference
-
Custom tags that help categorize and organize the credential. Tags can be used to group resources and control access.
Resource Groups represent sets of tags Users are authorized to use when creating credentials. Selecting a resource group will automatically apply its associated tags to the credential. Users with limited access must select at least one resource group to ensure the credential is created with tags they are permitted to use. Users may also add additional custom tags if needed. -
Click the blue Create credential button.
-
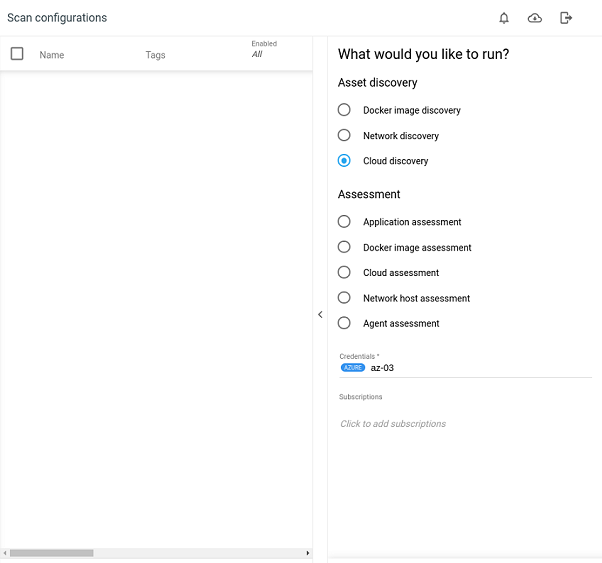
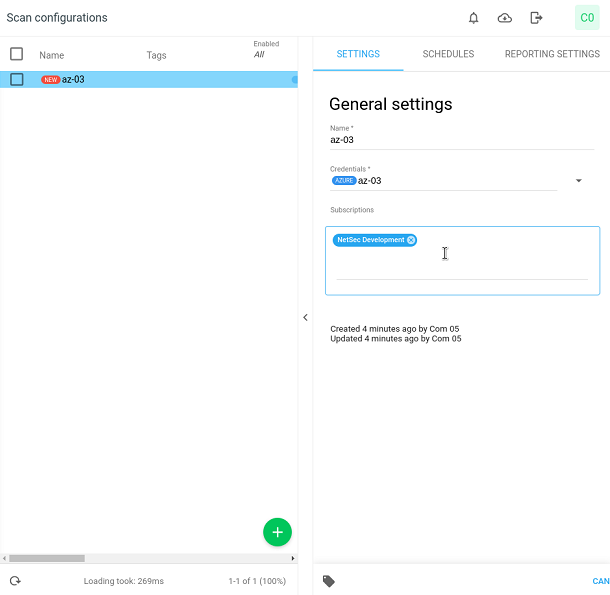
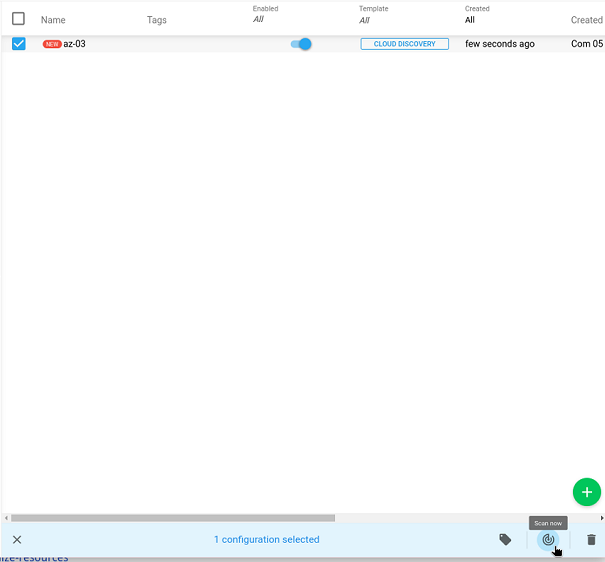
Run Discovery
Create a new discovery scan, with selected credential and perform the scan.
-
Create a scan configuration. You can provide subscription directly by input string inside input Subscriptions, or you can leave empty and trigger scan for the first time to get all subscription.
-
Click on the Scan icon to run the first time to get all the subscriptions.

-
Wait till the scan is finished.
🕘 …


-
Go back to scan configuration and update scan configuration with subscription.
-
Click on the Scan icon to run the scan. Trigger the scan and wait till the scan is finished.
-
Wait till the scan is finished.
🕘 …


Trouble shooting
Scan Ended with Issues
If the user lacks some permissions to scan against AZURE resources, the scan results will report an Issue.

Scan Ended with Failed
If the credentials for AZURE discovery is invalid, the scan results will report the scan as Failed.

Reference
Related Articles
- Scan Configuration Settings
- Scan Credentials
- HIAB Scale External
- Cloudsec Scan Configuration
- How to Scan AWS ECR Images
- Scans View
- Scan Policies
- Scan Assessment Configuration
- Discovery Scan Configuration
- Authenticated Scanning Using SMB
- How to Test SMB Authentication
- SMB Authentication from OUTSCAN/HIAB
- Windows 7
- Windows 8.1
- Windows 10/Windows 2019 Server