Last updated: 2019-11-12
Purpose
This article describes how to add personal attributes in the columns.
Introduction
The Attributes feature in Outpost24 stores structured metadata that describes assets, users, or other objects in the platform. Administrators create attributes in the Attributes view and define the attribute type, name, and allowed values. Supported types include text, numeric, boolean, and list-based values. Once created, attributes attach to objects such as targets or agents and appear in platform views and reports. Users apply attributes to classify assets, record business context, or store operational information. The platform uses attribute data for filtering, grouping, reporting, and automation.
Use Attributes to maintain consistent asset classification and metadata across the vulnerability management environment. Structured attributes support filtering, dynamic grouping, and reporting based on business context such as environment, ownership, or criticality. Security teams organize assets and analyze vulnerability data with greater accuracy. Consistent metadata improves operational visibility and supports asset management workflows across large environments.
Configure Attributes
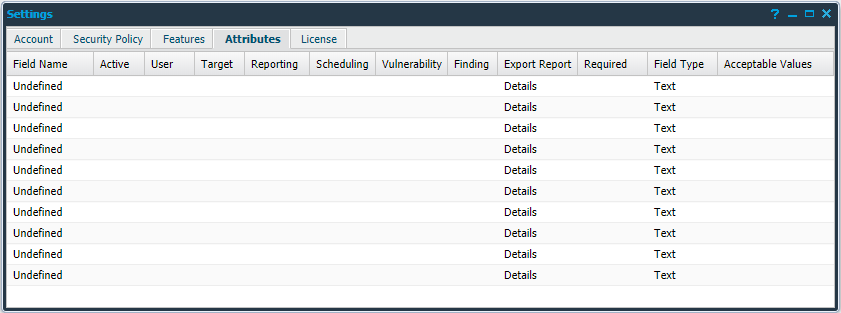
In the Attributes tab, you can define up to ten custom attributes which can be used throughout the system. They can also be configured to only allow predefined values.
These attributes become available in the following sections depending on their configuration:
-
Users
-
Target
-
Reports
-
Scheduling
-
Discovery
Configure a Custom Attribute
To configure a custom attribute,
-
Go to Main Menu > Settings > Account.
-
Select Attributes tab.
-
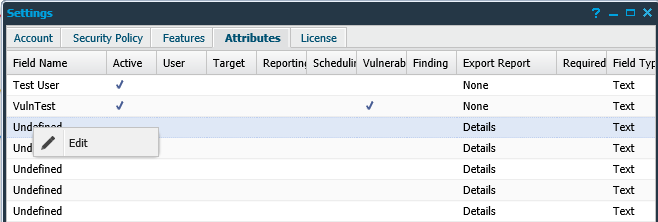
Right click on any undefined fields and click Edit to open the Edit Attribute window.
-
Provide a name for the column to be added.
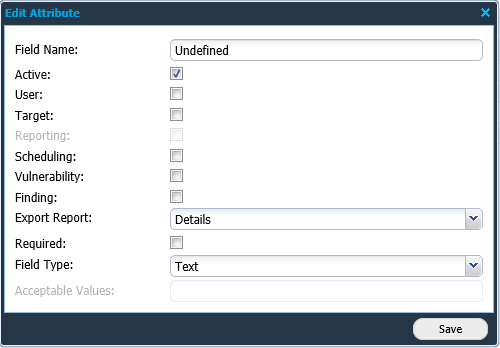
-
Enable Active field.
-
Configure the attribute according to options described in the Attribute Options table below.
-
Click Save.
Active field needs to be checked to make all the other check-boxes available. Also, Target field needs to be checked to make Reporting available.
Attribute Options table
|
Option |
Description |
|
Field Name |
Specifies the name of the custom attribute. |
|
Active |
If checked the attribute will be active in the system. |
|
User |
Creates a column in Manage Users, which is set when creating or editing a user. |
|
Target |
Creates a column in Manage Targets, which is set when editing a target or labeling a target group. |
|
Reporting |
Creates a column in Manage Targets and the Findings tab in Reporting Tools, which can be set when editing a target or labeling a target group. Only usable if target is selected. |
|
Scheduling |
Creates a column in the Scan Schedules tab in Scan Scheduling, which can be set when creating or editing a scan schedule. |
|
Vulnerability |
Creates a column in the Vulnerability Database, and in the Findings tab in Reporting Tools. This attribute can be set by editing an entry in the Vulnerability Database by right clicking the entry to edit and choose Edit Attributes. |
|
Finding |
Creates a column in the Findings tab in Reporting Tools, which can be set by editing an entry in the Findings tab by right clicking and select Edit Attributes. |
|
Export report |
Choose in what section of an exported report the attributes will be presented in. User, Target, and Scheduling are not presented in the exported reports.
|
|
Required |
If an attribute field exists for an entity, the attribute field requires a value. |
|
Field Type |
This selects a specific type of input that can be used in the attribute.
|
|
Acceptable Values |
Accepted values for the Combo and Number attributes.
Acceptable Values is only visible if Combo or Number has been selected in Field Type. |
Related Articles
Related Articles