Purpose
This document describe the set up of authenticated scanning for Windows 8.1 targets using OUTSCAN or HIAB.
Introduction
This guide provides you with the technical procedure to succeed with authenticated scanning for Windows 8.1 targets when using OUTSCAN or HIAB.
Requirement
Use SMB-based authenticated scanning in Outpost24 to access Windows hosts using provided credentials with remote registry for deeper security assessments.
The Authenticated Scanning Using SMB requires that .NET framework version 3.5 or higher is installed.
When performing authenticated scanning against windows hosts, the scanner creates and starts a service called O24 Auth on the target machine.
This service is used to execute commands on the target and send the results back to the scanner.
Do not remove the service during scanning, it will stop and remove itself after it is done.
Set Up
To succeed with authenticated scanning using SMB for Windows 8.1 targets, follow the steps below.
The following steps are only applicable for Windows 8.1 Pro or higher, NOT Windows 8.1 Home.
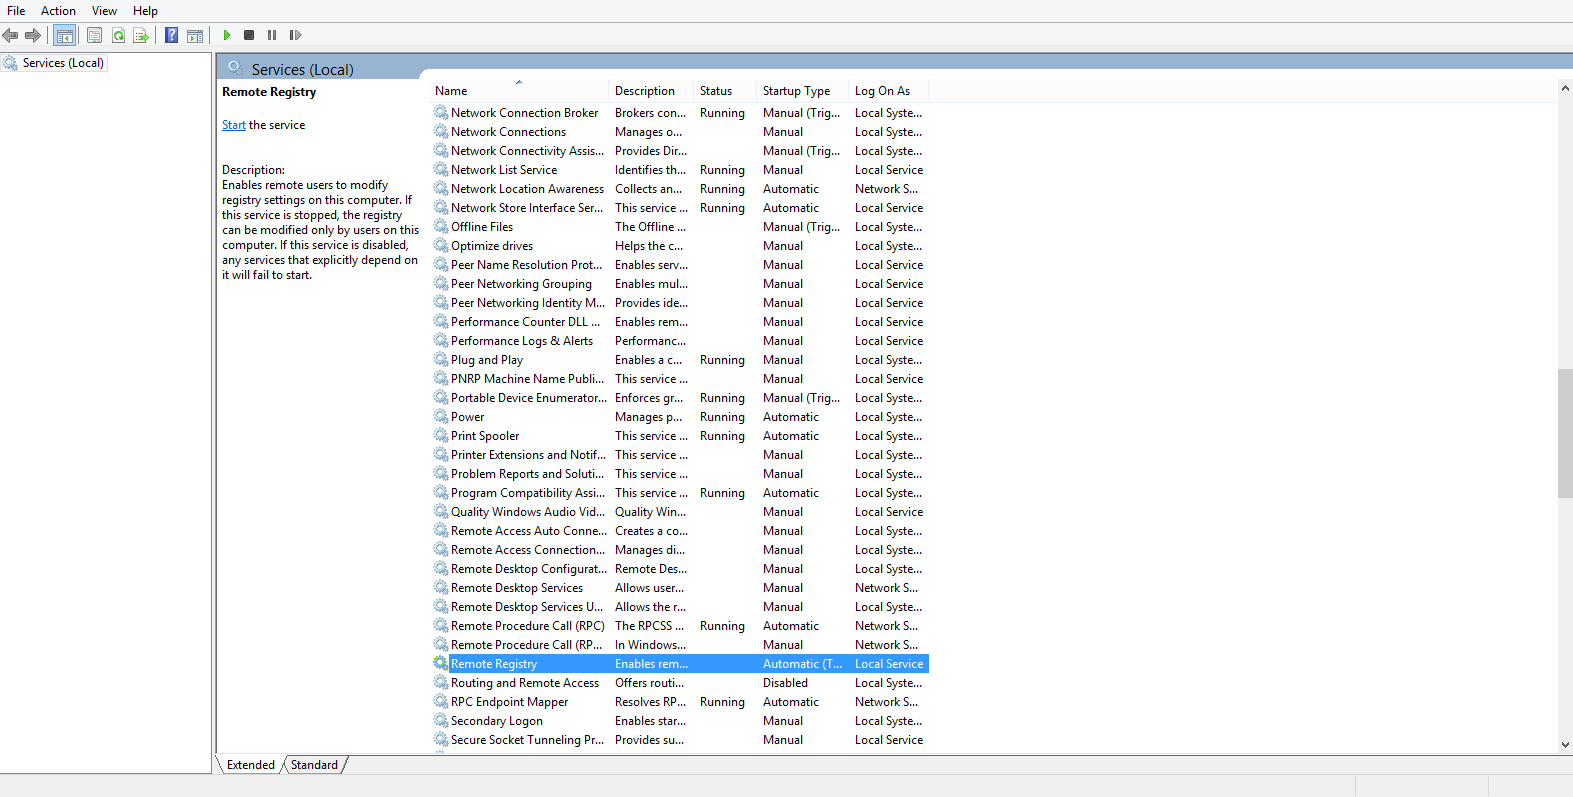
Step 1 - Enable Remote Registry
To enable Remote Registry (optional, can also be configured within the scanner):
-
Go to Start and enter Run in the search field to open the Run Prompt.
-
Open Services by enter services.msc in the Run Prompt and click OK.
-
Under Services (Local), right click Remote Registry and select Properties.
If Remote Registry is already enabled on your device, skip to Step 2.
-
In Remote Registry Properties (Local Computer), change the Startup Type to Automatic and start the service.
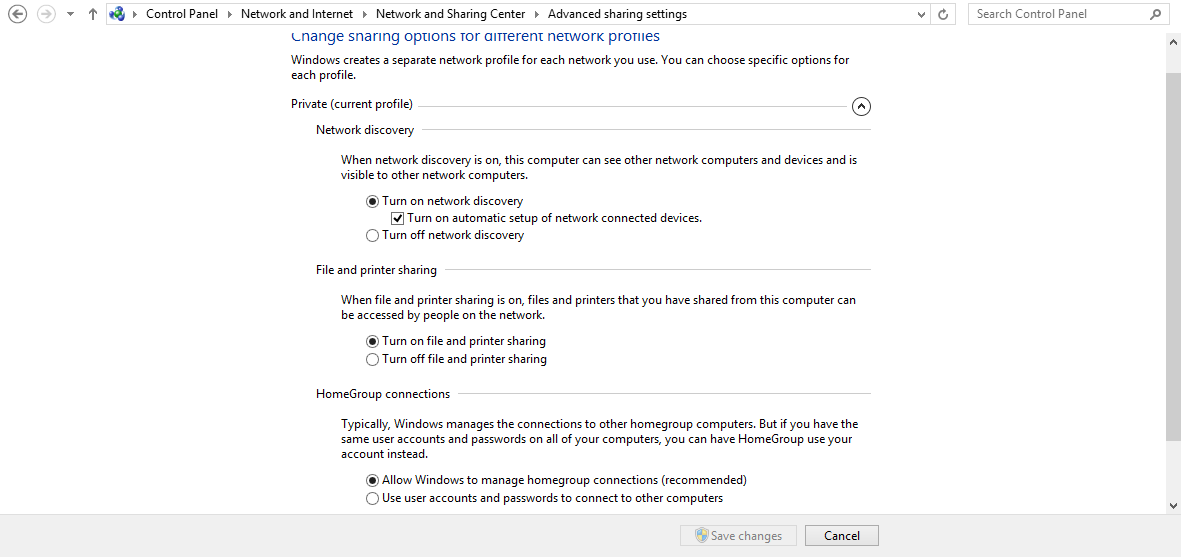
Step 2 - File and Printer Sharing
To turn on File and Printer Sharing:
-
Go to Start and enter Network and Sharing Center into the search field to open Network and Sharing Center.
-
In Network and Sharing Center, go to Change advanced sharing settings, located on the left-hand side.
-
In your current profile, Private/Guest or Public, select Turn ON file and printer sharing.
-
Click Save Changes.
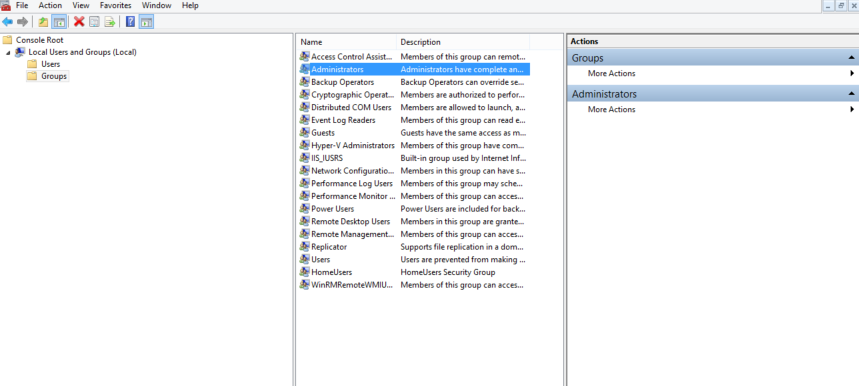
Step 3 - Administrator Rights
-
Go to Start and enter mmc in the search field to access Microsoft Management Console.
-
Select Local Users and Groups, located in the left pane of the Microsoft Management Console window.
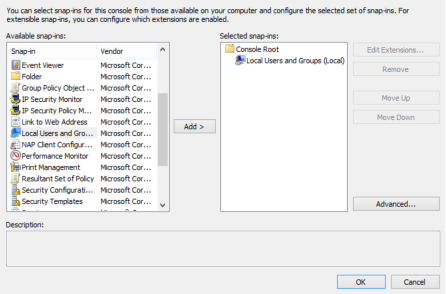
If Local Users and Groups is not listed:
a) Click the File menu
b) Select Add/Remove Snap-in
c) Select Local Users and Groups
d) Click Add
e) Select Local Computer
f) Click Finish
g) Click Ok
-
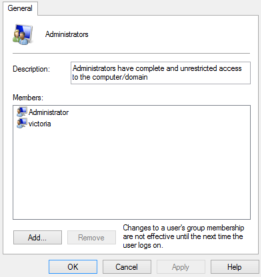
Enter the Groups folder and double click the Administrators group.
If the account is not listed under Members:
a) Click Add
b) Enter the name of the already created account that you wish to add
c) Click Check Names
d) Click Ok
e) Click Ok
|
|
Make sure that the Windows User Account Control (UAC) is disabled.
-
Go to Start and enter Run in the search field to open the Run Prompt.
-
In the run prompt enter regedit and click Ok to open the Registry Editor.
-
Navigate to HKEY_LOCAL_MACHINE\SOFTWARE\Microsoft\Windows\CurrentVersion\Policies\system.
-
Right click the System Folder.
-
Choose New >> DWORD (32-bit) Value and name the DWORD LocalAccountTokenFilterPolicy.
-
Right click the newly created DWORD and select Modify.
-
In the Edit Window set Value Data to 1.
-
If User Account Control is disabled, EnableLUA must be set to 0 in
HKEY_LOCAL_MACHINE\SOFTWARE\Microsoft\Windows\CurrentVersion\Policies\System.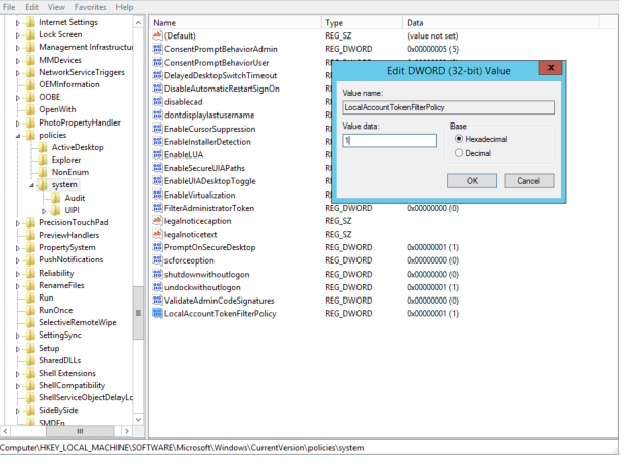
Step 4 - Memory Leak in the Remote Registry Service
To resolve the Memory Leak in the Remote Registry Service:
-
Go to Start and enter Run in the search field to open the Run Prompt.
-
In the Run Prompt enter regedit and click Ok to open the Registry Editor.
-
Locate the following registry sub key: HKEY_LOCAL_MACHINE\SOFTWARE\Microsoft\WindowsNT\CurrentVersion\RemoteRegistry.
-
In the details pane, on the right-hand side, double-click DisableIdleStop.
-
Change the value to 00000001.
Related Articles
- Windows 10/Windows 2019 Server
- Windows 8.1
- How to Test SMB Authentication
- Windows 2016 Server
- Core Installation
- Windows 2008 R2 Server
- SMB Authentication from OUTSCAN/HIAB
- Supported Platforms for Authenticated SSH Scanning
- Authenticated Scanning Using WinRM
- Windows 7
- Authenticated Scanning Using SSH
- Troubleshooting SMB Authentication
- Windows 2012 R2 Server
- O24AUTH
- Complementary Authenticated Scan on Default Credentials