Last Updated: 2024-10-02
Purpose
This article describe the installation and configuration process when setting up the HIAB for the first time.
Introduction
This article provides a comprehensive guide for the installation and configuration of the HIAB for first-time users, targeting HIAB administrators and network technicians. It includes a detailed checklist for installation, instructions for setting up IP assignments (both static and DHCP), and steps for verifying communication with necessary servers. Additionally, it covers the enrollment process for the HIAB, configuration of network settings, automatic updates, backups, and event notifications, emphasizing the importance of proper setup to ensure the HIAB operates effectively within the data center environment.
Once the HIAB is enrolled and configured to send out the alerts through the proper channels, then the vulnerability program needs to be implemented (not covered in this document).
Setting Up the HIAB
Checklist
The below table displays the checklist for HIAB installation.
|
Number |
Action |
|
1 |
Setting up the HIAB. |
|
2 |
Set up the IP assignment in the console. |
|
3 |
Verify the required communication settings. |
|
4 |
Enroll the server. |
|
5 |
Log on to the portal interface. |
|
6 |
Configure additional network settings. |
|
7 |
Verify time zone. |
|
8 |
Set up automatic updates. |
|
9 |
Configure backup. |
|
10 |
Set up events and notification. |
Prerequisites
It is required to have access to an OUTSCAN account and a HIAB license to download the image.
Downloading HIAB Image
To download the HIAB image:
-
Open the Main Menu in the lower left corner of the screen and select Support.
-
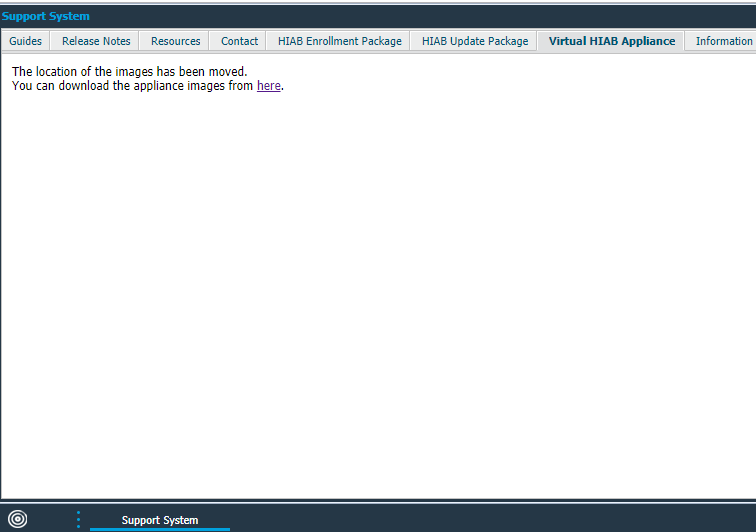
In the Support System window select the Virtual HIAB Appliance tab:
-
Click on the link "here", it leads to a new view in Outpost24 Platform.
-
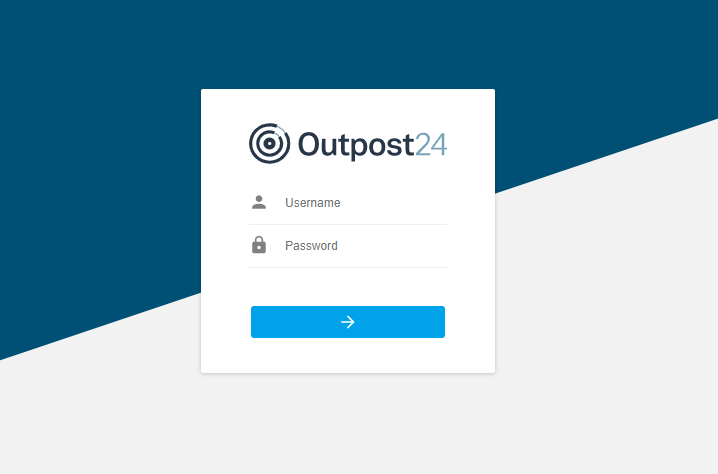
Log in to the portal using the same credentials as for https://outscan.outpost24.com.
-
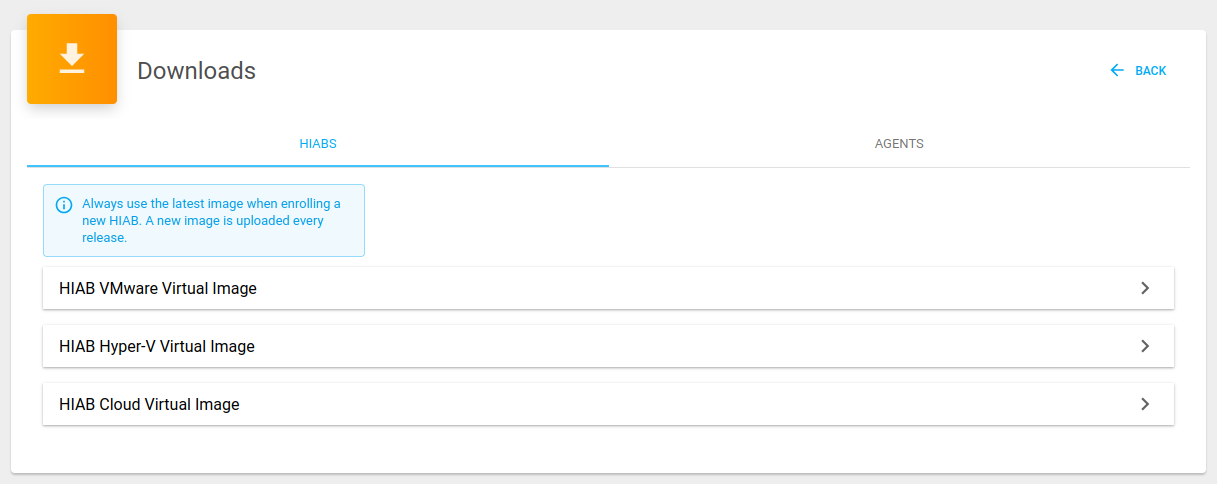
Available VMware, Hyper-V and HIAB Cloud Virtual Images download options are displayed.
-
Select the option that is most suitable for your virtual environment, and click on the Download button located on the bottom of each option. See Download Options for more information.
-
Select a location to store the downloaded file.
After downloading the HIAB image, follow the appropriate installation instructions to set up the appliance.
Recommended specifications of HIAB is 8 cores, 32GB memory and 1TB disk space. Deployment with lower specifications will not receive attention if the issues are related to the limitations imposed by the recommended specifications.
Installation Instructions for HIAB VMware Appliance
-
Open the administration tool for the virtual environment.
-
Select the option to deploy an OVF or OVA file.
-
Follow the instructions in the application. For more information on Deploying OVF or OVA files see VMware documentation about Deploying OVF and OVA Templates.
-
Start the virtual machine.
Select any Linux 64-bit system as the type of operating system.
Once the machine is started, you are presented with the HIAB menu in the virtual console. Use the console to set up the virtual HIAB according to your network environment.
Installation Instructions for HIAB Hyper-V Appliance
The installation can be done by using Microsoft Hyper-V import guide as well as other management tools for Hyper-V. Following instructions are written for PowerShell Management Library for Hyper-V.
-
Extract the downloaded ZIP-file to a directory on the Hyper-V server, for example
C:\HIAB_HYPER-V. -
Run Show-HypervMenu from PowerShell on the server.
-
Import the virtual machine by selecting [7] Import Virtual Machine.
-
Enter the path to the directory holding the extracted files you want to import. For example
C:\HIAB_HYPER-VHIAB_VIRTUAL01. -
Do you wish to re-use IDs?
[ ] No
If the virtual machine is unique on the Hyper-V server, then IDs may be re-used. If the imported HIAB is a copy of an existing virtual HIAB on this server, then IDs cannot be re-used and attempt to import the machine fails
-
Are you sure you want to perform this action?
[Y] Yes -
Start the virtual machine.
Select any Linux 64-bit system as the type of operating system.
Once the machine is started, you are presented with the HIAB menu in the virtual console. Use the console to set up the virtual HIAB according to your network environment.
The current Network Test may not provide adequate information with regards to access to the license server. This can be addressed using the Traceroute utility found under the Tools menu by manually testing access towards the host outscan.outpost24.com over TCP port 443.
Download Options
|
Name |
CPUs |
RAM |
Hard drive |
|---|---|---|---|
|
VMware |
|||
|
HIAB VMware Virtual Image (150 GB) |
2 |
8 GB |
150 GB |
|
HIAB VMware Virtual Image (150 GB) |
8 |
32 GB |
150 GB |
|
HIAB VMware Virtual Image (1024 GB) |
2 |
8 GB |
1024 GB |
|
HIAB VMware Virtual Image (1 TB) (Recommended) |
8 |
32 GB |
1024 GB |
|
Hyper-V |
|||
|
HIAB Hyper-V Virtual Image (150 GB) |
1 |
8 GB |
150 GB |
|
HIAB Hyper-V Virtual Image (1 TB) |
1 |
8 GB |
1024 GB |
|
HIAB Hyper-V Virtual Image (1 TB) (Recommended) |
8 |
32 GB |
1024 GB |
Import the HIAB image using PowerShell cmdlets on the Hyper-V Server
Alternative to using the Hyper-V Manager to import the HIAB image, it is possible to use PowerShell cmdlets run on the Hyper-V Server, see Export and import virtual machines | Microsoft Learn
Using Hyper-V Manager
-
Select the HIAB image for use with Hyper-V from the website at Outpost24 Platform and unzip the image to a directory.
-
Launch Hyper-V Manager and select the Import Virtual Machine wizard.
-
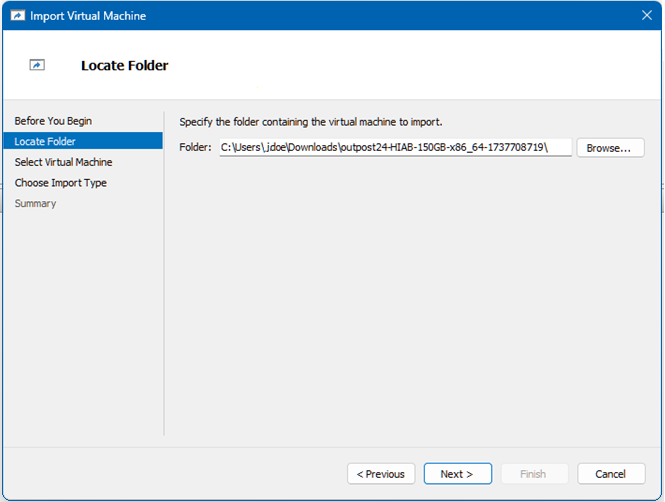
Select the folder the HIAB image was unzipped to, then click Next.
-
By default, the virtual machine to import is displayed and selected (see screenshot below), then click Next.
Note, when importing either of the 1TB images available for use, the Name field reflects it is 150GB. This name can be changed afterwards.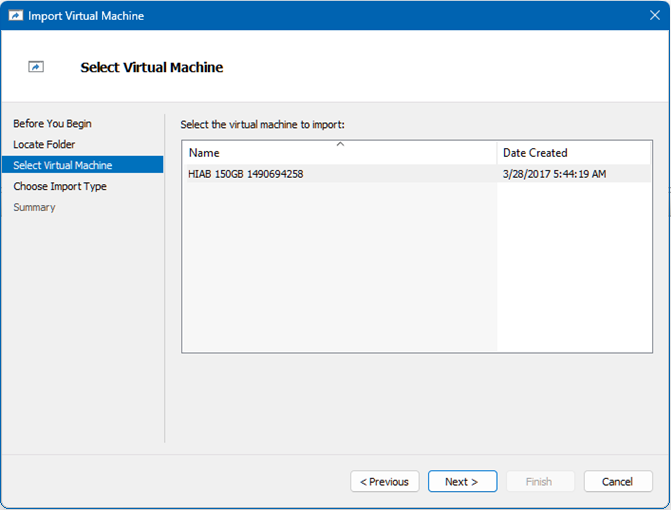
-
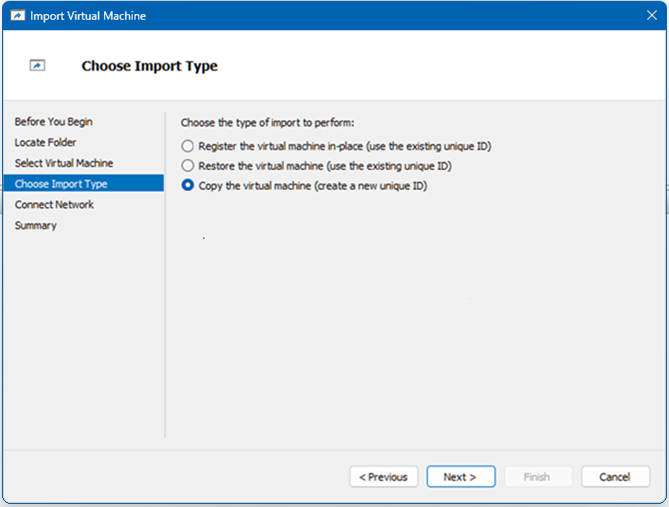
Next, select the Copy the virtual machine (create a new unique ID) option and click Next.
-
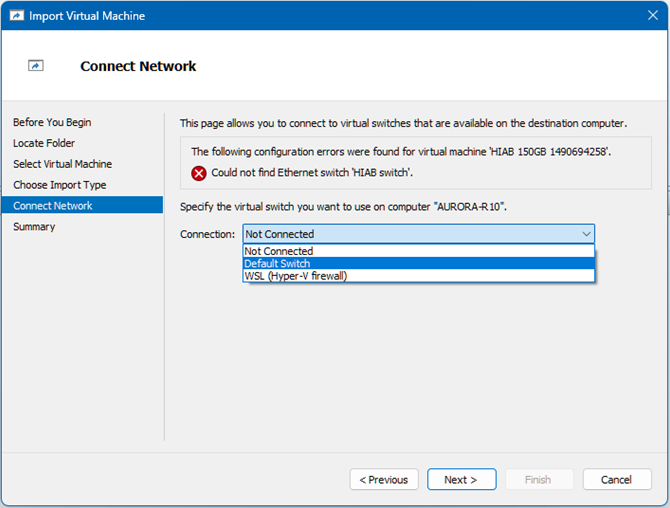
Click the drop-down and select the appropriate switch to provide the HIAB with a connection to the network, then click Next.
-
Lastly, review the Summary and click Finish.
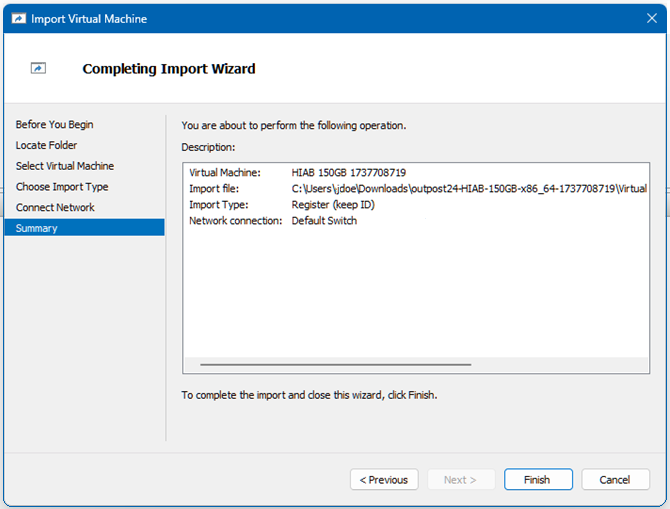
After the HIAB image has been imported, changes can be made such as increasing the memory, increasing the number of CPU’s, etc.
Set up the IP Assignment in the Console
Once the HIAB has booted (or if you connect to the HIAB via SSH), the following screen is displayed on your monitor.
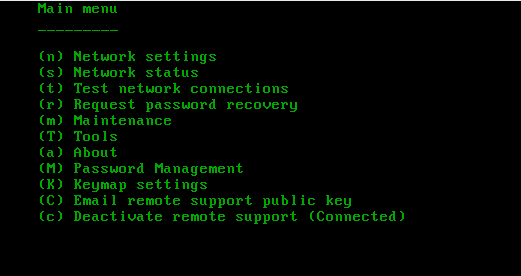
The main menu is a multi-choice menu allowing access to different sections of the configuration in the HIAB. From this menu, the HIAB can be configured, updated, and hardened.
To restrict the access, define a password.
-
Select option M in the above menu and provide a password.
Do not forget this password or you may be locked out of the console and require remote access to reset the password.
Static IP
Perform the following steps from the Main Menu to set up the HIAB to use a static IP:
-
Select option n to configure Network Settings.
Network Settings: -
Select option d (Devices) to see to the available devices.
-
Use the arrow keys to select the right device.
-
Select the option c to connect the selected device.
-
Select option q to go back to the network settings menu.
-
Select option c (Connections) to go the connections window.
-
Use the arrow keys to select the right connection.
-
Select option a to activate the selected connection.
Modify selected connection: -
Still in the n (Network Settings) > c (Connections), select option m to modify the selected connection.
-
Select option a (Addresses) to go to the addresses window.
-
Select option 4 or 6 depending on which IP version that are used.
An IP address need to be added before setting the IPv4/v6 to manual.
-
Type manual and press Enter.
-
Select option a to Add IP.
-
Enter the wanted IP address, for example 192.168.2.3/24 and press Enter.
Specified in CIDR.
-
Exit the addresses menu q and go to r (Routes) to specify a default gateway. A default gateway is usually required for the communication from and to the HIAB.
-
Select option q twice to go back to Connections.
-
Select option d and thereafter a to reactivate the interface.
DHCP Assigned IP for IPv4/IPv6
To enable the server to be granted an IP address via DHCP, please perform the following steps from the Main Menu.
-
Select option n to configure network settings.
-
Select option c (Connections) from the network settings menu.
-
Use the arrow keys to select an interface which you wish to change.
-
Select option m to modify the selected connection.
-
Select option a to modify the addresses for the interface.
-
Select option 4 or 6 to set DHCP for an IPv4 or IPv6 address.
-
Type auto and press Enter.
-
Select option q twice to go back to Connections.
-
Select option d and thereafter a to reactivate the interface.
Required Communication Settings
During the installation, it is required that the HIAB is able to communicate with the Enrollment server and the Update server at Outpost24. See the following section for information.
The update connection in the network tests will fail if the HIAB is not enrolled due to the required certificate not yet being obtained. The certificate is obtained during the license check with OUTSCAN during the enrollment procedure.
Network Scanning Range
Firewalls, IDSs and IPSs may interfere with the security scan if they have a reactive defense mechanism. In such case, we recommend to set up OUTSCAN (CIDR IP range 91.216.32.0/24, 80.254.228.0/22, 185.92.168.0/22, IPv6 range 2a13:5240::/29) as a trusted range.
Clarification
The scanning occurs from within the below range:
-
For IPv4:
-
91.216.32.1 to 91.216.32.254
-
80.254.228.0 to 80.254.231.255
-
185.92.168.1 to 185.92.171.255
-
-
For IPv6:
-
2a13:5240::0 to 2a13:5247:ffff:ffff:ffff:ffff:ffff:ffff
-
Firewall Rules
The HIAB requires several firewall rules to allow for a smooth functionality in regard to updates and enrollments. Below is a list of rules that are used, however the Enrollment and Update rules are required and necessary. DNS host names are used for services where changes may occur without prior notification.
When using IP address only instead of hostnames, you need to add the scanning range to the firewall for HIAB to reach Outscan.
|
Service |
Destination |
Port |
Protocol |
Direction |
Description |
|
Remote Support |
osrss.outpost24.com |
22 |
TCP |
Outbound |
Remote Assistance |
|
Update |
repo.outpost24.com |
443 5000 |
TCP |
Outbound |
HIAB Updates |
|
Enrollment |
outscan.outpost24.com |
443 |
TCP |
Outbound |
Registering HIAB |
|
Rules update |
outscan.outpost24.com |
443 |
TCP |
Outbound |
To update the HIAB with the rules for the latest vulnerabilities |
|
HIAB External/ OUTSCAN Internal |
outscan.outpost24.com |
443 |
TCP |
Outbound |
External Scanning from HIAB |
|
WEB |
<HIAB IP> |
443 |
TCP |
Inbound |
WEB GUI |
|
Scheduler to Scanner |
<HIAB IP> |
443 |
TCP |
Outbound |
Communication to scanner, depends on Polling enabled or not This is also necessary when enrolling a scanner through scheduler.
|
|
SMTP |
<SMTP Server> |
25 |
TCP |
Outbound |
For the HIAB to send emails |
|
DNS |
<DNS Server> |
53 |
TCP/UDP |
Outbound |
To resolve host names |
|
SSH |
<HIAB IP> |
22 |
TCP |
Inbound |
To allow remote access to the console |
|
Proxy |
<Proxy IP> |
<Proxy port> |
TCP |
Outbound |
To allow communications using a proxy server |
|
FTP |
<FTP IP> |
<FTP Port> |
TCP |
Outbound |
To perform backup and imports |
Verify the Communication Settings
To verify if the HIAB is able to communicate with the above locations, perform the following steps from the Main Menu.
-
Select option t to test network connections
-
Select option r to run network tests
-
Select option q to go back
Enroll the Server
The HIAB needs to be registered to the correct account to be able to perform any scanning. Therefore, you need to pair it with the Main Account, this is done through an enrollment process.
You can enroll the HIAB through console or portal interface.
If you are enrolling using console, you need to perform the following steps:
-
Select option m (Maintenance), from the main menu.
-
Select option u (Update).
-
Select option e to enroll.
-
Insert the user name for the HIAB license, which you have received in an email from Outpost24 and press Enter.
-
Type the password given in the email and press Enter.
Make sure that the correct K (Keymap) in Main Menu has been selected before typing in the password for enrollment.
-
Now the HIAB connects to the update server to register.
If you are enrolling through portal interface, you need to perform the following steps:
-
Navigate to https://<hiab-ip>.
-
Provide your details and click Enroll.
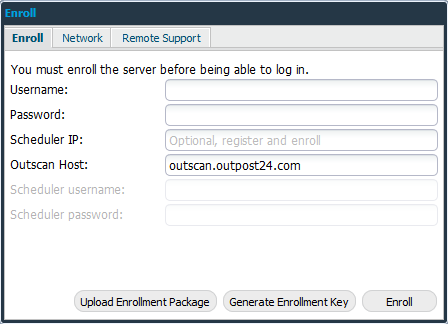
You can also configure your Network settings and Activate Remote Support.
Use the main account or any account with the Allow enroll HIAB option checked on the OUTSCAN system, to enroll the HIAB.
The Enrollment Package is bound to the generated key, in other words, it can only be uploaded on the specific HIAB on which the key was generated. Similarly, the key is bound to the HIAB on which it was generated.
The Enrollment Package contains:
-
An SQL file with license information, containing username, name, email, and hashed password.
-
A key file containing a unique key. The key file does not contain any information about MAC or IP.
-
Rules update.
-
Exploits update.
-
Updated RPM packages.
-
A certificate used for enrolling.
Log on to the Portal Interface
Once you enroll the server, you are able to see the below screen available at https://<hiab-ip>.
Example: If your assigned IP is 192.168.2.3, navigate to https://192.168.2.3
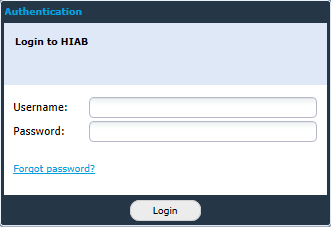
Log on using your credentials.
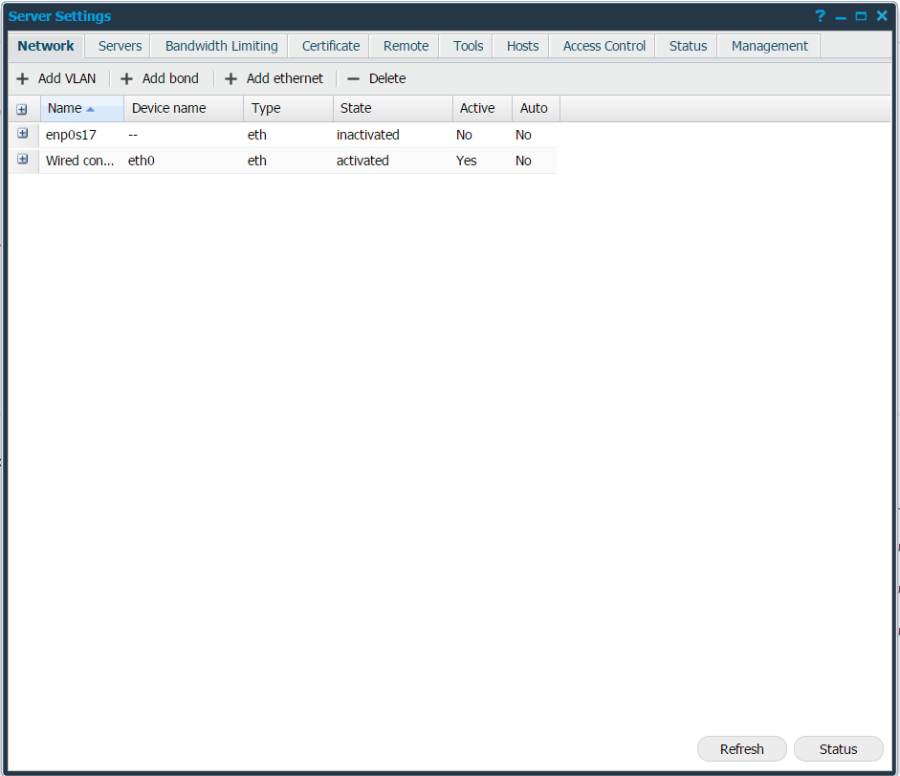
Configure Additional Network Settings
Once logged in, you are able to set up any additional network interfaces and define any additional routes if required.
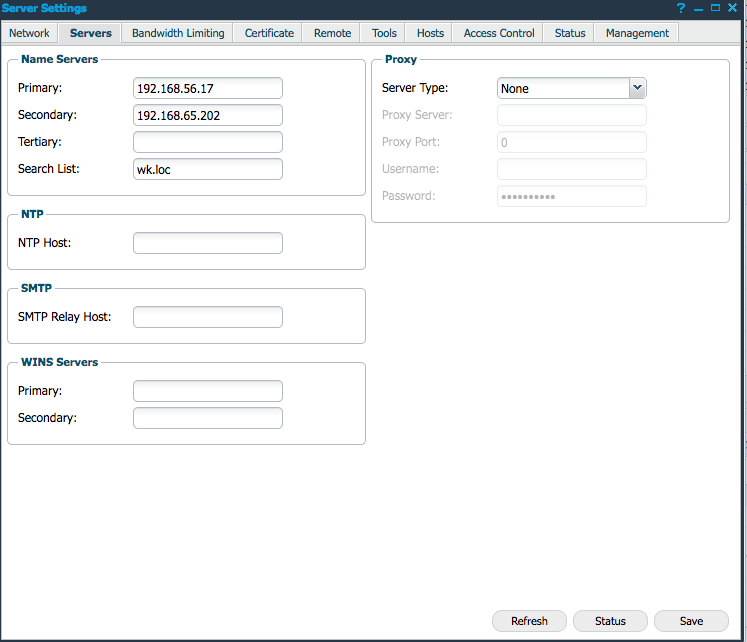
The network settings are available in the Main Menu > Settings > Server, under the Network tab.
NTP Settings
NTP settings can be configured in the Servers tab under: Main Menu > Settings > Server.
Verify Time Zone
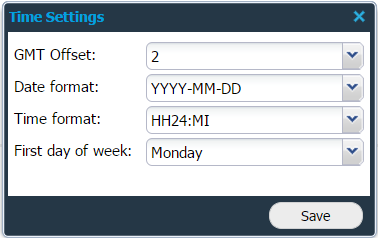
All references to time can be modified to reflect the time in the current time zone. Click on the time section of the window in the lower right corner of the window to modify the time zone offset from GMT.

You can also change the date and time format and what is considered the first day of the week.
Set up Automatic Updates
Before you start using your HIAB, it is a good idea to set up automatic updates. This enables you to always receive the latest vulnerability tests and provide you with new features as they become available.
To schedule your updates, go to Main Menu > Settings > Maintenance, select the Update tab.
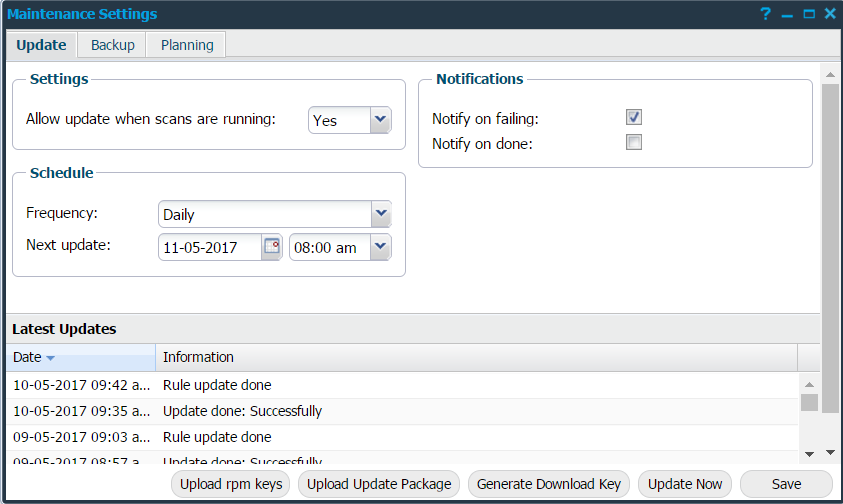
Here you can define if the updates are allowed to terminate any running scans (they resume afterwards if they are still within their scanning window).
Select the frequency for the update and provide a start time, then click Save to save the current settings.
Configure Backup
The HIAB can be set up to perform regular backups and transfer them over various protocols to a remote location for safekeeping. To configure these settings, go to Main Menu > Settings > Maintenance, select the Backup tab.
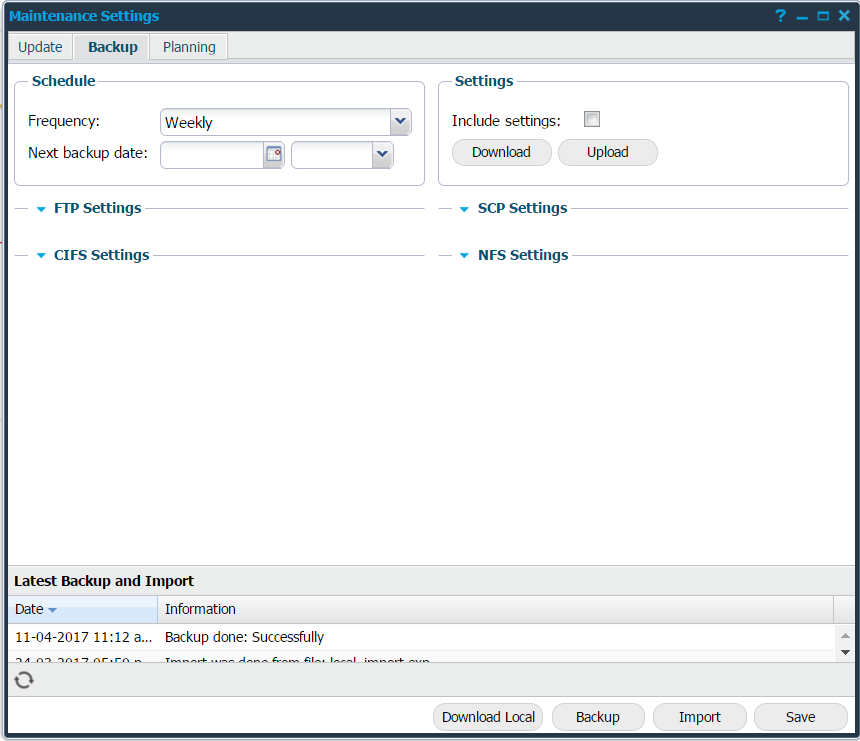
Refer to HIAB Maintenance Settings guide for detailed information about Update and Backup.
Set up Events and Notifications
The HIAB can send you the notifications either through email, Syslog or SNMP traps. The supported events that can be defined are located under Main Menu > Settings > Event notifications.
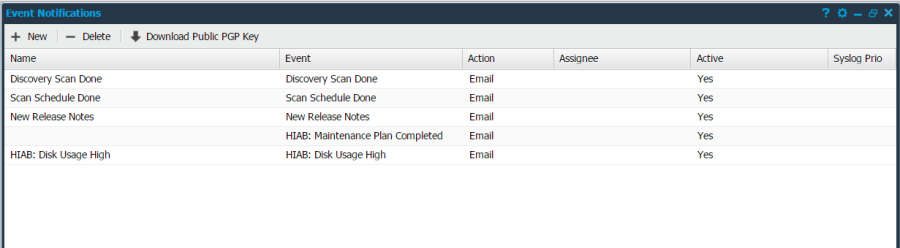
Click on + New button, to add a new event to the system. Right click on any event and select edit to set the event notification.
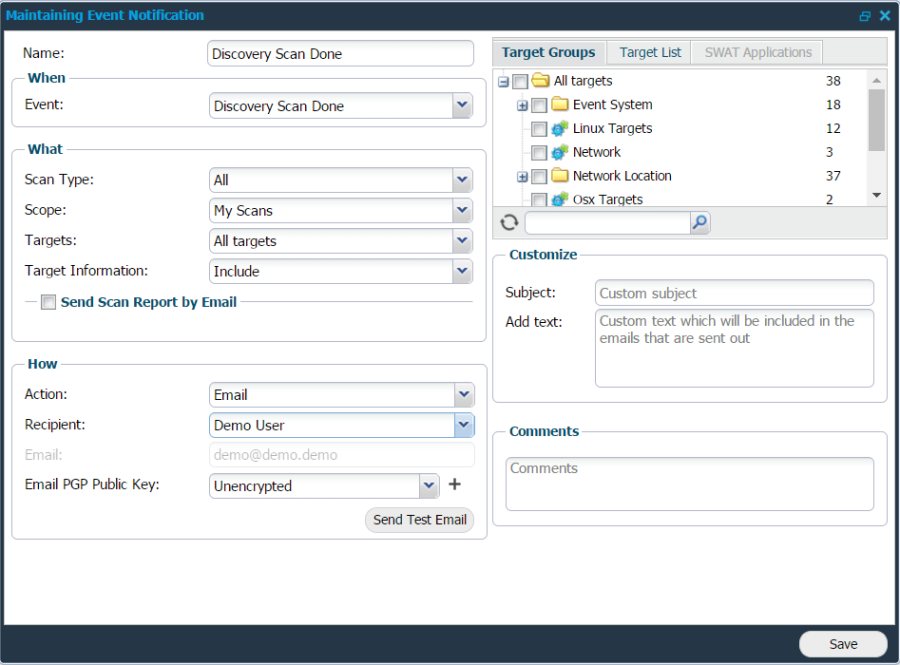
Click on ? (help button) on the top right corner of the window to know more details about the available options.