Last Updated: 2024-09-03
Purpose
This article provides instructions to set up scanning of Amazon Web Services (AWS) and the correct Identity and Access Management (IAM) access, and how to add the resulting Amazon Resource Name (ARN) to OUTSCAN.
Introduction
As more and more people are moving their IT Infrastructure to cloud based services, there often seems to be an assumption that the cloud provider will secure the service. To an extent, this is true. However, while they take extremely good measure to secure the service itself, it is almost never their responsibility to secure the hosts running within the service.
Amazon, for example, state that they will secure their cloud-based service, AWS, however, it is the responsibility of the user to secure all services within that.
This means that users of AWS should treat (and secure) their IT assets as if they were running on their own infrastructure, including regular vulnerability scanning.
Because of the shared infrastructure model used by almost all cloud service providers, both server and network infrastructure may be used by others and running any form of testing may have an impact on the availability and response.
If anyone wishes to conduct a vulnerability scan against anything hosted within AWS, they are normally required to request permission from Amazon prior to the testing taking place. (http://aws.amazon.com/security/penetration-testing/). This can be a laborious task if there is a large number of hosts being scanned.
Outpost24 offers pre-approved Vulnerability Scanning against AWS by using the AWS API, enabling scanning of both instances and Elastic Load Balancers (ELBs). However, AWS customers are welcome to carry out security assessments or penetration tests against their AWS infrastructure without prior approval for 8 services.
This integrates with AWS and ensures that the scanning requirements and limitations set by Amazon have been met.
These limitations are:
-
Amazon Targets (Instance IDs) cannot be manually added. The only way to add an AWS instance is by using a Discovery scan, which uses the API to query the account and to gather instance IDs.
-
Only instance sizes of m1.medium and above can be scanned. If, during the Discovery phase, any instances are discovered that are smaller than an m1.medium, or ELBs that contain members smaller than an m1.medium, they will be reported back as Too small to scan.
-
Only instances with an Elastic IP (EIP), or Load Balancers will be scanned.
-
Only safe tests can be run, and only using OUTSCAN.
While it may seem like there are a lot of limitations, these are the same checks that Amazon would do if permission was explicitly required.
Requirements
This document has been elaborated under the assumption the reader has access to the OUTSCAN/HIAB account and portal interface.
Configuration
For a full instruction for configuring AWS and OUTSCAN, see Step-by-Step Setup.
To setup AWS and the correct IAM access, and adding the resulting ARN to OUTSCAN:
-
Configure AWS.
-
Configure OUTSCAN.
The configurations of AWS and OUTSCAN are done once.
-
Set up the AWS IAM access. This requires:
-
The Outpost24 account information.
-
A permission policy to allow OUTSCAN to query the correct AWS API elements.
-
-
Add an ARN to OUTSCAN.
Many companies use multiple AWS accounts and then make use of Amazons unified billing. In this instance, multiple ARNs can be added to OUTSCAN, with a name to describe them.
-
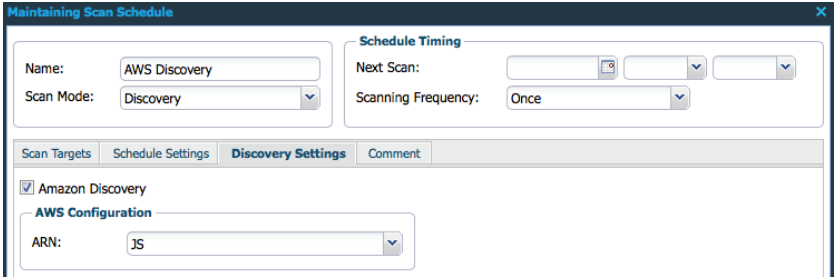
Set up a Discovery scan on OUTSCAN by checking the Amazon Discovery box.
-
Select an ARN under AWS Configuration.
The AWS discovery always run a discovery of everything regardless of what is in the target or ignore list. These lists are only used when starting a scan after the AWS discovery has been performed.
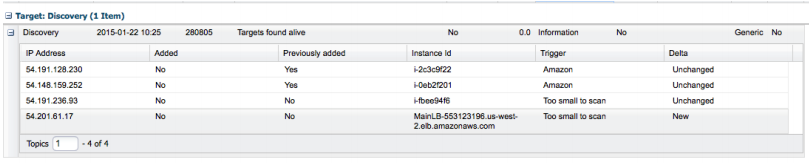
During the discovery process, several things happen. Initially, OUTSCAN use the API to query the account and list all the associated instances and ELBs. Once OUTSCAN knows which instances are available, it queries the instance for their size. Anything less than an m1.medium is marked as Too small to scan. Similarly, OUTSCAN also query the ELBs for the InstanceIDs behind them. If any of those instances are less than an m1.medium, the load balancer cannot be scanned, and the ELB is marked as Too small to scan.
Even if an ELB has six large instances and one small instance, this is enough to stop it being eligible for scanning.
Both ELB v1, v2 and CloudFront are supported.
Once the Discovery process is completed, open the Reporting tools to see the result.
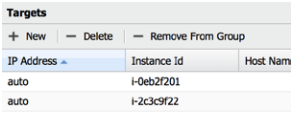
If the Add Targets to group option was selected during the setup of the Discovery, anything discovered and added to the targets during the scan is added by their InstanceID.
Out of the three instances, and a discovered ELB, only two are eligible for scanning by Amazon.
From this point on, AWS assets are treated the same as a normal OUTSCAN target. However, when it comes to scan time, OUTSCAN will again use the API, query the account to ensure the InstanceIDs are still associated and of an acceptable size, and query the current IP address to ensure that the correct host is scanned.
Summary
OUTSCAN now offers an effective way to run pre-authorized scans against AWS, effectively treating them as a standard target, but with all the necessary checks required by Amazon prior to providing any form of scanning.
Step-by-Step Setup
The procedure to setup AWS, the correct IAM access, and adding the resulting ARN to OUTSCAN is:
-
Login to your AWS Management Console.
-
Click Services at the top and then IAM.
-
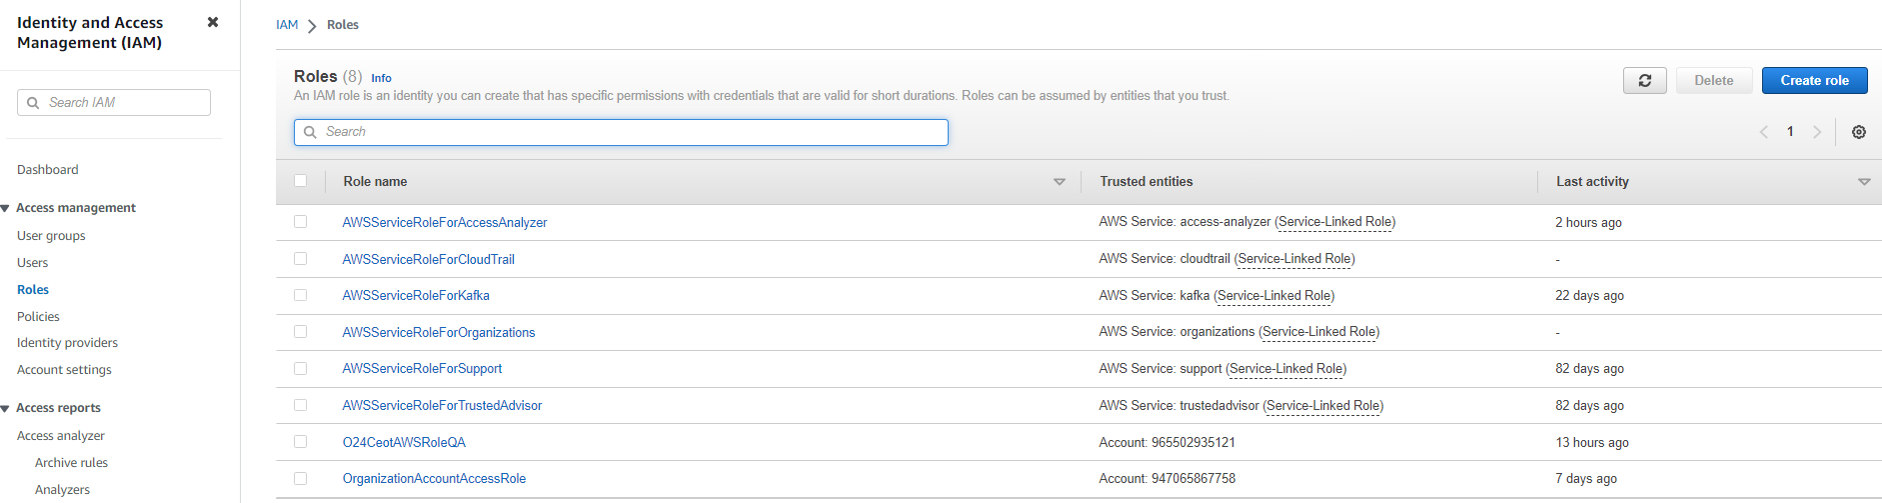
Click Policies in the left-hand menu.
-
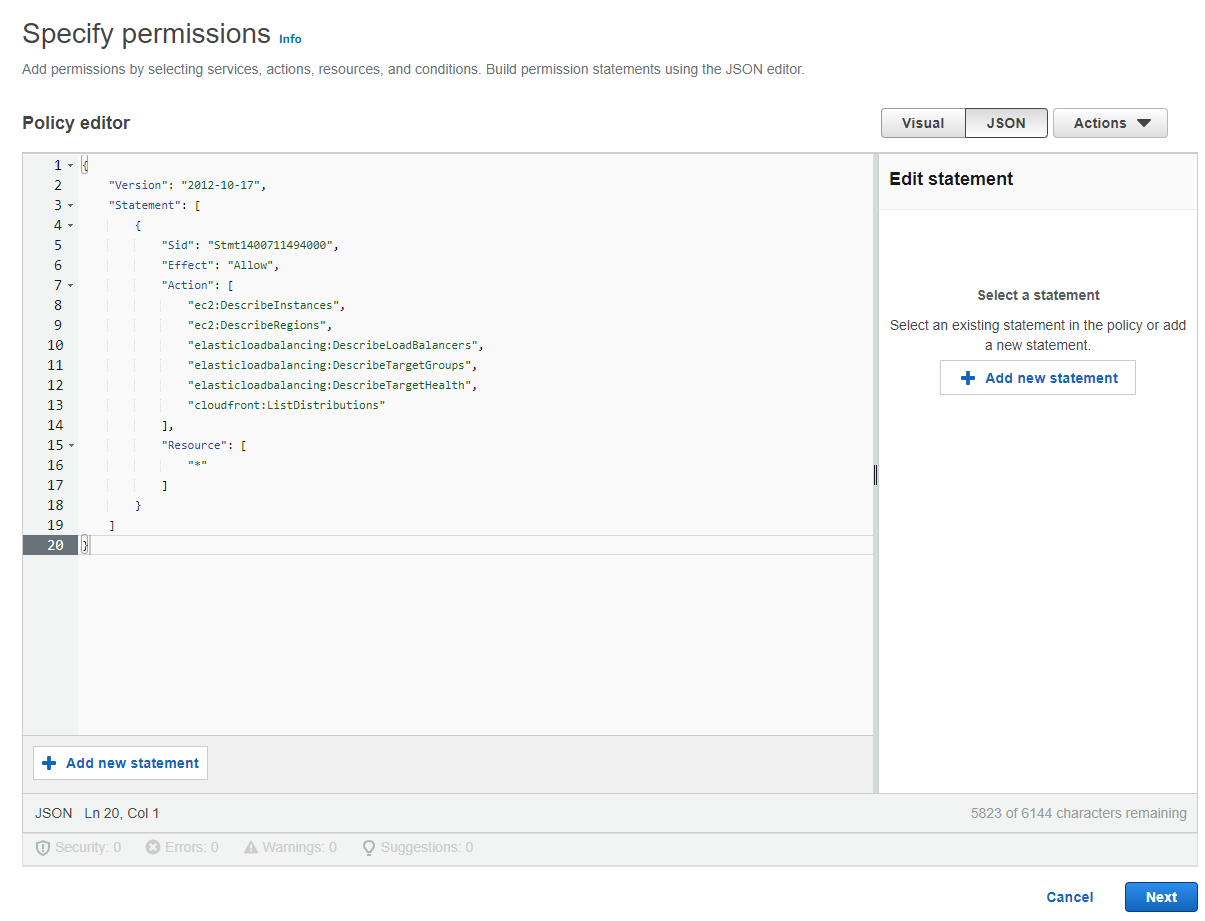
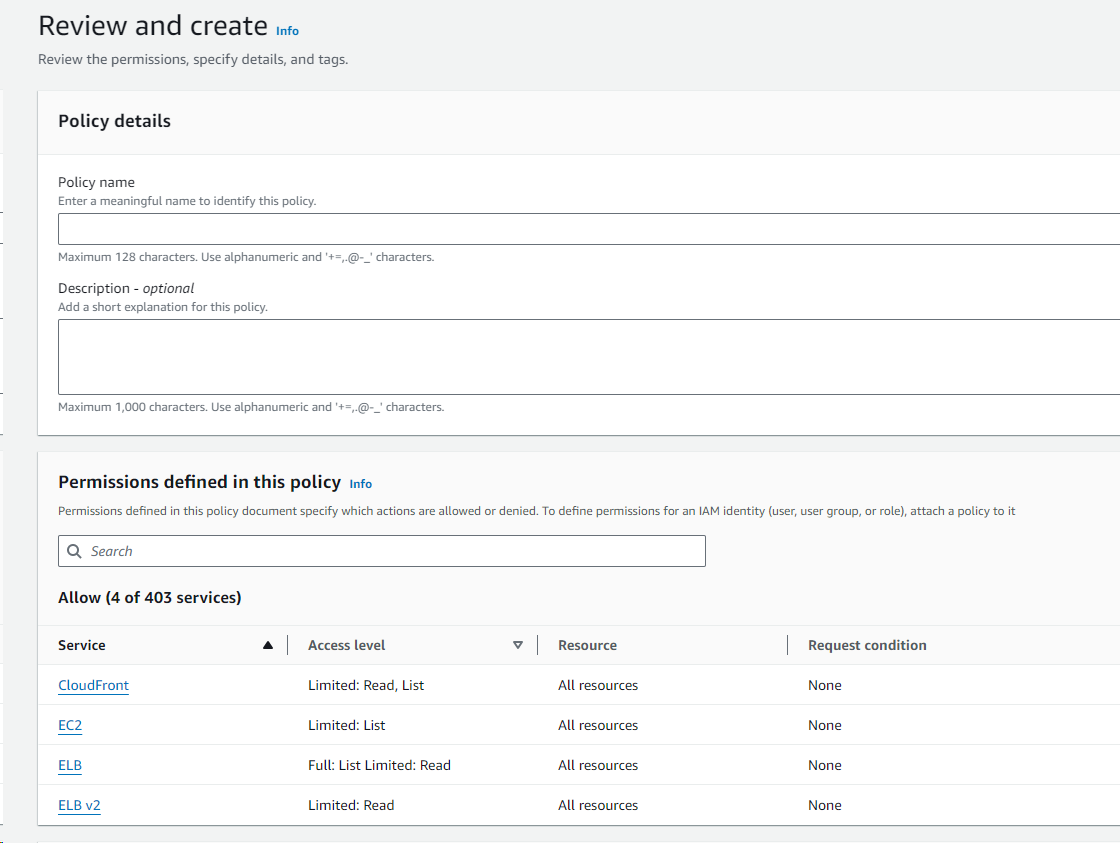
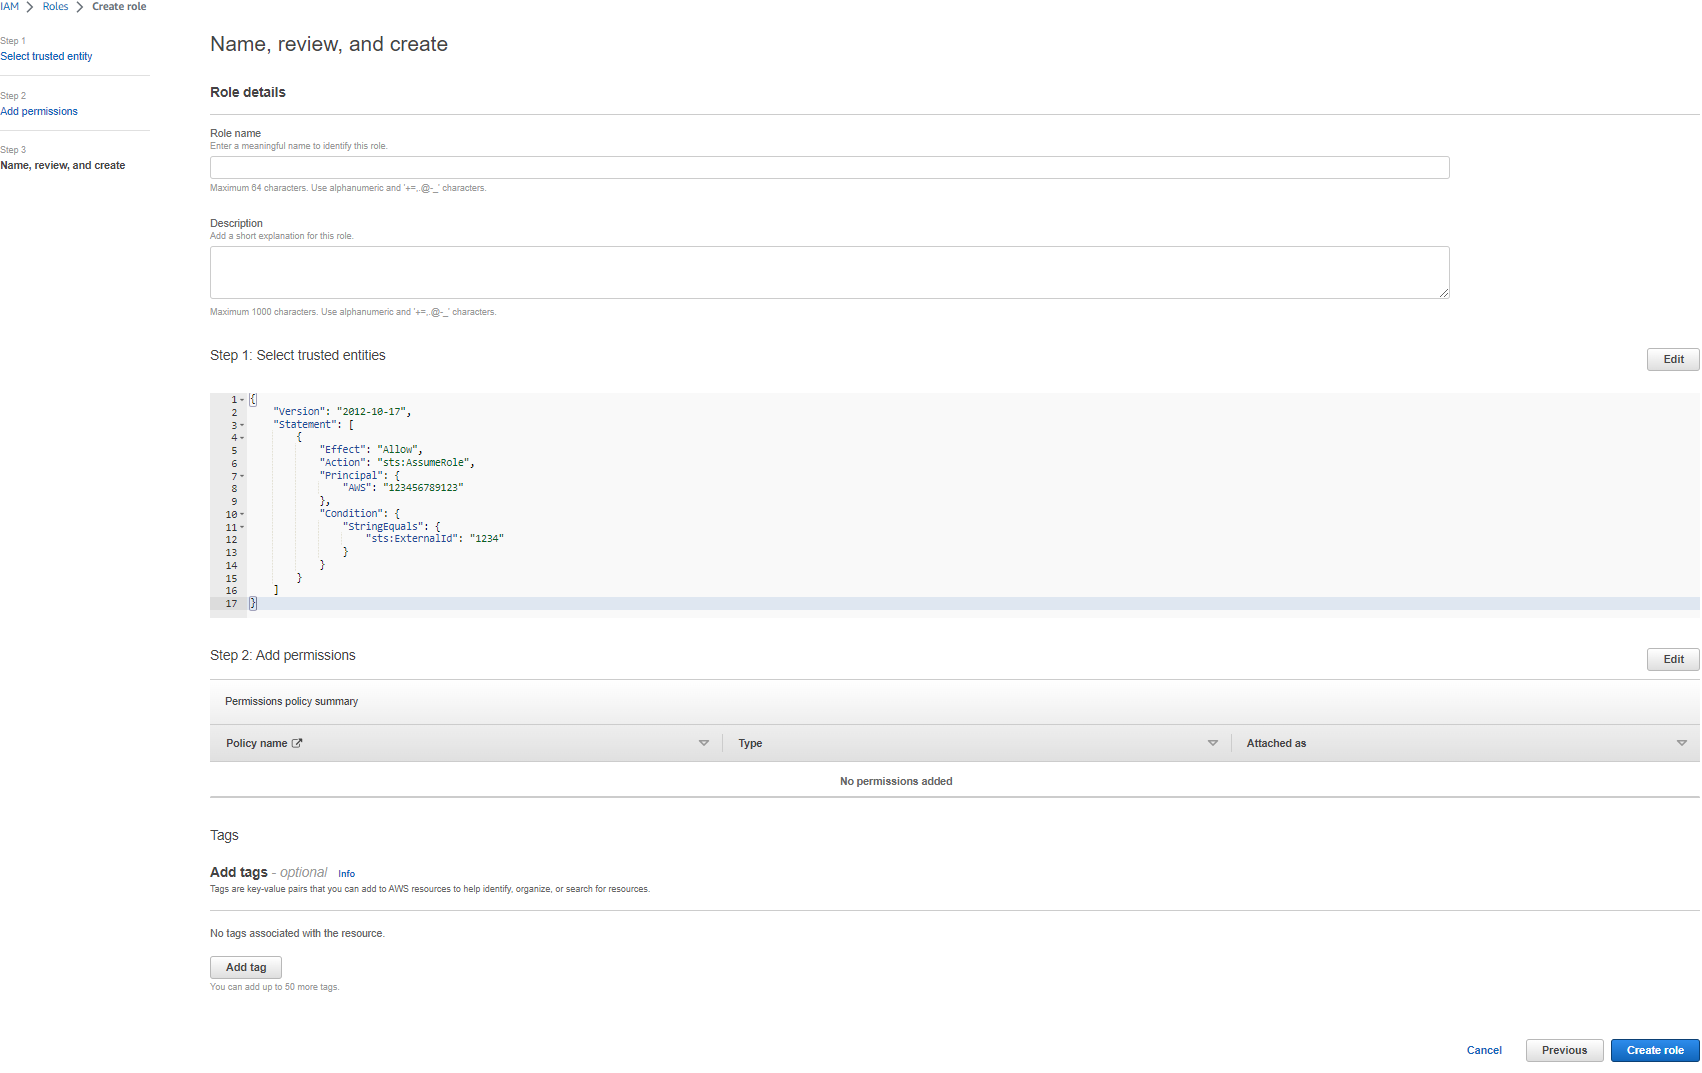
Click on Create policy then click on the JSON tab and copy the following statement in the window.
{
    "Version": "2012-10-17",
    "Statement": [
        {
            "Sid": "Stmt1400711494000",
            "Effect": "Allow",
            "Action": [
				"ec2:DescribeInstances",
				"ec2:DescribeRegions",
				"ec2:DescribeTags",
				"elasticloadbalancing:DescribeLoadBalancers",
				"elasticloadbalancing:DescribeTargetGroups",
				"elasticloadbalancing:DescribeTargetHealth",
				"elasticloadbalancing:DescribeTags",
				"cloudfront:ListDistributions",
				"cloudfront:ListTagsForResource"
            ],
            "Resource": [
                "*"
            ]
        }
    ]
}
-
Click the blue Next-button on the bottom right.
-
Give the policy a name such as Outpost24AWSPolicy.
-
Click Create Policy.
-
Click Role in the left-hand menu.
-
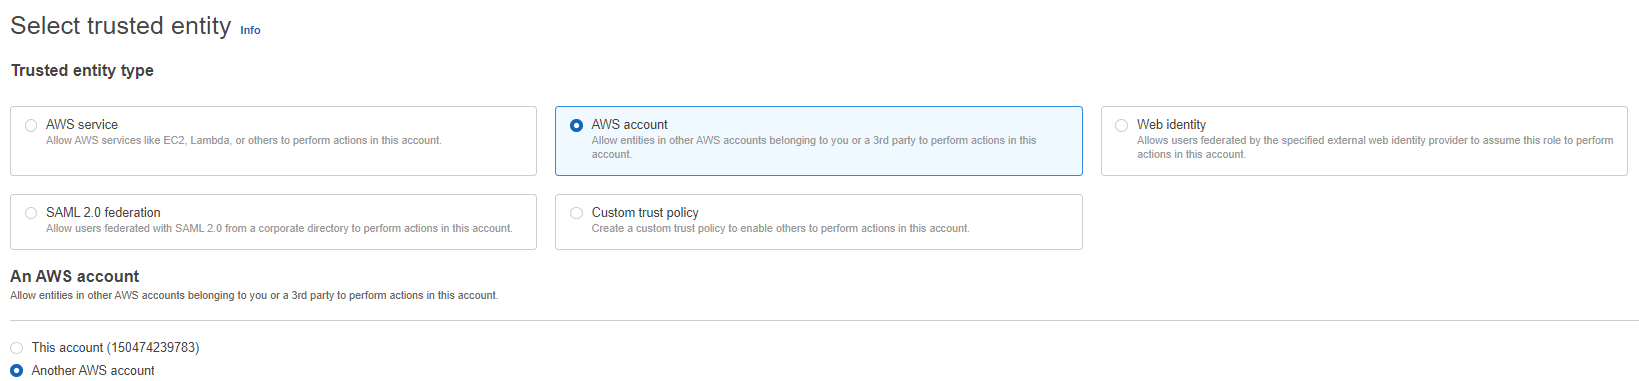
Click the blue Create Role-button on the top right.
-
Select AWS account.
-
Select Another AWS account.
-
Copy the Account ID (947065867758) and the unique External ID which has been allocated by OUTSCAN and paste it. The Account ID and External ID can be retrieved by navigating to Main Menu > Settings > Integrations > Amazon.

-
Click the blue Next-button on the bottom right.
-
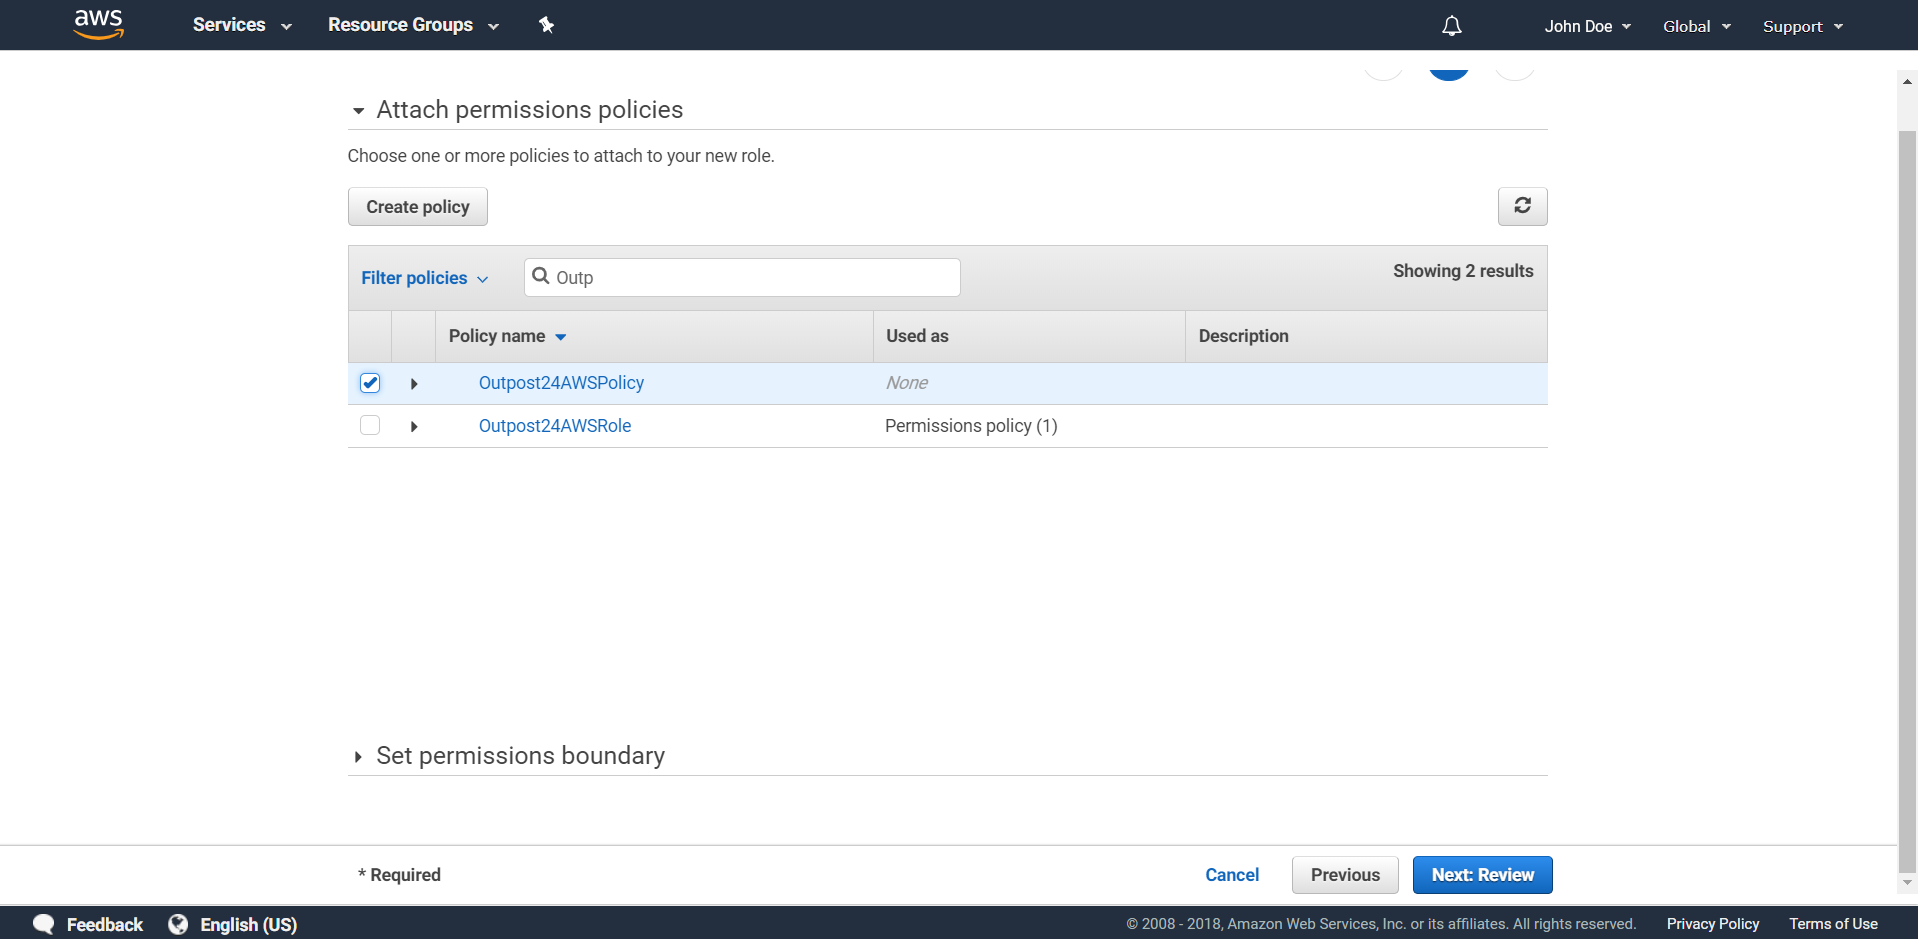
Search for your policy, for example Outpost24AWSPolicy and tick the box.
-
Click the Next: Review-button on the bottom right
-
Give the role a name such as Outpost24AWSRole.
-
Click the blue Create role-button in the lower right corner.
-
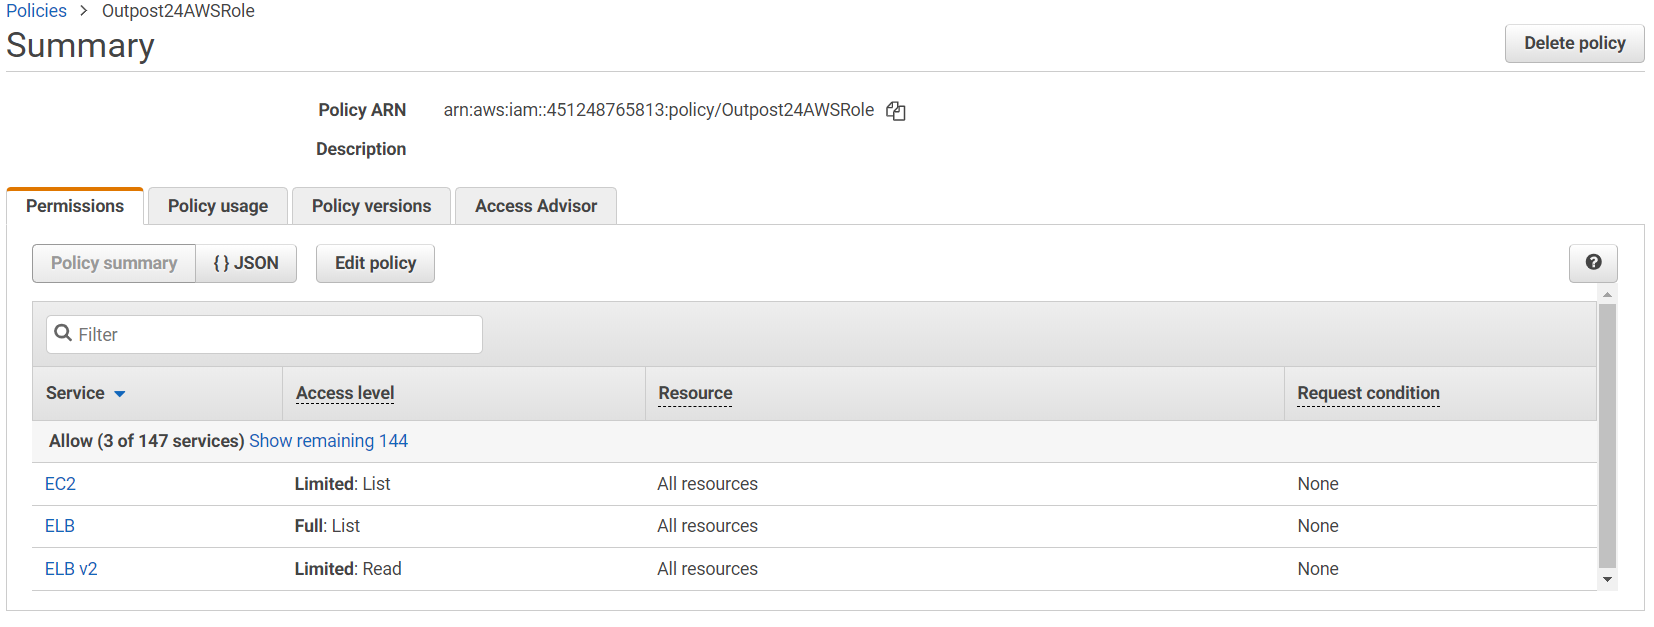
Click on Outpost24AWSRole and review the role.
-
Login to your OUTSCAN account.
-
Under Main Menu > Settings > Integrations > Amazon, ensure the Enabled checkbox is checked and click +New.
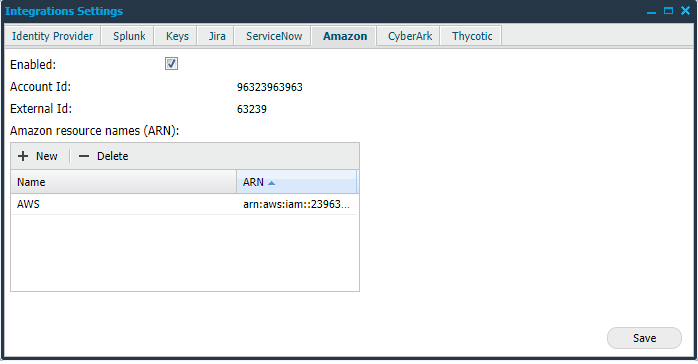
-
Under Name enter a name to identify the ARN and paste the ARN. The ARN can be found by navigating in AWS to Services > IAM > Role and click the earlier created role, and locate the field called Role ARN.
-
Click Save.
Related Articles
- Windows 10/Windows 2019 Server
- General Information about SMB/WinRM Scanning
- Windows 8.1
- Scan Blueprint
- How to Test SMB Authentication
- Docker Image Assessment
- Windows 2016 Server
- How to Scan AWS ECR Images
- Scanning-Less Scanning
- Scan Scheduling Errors
- Network Host Assessment
- Core Installation
- Windows 2008 R2 Server
- Scanning Range
- SMB Authentication from OUTSCAN/HIAB