Last Updated: 2024-08-29
Purpose
This article provides users with an overview of the Configuration.
Introduction
Cloudsec Scan Configuration lets you link cloud assets such as AWS and Azure to a scan setup that defines regions, credentials, duration limits and impact constraints. By tailoring scans to your cloud environment and policy needs, this feature ensures that vulnerability assessments are efficient, properly scoped, and aligned with the access and performance boundaries of your cloud infrastructure.
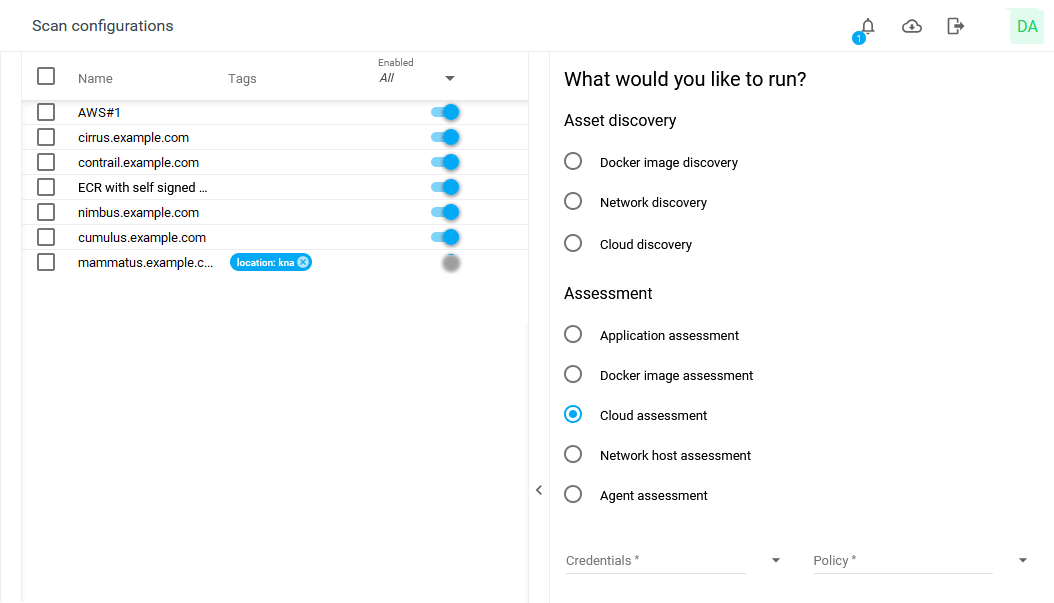
The Scan configuration view consists of the target information that links to an asset, and the scan settings. Scan settings include Automated scanning process, allowing restriction of scan duration and its impact on the scanned asset such as the cloud account and the compliance policy.
Requirements
Basic access to the OUTSCAN account and a Netsec, Appsec, or Cloudsec subscription is needed to access the Portal.
Setting up a Cloudsec Scan Configuration
To set up a Cloudsec Scan Configuration:
-
Open a browser and navigate to https://outscan.outpost24.com/portal, or click the Main Menu > Portal in your OUTSCAN.
-
In the Portal menu column on the left hand side, click Configuration to expand it.
-
Click Scan configurations to open the Scan configurations view.
-
To create a new configuration click on the green plus
-
Select which assessment to use, for this example Cloud assessment is chosen.
-
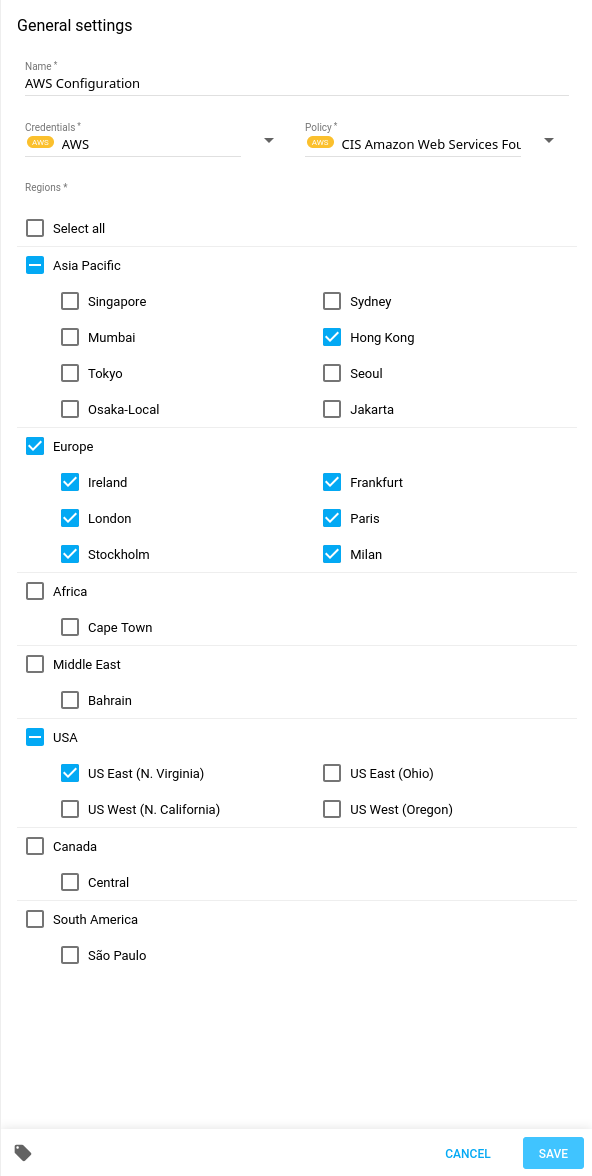
Select Credentials from the drop down menu. See Scan Credentials for more information on how to set up scan credentials.
-
Select Policy from the drop down menu.
-
Select which Regions to scan. For further information about AWS regions see https://docs.aws.amazon.com/AWSEC2/latest/UserGuide/using-regions-availability-zones.html.
-
Click on the blue Add button in the lower right corner to add the configuration.
If multiple regions are selected, each time the scan configuration runs, the number of scans queued/started will match the number of regions selected.
When aws.access.key.allow.remote = false and ARN credentials are selected, the scanner dropdown is hidden and the default scanner is selected as value.
Schedules
On the Schedules tab, you create a schedule when the scan should run. The schedule is also accessible through Automation > Schedules in the main menu to the left.
Blocked Time Slot can not be set in Scan Configuration. To set Blocked Time Slot open the schedule in Automation > Schedules.
Add a Schedule
-
Click on the green plus
-
Fill in the schedule form.
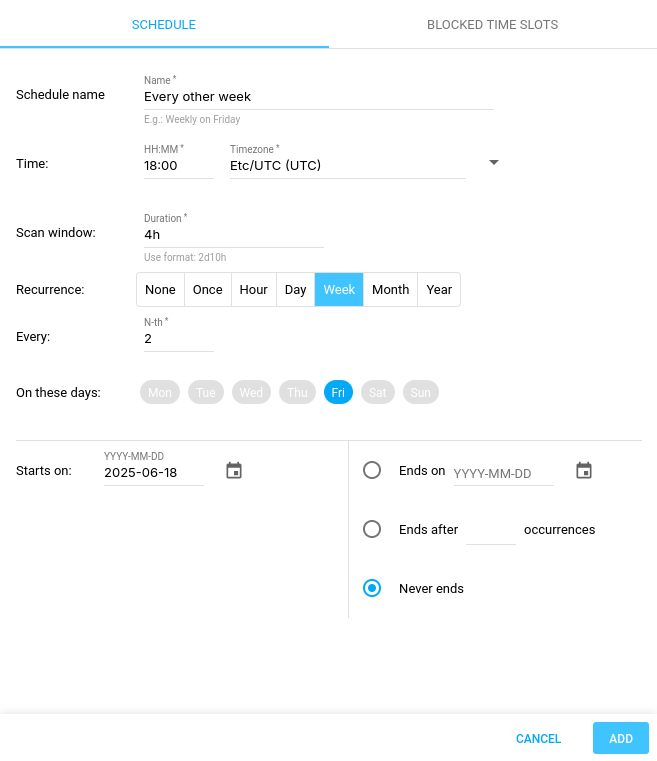
|
Option |
Description |
|---|---|
|
Schedule name |
Provide a name for the schedule. |
|
Time |
Set a time when the schedule must be triggered. The time value is saved in UTC (Coordinated Universal Time) and the offset corresponds to the system time in the user web browser and therefore might differ for users accessing the schedule options in different time zones. For example, a schedule time set to 10:00 in July (summertime) by a user located in Copenhagen
|
|
Scan window |
How long is the period where scanning is allowed. Minimum period is 1 hour and maximum is 7 days. |
|
Recurrence |
Determines the frequency of the scheduled scan. Select one of the available options in the menu: None - The scan will never run. Once - The scan is scheduled to run only once on a select start date. Hour - Set the recurrence window by providing the Number of hours in this field. Day - Set the recurrence window by providing the Number of days in this field. Example: If set to 2, it means that the scan is scheduled to run once in every 2 days. Week - Select on which days of the week the scan should run. Month - Select the occurrence of days, weekday, day of the month when the scan should run. Year - Select on which the day of year the scheduled scan should run. A scan is not restarted when a schedule is triggered while it is still running. It starts when the next schedule time ticks. |
|
Every |
N-th Depending on recurrence, Every sets the amount of Hour, Day, Week, Month, Year. Example. N-th=1, Recurrence=Day = Every day. N-th=3, Recurrence=Month = Every third month. N-th=2, Recurrence=Week = Every other week. |
|
Starts on |
Set the start date for the schedule. |
|
Ends on |
Set an end date for the schedule. The schedule becomes inactive after this date. |
|
Ends after_occurrences |
Set the number of occurrences the schedule must be triggered before it becomes inactive. |
|
Never ends |
If set, the schedule never becomes inactive. |
-
Click on the ADD button to schedule the configuration.
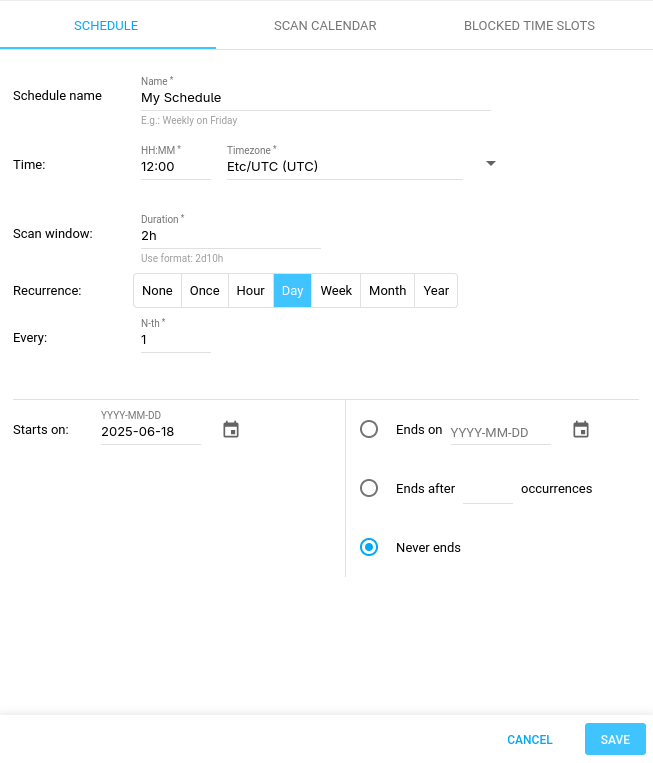
Edit a Schedule
Click on an existing schedule to open the edit function. Follow the same steps as Add a Schedule and click the Save button.
Removing a Schedule
To remove a schedule either:
-
Right click on the schedule that shall be removed to open a menu.

-
Then click Delete.
or
-
Select the schedule you want to remove by ticking the box to the left on the row.
-
Click on the bin

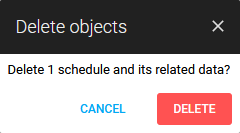
In both cases, confirm by clicking the red DELETE button.
Scan Calendar
Click the Scan Calendar tab to view the schedule. Select Month or Week at the top of the calendar to change the view, and use the arrows beside the date label to navigate to other months or weeks.
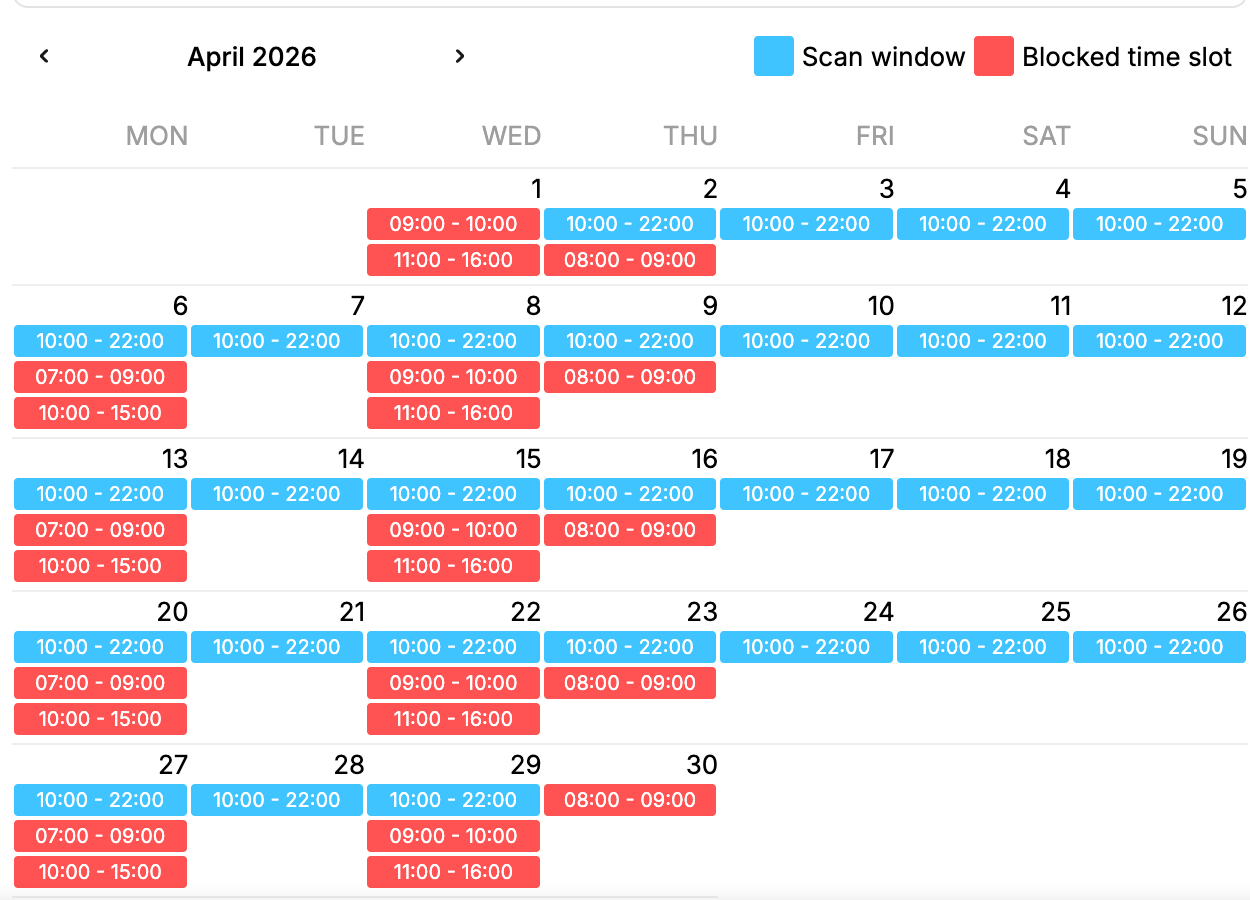
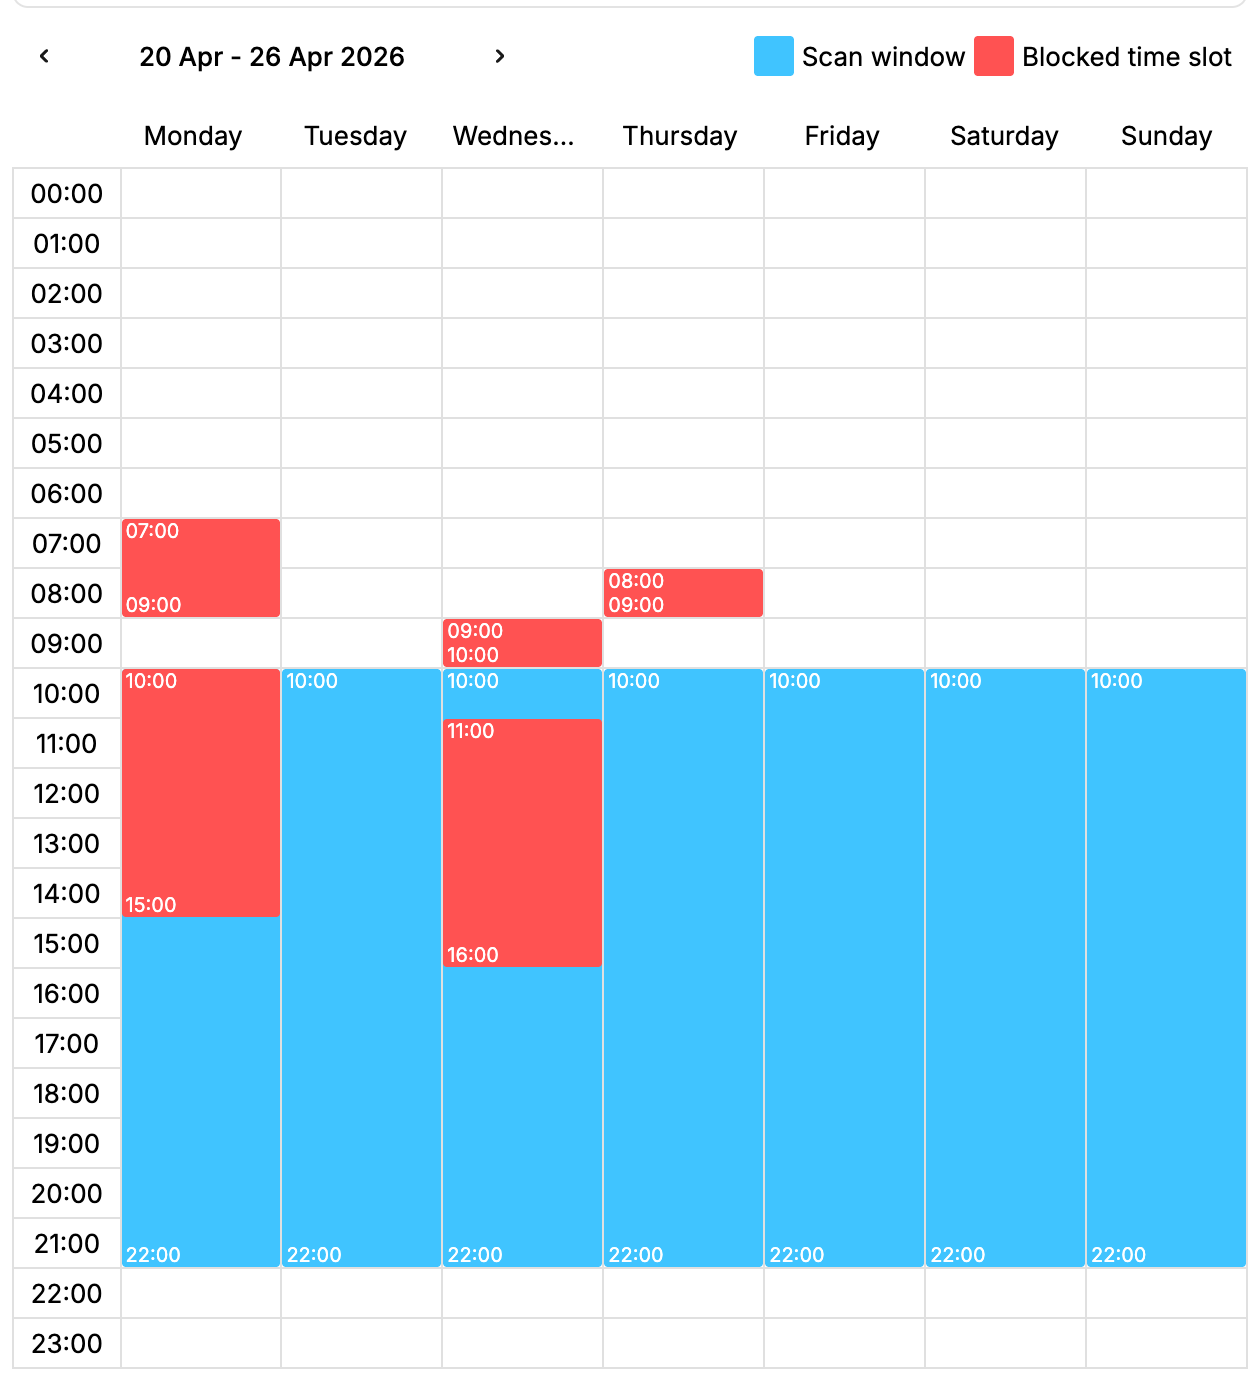
Scan windows are displayed in blue and Blocked Time Slots in red, as indicated by the legend above the calendar. To display the schedule in a different time zone than the one saved on the schedule, select the desired time zone from the dropdown above the Month/Week toggle.
The Blocked Time Slots are time periods where scanning is not allowed. If a scan interfere with a blocked time slot, the scan is set to pending during that time and is re-attempted after the blocked time slot is over.
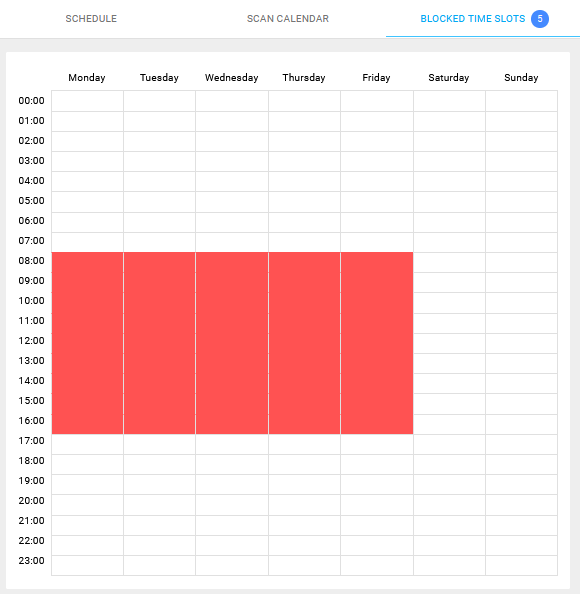
Blocked Time Slots
To block specific time slots click in the calendar to add or remove blocks.
To select or deselect multiple block, click and drag across desired area to mark on unmark blocks.
The blocked time is displayed in the Scan Calendar tab as red blocks.
The number in the tab name indicates the number of days that have Blocked Time Slots.
The number in the tab name indicates the number of days that have Blocked Time Slots.
Related Articles
- Windows 10/Windows 2019 Server
- General Information about SMB/WinRM Scanning
- Windows 8.1
- Scan Blueprint
- How to Test SMB Authentication
- Docker Image Assessment
- Windows 2016 Server
- How to Scan AWS ECR Images
- Scanning-Less Scanning
- Scan Scheduling Errors
- Network Host Assessment
- Core Installation
- Windows 2008 R2 Server
- Scanning Range
- SMB Authentication from OUTSCAN/HIAB