Last Updated: 2025-01-30
Purpose
This article describes how to download a HIAB image to set up HIAB in a virtual environment.
Introduction
The Virtual HIAB Appliance provides a fully virtualised version of the HIAB platform that can be deployed in environments such as VMware, Hyper-V, or supported cloud infrastructures. This virtual image enables organisations to perform internal vulnerability scanning and asset management without the need for dedicated physical hardware. By using the virtual appliance, teams benefit from flexible deployment, lower upfront infrastructure costs, and seamless integration into existing virtual environments—all while maintaining the full functionality and security posture of the HIAB system.
The HIAB is available as downloadable image files, ready to be set up in a local virtual environment. Following the guide enables you to download the image in several different configuration to better suit the size of the environment. Once the HIAB is installed, it needs to be enrolled with an OUTSCAN scanner before use. The enrollment procedure is covered in the HIAB Enrollment document.
Prerequisites
It is required to have access to an OUTSCAN account and a HIAB license to download the image.
Downloading HIAB Image
To download the HIAB image:
-
Open the Main Menu in the lower left corner of the screen and select Support.
-
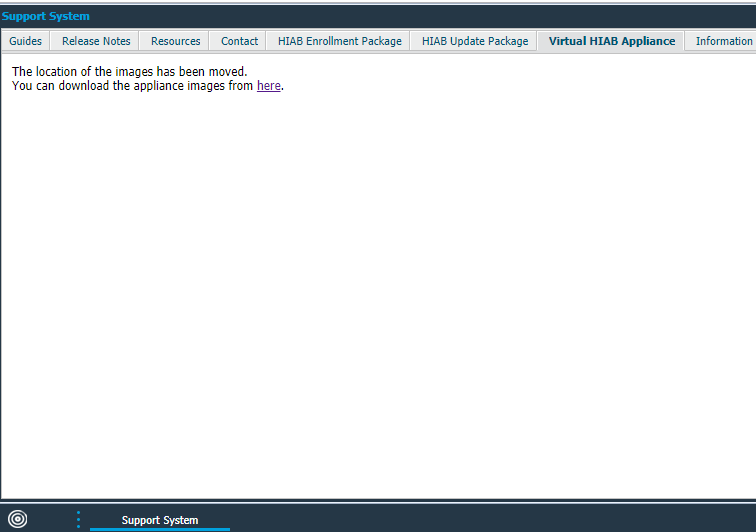
In the Support System window select the Virtual HIAB Appliance tab:
-
Click on the link "here", it leads to a new view in Outpost24 Platform.
-
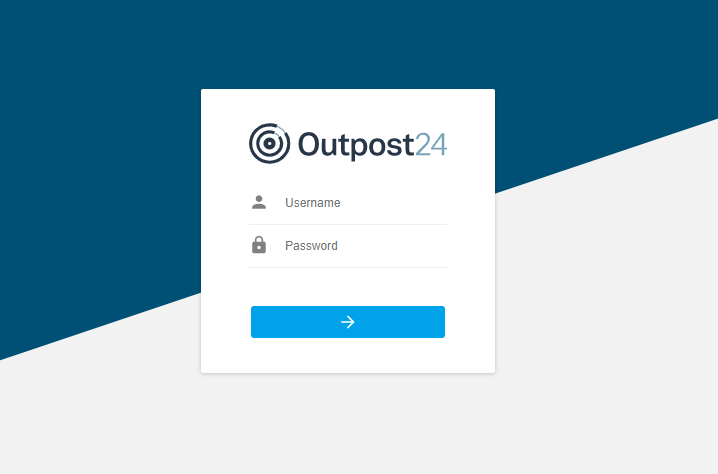
Log in to the portal using the same credentials as for https://outscan.outpost24.com.
-
Available VMware, Hyper-V and HIAB Cloud Virtual Images download options are displayed.
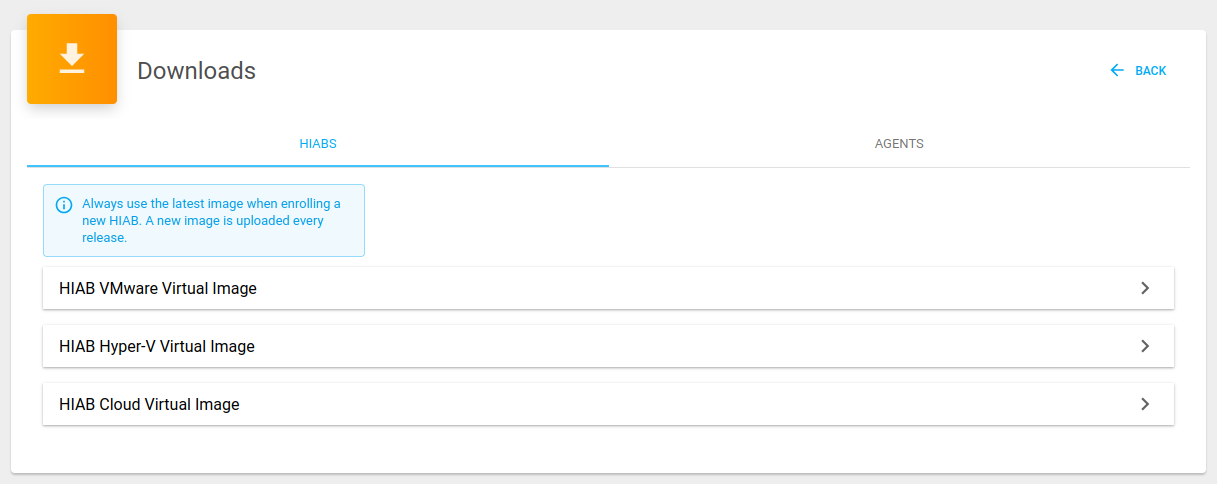
-
Select the option that is most suitable for your virtual environment, and click on the Download button located on the bottom of each option. See Download Options for more information.
-
Select a location to store the downloaded file.
After downloading the HIAB image, follow the appropriate installation instructions to set up the appliance.
Recommended specifications of HIAB is 8 cores, 32GB memory and 1TB disk space. Deployment with lower specifications will not receive attention if the issues are related to the limitations imposed by the recommended specifications.
Installation Instructions for HIAB VMware Appliance
-
Open the administration tool for the virtual environment.
-
Select the option to deploy an OVF or OVA file.
-
Follow the instructions in the application. For more information on Deploying OVF or OVA files see VMware documentation about Deploying OVF and OVA Templates.
-
Start the virtual machine.
Select any Linux 64-bit system as the type of operating system.
Once the machine is started, you are presented with the HIAB menu in the virtual console. Use the console to set up the virtual HIAB according to your network environment.
Installation Instructions for HIAB Hyper-V Appliance
The installation can be done by using Microsoft Hyper-V import guide as well as other management tools for Hyper-V. Following instructions are written for PowerShell Management Library for Hyper-V.
-
Extract the downloaded ZIP-file to a directory on the Hyper-V server, for example
C:\HIAB_HYPER-V. -
Run Show-HypervMenu from PowerShell on the server.
-
Import the virtual machine by selecting [7] Import Virtual Machine.
-
Enter the path to the directory holding the extracted files you want to import. For example
C:\HIAB_HYPER-VHIAB_VIRTUAL01. -
Do you wish to re-use IDs?
[ ] No
If the virtual machine is unique on the Hyper-V server, then IDs may be re-used. If the imported HIAB is a copy of an existing virtual HIAB on this server, then IDs cannot be re-used and attempt to import the machine fails
-
Are you sure you want to perform this action?
[Y] Yes -
Start the virtual machine.
Select any Linux 64-bit system as the type of operating system.
Once the machine is started, you are presented with the HIAB menu in the virtual console. Use the console to set up the virtual HIAB according to your network environment.
The current Network Test may not provide adequate information with regards to access to the license server. This can be addressed using the Traceroute utility found under the Tools menu by manually testing access towards the host outscan.outpost24.com over TCP port 443.
Download Options
|
Name |
CPUs |
RAM |
Hard drive |
|---|---|---|---|
|
VMware |
|||
|
HIAB VMware Virtual Image (150 GB) |
2 |
8 GB |
150 GB |
|
HIAB VMware Virtual Image (150 GB) |
8 |
32 GB |
150 GB |
|
HIAB VMware Virtual Image (1024 GB) |
2 |
8 GB |
1024 GB |
|
HIAB VMware Virtual Image (1 TB) (Recommended) |
8 |
32 GB |
1024 GB |
|
Hyper-V |
|||
|
HIAB Hyper-V Virtual Image (150 GB) |
1 |
8 GB |
150 GB |
|
HIAB Hyper-V Virtual Image (1 TB) |
1 |
8 GB |
1024 GB |
|
HIAB Hyper-V Virtual Image (1 TB) (Recommended) |
8 |
32 GB |
1024 GB |
Import the HIAB image using PowerShell cmdlets on the Hyper-V Server
Alternative to using the Hyper-V Manager to import the HIAB image, it is possible to use PowerShell cmdlets run on the Hyper-V Server, see Export and import virtual machines | Microsoft Learn
Using Hyper-V Manager
-
Select the HIAB image for use with Hyper-V from the website at Outpost24 Platform and unzip the image to a directory.
-
Launch Hyper-V Manager and select the Import Virtual Machine wizard.
-
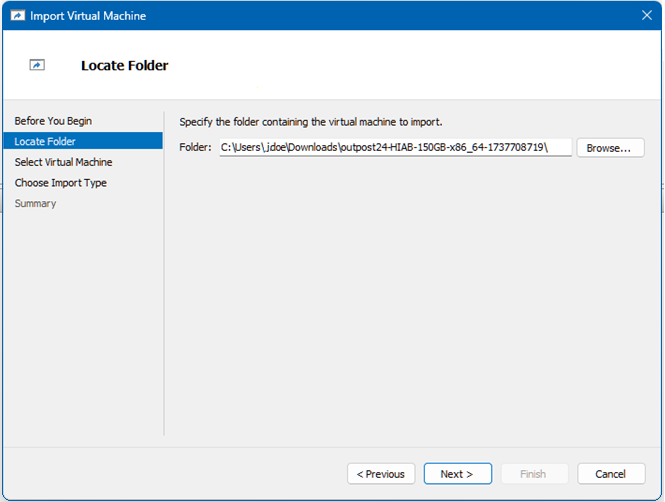
Select the folder the HIAB image was unzipped to, then click Next.
-
By default, the virtual machine to import is displayed and selected (see screenshot below), then click Next.
Note, when importing either of the 1TB images available for use, the Name field reflects it is 150GB. This name can be changed afterwards.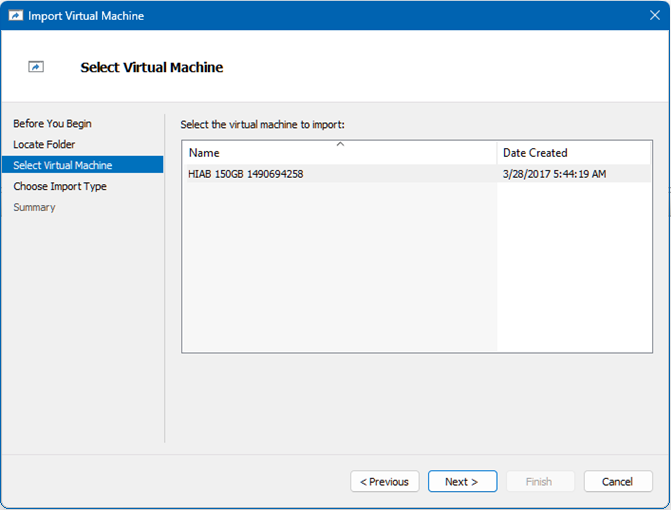
-
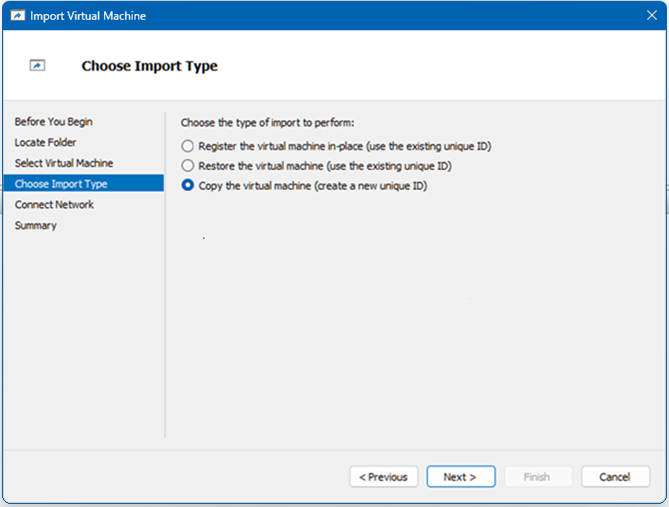
Next, select the Copy the virtual machine (create a new unique ID) option and click Next.
-
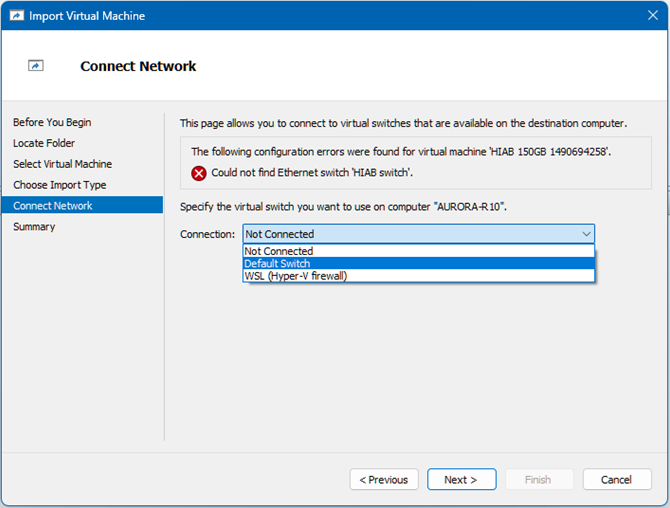
Click the drop-down and select the appropriate switch to provide the HIAB with a connection to the network, then click Next.
-
Lastly, review the Summary and click Finish.
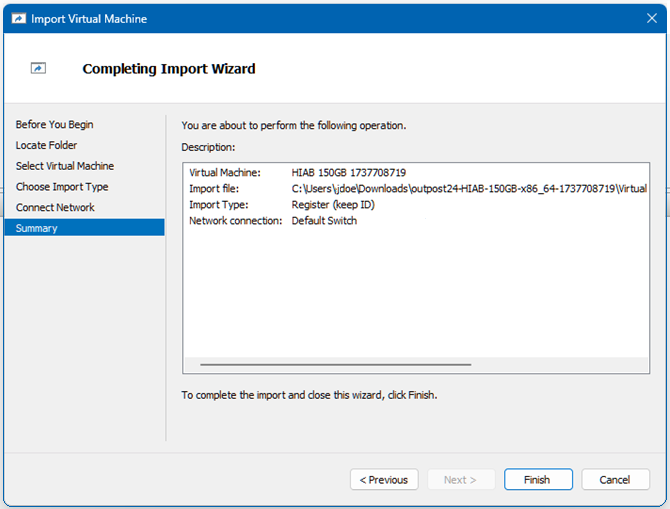
After the HIAB image has been imported, changes can be made such as increasing the memory, increasing the number of CPU’s, etc.