Last Updated: 2025-09-30
Purpose
This article shows how to perform a network scan against multiple assets.
Introduction
Network Scan Against Multiple Assets allows you to run a single scan configuration over different identifiers (such as IPs, hostnames) tied to the same logical asset. This means that assets with multiple endpoints can all be assessed in one go, giving you flexibility in targeting and enabling you to see how changes in configuration affect scan coverage or performance.
Scan Data Preparation
Cloud Credentials
-
Create AWS credentials on the Account/Credentials page.
-
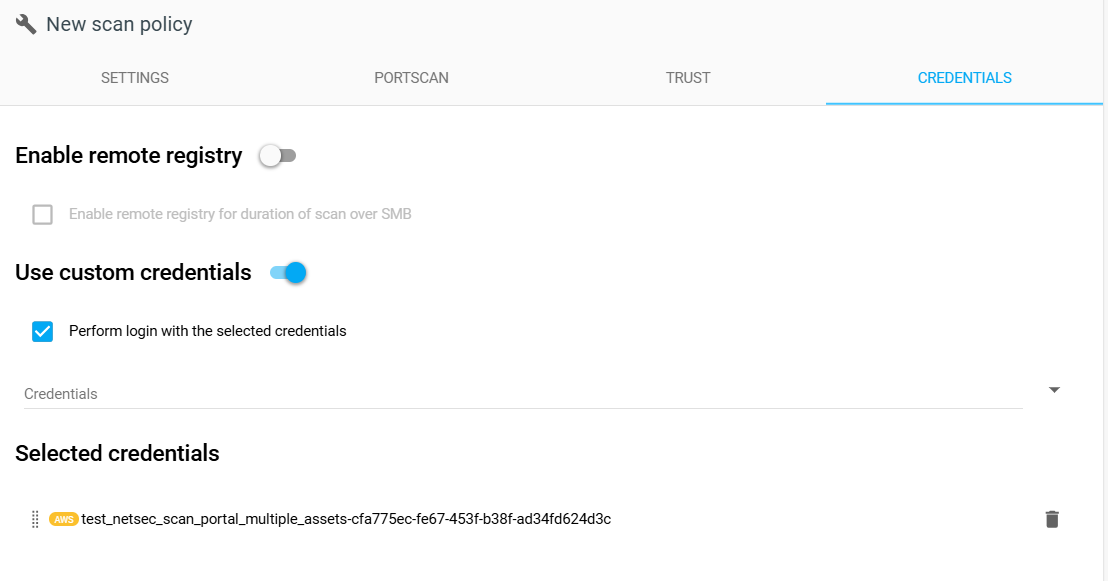
Create a new Scan policy with the credentials to be used in the Network host assessment scan configuration.
Cloud Asset
-
Prepare a cloud asset for scanning. To learn more about discover cloud assets, refer to the Cloud Discovery article.
-
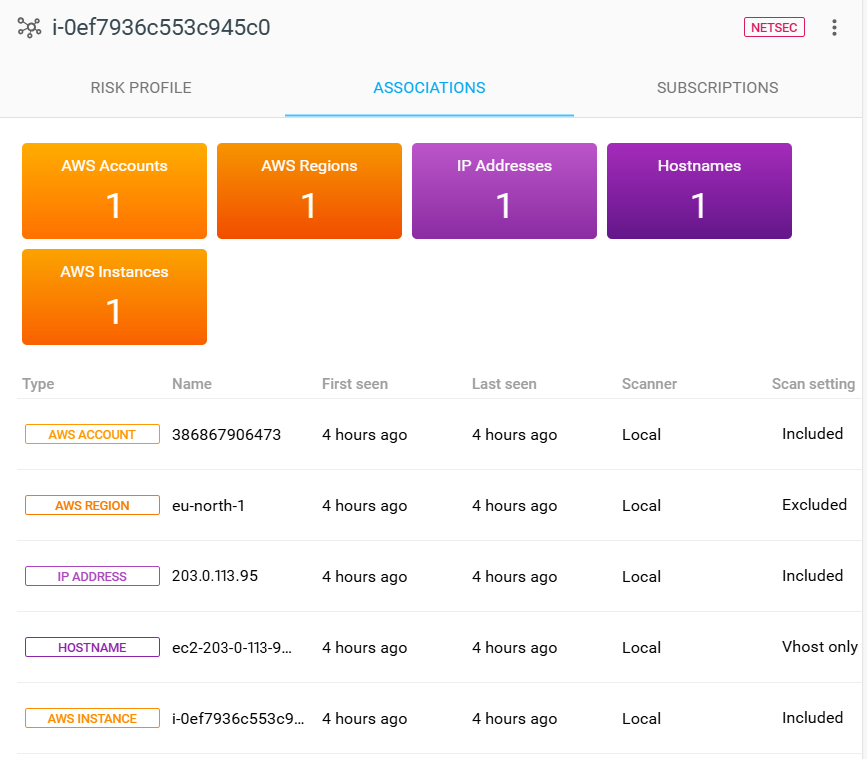
Tag the cloud asset that is discovered in the process of Cloud Discovery mentioned in step 1. This tag will be used in the network scan configuration.
-
Set Scan setting for each asset identifier. Users can target specific identifiers for an asset by including these identifiers and excluding others from a scan. HOSTNAME identifiers have another Scan setting option named Vhost only which allow them to be used only as a Vhost.
Network Asset
-
Prepare a network asset for scanning. To learn more about discover network assets, refer to the Network Discovery article.
-
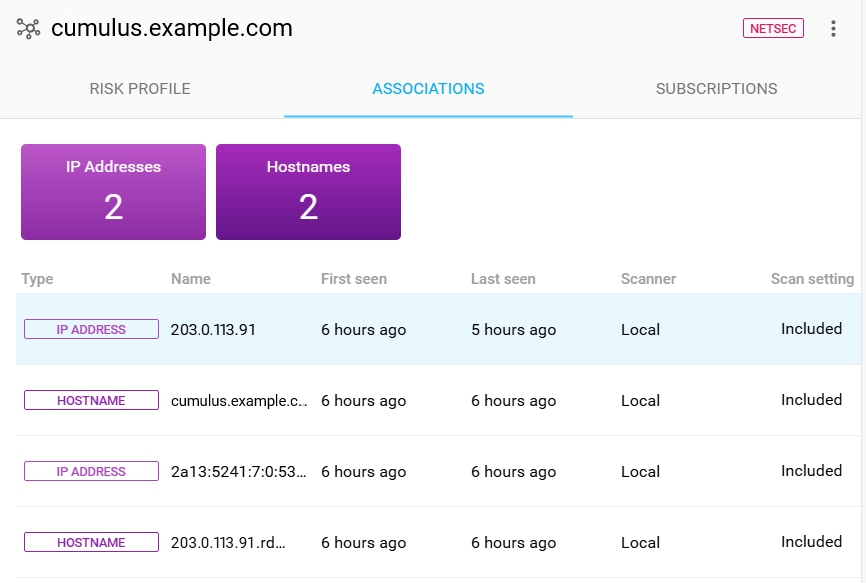
Tag the network asset that is discovered in the process of Network Discovery mentioned in step 1 with the same tag you used for the cloud asset so that the network scan can pick up both the cloud asset and this network asset.
-
Specify which identifiers should be included in a scan against the asset.
Network Scan
-
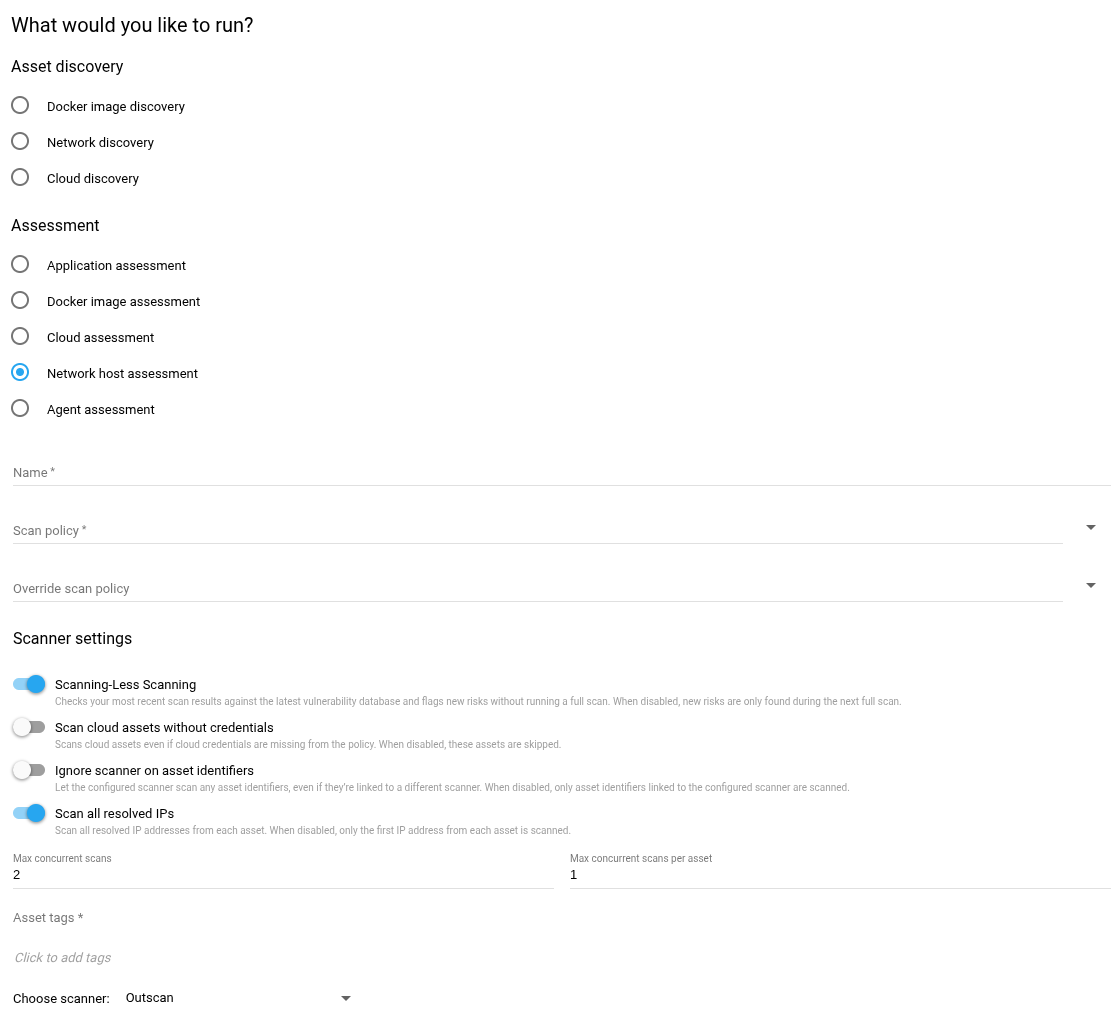
Create a new Network host assessment scan configuration with the created Scan policy and the tag used for the discovered assets.
-
Set the Scanner settings. For better understanding of the settings, please refer to Network Host Assessment. In this specific case, we will tweak the settings as followed:
-
Enable the Scan all resolved IPs option to scan all the IP addresses resolved from assets.
-
Disable the Ignore scanner on asset identifiers option so that the asset associations will only be scanned using scanners that match the specified scanner field. To view the specified scanner for each asset identifier in an asset, click on the asset and check the Scanner column under the ASSOCIATIONS tab.

-
Disable the Scan cloud assets without credentials option so that any assets with no cloud credentials are skipped.
-
Limit the maximum number of concurrent scans by setting the Max concurrent scans to two.
-
Limit the maximum number of concurrent scans against a single asset by setting the Max concurrent scans per asset to one.
-
-
Run the network scan.

-
A NETWORK LOOKUP scan will run before the actual network scans are triggered. This scan will resolve all the IP addresses from the assets and prepare them for the following network scans.
-
Since we opted for the Scan all option, all resolved IP addresses will be scanned. In this case, we have three triggered network scans corresponding to three resolved targets.
-
Related Articles
- Windows 10/Windows 2019 Server
- General Information about SMB/WinRM Scanning
- Windows 8.1
- Scan Blueprint
- How to Test SMB Authentication
- Docker Image Assessment
- Windows 2016 Server
- How to Scan AWS ECR Images
- Scanning-Less Scanning
- Scan Scheduling Errors
- Network Host Assessment
- Core Installation
- Windows 2008 R2 Server
- Scanning Range
- SMB Authentication from OUTSCAN/HIAB