Last Updated: 2024-12-12
Purpose
This article describes how to set up remote SSH access to the text console in the HIAB.
Introduction
The HIAB solution can be set up to allow SSH connections from the client computer to facilitate the setup and configuration remotely. The HIAB is hardened by default and therefore this functionality is not enabled by default. The SSH authentication only allows keys and does not support the use of password authentication.
Remote access to the text console can be useful if the HIAB GUI becomes unavailable, and the remote support requires to be started.
The SSH connection to the HIAB does not provide you with a SSH terminal, only access to the HIAB Console is allowed.
Requirements
-
Verify that the HIAB Server is pingable. If HIAB Server Pingable is set to NO, remote SSH access to the HIAB console is not possible. See the section about Configure UI Management Interface in the HIAB Console document on how to configure HIAB Server Pingable.
-
Verify that the client from which you would like to connect from can connect to the HIAB over TCP port 22.
-
Enable and configure the service according to the information in this document.
-
Access to the program puttygen and the PuTTY terminal.
Configuration
Enable Remote SSH Access
To access the HIAB using SSH, the remote SSH access need to be enabled.
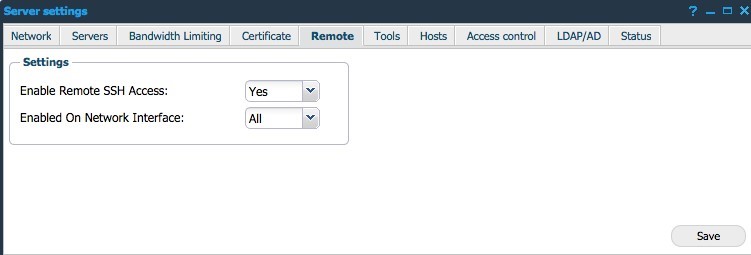
To enable remote SSH access:
-
Navigate to Main Menu > Settings > Server.
-
Click the Remote tab to access settings for SSH.
-
In the Settings section, set Enable Remote SSH Access to yes in the drop-down menu.
-
In the Enabled On Network Interface drop-down menu, select which interface the service should be available on.
-
Click Save and the service will become available.
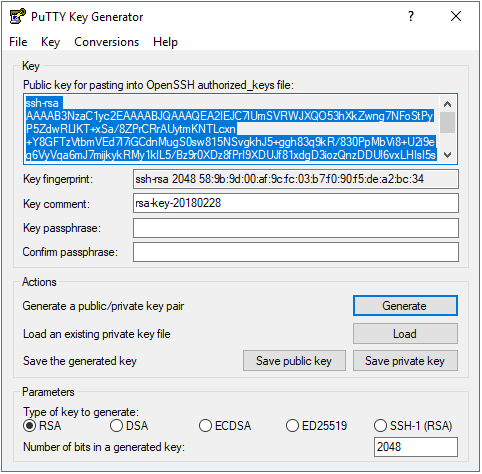
Generating Keys
To connect to the SSH service you need to supply your public key. This is generated in the program puttygen. The required key that you need to supply to the tool is marked in the figure.
-
Store the private key for later use, as it is required when you connect to the service.
-
Copy the public key and store it in a text file on one line. The file can later be uploaded through the upload functionality available in the GUI.
While storing the key, do not use the file generated by the Save public key button in putty key generator. The public key need to be in OpenSSH format.
Adding Generated Key to the GUI
To add new keys:
-
Click New in the Allowed SSH Keys section. The Maintaining Remote SSH Key window is displayed.
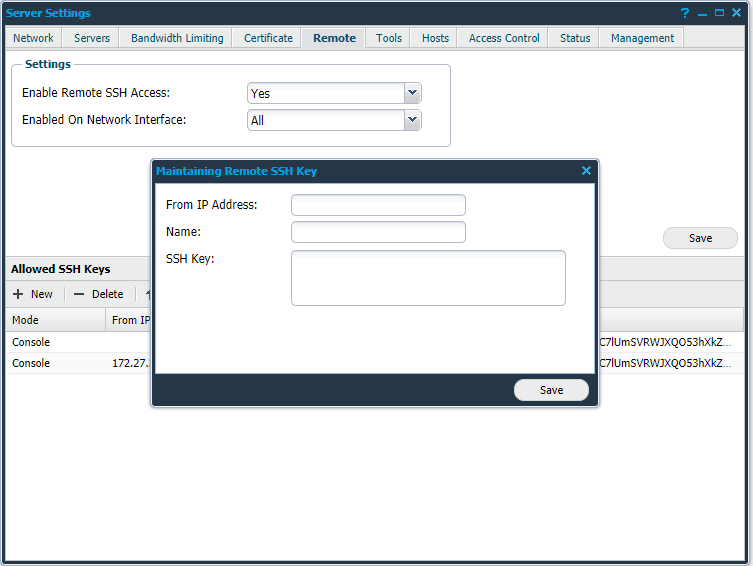
The following options are presented:
|
Option |
Description |
|---|---|
|
From IP address |
The IP address of the remote machine. (Optional) |
|
Name |
Name of the remote host. |
|
SSH Key |
The generated public key of the remote machine. |
-
Enter the name of the remote host.
-
Enter the SSH generated public key.
To remove unwanted keys, click Delete.
Click Upload to upload keys via text file by entering the search path to the file stored previously in the section Generating Keys.
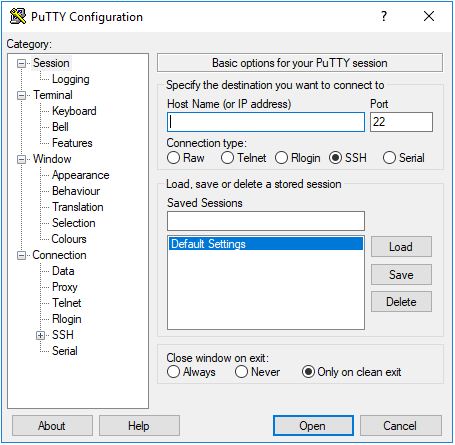
Setting up PuTTY
After adding the SSH keys to the HIAB, the PuTTY console need to be set up.
-
Open the PuTTY and insert the IP-address or Host Name for the HIAB.
-
Click Connection > Data in the Category tree section to the left.
-
The username for the connection is hiab_console. Add the HIAB console username in Auto-login username to be established the connection.

-
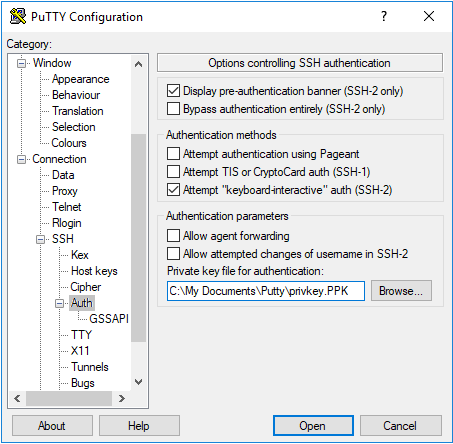
Click SSH > Auth in the Category tree section to the left, and set up PuTTY to use the private key file you stored in section Generating Keys.
-
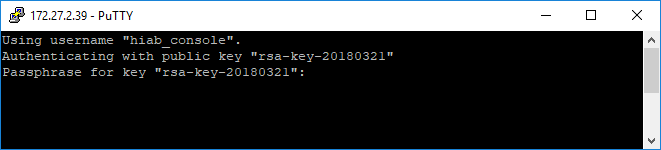
Click Open to start the connection.
-
Enter the Key Passphrase you entered in the PuTTY Key Generator when you saved your private key.
If you stored the private key without passphrase, this step is skipped and you will be logged on directly.
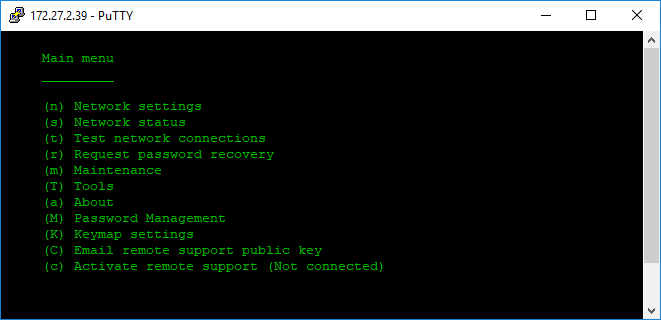
If the file has been uploaded without any errors into HIAB and you have defined the user name in PuTTY, then you are now able to connect to the HIAB appliance with the use of the private key in PuTTY.
Related Articles