Last updated: 2023-08-17
Purpose
This article provides users with an overview of the account settings for OUTSCAN and HIAB.
Introduction
The Account Settings feature in OUTSCAN and HIAB provides a centralized interface where administrators and main users configure account-level information, security policies, and system preferences. From Main Menu → Settings → Account, users can manage personal account details such as contact information, language, and login credentials, as well as configure session timeouts and enable two-factor authentication. The module also includes a Security Policy section where administrators can enforce password complexity rules, authentication methods, CSRF protection, and login restrictions based on IP ranges. Additional capabilities include managing application access tokens for API authentication, defining custom attributes used across users, targets, and reporting, enabling optional features such as the IP Monitor application (HIAB), and reviewing license information such as available scans and allowed targets.
Organizations should use the Account Settings feature to maintain secure and controlled configuration of user access and platform behavior. By enforcing password policies, restricting login sources, enabling multi-factor authentication, and protecting against CSRF attacks, administrators can strengthen the security posture of the platform and reduce the risk of unauthorized access. The ability to define custom attributes and manage licensing also improves operational visibility and customization, allowing teams to tailor the platform to their organizational structure, reporting requirements, and scanning capacity.
Account
To access the Account Settings module, go to Main Menu > Settings.
In the Account tab, the account Details and Login for a user can be edited.
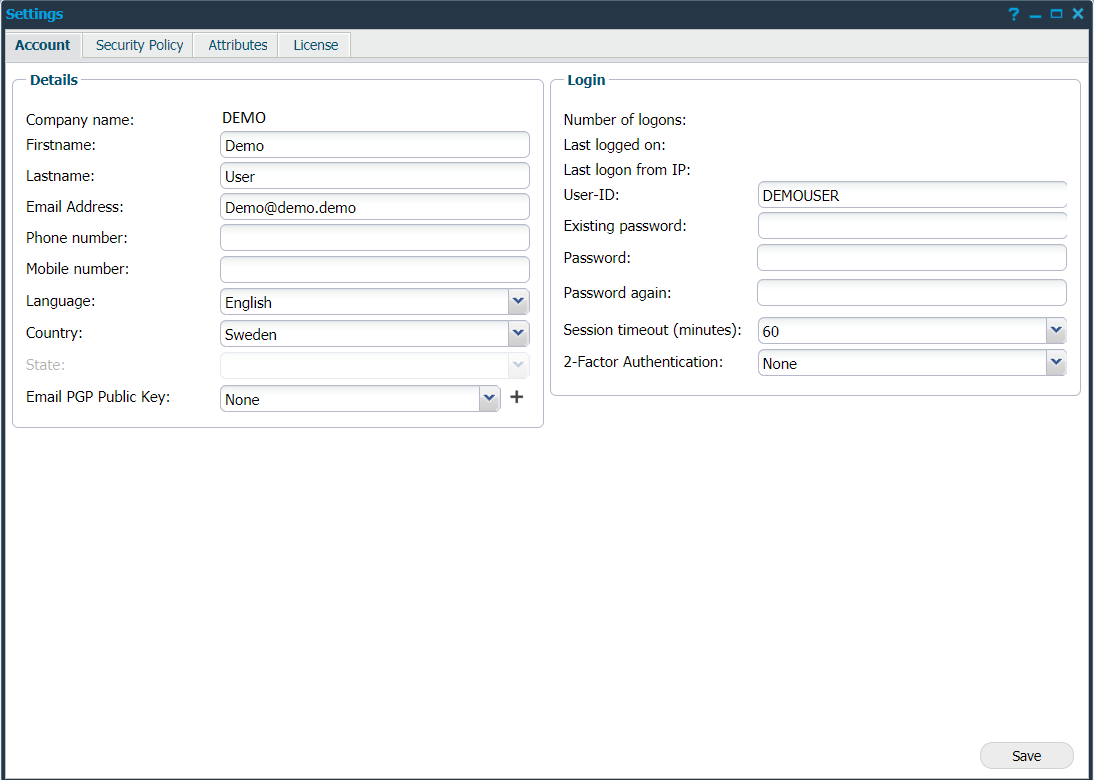
Details
The Details area contains personal information such as name, email address, phone number, language and location information.
|
Option |
Description |
|
Company name |
Displays your company name. |
|
First name |
Provide your first name. |
|
Last name |
Provide your last name. |
|
Email address |
The email address that you wish to bind to your account. This email address will receive notifications, recovered passwords, and update notes. |
|
Phone number |
Provide the phone number you wish to bind to your account. Phone numbers are entered without any leading + or 0 and a minimum of six digits. Format:<country code><phone number> |
|
Mobile number |
Provide the mobile number you wish to bind to your account. Phone numbers are entered without any leading + or 0 and a minimum of six digits. Format:<country code><phone number> |
|
Language |
The language that you would like the user interface to use. |
|
Country |
Your country location. |
|
State |
Select your state if applicable. |
|
Email PGP Public Key |
The email can be encrypted with a PGP public key. Default options: None, Unencrypted To add a public key file:
If a PGP public key is uploaded on Portal, the key string is saved instead of a key file, the key is then displayed on Classic UI as Users using Classic UI can discard or override this Portal key by selecting Unencrypted or another key file in the drop-down.
|
Login
The Login area contains account statistics, including the number of times that the account has logged in. It also allows you to change the password, and the User-ID, which is used to log in to the service.
The main user can also set the Session timeout interval. If the timeout is specified, a session will timeout if the user is inactive for the specified number of minutes. This includes the main user.
Two-factor authentication can be enabled, and the mode of authentication is selected from here. Either Mobile Security Code or Google Authenticator can be used for authentication. The means used for authentication can be limited, depending on the options configured for two factor authentications under Security Policy tab.
When Google Authentication is selected, you are asked to enter the credential ID which is used to set up the account.
|
Option |
Description |
|
Number of logons |
Displays the total number of logons. |
|
Last logged on |
Displays the date of the last logon. |
|
Last logon from IP |
Displays the IP of the last logon. |
|
USER-ID |
Displays your user ID. |
|
Existing Password |
If you wish to reset your password you must provide the current password for the account in this field. |
|
Password |
Type the password that you wish to use for this account. |
|
Password Again |
Confirm the new password by typing it again. |
|
Session Timeout (minutes) |
For how long the system is allowed to be idle before the session times out and you are logged out. |
|
2-Factor-Authentication |
Choose between the following in the drop-down menu:
Some network providers do not process incoming text messages where the sender information is set, this is a known issue with some larger providers in Turkey and Malaysia but may occur in other countries as well. In those cases, the best option is to use the Google Authenticator. The feature is provided as an enhancement option.
|
Security Policy
In the Security Policy tab, several security policies can be edited such as:
-
Password Policy
-
Method Enforcing
-
CSRF Validation
-
Login Policy
Application Access Tokens can also be managed.
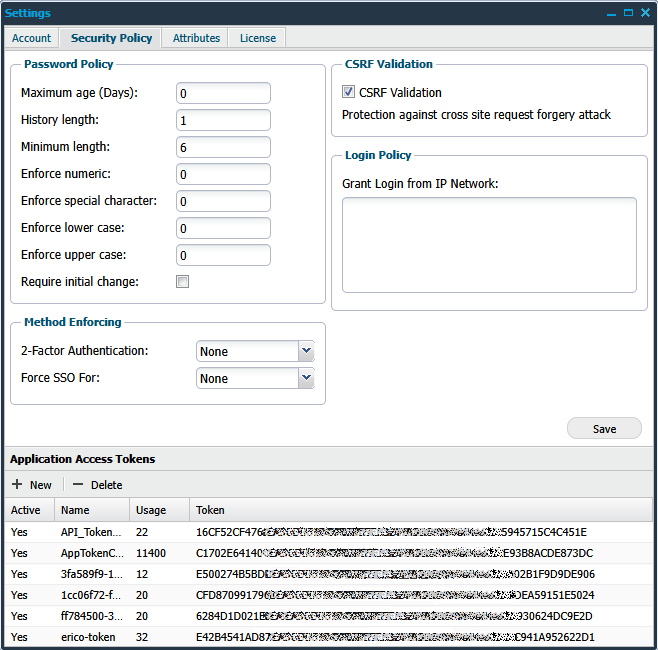
Password Policy
The Password Policy area is used to set up a policy regarding password complexity. Following fields are available to use to increase or decrease password security:
|
Option |
Description |
|
Maximum age |
Used to set for how long a set password is valid before it expires and the user has to set a new password. |
|
History length |
Determines how many entries the system will save to confirm that the entered password has not been used before. |
|
Minimum length |
Set the minimum length of the password. |
|
Enforce numeric |
Determines the number of digits that the password must contain. |
|
Enforce special character |
Determines the number of special characters a password must contain. The special characters are: `~!@#$%^&*()-_=+[{]}\\|;:'\",<.>/?. |
|
Enforce lower case |
Determines the number of lower case characters that the password must contain. |
|
Enforce upper case |
Determines the number of upper case characters that the password must contain. |
|
Require initial change |
Force the newly created user to change the password upon the first login to the system. |
When changing the password policy, the existing passwords that does not match the new policy will not be subject to change, the only change that affects all existing passwords is the Maximum Age.
The new setting of the Maximum Age will therefore be applied even for existing passwords.
Method Enforcing
The Method Enforcing area determines the type of method used for authentication.
|
Option |
Description |
|
2-Factor Authentication 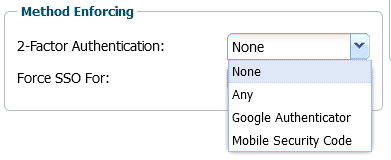
|
The available options are:
|
|
Force SSO For: 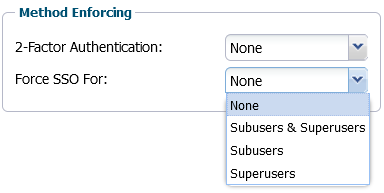
|
Force use of Single Sign On for:
|
CSRF Validation
If enabled, your account will have protection against cross site request forgery attacks. The reason for why this can be disabled is due to older integrations which do not have support for protection against cross site request forgery attacks.
Do not disable this if not necessary.
|
Option |
Description |
|
CSRF Validation |
Protects against Cross Site Request Forgery attacks. Only disable for older integrations which do not have support for protection against cross site request forgery attacks. Default value: Enabled |
Login Policy
The Login Policy area is used to grant login access from a specific network range.
Here you can define multiple network ranges from which the users will be allowed to log in. If a user supplies the correct credentials but is not located within the granted range, their access will be denied.
|
Option |
Description |
|
Grant Login from IP network |
Multiple entries separated by a new line can be entered in the following formats:
|
Application Access Tokens
The Application Access Tokens are keys that is generated and can be used instead of username/password. The key can be copied and sent into the request as the parameter APPTOKEN using the API.
See Access Tokens for more information.
The Application Access Tokens area lists the applications using access tokens.
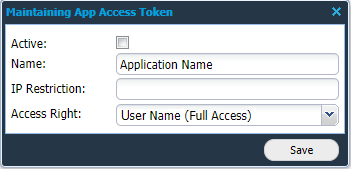
Clicking on the + New button will display the Maintaining App Access Token window.
|
Option |
Description |
|
Active |
Checking this box marks the token as active. |
|
Name |
Indicates the name of the application. |
|
IP Restriction |
Restricting the IP address used by the application. |
|
Access Right |
Indicates the type of access right. |
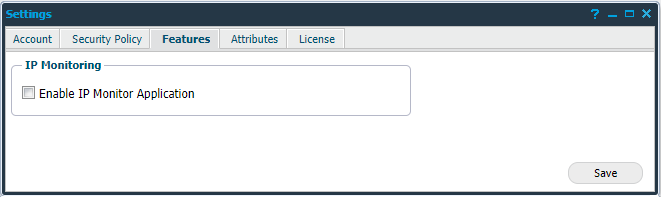
Features (HIAB only)
When the Enable IP Monitor Application is enabled, an application is available in the menu which can be used to determine if a target goes online or offline.
|
Option |
Description |
|
Enable IP Monitor Application |
Check this box if you want to enable IP Monitor Application. Default value: Disabled |
Attributes
Attributes in Outpost24 store structured metadata for assets and users, enabling classification, filtering, grouping, and reporting across the platform.
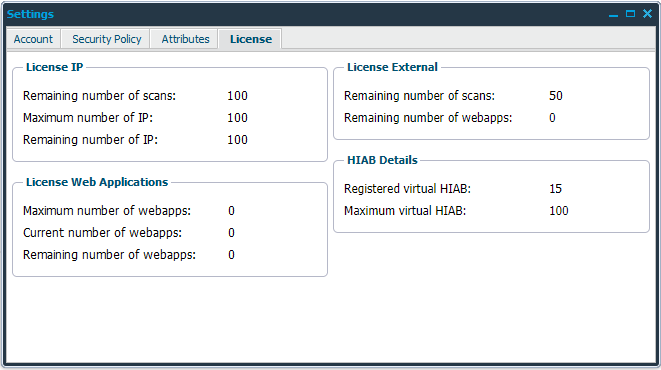
License
In the License tab, the remaining number of scans on the account can be seen, together with the maximum number of targets that can be maintained in the system.
Note the difference layout between OUTSCAN and HIAB.
HIAB
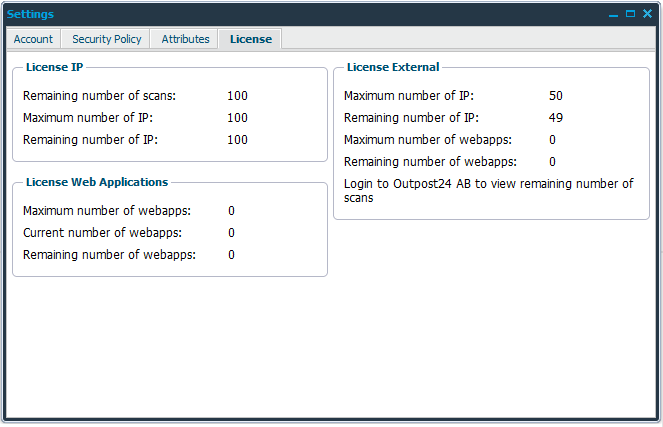
OUTSCAN
Related Articles