Purpose
This document describes how to modify the risk level for a specific finding/vulnerability.
Introduction
With the Change Risk function, the risk level for a specific finding/vulnerability can be modified.
Any updated risk level is displayed in italics in the portal interface.
Changing Risk Level
To change then risk level:
-
Go to Main Menu > Netsec > Reporting Tools.
-
Select a group in Target Group.
-
In the Findings tab, click on a finding to select it. Multiple findings can be selected by pressing the CTRL or SHIFT key.
-
Right click on the finding and select Change Risk.
-
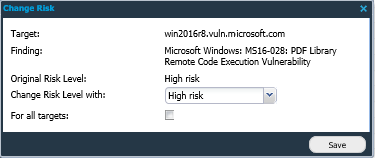
The Change Risk window is displayed.
-
Click Change Risk Level with: and select the risk level.
-
High Risk
-
Medium Risk
-
Low Risk
-
Information
-
Original Risk Level
-
Selecting the Original Risk Level reverts the risk level back to the original state
-
To change the risk level for all targets, select the For all targets check box.
-
Click Save.
Now every time a scan runs that finding is picked up as the selected risk level.
Related Articles