Last updated: 2026-06-15
Purpose
This article describes Workflows in Scanning.
Technical Preview
This article contains parts that are technical previews of features that is currently under development. These features may be hidden behind a feature flag.
Introduction
The Workflows feature enables users to automate and sequence multiple scan types, such as network discovery, vulnerability assessments, and application scans, followed by reporting. This structured approach ensures that findings from one scan can inform subsequent scans, enhancing the efficiency and relevance of the security assessments. By configuring workflows, organizations can streamline their vulnerability management processes, reduce manual intervention, and maintain a consistent and repeatable scanning strategy. The workflow setup is facilitated through a step-by-step wizard, allowing for customization and flexibility to meet specific security objectives.
Workflows allow you to run several distinct types of scans sequentially, as an example, Discover your network assets, then run a Network assessment on those discovered hosts, then run an Application (Scale) scan on those assets where web services were found, and finally schedule a Report to be delivered on the Findings of the scan.

A workflow can be useful when several different scan types are needed, but the order of the scans is important. A workflow allows the findings from the previous scan element to influence the next.
For more information on how to set up the different discovery scans and assessment scans, see Discovery Scan Configurations and Scan Assessment Configuration.
Requirements
It is assumed that the reader has basic access to the OUTSCAN/HIAB account with an Appsec, or Cloudsec subscription.
Create a Workflow
To create a workflow:
-
Navigate to Configuration > Workflows in the Main Menu.
-
Click on the blue Create new Workflow button in the action bar above the table.
-
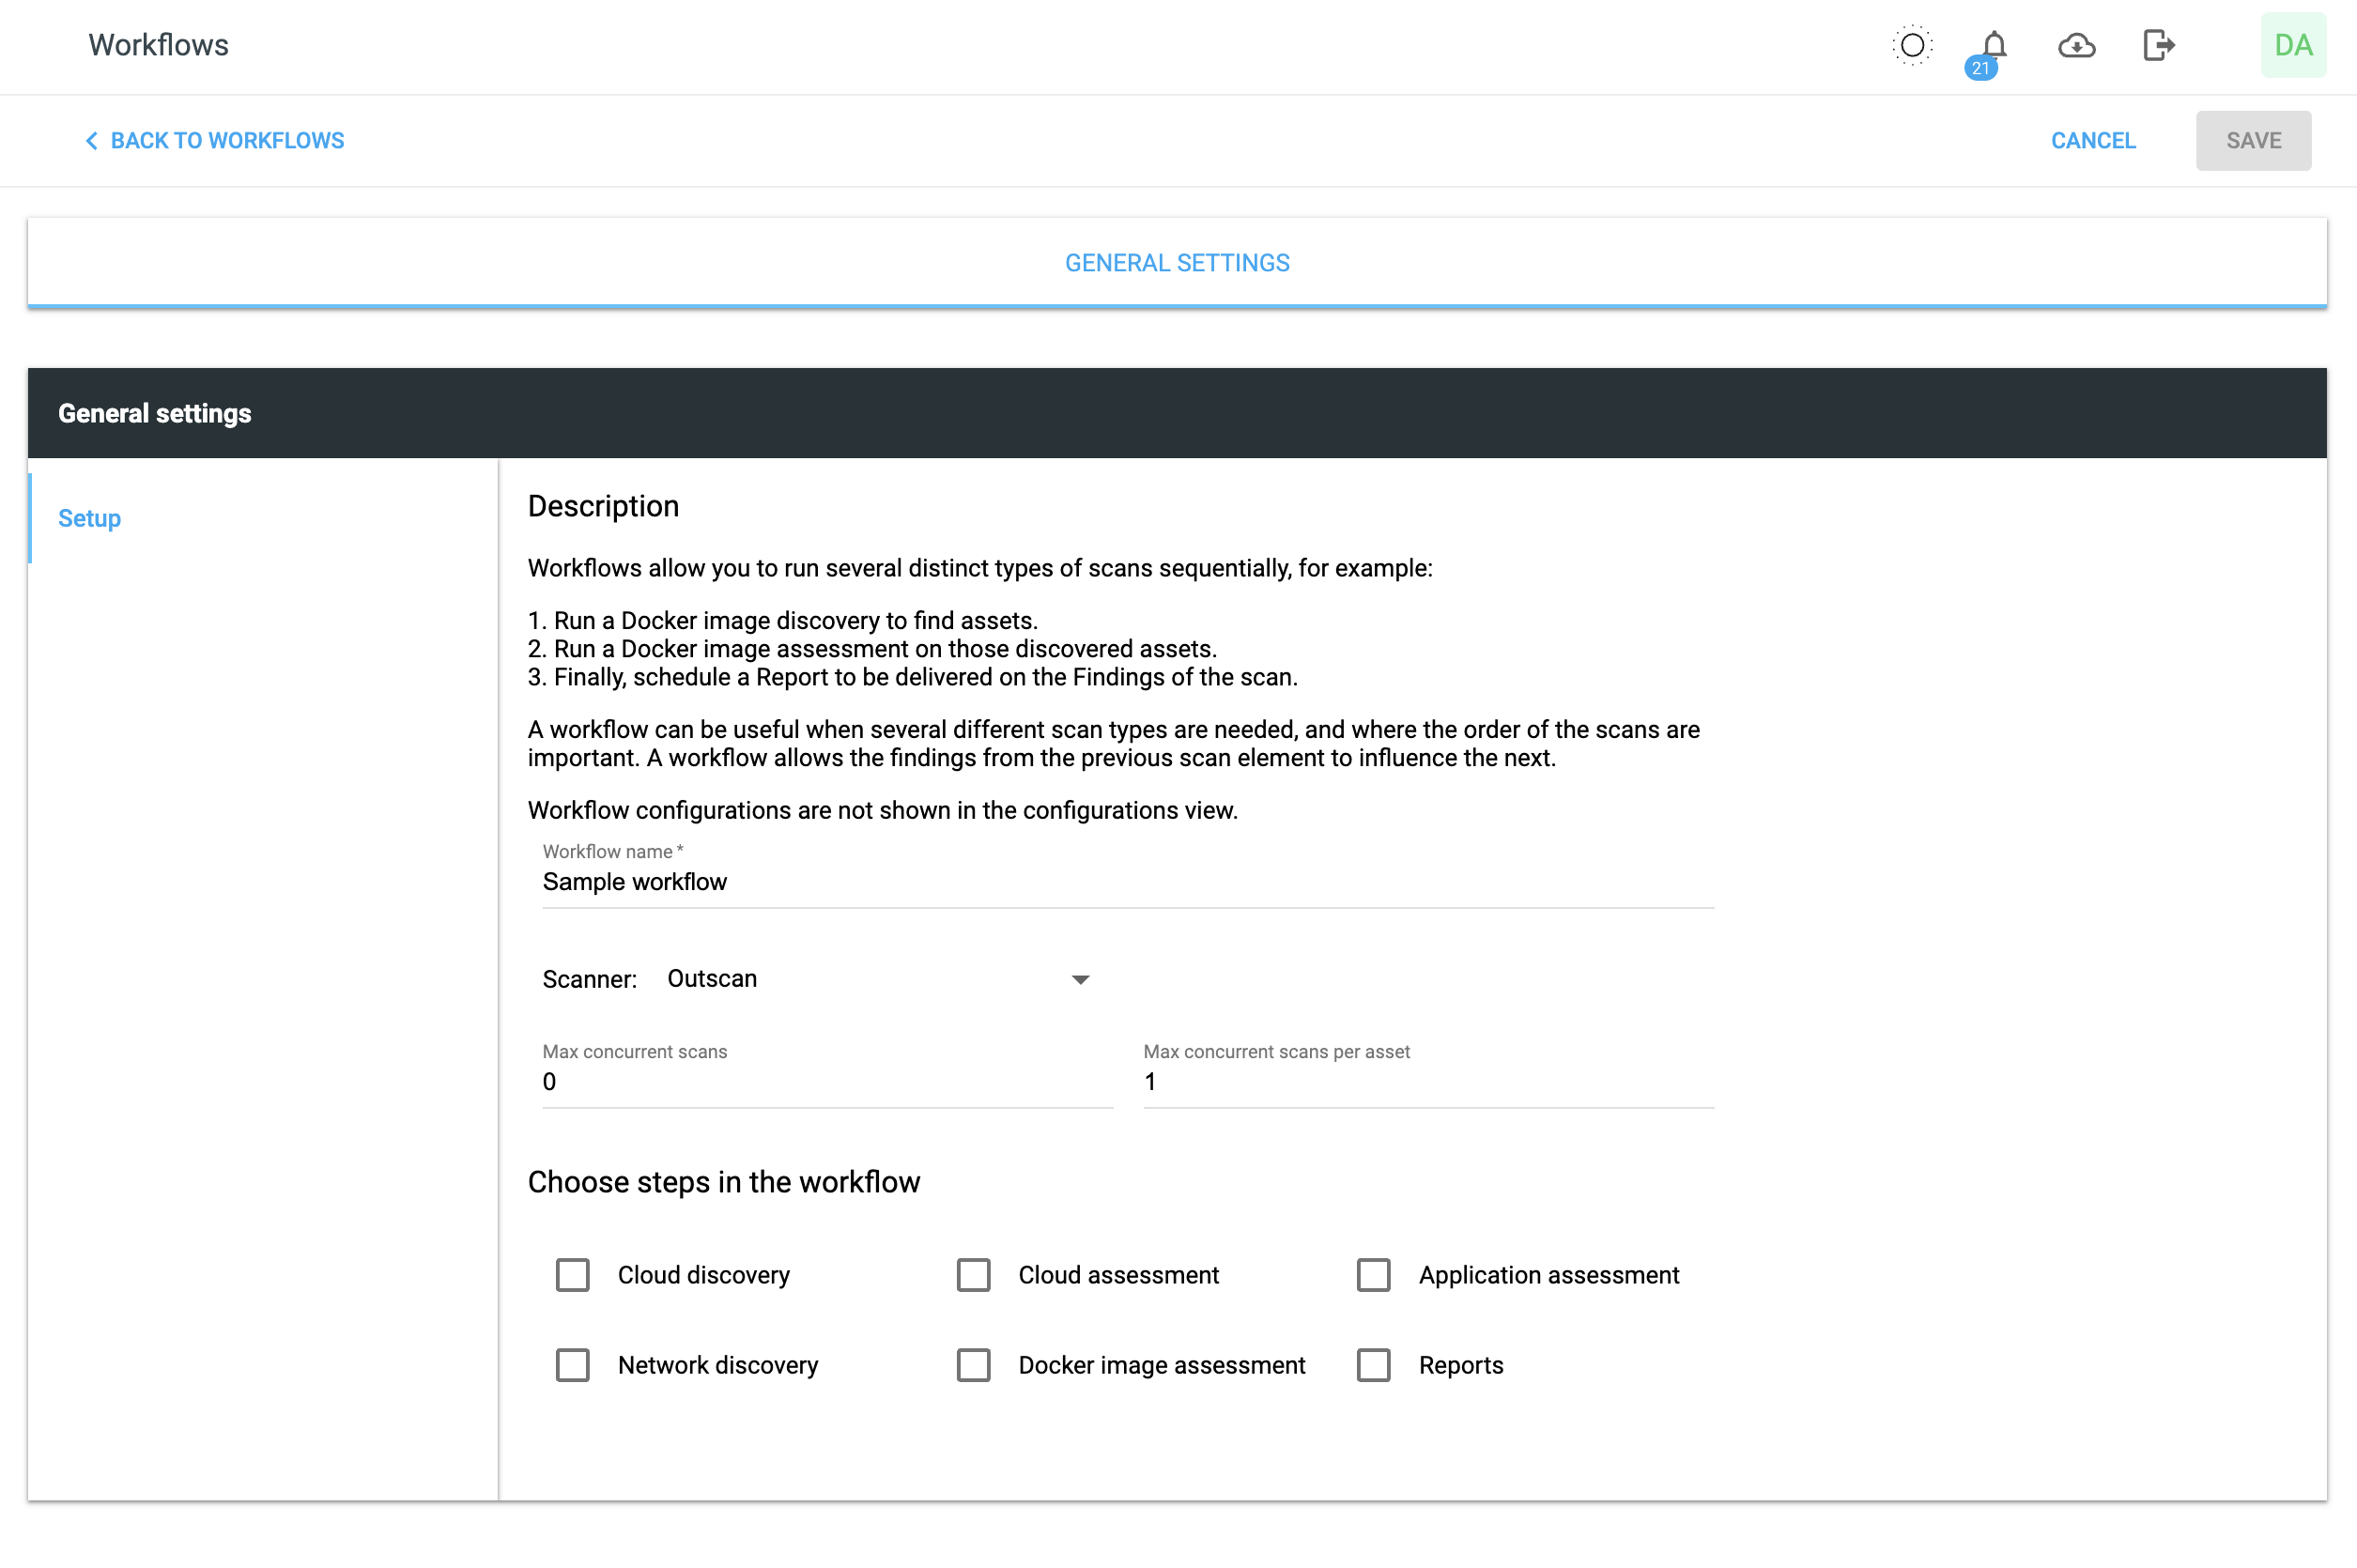
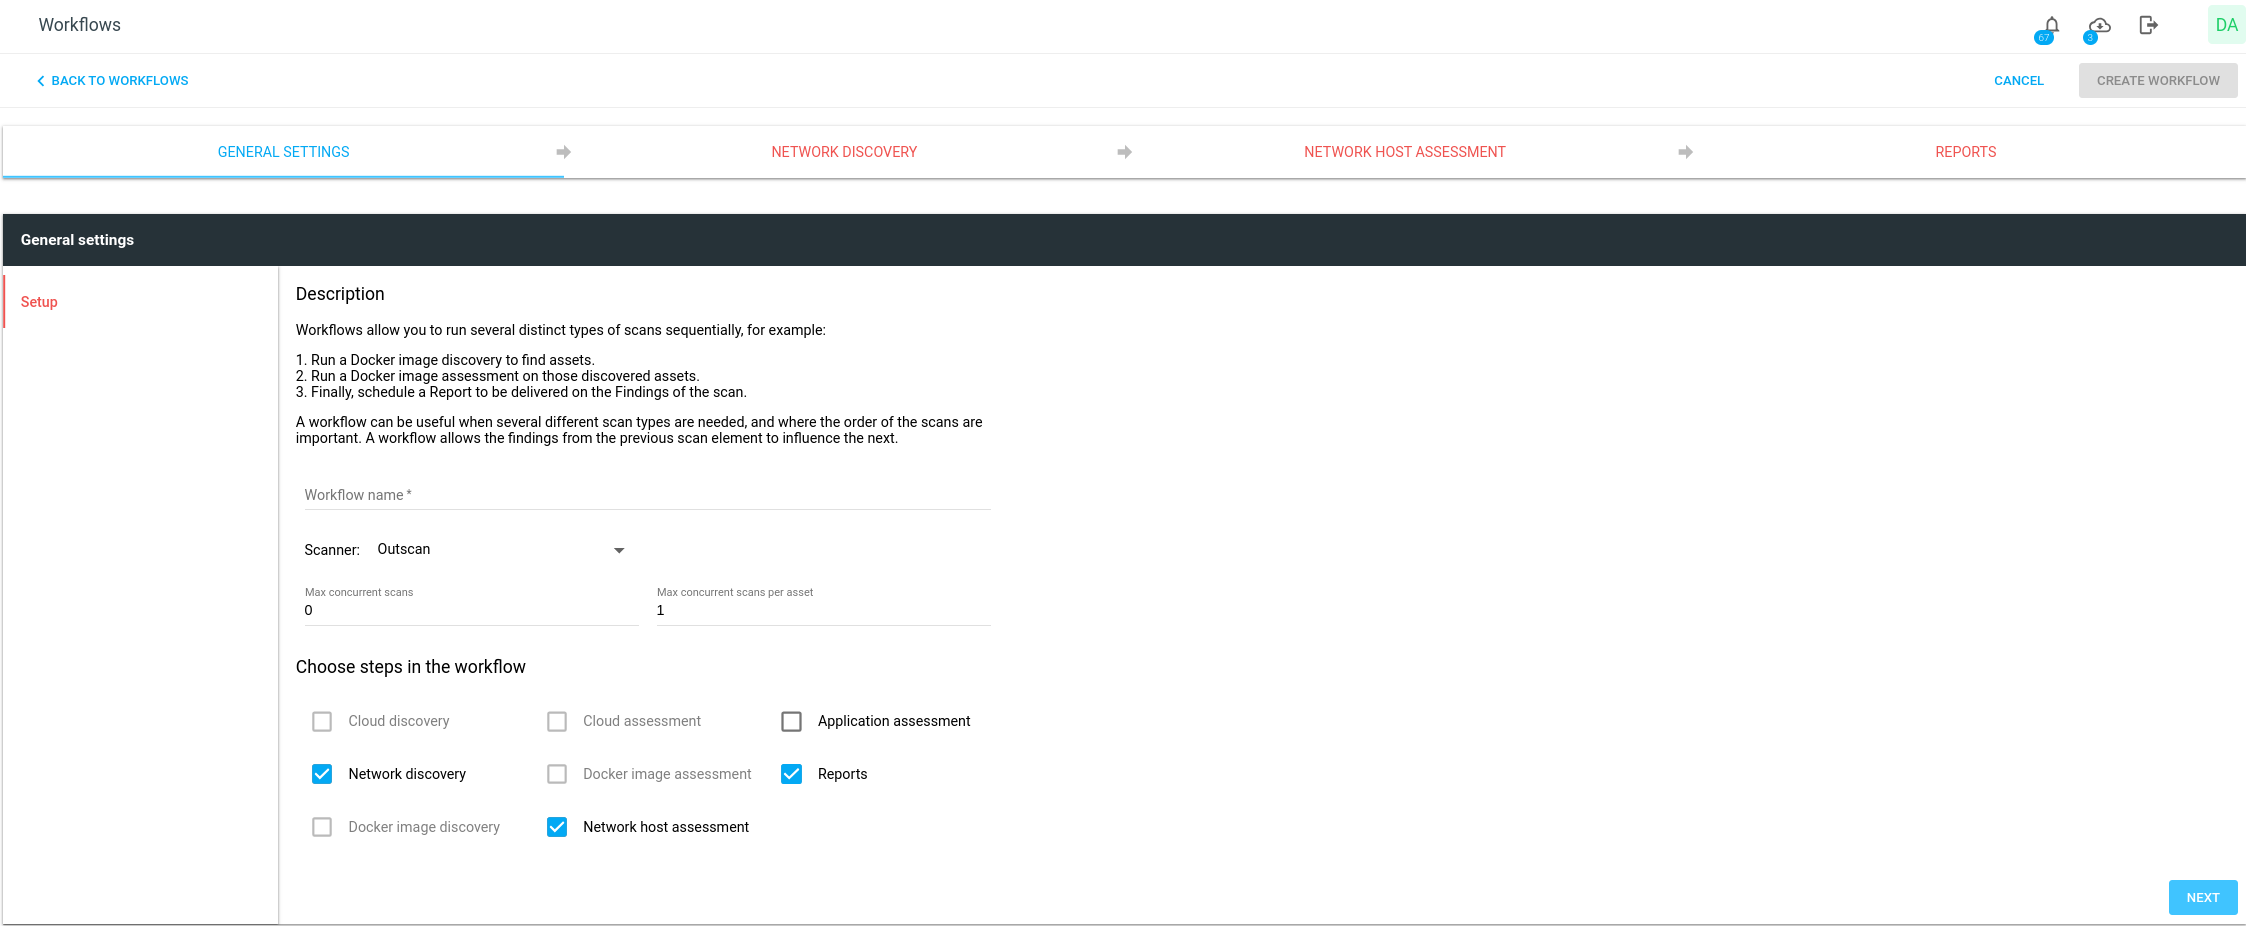
A wizard for configure a new workflow is displayed. In General settings, enter the name for the workflow and optionally change which scanner to use.
When selecting ARN credentials for the workflow, the scanner selection drop-down will be hidden and set its value from the previous step. A notification is displayed at the bottom stating "You can't have both ARN credentials and a remote scanner. The scanner has been reset to the default one and the drop-down is hidden."
When selecting non-ARN credentials, a notification will be displayed saying "Scanner selection has been reverted."
-
If your workflow contains Cloud assessment
You cannot choose scanner, Outscan is forced. -
If the workflow contains at least one step that is from the following types
- Cloud discovery
- Network discovery
- Network host assessment
- Application assessment
You can choose Outscan as scanner. -
If your workflow contains a step of type “Application assessment”
You can choose a HIAB scanner that is of type “Appsec” -
If the workflow contains at least one step that is from the following types:
- Cloud discovery
- Network discovery
- Docker image discovery
- Docker image assessment
- Network host assessment
You can choose a HIAB scanner that is not of type “Appsec”
-
The Max Concurrent Scans field sets the maximum number of scans that can run at the same time. Set the value to 0 for no limit.
-
The Max Concurrent scans per asset field determines how many scans can concurrently run against a single asset. Set the value to 0 disables this restriction.
-
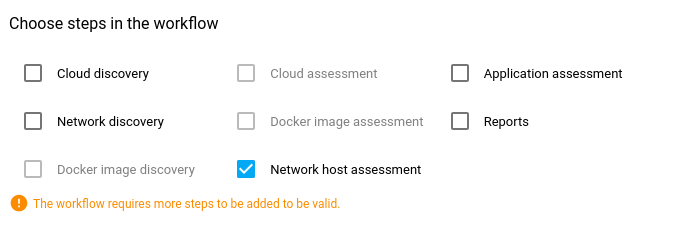
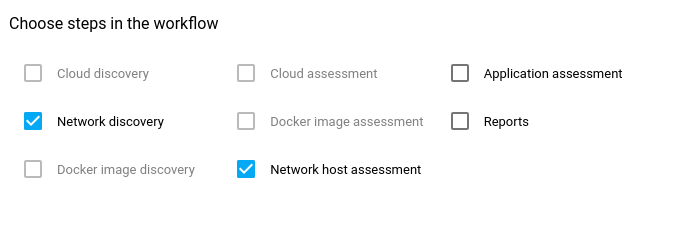
To add a scan configuration to the workflow, click one of the check boxes in the section Choose step in the workflow, for example Network host assessment. Some of the check boxes will be disabled and some will be enabled, indicating which scan configurations that are valid to combine with the selected one(s).
-
The warning The workflow requires more steps to be added to be valid is shown until the minimum required steps are selected.
-
For each selected step a corresponding tab will be added to the wizard. The tabs will be red indicating that it needs further input. To navigate to a tab, either click Next button or the tab itself.
-
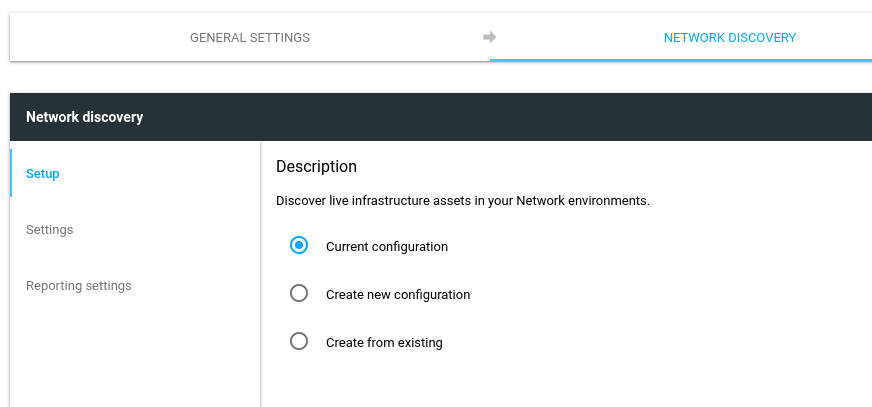
The scan configuration tabs consists of sub steps that are listed in the left panel. Depending on the type of scan there might be several sub steps. The sub steps are disabled by default, except for the first Setup sub step. To activate the sub steps to further configuration, select one of two radio buttons:
- Create new configuration – the Settings sub step needs to be filled in from scratch.
- Create from existing – when selected, a list with existing scan configurations is displayed. By selecting a row, the Settings sub step is filled in with the values from the selected configuration.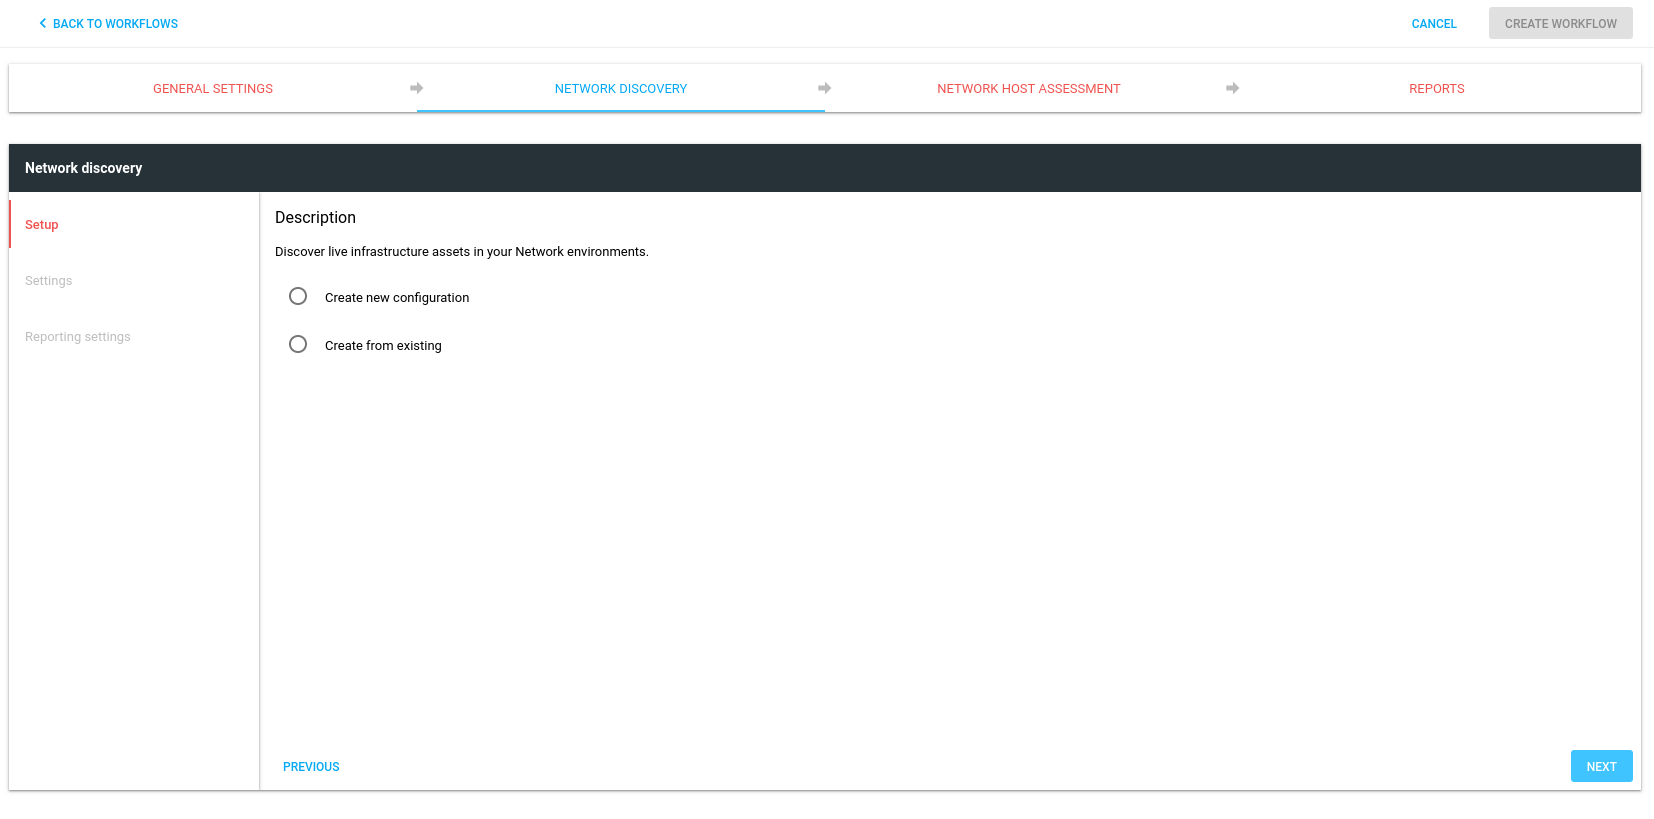
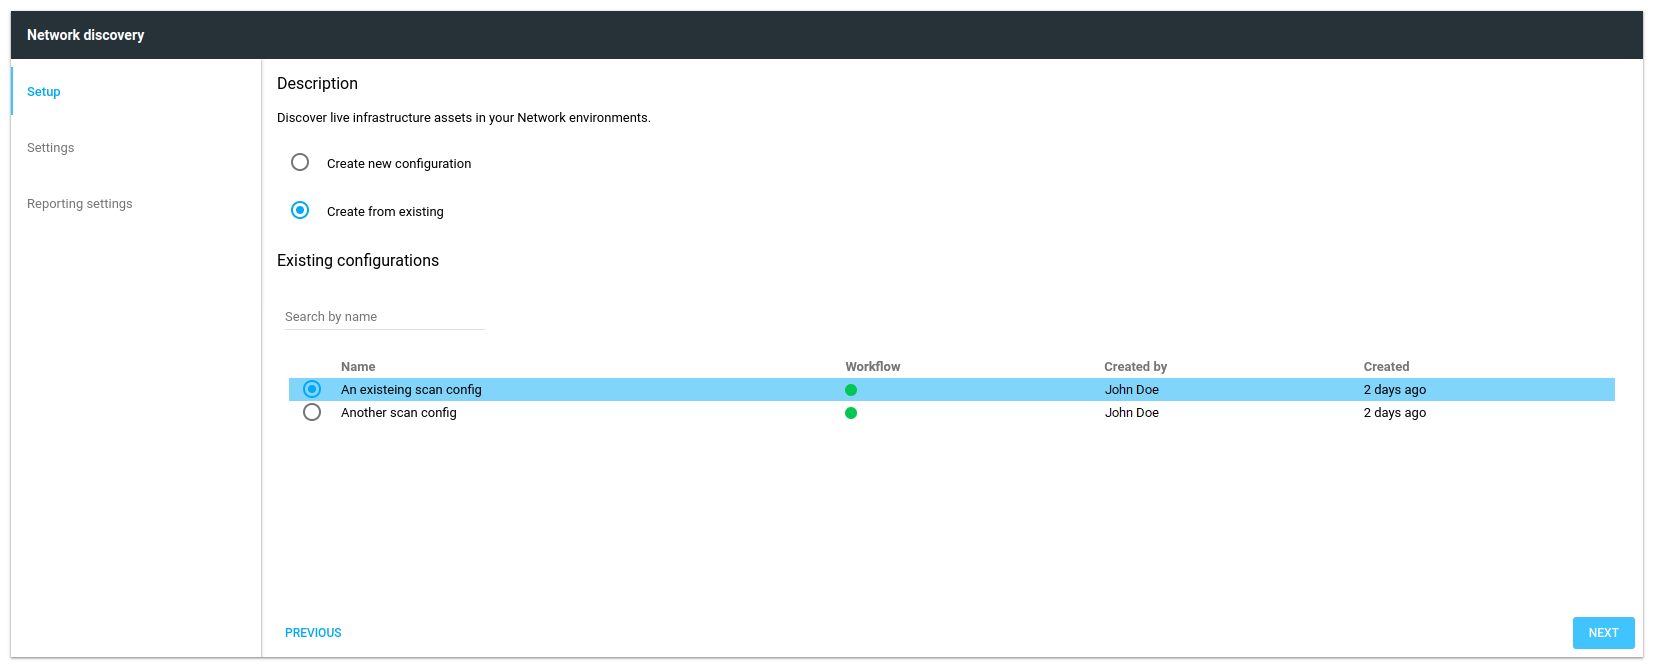
In the Workflow column, a green dot indicates a workflow, and a grey dot indicates a normal scan configuration.
-
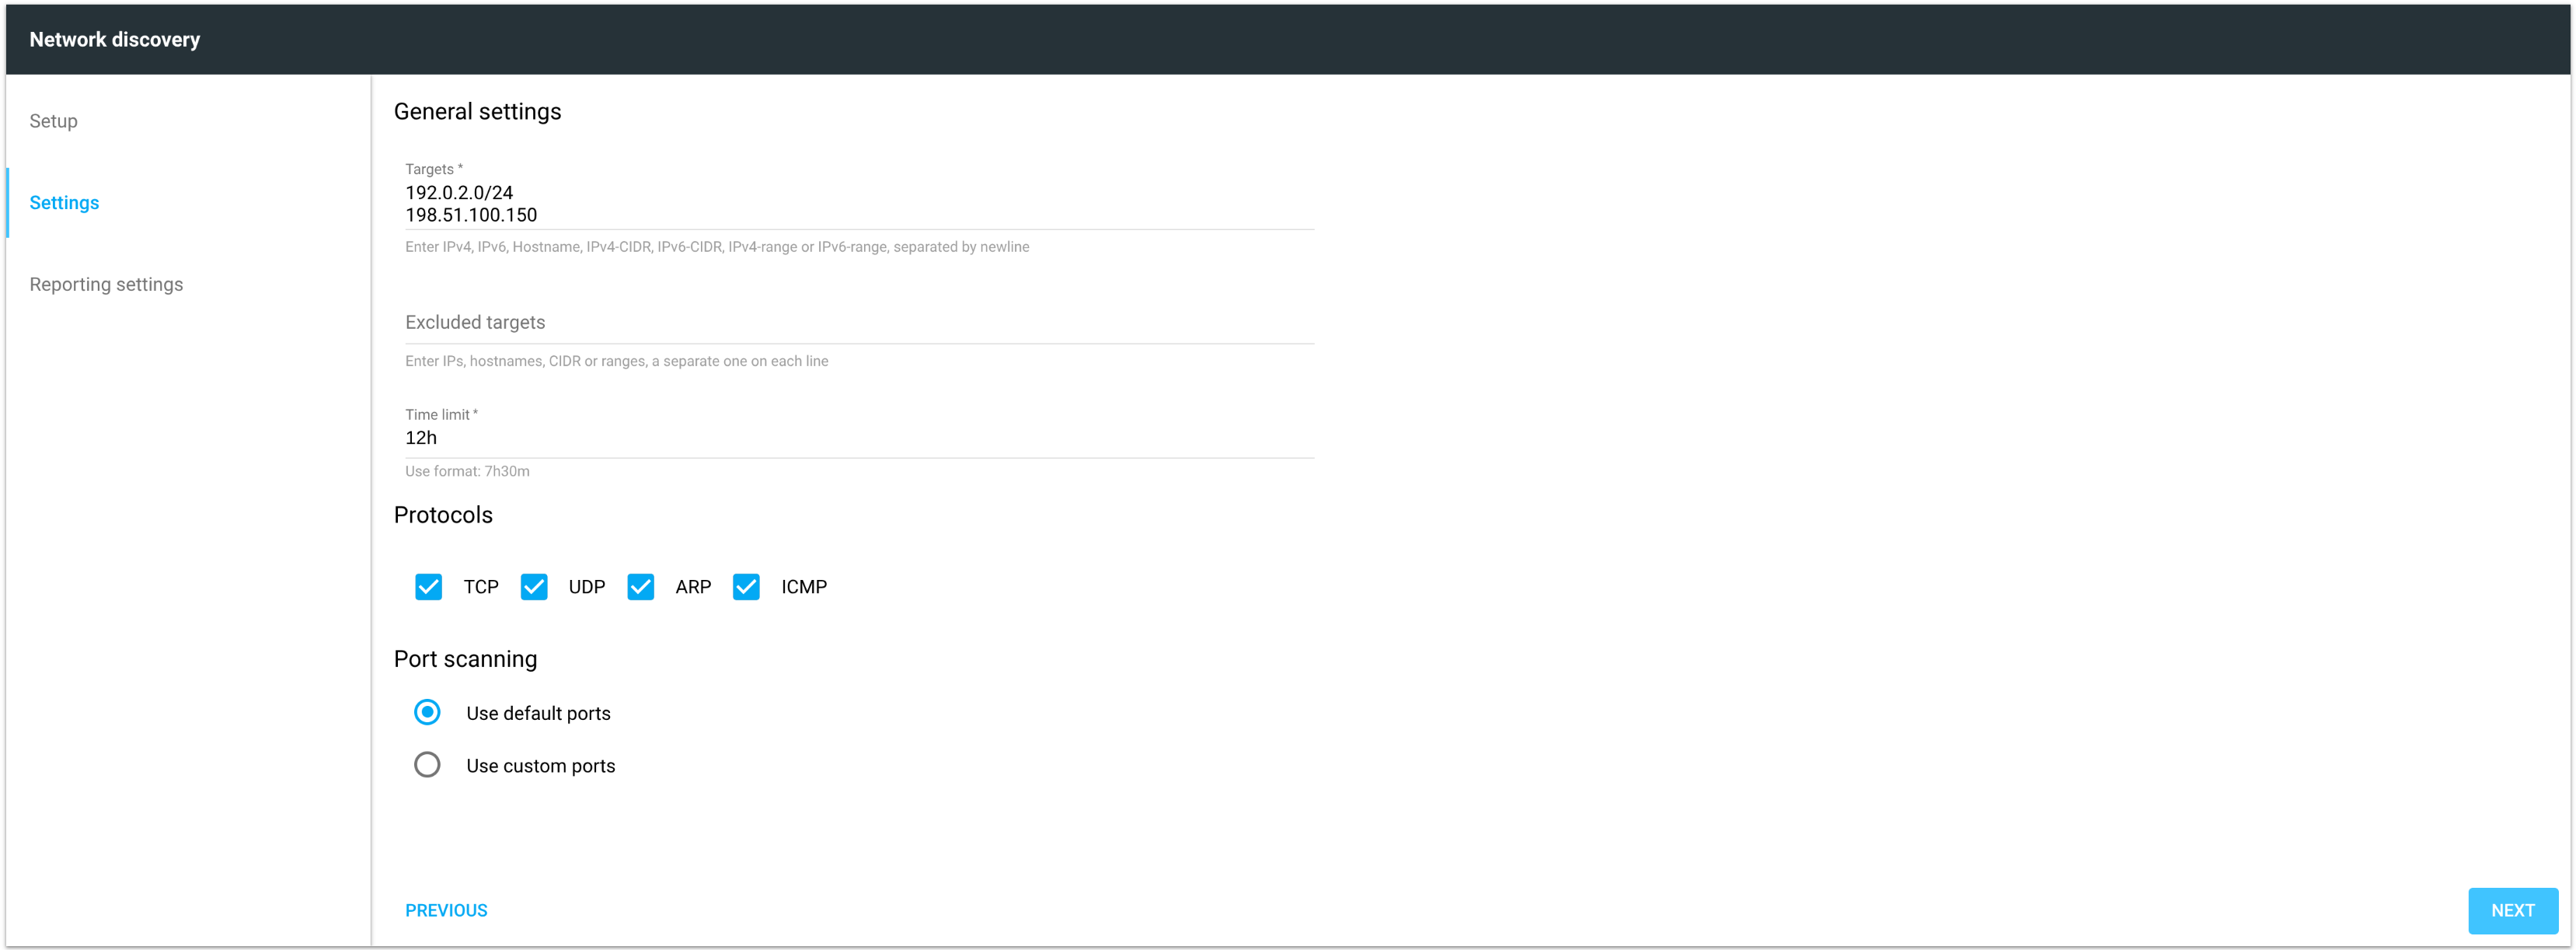
To fill in the Settings or to change any of the existing values, click Next in the lower right or click Settings sub step in left panel. The sub step may be red indicating that the step is invalid due to required field is not filled in.

-
When configuring a discovery scan it is possible to set tags that are applied to the found assets, there are two different ways the tags can be applied. If a Discovery has not been selected, this step is omitted.
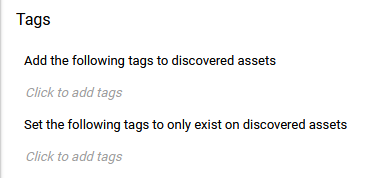
- The tags given in Add the following tags to discovered assets is added to all discovered assets.
- The tags given in Set the following tags to only exist on discovered assets is removed from all assets, and added to all assets found by the discovery.
Note that this feature removes that tag from all existing assets you have and ads it to the discovered assets, so make sure to not do this for tags you want to be using across different configurations!
-
With the advanced report filtering option, you can perform a discovery scan but ignore traffic matching the filter by adding Berkeley Packet Filter (BPF) expressions.
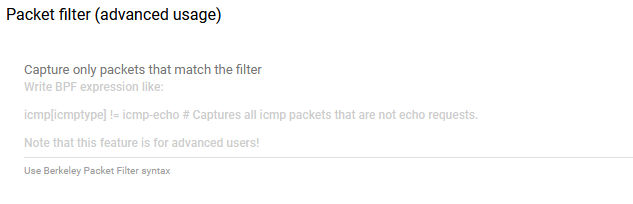
Refer to https://biot.com/capstats/bpf.html for syntax.
Also see Discovery Scan Configuration for more information on Discover Tagging and Packet filter use cases. -
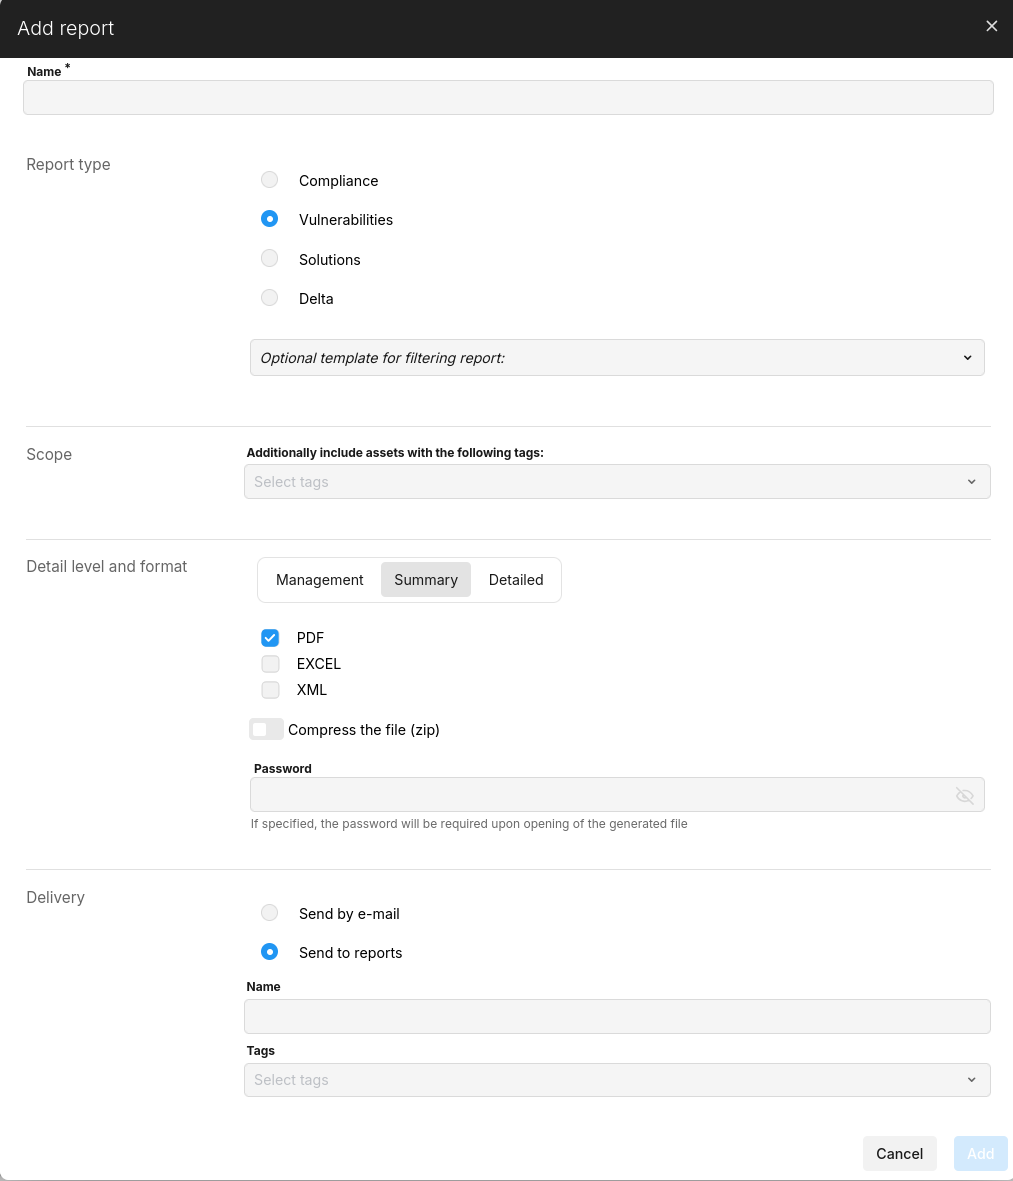
The optional Reports step allows you to add one or several reports by clicking the green Plus
.
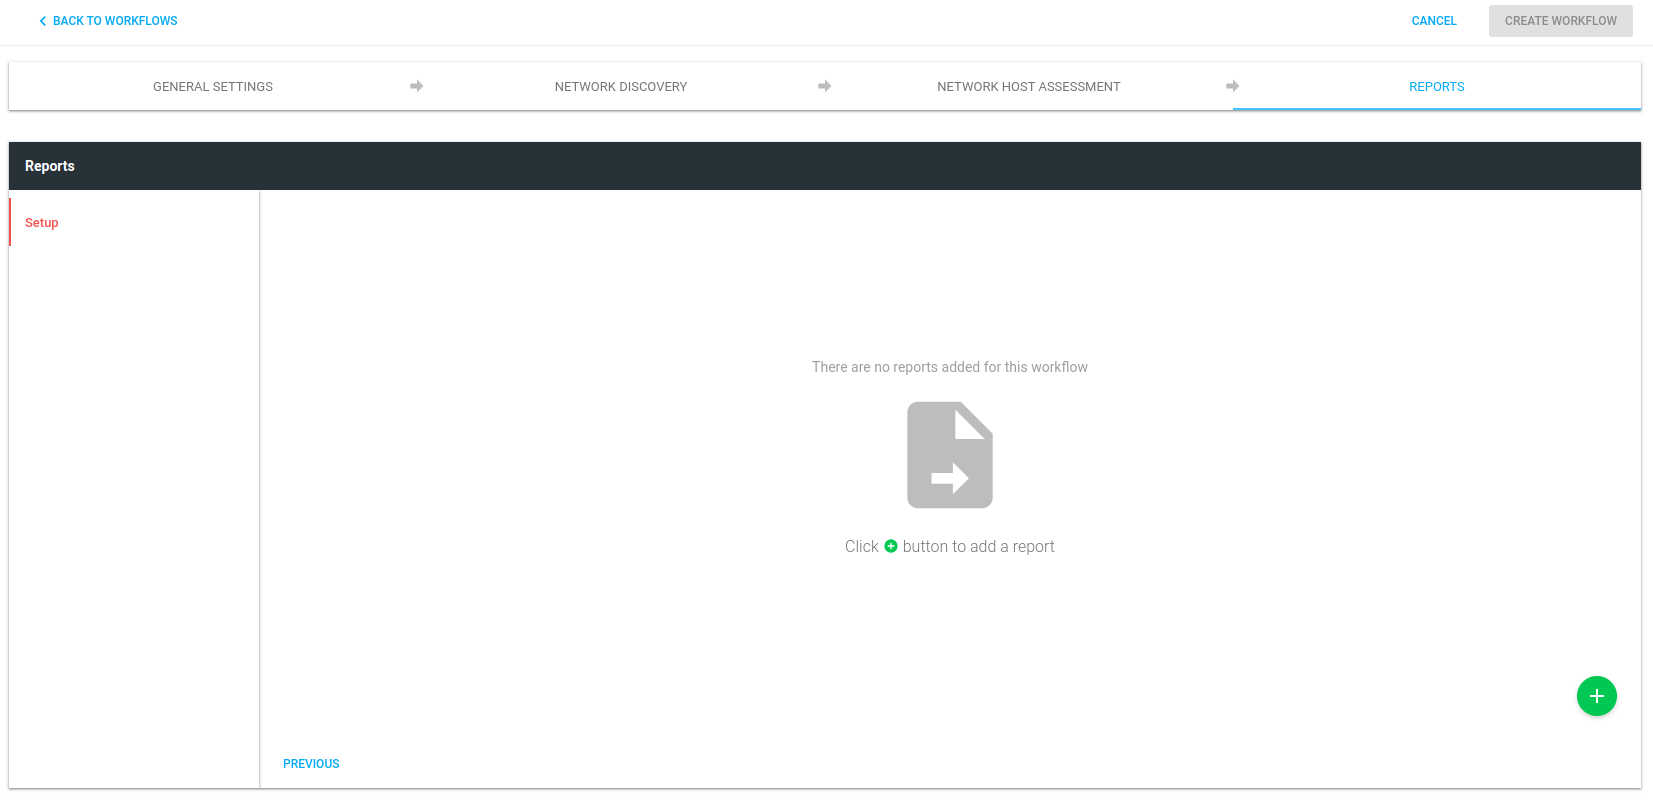
-
The Add report dialog is displayed and used for further input. Either the form can be filled in from scratch or pre-populated with values from an existing report by using the auto complete field Create from existing.
-
Several reports can be added to the Workflow. The edit


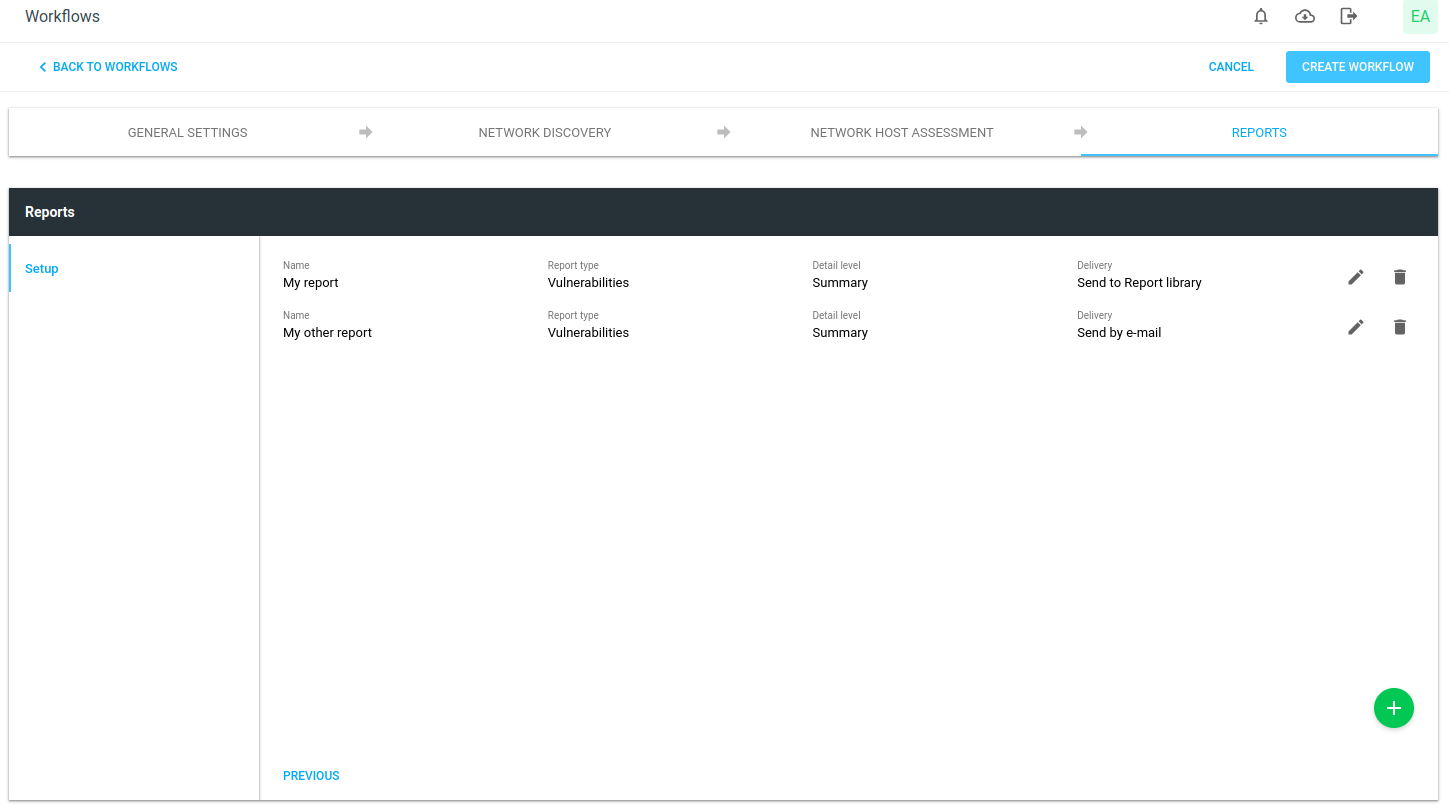
-
Once all steps are valid, the Create Workflow button is enabled and clickable. The wizard is closed and the Workflow View is shown with the newly created workflow.
In the Workflow column, a green dot indicates a workflow, and a grey dot indicates a normal scan configuration.
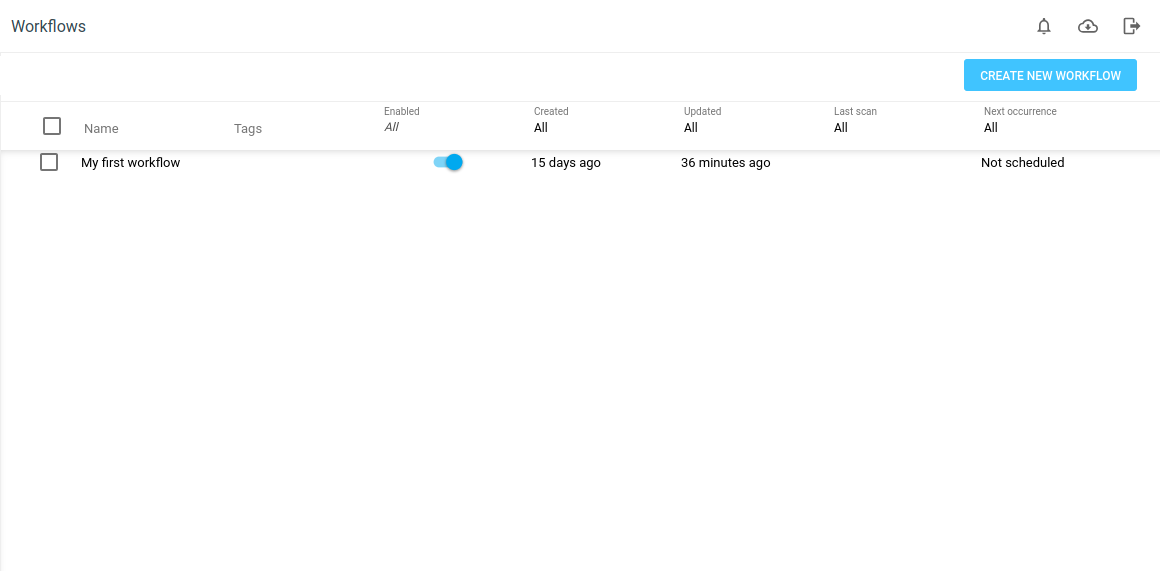
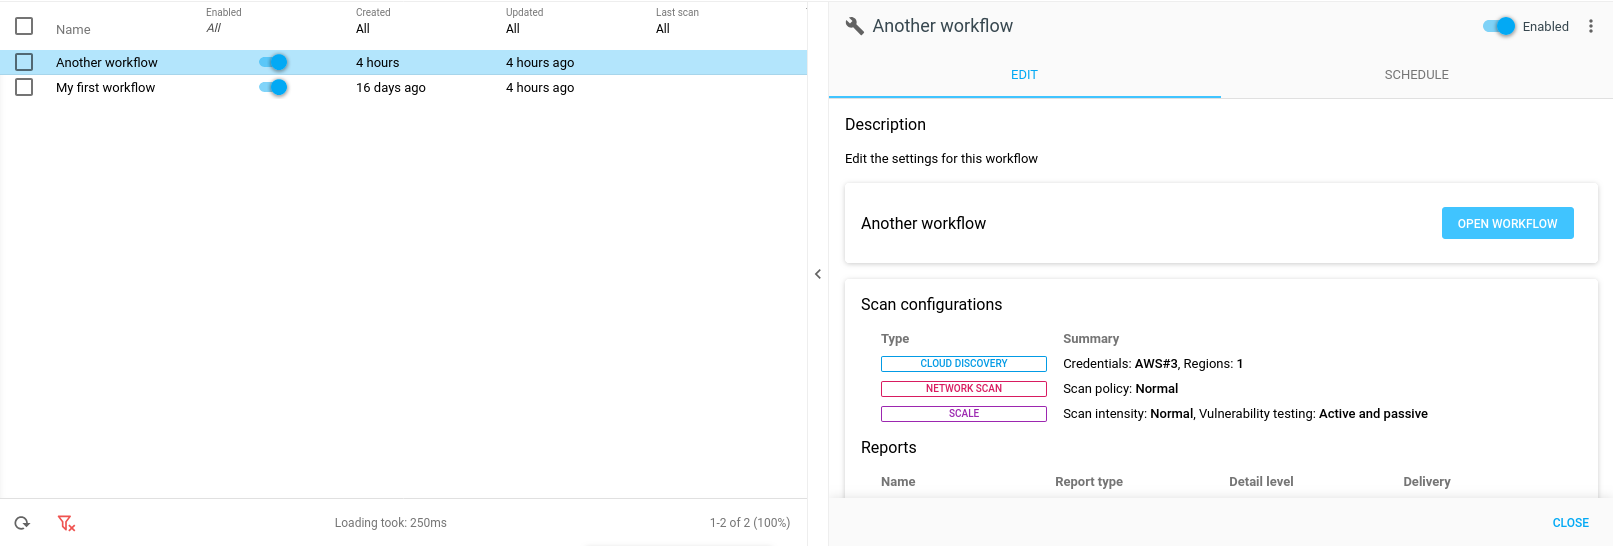
The Workflows View
The Workflows view presents all workflows in the system. When selecting a row, the side panel opens with an Edit tab and a Scheduled tab.
From the Edit tab the workflow can be reopen in the wizard for further editing, see Edit Workflow.
In the Schedule tab, schedules for when to run the Workflow can be configured, see Scheduled workflow.
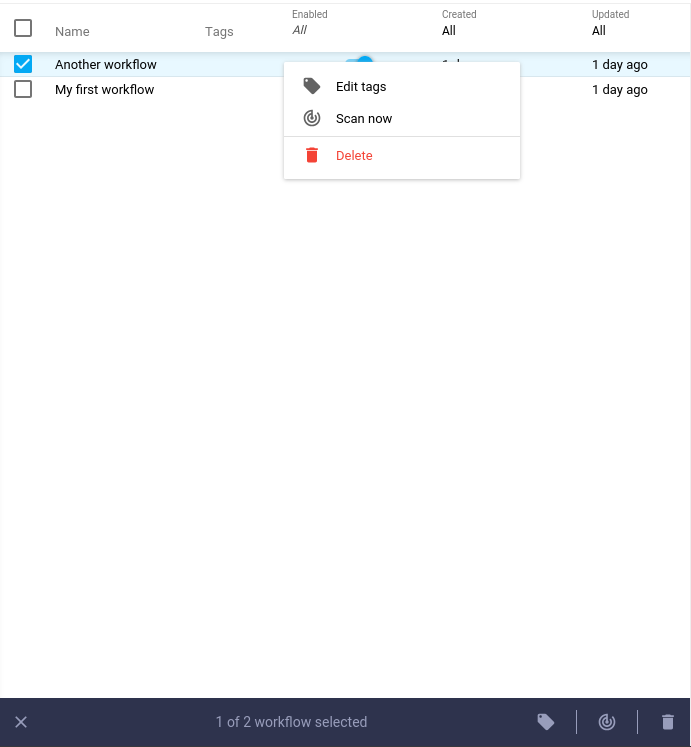
Workflow Actions
The context menu contains the following functions:
-
Edit tags opens the tag dialog.
-
Scan now start a scan manually.
-
Delete delete the workflow and all included scan configurations and reports.
Schedule Workflow
The Workflow can be scheduled to preform scans in the same way as an ordinary scan configuration.
See Schedules in the Scan Configuration Settings document for more details.

Edit Workflow
The Open Wizard button in the Edit tab opens the selected workflow in the wizard for further editing. The wizard is similar to the one used when creating a new workflow with some minor exceptions:
-
Create Workflow button is renamed to Save.
-
The Setup sub step have an additional radio button called Current configuration if the step is active in the workflow.
To change the configuration you can either change the saved Current configuration, Create a new configuration, or Create from existing by selecting the different radio buttons.
It is also possible to go to the general settings step and add or remove steps.
Related Articles