Last updated: 2026-06-15
Purpose
This article describes the View Templates view in the Outpost24 Portal.
Introduction
The View Templates view is the central management interface for all view templates in the Portal. It is located under Configuration > View templates in the Main Menu and provides a table-based overview of every view template in the system, including both built-in templates and user-created templates. From this view, users can create new view templates, edit existing ones, assign tags, set defaults, preview templates in their target views, and delete templates that are no longer needed.
Each view template stores a combination of column layout, filters, and sorting preferences for a specific view type (for example, Assets, Vulnerabilities, or Compliance). The View Templates view allows administrators and users to manage these configurations across all supported view types from a single location, rather than navigating to each individual view. For a general overview of view templates and how they are used across the Portal, see View Templates.
Requirements
It is assumed that the reader has basic access to the OUTSCAN/HIAB account to access the Portal. The user must be assigned a role with access to the View Templates section in order to view and manage view templates.
Accessing the View Templates View
-
Navigate to Configuration > View templates in the Main Menu.
The View Templates view is displayed, showing a table of all available view templates.
Table Columns
The following columns are available in the View Templates table. Columns can be shown or hidden, reordered, and resized according to user preference.
|
Column |
Description |
|---|---|
|
Name |
The name of the view template. |
|
Tags |
Tags assigned to the view template for organizational purposes. |
|
Built-in |
A green status dot indicating whether the template is a system-provided built-in template. Built-in templates are pre-configured by Outpost24 and cannot be renamed or deleted. |
|
Default |
A toggle switch indicating whether the template is the default for its view type. Only one template can be set as the default per type. |
|
Type |
The view type the template applies to (for example, Assets, Vulnerabilities, Compliance, Scan configurations). |
|
ID |
The unique identifier of the view template. |
|
Created |
The date and time when the view template was created, displayed as a relative time value (for example, "3 days ago"). |
|
Created by |
The user who created the view template. |
|
Updated |
The date and time when the view template was last modified, displayed as a relative time value. |
|
Updated by |
The user who last modified the view template. |
The default visible columns are Name, Tags, Built-in, Default, and Type.
Toolbar
The toolbar at the top of the table provides the following actions:
|
Icon |
Name |
Description |
|---|---|---|
|
|
Column configuration icon |
Opens the column picker to show or hide columns in the table. |
|
|
Filter icon |
Opens the filter panel to apply filters to the table. |
|
|
View templates icon |
Opens the view template panel to apply a saved view template to the View Templates table itself. |
Viewing Template Details
When clicking on a view template in the table, a read-only details panel is displayed beside the table. The panel contains a Details tab with the following information:
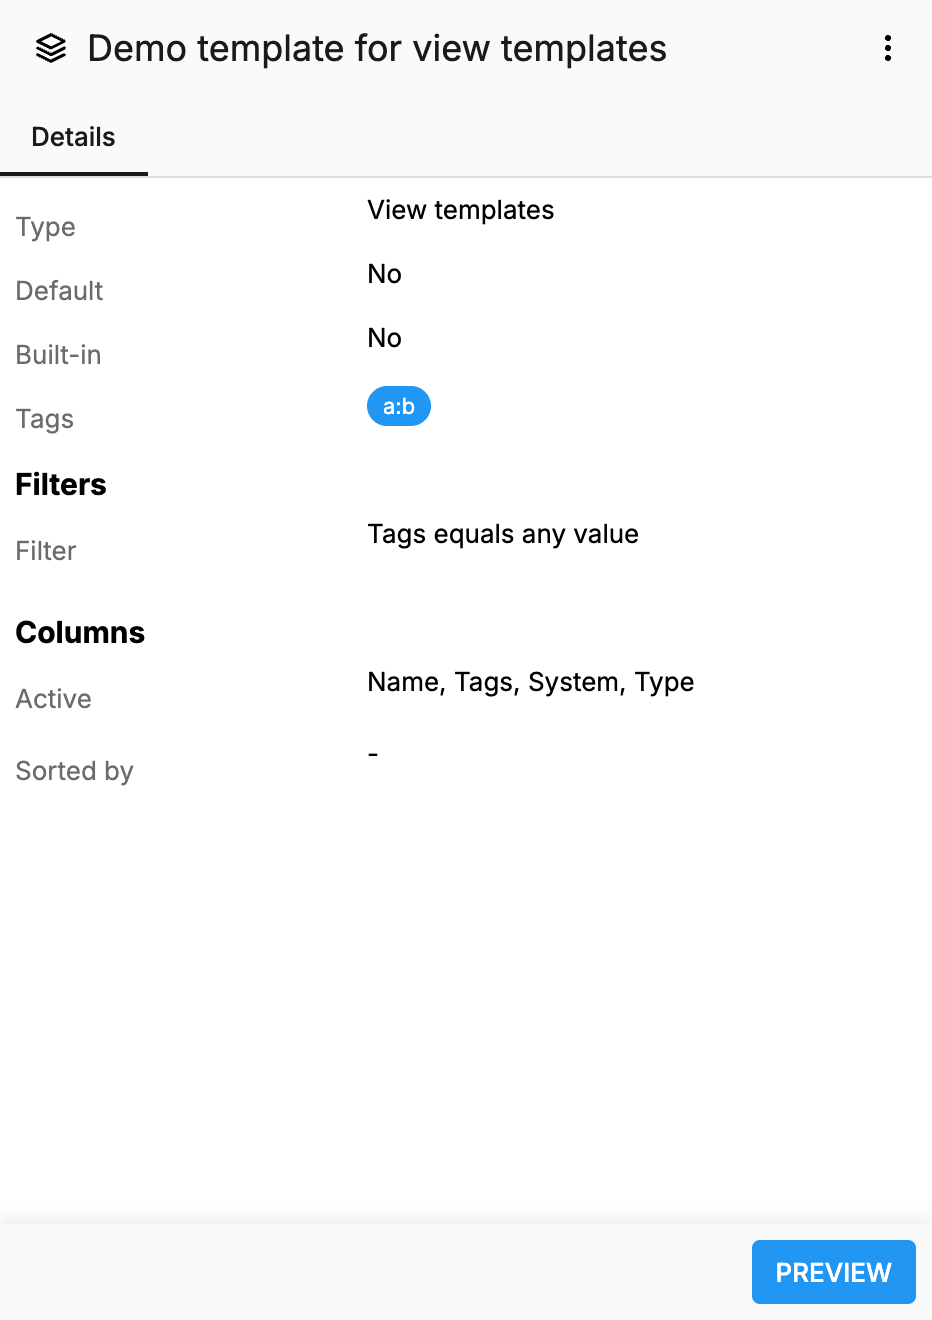
Details
|
Field |
Description |
|---|---|
|
Type |
The view type the template is configured for (for example, Vulnerabilities, Assets, Compliance). This value is set during creation and cannot be changed. |
|
Default |
Indicates whether the template is set as the default for its view type. Displayed as "Yes" or "No". |
|
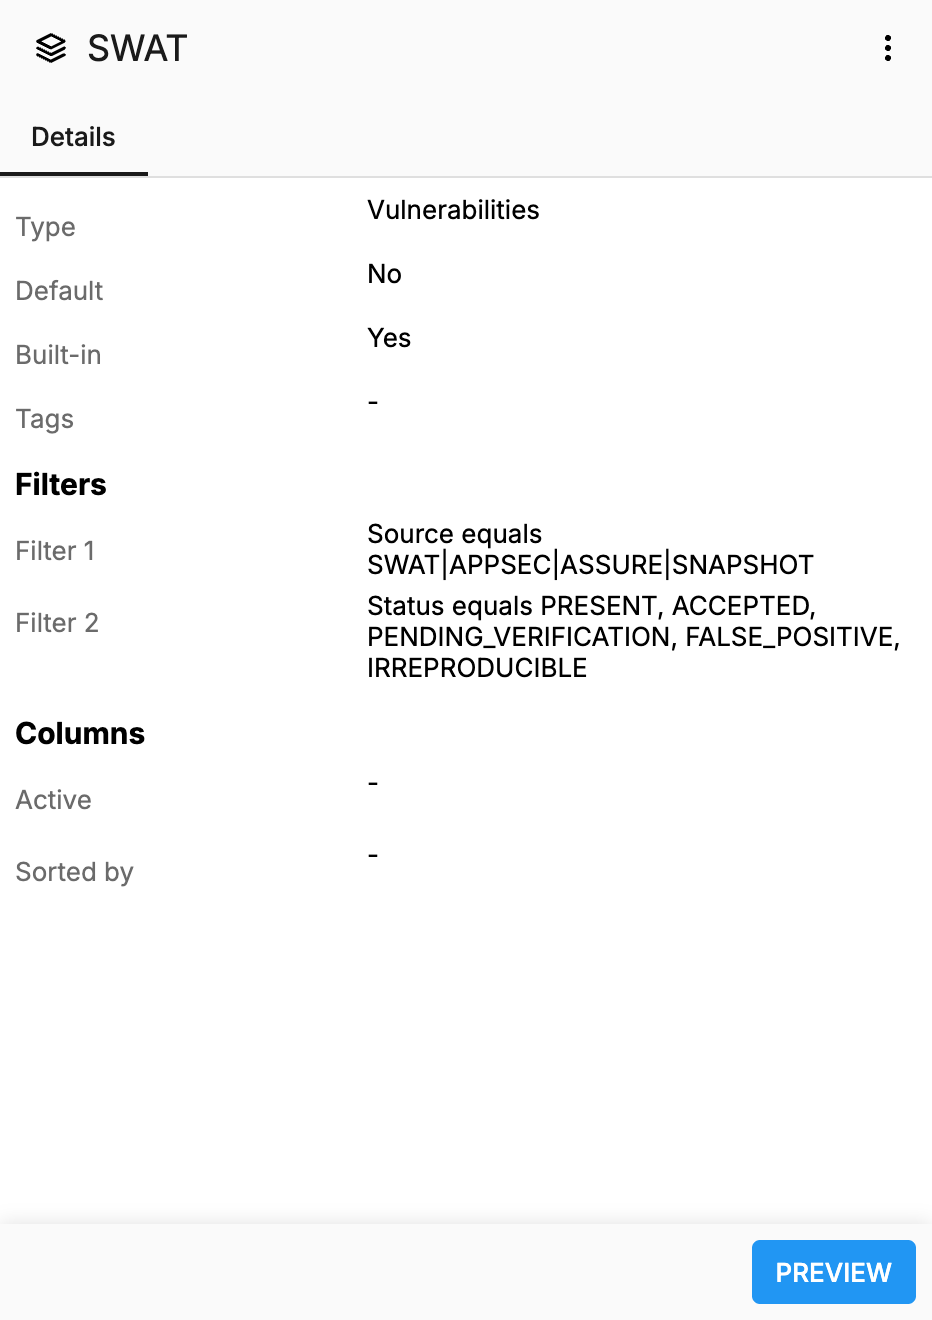
Built-in |
Indicates whether the template is a system-provided built-in template. Displayed as "Yes" or "No". |
|
Tags |
Tags assigned to the view template, displayed as tag chips. If no tags are assigned, a dash (–) is shown. |
Filters
The Filters section displays all filter conditions saved in the view template. Each filter is shown as a row with the field name, comparison operator, and value. If no filters are defined, the text "No filters" is displayed.
Columns
The Columns section provides the following information:
|
Label |
Description |
|---|---|
|
Active |
A comma-separated list of all columns that are configured to display when the template is applied. If no specific columns are configured, a dash (-) is shown. |
|
Sorted by |
The sorting configuration, showing the field name and sort direction (ascending or descending). If no sorting is configured, a dash (-) is shown. |
Action Buttons
The following buttons are displayed at the bottom of the details panel:
|
Button |
Description |
|---|---|
|
PREVIEW |
Opens the target view with the template configuration applied, allowing the user to see the effect of the filters, columns, and sorting. This button is only available for template types that have a corresponding view in the Portal. |
Three-Dot Menu
The three-dot menu icon in the upper right corner of the details panel provides additional actions:
|
Action |
Description |
|---|---|
|
Edit tags |
Opens the tag management dialog for the selected template. |
|
Delete |
Deletes the selected view template. |
Built-in Templates
Built-in templates are pre-configured by Outpost24 and are indicated by a green dot in the Built-in column. These templates provide standard configurations for common use cases. Built-in templates have the following restrictions:
-
The Name field is read-only and cannot be modified.
-
Built-in templates cannot be deleted.
-
Tags can still be assigned to built-in templates.
-
The Default toggle can still be changed for built-in templates.
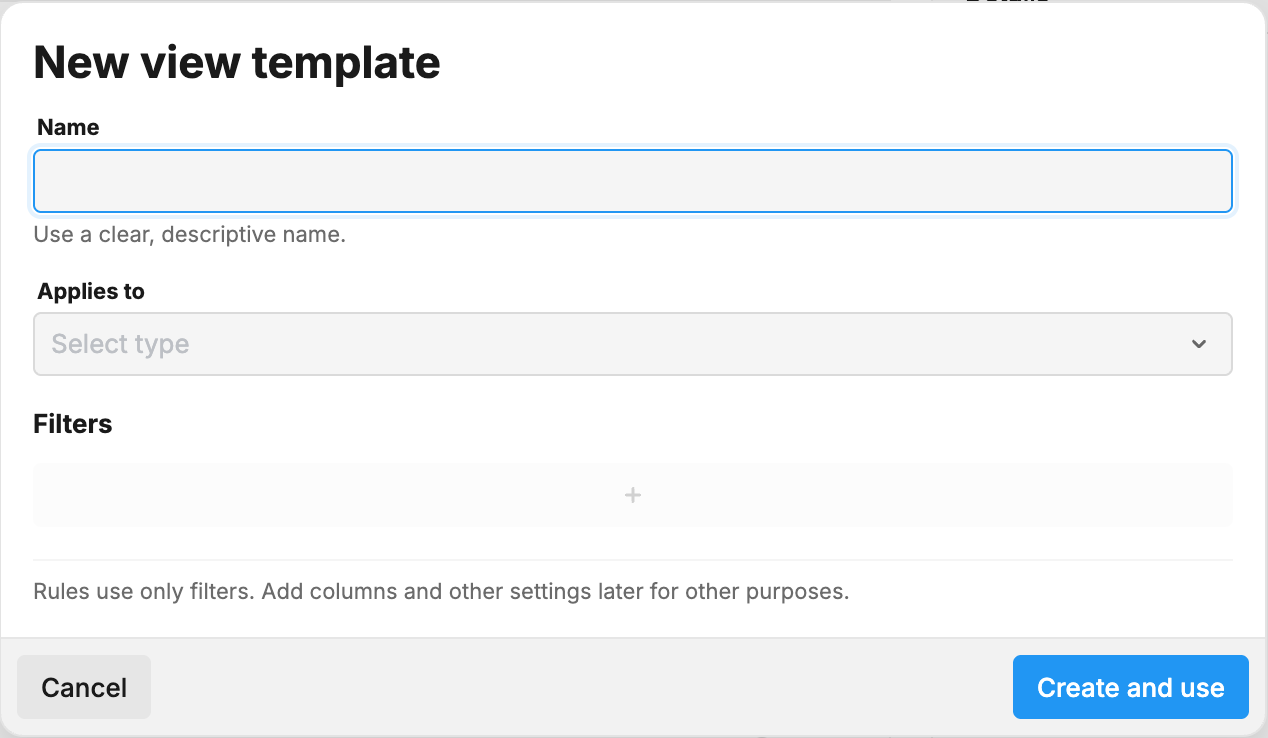
Creating a View Template
To create a new view template:
-
Click the green plus icon below the table.
-
Enter a Name for the view template. This field is mandatory.
-
Select a Type from the drop-down to specify which view the template applies to.
-
Optionally, toggle Default to mark this template as the default for the selected view type.
-
Optionally, assign tags by clicking the Tags drop-down and selecting from the available tags.
-
Click the CREATE button.
The new view template is displayed in the table.
A newly created view template does not contain any filters, columns, or sorting configuration. To add these settings, navigate to the target view (for example, Vulnerabilities), configure the desired columns, filters, and sorting, and then save the configuration as the view template. For more information, see View Templates.
Supported View Types
View templates can be created for the following view types:
|
View Type |
Description |
|---|---|
|
Accounts |
The Accounts view. |
|
Agents |
The Agents view. |
|
Appliances |
The Appliances view. |
|
Assets |
The Assets view. |
|
Asset groups |
The Asset Groups view. |
|
Audits |
The Audits view. |
|
Certificates |
The Informational > Certificates view. |
|
Compliance |
The Compliance view. |
|
Consumption |
The Consumption view. |
|
Customers |
The Customers view. |
|
Engagement requests |
The Engagement Requests view. |
|
Finding templates |
The Finding Templates view under Findings > Catalog. |
|
Integrations |
The Integrations view. |
|
Matches |
The Matches view under Findings > Catalog. |
|
Ports |
The Informational > Ports view. |
|
Products |
The Informational > Products view. |
|
Product database |
The Product Database view under Findings > Catalog. |
|
Reports |
The Reports view. |
|
Scan configurations |
The Scan Configurations view. |
|
Scan policies |
The Scan Policies view. |
|
Scans |
The Scans view. |
|
Scheduled reports |
The Scheduled Reports view. |
|
Schedules |
The Schedules view. |
|
Services |
The Informational > Services view. |
|
Subscriptions |
The Subscriptions view. |
|
Subscription templates |
The Subscription Templates view. |
|
Tags |
The Tags view. |
|
Terms |
The Terms view. |
|
Term templates |
The Term Templates view. |
|
Users |
The Users view. |
|
View templates |
The View Templates view itself. |
|
Vulnerabilities |
The Vulnerabilities view under Findings. |
|
Vulnerability database |
The Vulnerability Database view under Findings > Catalog. |
|
Workflows |
The Workflows view. |
Editing a View Template
To edit an existing view template:
-
Right-click the view template to open the context menu, or click the three-dot icon in the details panel, and select Edit.
-
In the edit dialog, modify the Name, Default toggle, or Tags as needed.
-
Click SAVE.
The view template is updated and the changes are reflected in the table.
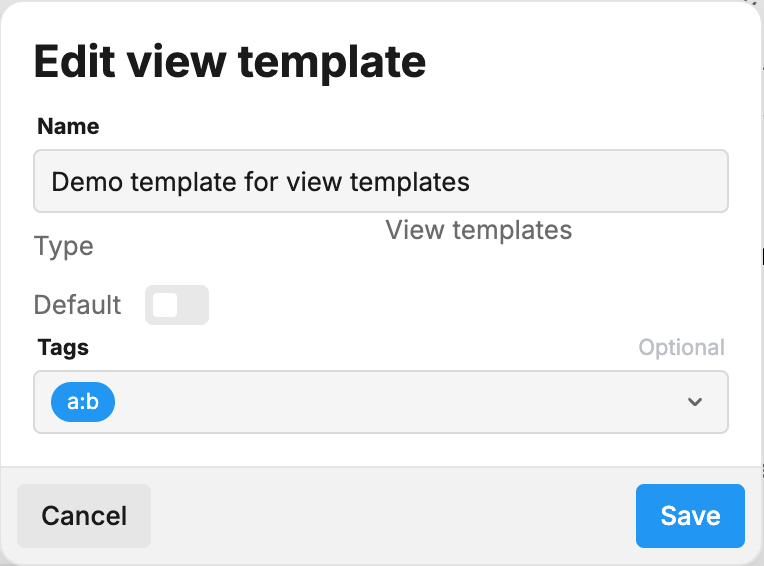
The Type field cannot be changed after creation. Filters, columns, and sorting configurations are managed from within the target view itself, not from the edit dialog. For more information on saving view configurations, see View Templates.
Setting a Template as Default
A default view template is automatically applied when a user opens the corresponding view for the first time or when the user has not previously customized the view.
To set a view template as the default for its view type:
-
Click the toggle switch in the Default column for the corresponding template.
Or:
-
Right-click the view template, or click the three-dot icon, and select Edit.
-
Toggle the Default switch.
-
Click SAVE.
Only one view template can be marked as the default per view type. Setting a new default automatically removes the default status from the previous default template of the same type.
Previewing a View Template
To preview the effect of a view template:
-
Click the view template in the table to open the details panel.
-
Click the PREVIEW button at the bottom of the panel.
The Portal navigates to the corresponding view with the template configuration applied, including the saved filters, columns, and sorting order. This allows the user to verify the template before applying it permanently.
The PREVIEW button is only available for template types that have a navigable view in the Portal.
Managing Tags on View Templates
Tags can be used to organize and categorize view templates. There are two ways to manage tags:
From the Details Panel
-
Click the view template in the table to open the details panel.
-
Click the Tags drop-down and select or deselect tags.
-
Click the SAVE button.
From the Context Menu
-
Select one or more view templates by selecting the corresponding check boxes.
-
Click the Edit tags icon in the toolbar that appears above the table.
-
Add or remove tags in the tag management dialog.
Or:
-
Right-click a view template in the table to open the context menu.
-
Click Edit tags.
-
Add or remove tags in the tag management dialog.
Deleting a View Template
To delete a view template:
-
Right-click the view template in the table to open the context menu.
-
Click Delete.
Or:
-
Select one or more view templates by selecting the corresponding check boxes.
-
Click the Delete (bin) icon in the toolbar that appears above the table.
Or:
-
Click the view template in the table to open the details panel.
-
Click the three-dot menu icon in the upper right corner of the panel.
-
Click Delete.
Built-in view templates cannot be deleted.
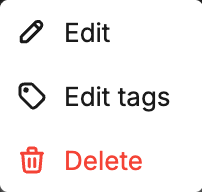
Context Menu
Right-clicking a view template in the table opens a context menu with the following actions:
|
Action |
Description |
|---|---|
|
Edit |
Opens the edit dialog for the selected view template. |
|
Edit tags |
Opens the tag management dialog for the selected template. |
|
Delete |
Deletes the selected view template. This action is not available for built-in templates. |
Multi-Select Actions
Select one or more view templates by selecting the corresponding check boxes. When at least one template is selected, a toolbar is displayed above the table with the following actions:
|
Action |
Description |
|---|---|
|
Edit tags |
Opens the tag management dialog for the selected templates. Tags can be added or removed in bulk. |
|
Delete |
Deletes all selected view templates. Built-in templates are excluded from deletion. |
Status Bar
The status bar at the bottom of the table displays the following information:
-
A reload button to refresh the table data.
-
The name of the currently active view template for the View Templates view itself, displayed as a link (for example, "Using Container configuration view template").
-
The loading time for the current data set.
-
The row count and pagination information (for example, "1-35 of 35 (100%)").
Related Articles