Last Updated: 2022-09-09
Purpose
This article describes how to set up an agent behind a proxy.
Introduction
In environments where machines must route external traffic through a proxy, Outpost24 agents are not able to enroll, fetch configurations, or send results unless they are configured to use that proxy. The system proxy setup lets you embed the HTTPS_PROXY setting into the agent’s operating-system environment—whether on Linux, Windows or macOS—so that all agent communications pass through the proxy without manual redirection. This ensures agents work correctly behind firewalls or in segmented networks, preserving security while maintaining full functionality.
Configuration
Linux
Edit the /etc/sysconfig/o24-agent file to add a block to specify and HTTPS_PROXY directive.
HTTPS_PROXY="http://<PROXY_IP>:<PROXY_PORT>"
Windows
In the Start menu:
-
Open Settings.
-
Go to About.
-
Click on Advanced System Settings.
-
Click on Environment Variables.
-
Under System Variables click New.
-
Under New System Variable, fill in the new Variable Name and Variable Value.
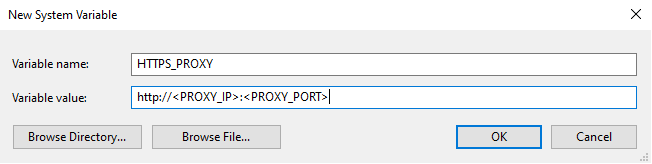
-
Click OK to add each new variable.
macOS
Edit the /Library/LaunchDaemons/com.outpost24.agent.plist file to add a block to specify and Launch Service Environment key.
<key>LSEnvironment</key>
<dict>
      <key>HTTPS_PROXY</key>
      <string>http://<PROXY-IP>:<PROXY-PORT></string>
</dict>
You can also use standard agent-settings.yml file extracted from another pages which allows you to not make a curl call to get the enrollment configuration.
Related Articles
- Removing an Agent from Windows
- Discovering the Agent in OUTSCAN
- Installing a Linux Agent
- Check Connectivity to Agent Server
- Checking if Agent is Running
- Agent Installation Introduction
- Firewall Setup for Agents
- Agent Call Home
- Using the Agent Info Command
- Agent Assessment
- Removing an Agent from Linux
- Retrieving the Agent UUID
- Finding the Agent Version
- Installing a macOS Agent
- Agent Introduction