Last updated: 2023-04-24
Purpose
This document provides set up information on the Splunk integration.
Introduction
The Splunk integration enables Outpost24 platforms such as HIAB and OUTSCAN to send security-related events, audit logs, and vulnerability information to a Splunk environment for centralized monitoring and analysis. Splunk is widely used for collecting, indexing, and analyzing machine-generated data, allowing organizations to search, visualize, and correlate large volumes of operational and security information. By connecting the Outpost24 platforms to Splunk, scan events and notifications can be forwarded to a Splunk index where they can be processed alongside other security telemetry.
This integration helps organizations incorporate vulnerability scanning activity into their broader security monitoring workflows. Once configured, data from the scanning platform can be sent to Splunk using either a TCP-based integration or the HTTP Event Collector, allowing the platform to ingest events securely through authenticated channels. Security teams can then build dashboards, alerts, and reports that combine vulnerability findings with other log sources, improving visibility and enabling faster detection and response to potential security risks.
Splunk search, monitor, and analyze machine-generated big data, and captures, indexes, and correlates real-time data in a searchable repository from which graphs, reports, alerts, dashboards, and visualizations can be generated.
A trial version of Splunk can be downloaded from the official Splunk website. It is implemented in both OUTSCAN and HIAB and is mostly used in Event Notification system and Audit Log.
Splunk is integrated with both HIAB and OUTSCAN. This guide describes the integration from a HIAB, but the procedure is the same for OUTSCAN.
There are two ways of integrating with Splunk:
-
Create a User with a role for a TCP mode.
-
Create an HTTP Event-Collector (HEC) for a HTTP Event-Collector mode that lets send data and applications events to Splunk over the HTTP and secure HTTP (HTTPS) protocols.
Prerequisites
-
To set up the HIAB/OUTSCAN-Splunk integration in TCP mode, it requires index, role, and user be already set up in Splunk.
It is recommended to create a new user with limited access rights and a separate Splunk index for the data sent from the HIAB to Splunk.
-
It is important that the index exists before defining a role for the HIAB access. Otherwise, the restricted access cannot be setup for the specific index. If an index has already been setup, skip to section Create a Role.
-
The HTTP Event-Collector does not require users and roles to be set up in Splunk since it uses a access token. However an index is required for the HTTP Event-Collector. If an index has already been setup, skip to section Create an HTTP Event Collector.
A Splunk index is a repository for data in Splunk which reside in flat files on the Splunk instance.
Splunk Integration - TCP
Due to the limitations of the number of characters that can be transferred through syslog to Splunk, the information in the Gathered Information field in the findings has been excluded as it exceeds the limit of what can be sent via syslog.
Create Index
-
Login with an existing Splunk account.
-
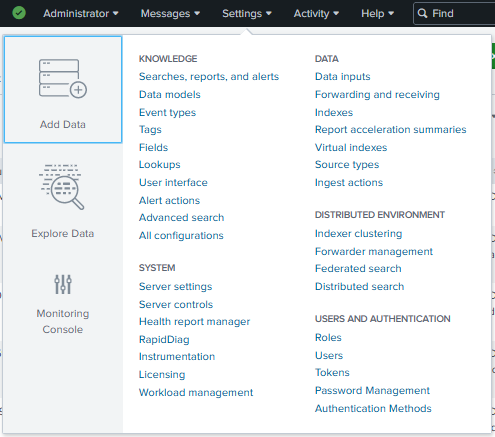
Go to Settings on the top left menu and then click on Indexes in the DATA group.
-
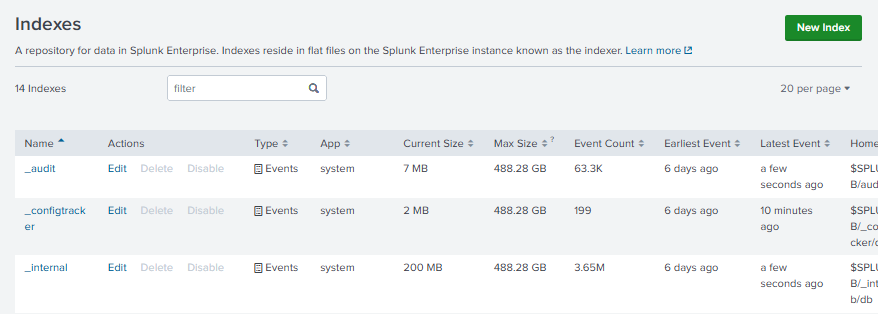
Click on the New Index button in the upper right corner.
-
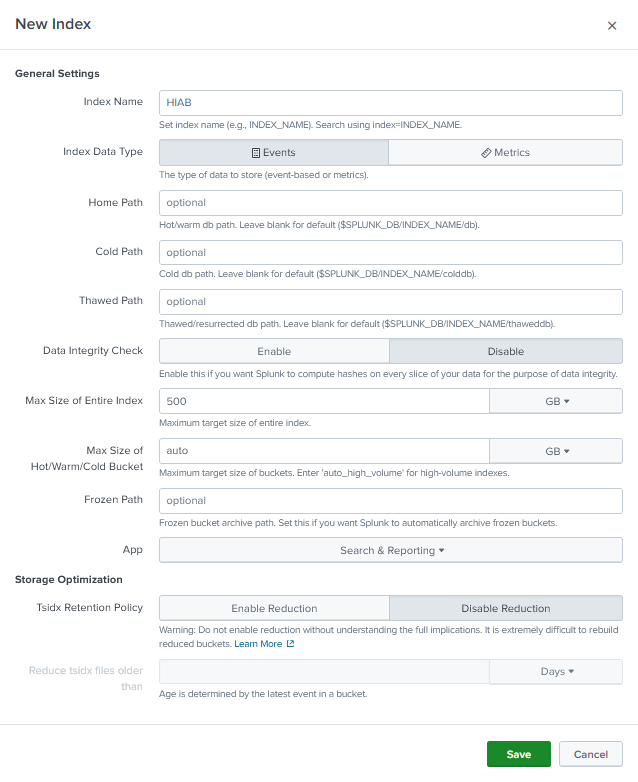
Complete these details. In the steps below, HIAB is used as example.
-
Click Save.
-
The new index has been added to the list.

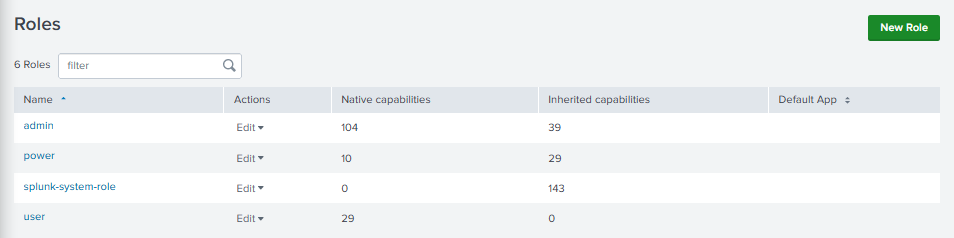
Create Roles
-
Go to Settings on the top left menu and then click on Roles in the USERS AND AUTHENTICATION group.
-
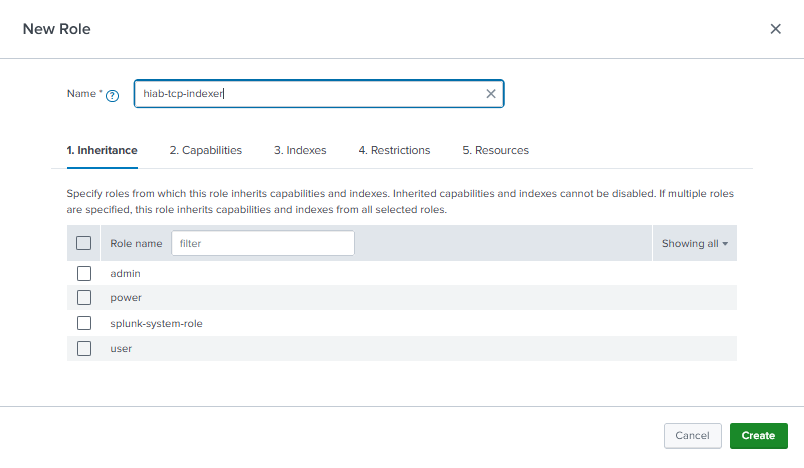
Click New Role button in upper right corner.
-
Create a role in Splunk according to the HIAB Integration Mode you want to use.
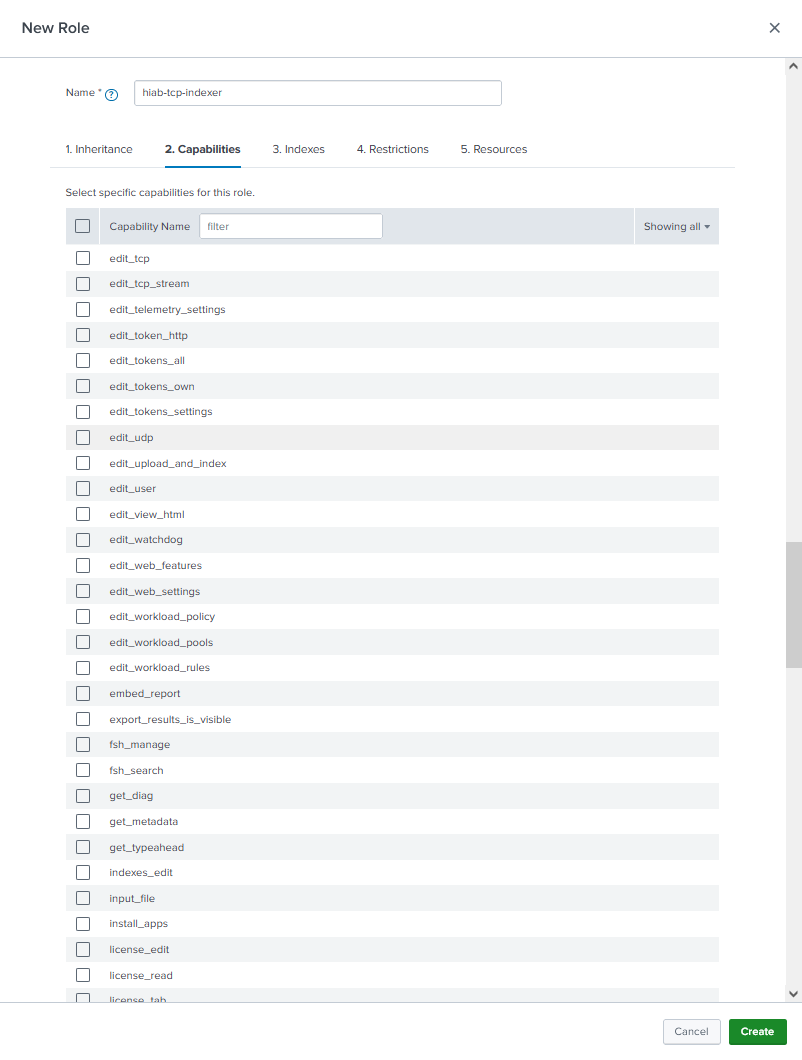
a) Create a role in Splunk and specify the following parameter for a TCP Integration. See Mode option in the HIAB Integrations Settings table.
|
Parameter |
Value |
|---|---|
|
Name |
hiab-tcp-indexer |
|
Capabilities |
edit_tcp |
|
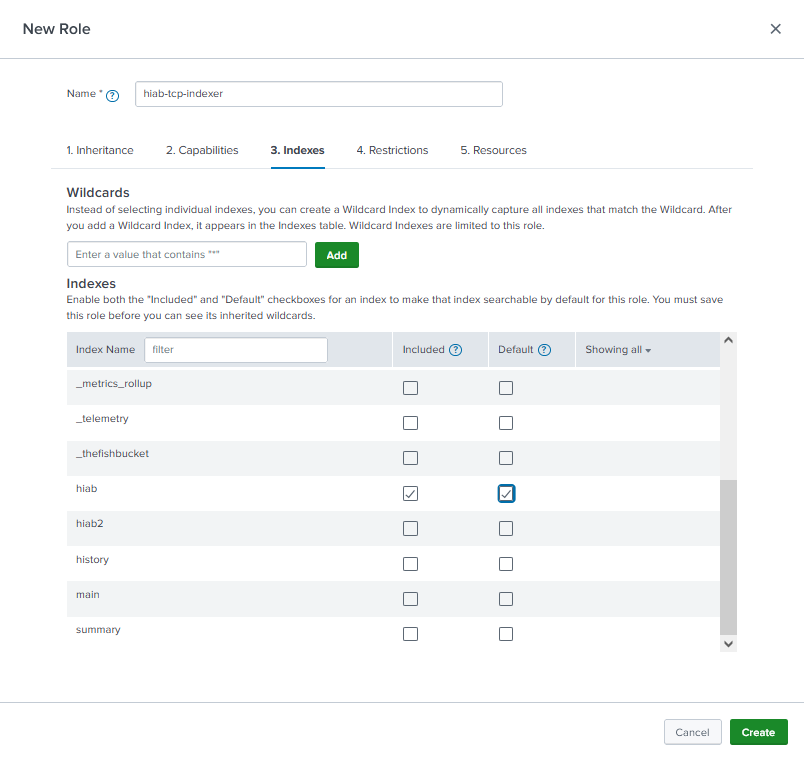
Indexes |
hiab |
The role is only granted access to indexes defined here.
-
Click Create.
Create Users
In this section we will add a new user (account) for the HIAB. This user will be given the role that was created in the previous step, this effectively limits the capabilities of this account to pushing data to the specified index.
-
Go to Settings on the top left menu and then click on Users in the USERS AND AUTHENTICATION group.
-
Click New User button in the upper right corner.

-
Click Add new on the user row:
-
Name: HIAB
-
Assign roles: hiab-indexer

-
-
Click Save.
Procedure in HIAB/OUTSCAN
-
In the HIAB click the Main Menu > Settings > Integration
-
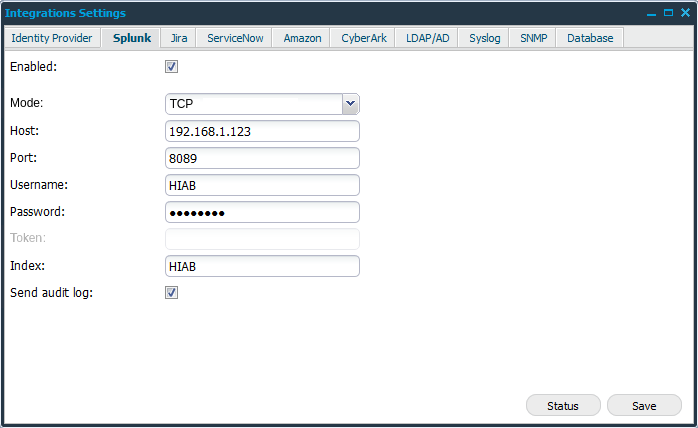
Select the Splunk tab in the Integrations Settings window.
-
Fill in the Integration settings as shown in the HIAB Integrations Settings table.
-
Click the Save button.
-
Click the Status button in the lower right corner to test the setup to Splunk.
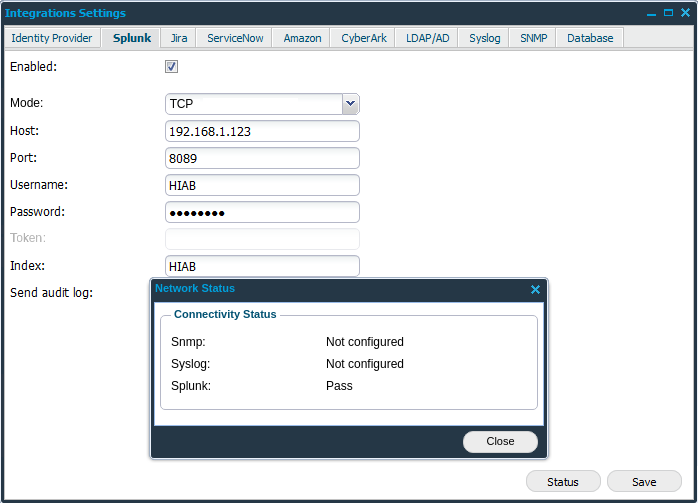
The HIAB should now show pass, indicating a successful setup of the HIAB Integration with Splunk.
Splunk Integration - HTTP Event Collector
Create an HTTP Event Collector
-
Go to Settings on the top left menu.
-
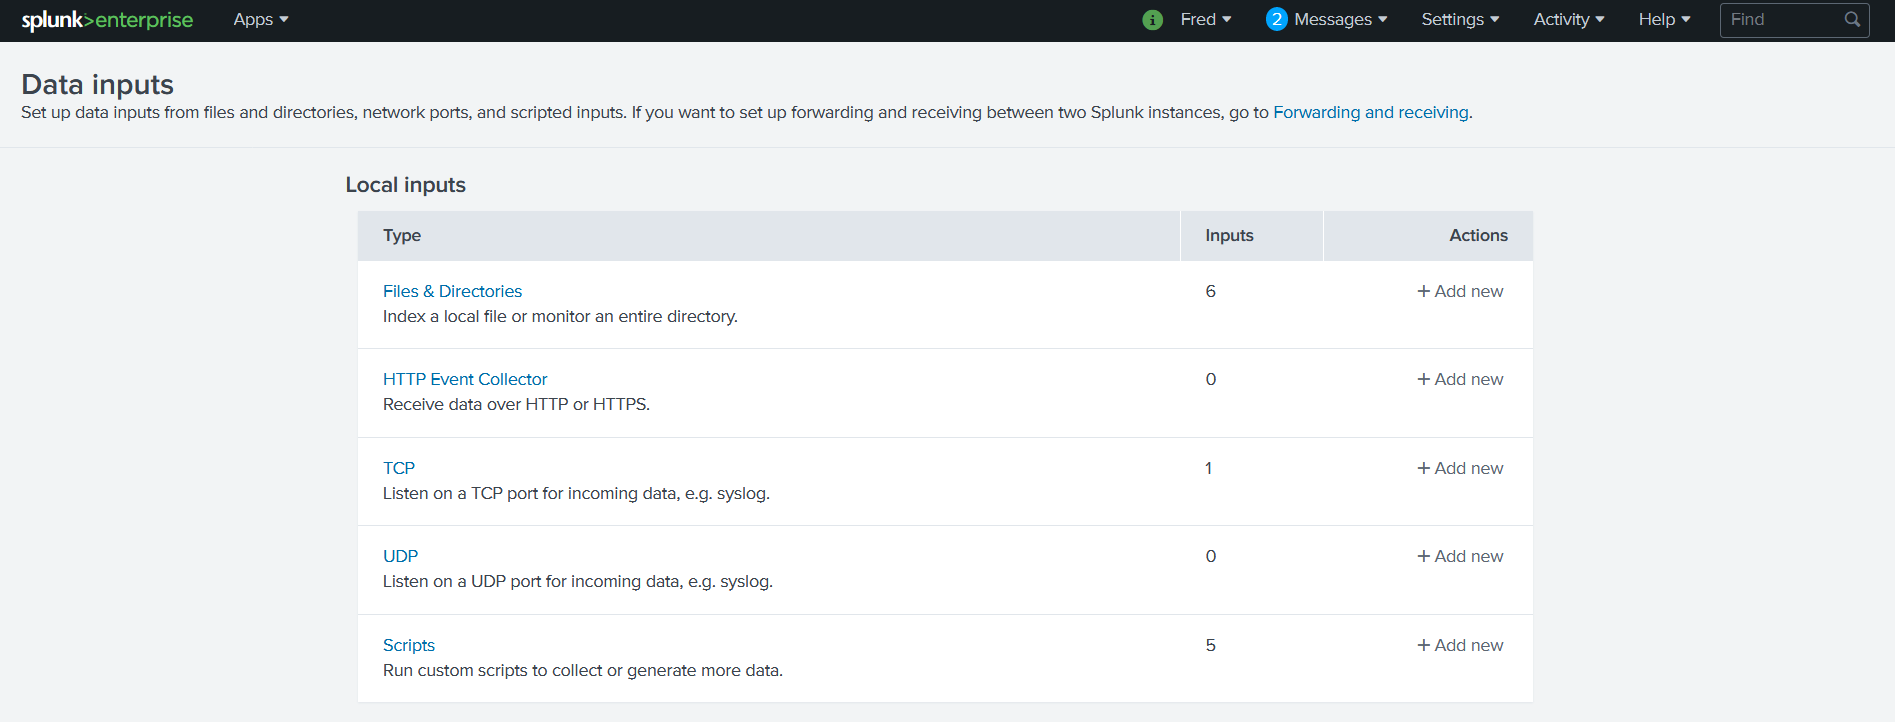
Click on Data Inputs in the DATA group.
-
Click HTTP Event Collector in the Type row of the table.
-
Click the Global Settings button on the top right of the menu.

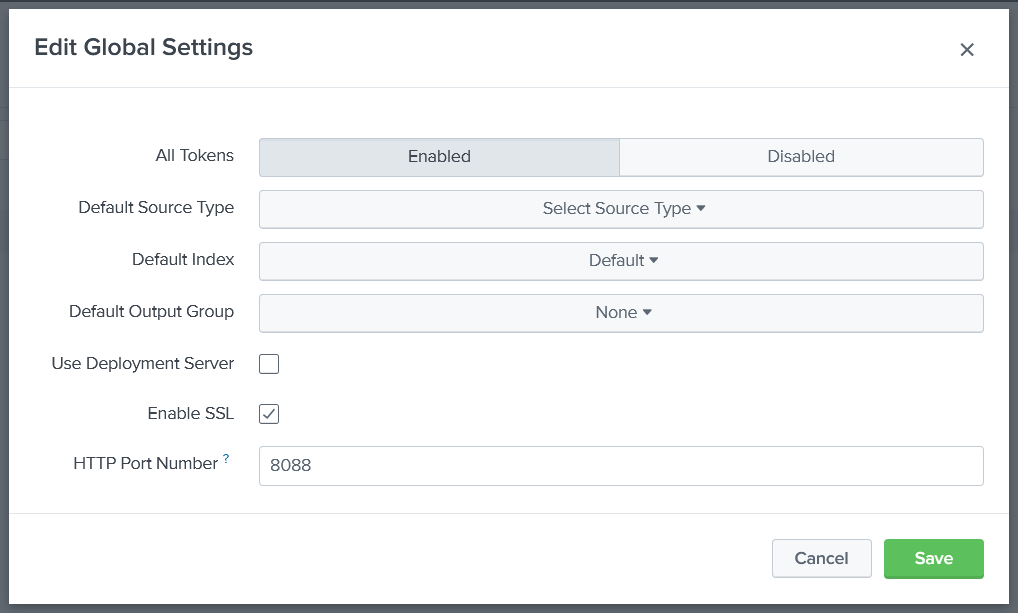
-
Click the Enabled button.
-
Select the Enable SSL checkbox.
-
Enter the HTTP port number.
-
Click the Save button.
-
Click the New Token button on the top right to create the token.
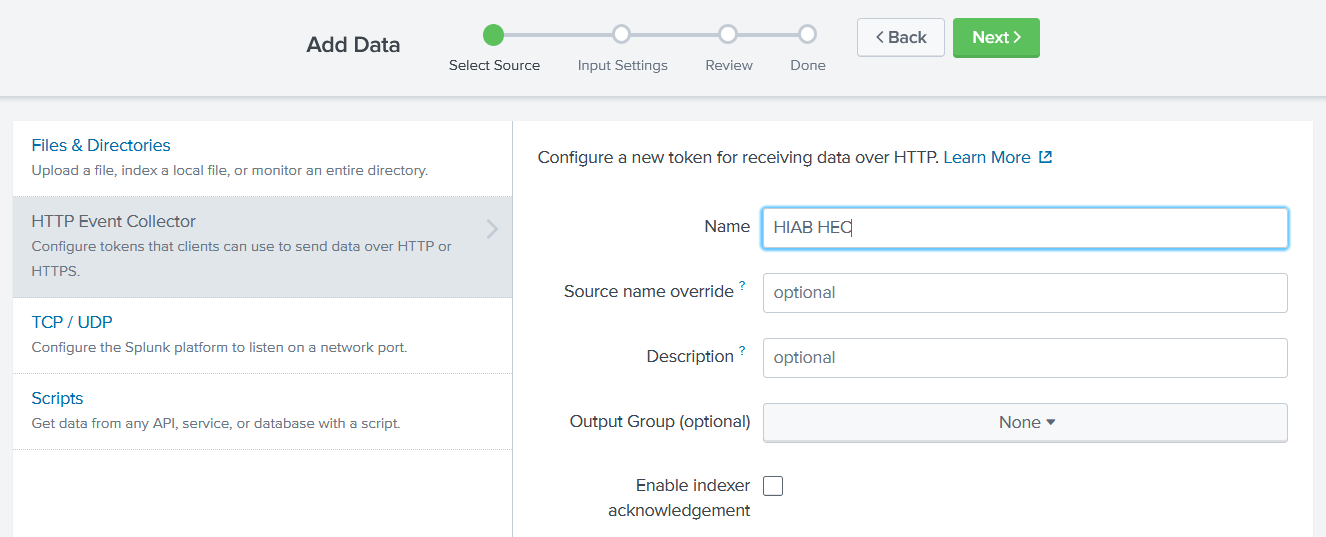
-
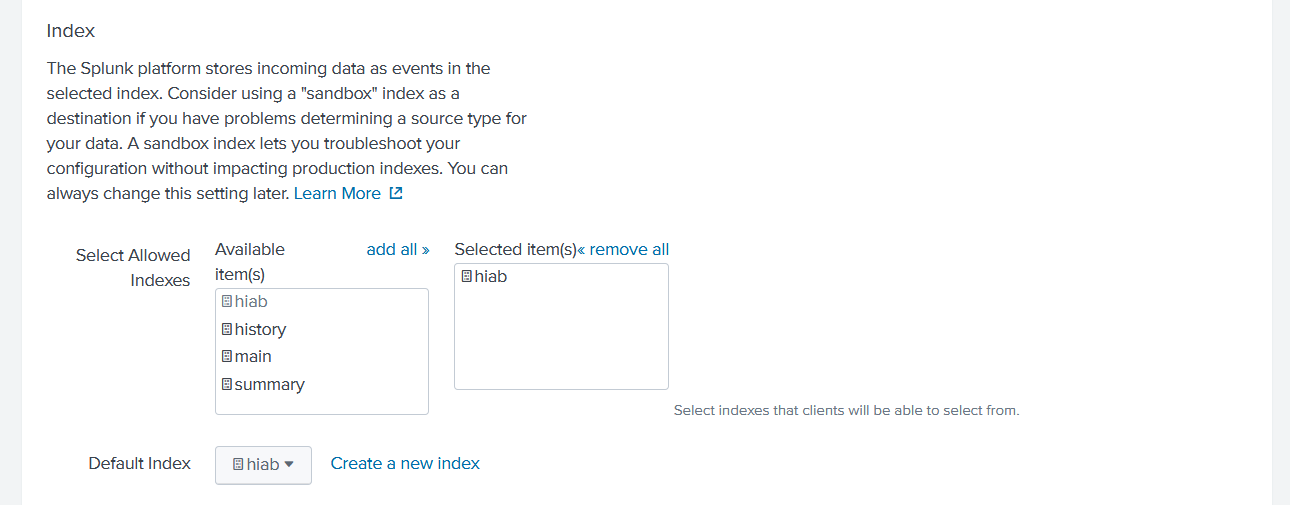
Select the HIAB index that was created in Creating Index section at the beginning of the configuration.
-
Click the Review button to Review the configuration.
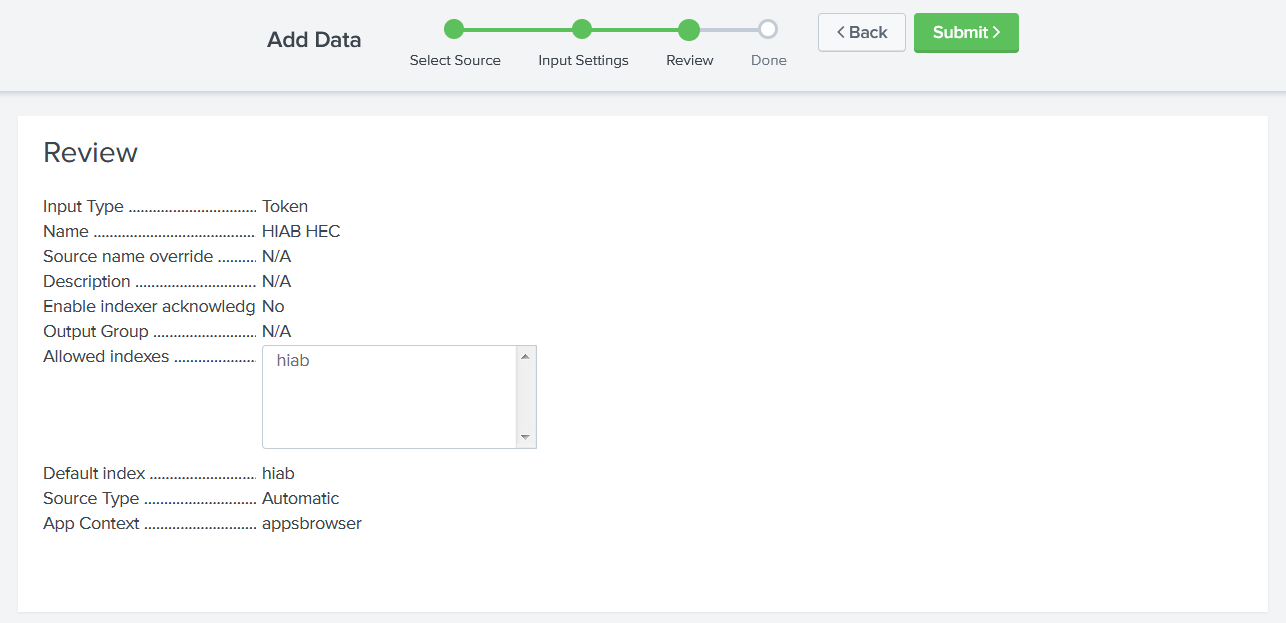
-
Then click on the Submit button.
-
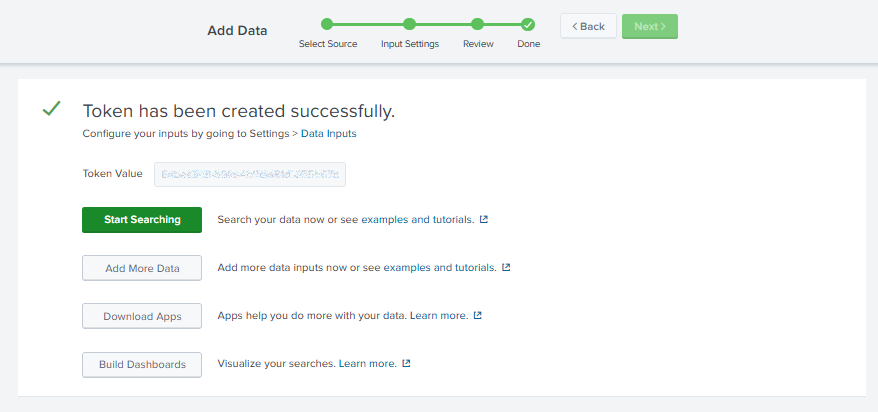
Do not forget to register the Token Value given after submitting the configuration.
Procedure in HIAB/OUTSCAN
-
In the HIAB or OUTSCAN click the Main Menu > Settings > Integration.
-
Select the Splunk tab in the Integrations Settings window.
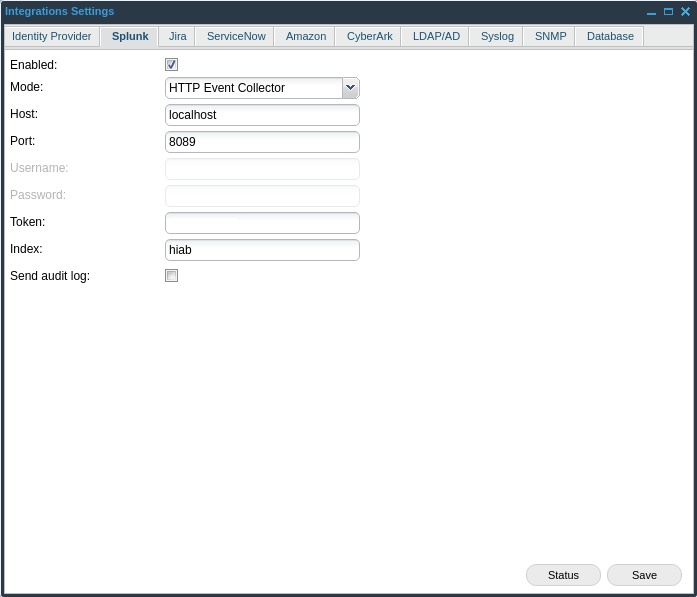
-
Fill in the Integration settings as shown in the Integrations Settings table.
Integrations Settings
|
Option |
Value |
|---|---|
|
Enabled |
Click on this field to enable the Splunk feature. |
|
Mode |
|
|
Host |
Provide your Splunk server name. |
|
Port |
Provide the management port that Splunk is using to communicate.
Port 443 is also available. |
|
Username |
Provide username to authenticate against Splunk server. |
|
Password |
Provide password to authenticate against Splunk server. |
|
Token |
HTTP Event Collector (HEC) tokens. HEC tokens are sent in the headers of the sent data packets to authenticate them with Splunk. |
|
Index |
If the user enters an index that does not exists, it will create a new one. All events will be prefixed with the index name. |
|
Send audit log
|
Check this box to send audit log entries to Splunk. |
-
Click the Save button.
-
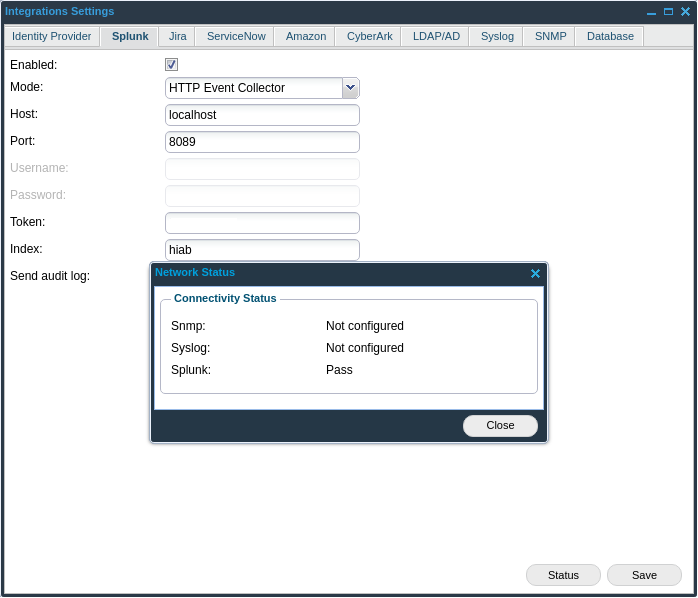
Click the Status button in the lower right corner to test the setup to Splunk.
The HIAB should now show pass, indicating a successful setup of the HIAB Integration with Splunk.
The newly setup account only has access through the API and is only able to interact with the index, restricting its access.
Event Notifications for Splunk
Common Information Model
The Splunk CIM is a shared semantic model that focuses on extracting value from data. The CIM is an add-on that contains a collection of data models, documentation, and tools that support the consistent, normalized treatment of data for maximum efficiency at search time.
You can now choose to send notifications related to Findings only in CIM format.
|
Outpost24 name |
Splunk CIM |
|---|---|
|
Script Name |
signature |
|
Script ID |
signature_id |
|
Target |
dest_ip |
|
Hostname |
dest_name |
|
Bugtraq |
bugtraq |
|
Risk Level |
risk |
|
CVSS |
cvss |
|
CVE |
cve |
|
Family |
Catagory |
|
Solution Patches |
MSKB |
|
Product |
vendor_product |
|
Severity |
severity |
For settings, see Event Notification Module.
References
Splunk Documentation
-
https://docs.splunk.com/Documentation/Splunk/latest/Data/UsetheHTTPEventCollector
-
https://docs.splunk.com/Documentation/CIM/4.13.0/User/Overview
Related Articles
- ServiceNow - Legacy
- Identity Provider Settings
- Okta Identity Provider Configuration
- Database Connector (HIAB only)
- Microsoft Entra ID (Azure AD) Identity Provider Configuration
- SNMP (HIAB only)
- ADFS Identity Provider Configuration
- Splunk
- Amazon
- Atlassian Jira
- Syslog (HIAB only)
- Thycotic
- OneLogin Identity Provider Configuration
- CyberArk
- LDAP/AD