Last updated: 2022-08-11
Purpose
This article describes the user defined attributes in agents.
Introduction
The Adding Agent Attributes feature in Outpost24 OUTSCAN enables administrators to assign attributes to agents that run on monitored systems. Attributes store structured metadata about the system where the agent operates, such as environment, business unit, location, or asset classification. Administrators configure attributes in the platform and apply them to agents from the Agents view. The assigned attributes become part of the agent record and integrate with filtering, grouping, and reporting functions across the platform. This metadata remains associated with the agent and updates when administrators modify the attribute values.
Organizations use Agent Attributes to improve asset classification and management. Attributes provide consistent metadata that supports filtering, grouping, and automated workflows across large environments. Security teams identify agents by environment, ownership, or criticality and apply targeted scanning or reporting. Structured metadata improves visibility of monitored systems and simplifies operational management of agent-based assets.
How To Add Agent Specific Attributes
-
Open the Attributes tab in Main Menu > Settings > Account.
-
By following the instructions on how to create attributes in the Attributes document, create the attributes you wish to be added to the agent.
For example, Agent ID, Locations, Critical, Other Target Attributes and so on.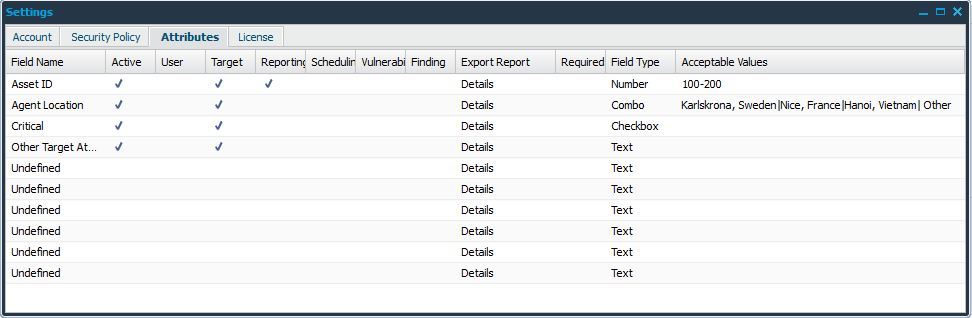
-
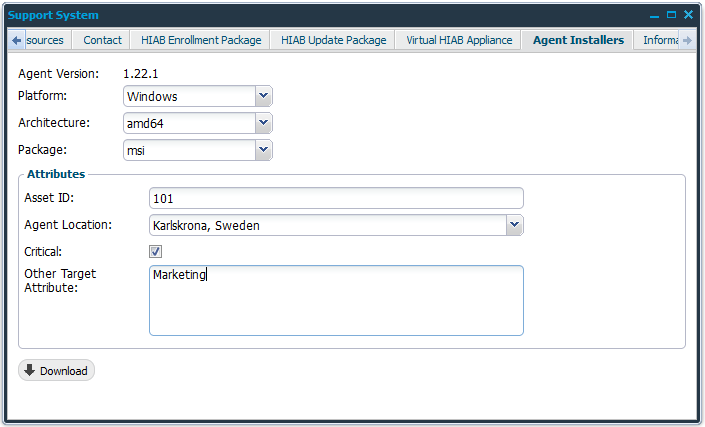
Once saved, navigate to the Agent Installers tab in Main Menu > Support.
-
Fill in the Platform, Architecture, and Package as usual.
-
Add the information to the attributes created earlier.
-
Click the Download button to save the agent installer and continue with the installation as described in Installing Agents.
After the Agent has been installed and enrolled, the agents are listed with the attributes under Managed Targets after a discovery scan.

Reference
Related Articles
- Removing an Agent from Windows
- Discovering the Agent in OUTSCAN
- Installing a Linux Agent
- Check Connectivity to Agent Server
- Checking if Agent is Running
- Agent Installation Introduction
- Firewall Setup for Agents
- Agent Call Home
- Using the Agent Info Command
- Agent Assessment
- Removing an Agent from Linux
- Retrieving the Agent UUID
- Finding the Agent Version
- Installing a macOS Agent
- Agent Introduction