Last Updated: 2024-02-22
While this integration was thoroughly tested as of February 2024, please note that ongoing support may not be guaranteed beyond this point.
Purpose
This article describe how to create incidents through REST API in ServiceNow from Portal.
Introduction
This article outlines the process of creating incidents in ServiceNow using its REST API, Webhooks, and Event Notifications from the Portal. It begins by guiding users on how to access the REST API Explorer and construct a request to create an incident, including selecting the appropriate table and populating the request body. The article then details the steps to create a Webhook integration in the Portal, emphasizing the importance of using the correct authentication method. Finally, it describes how to set up an Event Notification to automate incident creation whenever a new finding is discovered.
This article will not go into a deep explanation of ServiceNow’s REST API. If you need the full list of endpoints you can check their documentation here.
Open the REST API Explorer in Your Instance
First open the REST API Explorer from your ServiceNow instance.
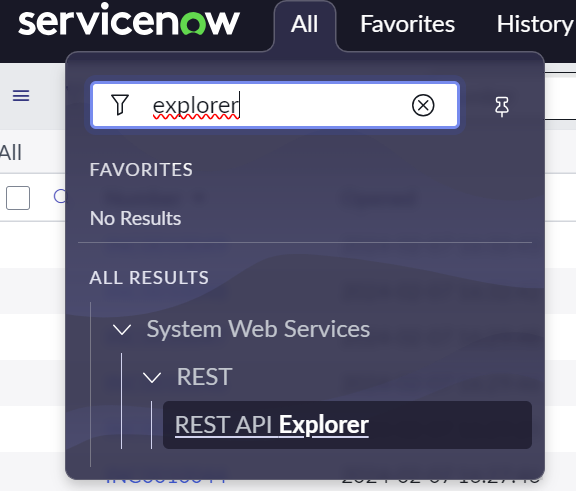
The Explorer is a tool that help you build your request to the REST API. Once again, this article is focusing solely on creating an incident.
.png?cb=39498f266df271a7911689e48655ef8f)
-
On the left side menu, select the option Create a record (POST) (fig.1).
-
Select the table type you want to create a record to. (fig.2)
In this example we selected Incident (incident) in the drop-down menu. -
This is the endpoint to which you need to make the request against (fig.3) .
The variable {tableName} is the one you selected in step 2. In this case, the full URL would be:
XMLhttps://{your-instace-name}.service-now.com/api/now/table/incidents
-
Scroll down to the Request Body section and click on Add a field.
-
A new line is displayed with a drop-down menu (fig. 1 and 2) where you can select which fields you want to populate when creating an incident via the integration. In this case we are using a request with a short_description
.png?cb=7c57ae763b91a5372f6cdd6d7ab622a1)
-
If you want to add more fields, click on the + button (fig. 3) to add new.
-
An example of the body is displayed in json format beneath rows (fig. 4).
Next step is to create the integration in the Portal.
Create a Webhook in Portal
To create a webhook integration in Portal:
-
Navigate to Configuration > Integrations in the Main menu.
-
Click on the green
-
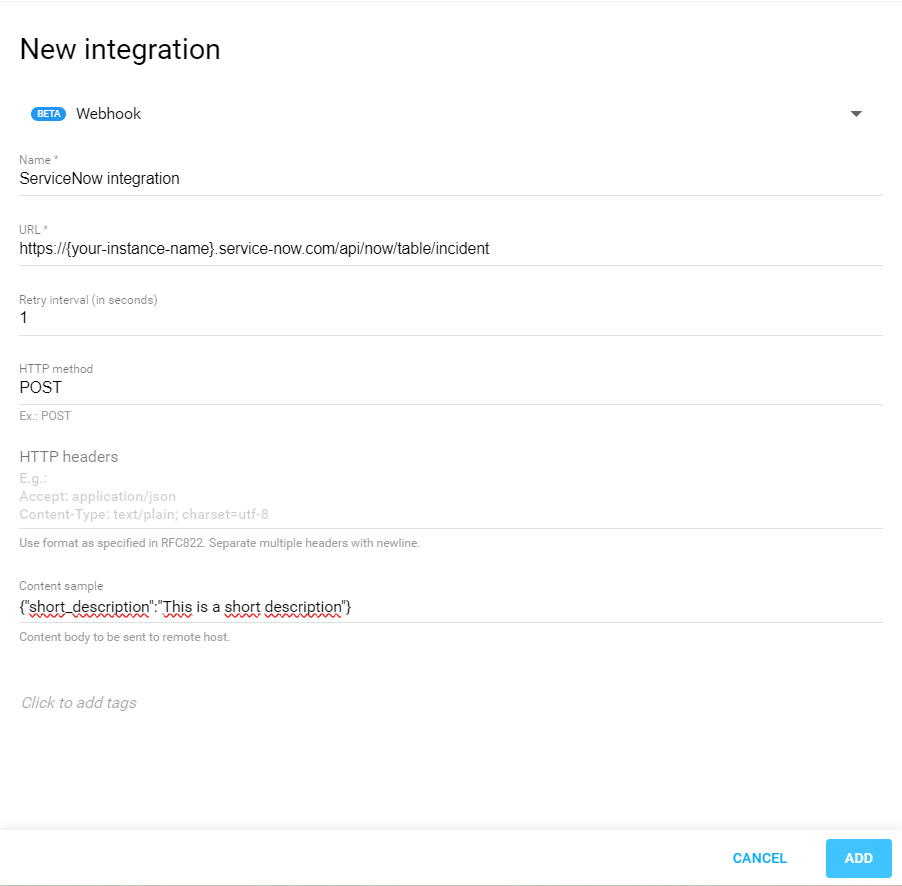
Select Webhook from the drop-down menu and fill in the fields:
-
Name: the name you want to give to this integration.
-
URL: the URL from ServiceNow that you just generated in the previous section.
-
HTTP method: POST
-
Content sample: this is just to test out the integration. You can copy+paste the body that we just generated in the previous section.
-
-
Click on Add, at the right corner to create the integration.
-
Next is to add authentication.
Navigate to the Authentication tab and fill in the fields.
For this example Basic Auth is used: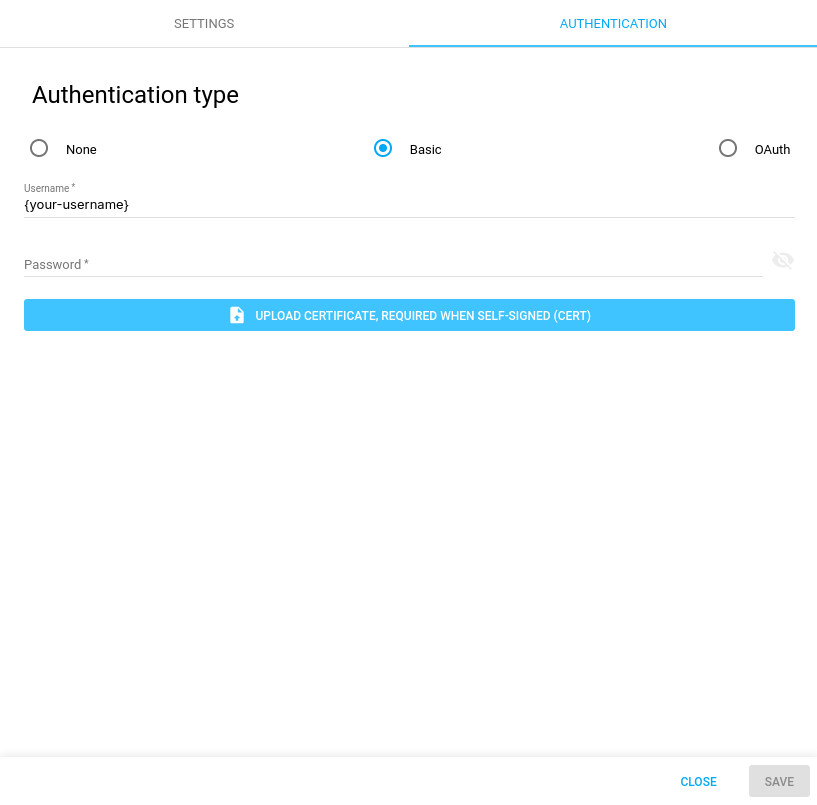
Make sure you are using your User ID as the username and not your e-mail or any other identifier. To check this, you can go to your profile in ServiceNow. The user also needs to have the necessary permissions and it cannot have MFA enabled.
-
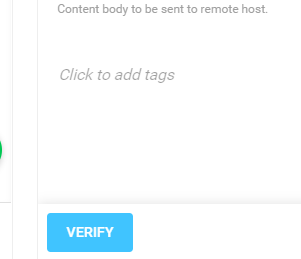
Once you are done you can go back to the Settings tab and click on Verify. If the information is correct, a new incident is created with the Short Description “This is a short description“:
-
Click on Save and continue to the next step.
Create an Event Notification
-
Navigate to Configuration > Notification Settings in the Main menu.
-
Once there, click on the green
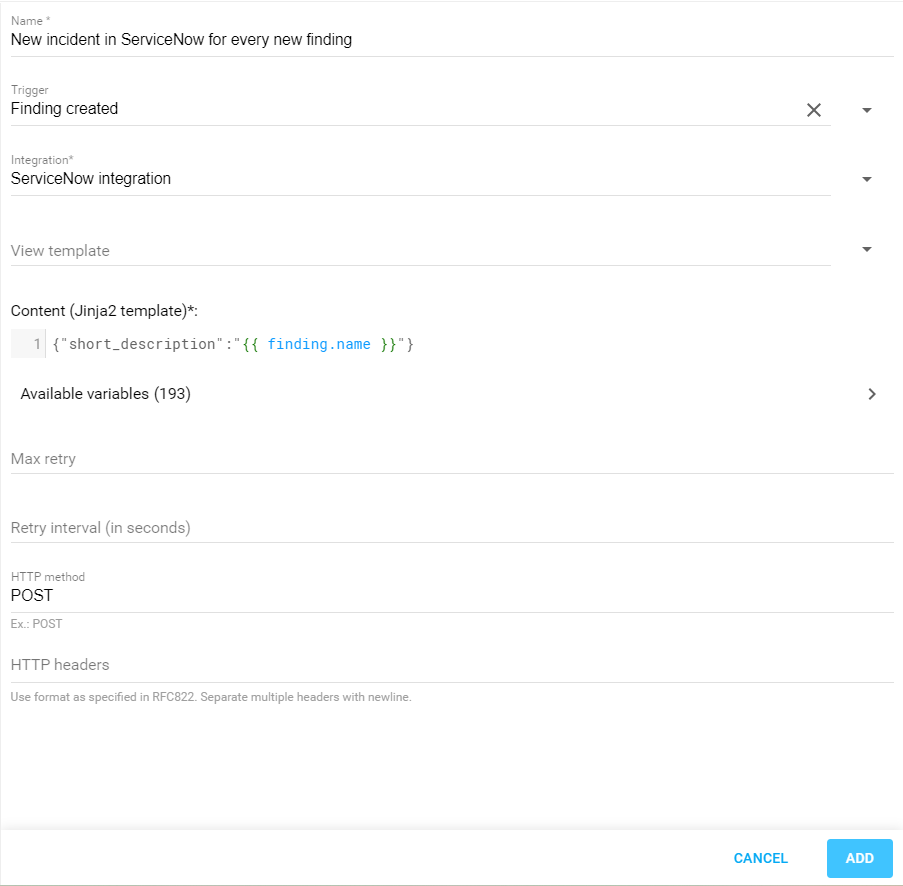
Name: Is the name you want to give to this event notification.
Trigger: In this example we are building an integration that creates a new incident every time a new finding is discovered, so Finding created is used.
Integration: Select the integration just created in the previous step from the list.
Content: Provide the short_description named of the finding using the appropriate variable. You can see the list of available variables by clicking on the Available variables card.
{"short_description":"{{ finding.name }}"}
HTTP method: POST
-
Click on Add and you are ready to go!
Now an incident is created every time a new finding is discovered.
Related Articles
- CyberArk Integration
- Delinea Integration
- General Information about SMB/WinRM Scanning
- Overview
- Portal Integration with ServiceNow Incidents
- SNMP Integration
- Syslog Integration
- Tickets Quick Start Guide
- Webhook Integration
- Webhook Integration with JIRA
- Webhook Integration with Microsoft Teams
- Webhook Integration with OAuth v2