Last updated: 2021-01-12
Purpose
This article describes how to configure Azure Application Gateway to both protect and give access to an HIAB deployed on Azure.
Introduction
This article outlines the configuration process for Azure Application Gateway to secure and provide access to a HIAB deployed on Azure. Azure Application Gateway provides an application delivery controller (ADC) with layer 7 load-balancing capabilities, requiring a running HIAB. The guide includes steps for creating a self-signed CA and certificate using OpenSSL, configuring the Application Gateway, and ensuring proper certificate installation. Additionally, it emphasizes the importance of setting up a specific subnet in the existing Virtual Network for the Application Gateway and provides references for further assistance.
Requirements
As a requirement you need a running HIAB deployed on Azure (with or without a public IP).
Step-by-step guide
To configure an Azure Application Gateway to act as a Web Application Firewall (WAF) in front of your running HIAB, you need to go through the following steps:
-
Create or obtain a certificate for your HIAB and the Application Gateway
-
Configure Application Gateway for HIAB on Azure#Configure HIAB CA and Certificate
-
Create an Application Gateway and adjust some settings (certificate and CAs, backend health check timeout, etc...)
In case you do not have valid CA and certificate, we will show how to generate a self-signed CA and certificate using OpenSSL tool.
Creating a Self-Signed CA and a Certificate using OpenSSL
-
Creating a self signed RootCA can be done by using the following command:
Bashopenssl genrsa -f4 -out self_signed_ca_pkey.pem 4096 openssl req -new -x509 -key self_signed_ca_pkey.pem -out self_signed_ca_crt.pem -days 365 -sha256
-
Creating a Certificate signed by the self-signed RootCA can be done by issuing the following command line:
Bashopenssl x509 -req -in hiab_csr.pem -CA self_signed_ca_crt.pem -CAkey self_signed_ca_pkey.pem -CAcreateserial -out hiab_crt.pem -sha256 -days 365 -extfile ext.conf
-
The OpenSSL extension file
ext.confcan be filled with the following extensions:BashbasicConstraints=CA:FALSE subjectKeyIdentifier=hash authorityKeyIdentifier=keyid,issuer keyUsage=digitalSignature,nonRepudiation,keyEncipherment,dataEncipherment extendedKeyUsage=serverAuth,clientAuth # Optional Alternative Name in case the same server is having different FQDN name subjectAltName = @alt_names [ alt_names ] DNS.1 = hiab.outpost24.azure
-
Export the self-signed CA and the certificate to a (password protected) PKCS#12 format for adding it to the Azure Application Gateway, which can be done as follows:
Bashopenssl pkcs12 -export -out hiab_cert_chain.pfx -in hiab_crt.pem -inkey hiab_pkey.pem -CAfile self_signed_ca_crt.pem
Configure HIAB CA and Certificate
CA Certificate requirement
Pay attention that the CA Certificate file does NOT contain the HIAB certificate. This MUST be a PEM formatted file containing the CA and subCA
In the HIAB UI:
-
Navigate to Main Menu > Settings > Server to open the Server Settings panel. Then select the Certificate tab and add the HIAB CA and certificate as follow.
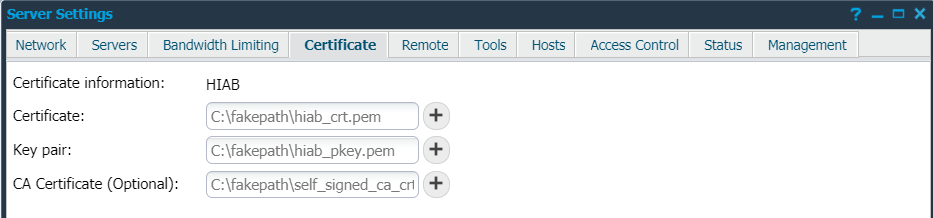
-
Click Save button in the bottom right corner.
-
Check the CA and Certificate installation by using OpenSSL command line tool and the following command line:
Bashopenssl s_client -connect <HIAB_IP>:443 -showcerts > test_openssl_hiab.txt 2>&1
-
Open the output file
test_openssl_hiab.txtand verify the CA and certificate. Here is an example of such content showing both CA and certificate.Bashdepth=1 C = FR, ST = France, L = Sophia Antipolis, O = Outpost24, OU = R&D Dept., CN = ca.outpost24.azure verify error:num=19:self signed certificate in certificate chain verify return:1 depth=1 C = FR, ST = France, L = Sophia Antipolis, O = Outpost24, OU = R&D Dept., CN = ca.outpost24.azure verify return:1 depth=0 C = FR, ST = France, L = Sophia Antipolis, O = Outpost24, OU = R&D Dept., CN = hiab.outpost24.azure verify return:1 ... Certificate chain 0 s:C = FR, ST = France, L = Sophia Antipolis, O = Outpost24, OU = R&D Dept., CN = hiab.outpost24.azure i:C = FR, ST = France, L = Sophia Antipolis, O = Outpost24, OU = R&D Dept., CN = ca.outpost24.azure ... 1 s:C = FR, ST = France, L = Sophia Antipolis, O = Outpost24, OU = R&D Dept., CN = ca.outpost24.azure i:C = FR, ST = France, L = Sophia Antipolis, O = Outpost24, OU = R&D Dept., CN = ca.outpost24.azure ... Server certificate subject=C = FR, ST = France, L = Sophia Antipolis, O = Outpost24, OU = R&D Dept., CN = hiab.outpost24.azure issuer=C = FR, ST = France, L = Sophia Antipolis, O = Outpost24, OU = R&D Dept., CN = ca.outpost24.azure ... Verification error: self signed certificate in certificate chainIn this case the self-signed CA is detected and this can be circumvented by using
-CAfileoption in OpenSSL command line tool as follow.Bashopenssl s_client -connect <HIAB_IP>:443 -showcerts -CAfile self_signed_ca_crt.pem > test_openssl_hiab.txt 2>&1Output will look like this.
Bashdepth=1 C = FR, ST = France, L = Sophia Antipolis, O = Outpost24, OU = R&D Dept., CN = ca.outpost24.azure verify return:1 depth=0 C = FR, ST = France, L = Sophia Antipolis, O = Outpost24, OU = R&D Dept., CN = hiab.outpost24.azure verify return:1 ... Certificate chain 0 s:C = FR, ST = France, L = Sophia Antipolis, O = Outpost24, OU = R&D Dept., CN = hiab.outpost24.azure i:C = FR, ST = France, L = Sophia Antipolis, O = Outpost24, OU = R&D Dept., CN = ca.outpost24.azure ... 1 s:C = FR, ST = France, L = Sophia Antipolis, O = Outpost24, OU = R&D Dept., CN = ca.outpost24.azure i:C = FR, ST = France, L = Sophia Antipolis, O = Outpost24, OU = R&D Dept., CN = ca.outpost24.azure ... Server certificate subject=C = FR, ST = France, L = Sophia Antipolis, O = Outpost24, OU = R&D Dept., CN = hiab.outpost24.azure issuer=C = FR, ST = France, L = Sophia Antipolis, O = Outpost24, OU = R&D Dept., CN = ca.outpost24.azure ... Verification: OK
Create a Subnet for Azure Application Gateway
In your Azure portal, you need to add a Subnet in your Virtual Network containing the Subnet where you HIAB is deployed.
Adding a Subnet in Azure Virtual Network may require to add an Address Space first, to be able to specify this address space while creating the subnet.
Create and Configure the Azure Application Gateway
-
In your Azure portal, open Azure Application Gateways and click on Add button to create an Application Gateway for your HIAB.
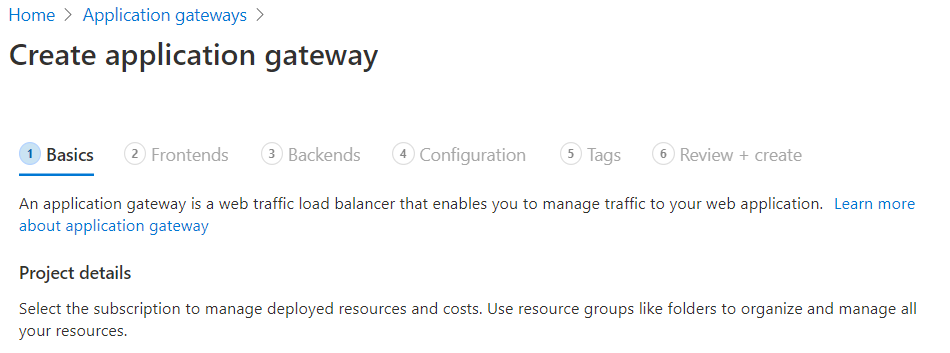
-
Fill all required field according to your settings and giving a proper name.
While configuring your virtual network, choose the virtual network where your HIAB is deployed as Virtual Network and the newly created subnet as Subnet. -
Configure a back-end pool and add your running HIAB.
While Adding a routing rule, do NOT forget to select HTTPS protocol and select Upload a certificate in Https Settings as follow.
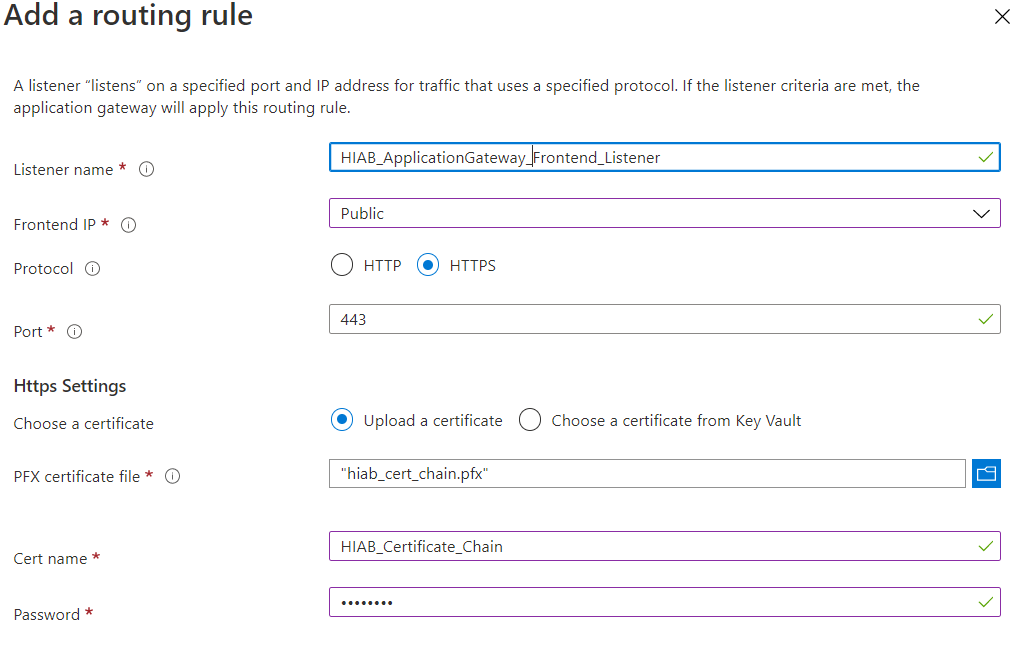
Azure is only able to handle PFX extensions for PKCS#12 certificate chain. In case of a different extension of your PKCS#12, just rename it as a.pfxfile. -
Then Click on Add button to create the Azure Application Gateway.
-
While configuring HTTP Setting, ensure you set HTTPS for back-end protocol and add your CA certificate as follow.
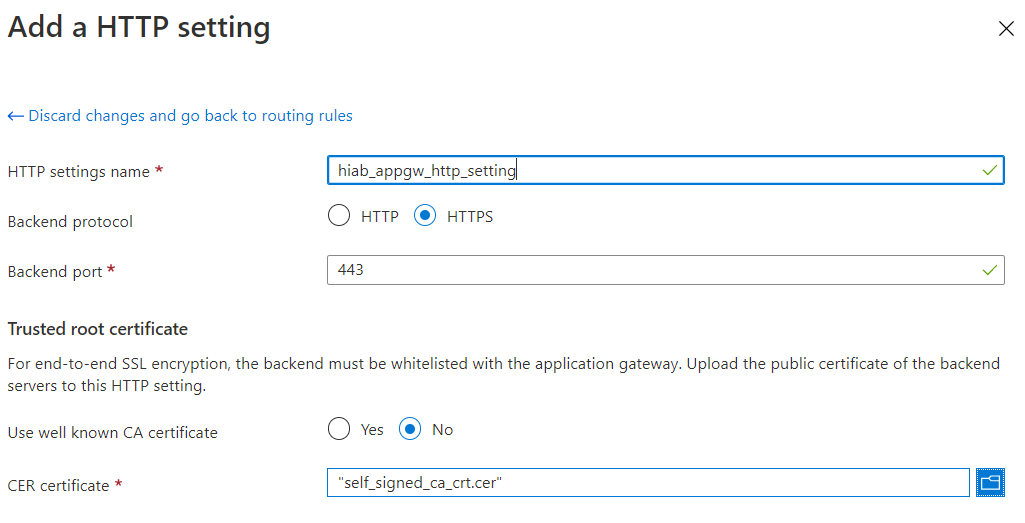
Azure is only able to handle CER extensions for base64 certificate (PEM encoding). In case of a different extension of your certificate, just rename it as a
.cerfile.
-
Also ensure you override the hostname accordingly to the CN of your Certificate.

Reference
-
Microsoft documentation about Azure Application Gateway - https://docs.microsoft.com/en-us/azure/application-gateway/quick-create-portal
-
A online troubleshooting helper for "Bad Gateway (502)" error can be found here: Azure Application Gateway with bad gateway (502) errors (microsoft.com)
Related Articles