Last Updated: 2025-05-27
Purpose
This article serves to improve understanding of the role that discovery scans play in enhancing the security and resilience of an organization's digital infrastructure. Its aim is to provide a comprehensive overview of the objectives and configurations of Asset Discovery.
Introduction
Discovery scans serve as the foundation for proactive cybersecurity measures. They assume a pivotal role in asset identification within the network, irrespective of the underlying mechanisms, whether network, cloud, or Docker images. A holistic view of the digital landscape is obtained through these scans, facilitating the groundwork for more comprehensive assessments. This can be achieved through various mechanisms, including network, cloud, and Docker image scans. Each method offers a distinct perspective on asset identification.
Two types of scans can be performed:
-
Asset Discovery scans
-
Assessment scans
It is recommended to perform discovery scans to get an overview of the assets on the network and assessment scans to understand the vulnerabilities on those assets.
Asset Discovery
Asset Discovery enumerate the hardware and software assets within an organization's network infrastructure. The goal of Asset Discovery is to provide a comprehensive view of an organization's IT assets to be used when setting up the Vulnerability Scanning.
Asset Discovery is an essential component of network security and risk management, and is performed with the help of automated tools that scan an organization's network to provide a detailed report of all detected assets.
Docker Image Discovery
A Docker image is a file used to execute code in a Docker container. Docker images act as a set of instructions to build a Docker container, like a template. Docker images also act as the starting point when using Docker. An image is comparable to a snapshot in virtual machine (VM) environments.
Docker Image Discovery enumerates docker images within a registry using provided credentials and the Docker Registry HTTP API V2.
Prerequisite
Prior to running a Docker discovery, make sure you have created the Docker credentials.
Running the Scan
A Docker Registry discovery function retrieves image information from a private Docker Registry such as name, OS, architecture and size.
The discovery will only find Docker images with the latest tag to limit the number of Docker images and improve visibility.
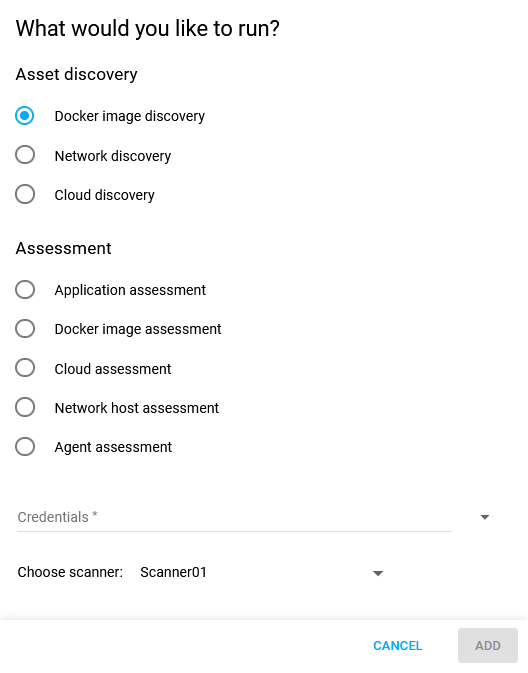
To perform a Docker discovery:
-
Navigate to Configurations > Scan Configurations in the Main Menu.
-
Click on the
-
Select Docker image discovery.
-
Fill in the required information.
-
Select a scanner.
-
Click on ADD to save the newly created configuration.
-
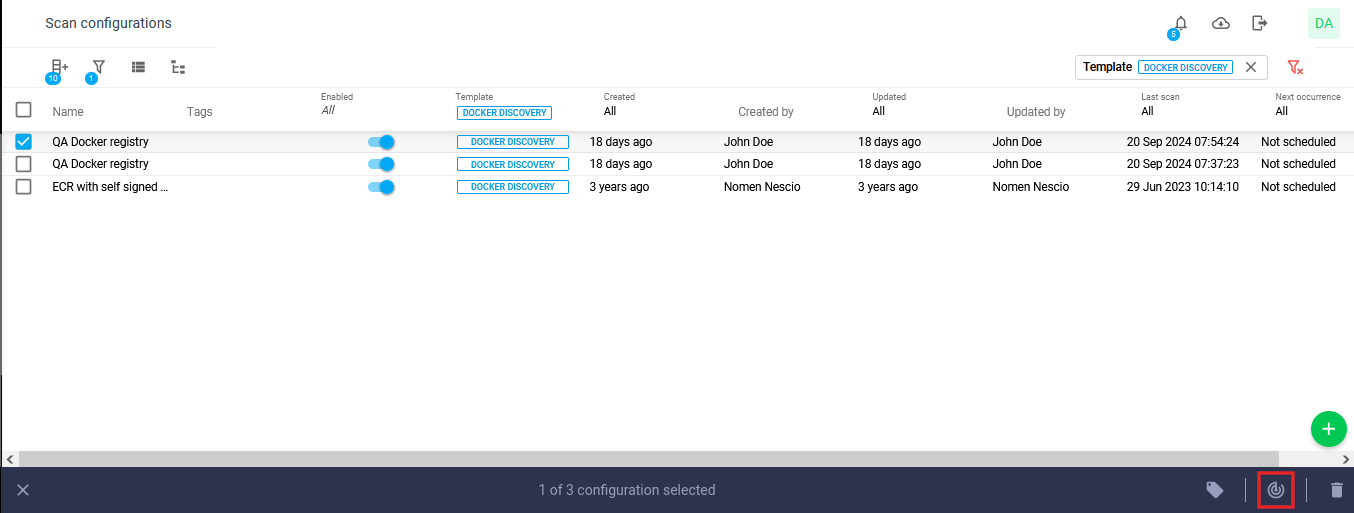
Select the Scan configuration and click on the scan now

-
View the scan status under Scans in the Main Menu.
-
View the discovered assets, Docker images under Assets. They are shown in the list of assets with the filter 'source' set to Cloudsec, and the type set to Docker Image.
.png?cb=38425070d7725397b3359d8a9a1f5b73)
Network Discovery
A Network Discovery scan identifies and lists all the hardware and software assets within an organization's network infrastructure by sending packets over multiple protocols such as ARP/ICMP/TCP/UDP. If the scanner gets anything back from the target, the target is confirmed to be alive.
Setting up a Network Discovery Scan
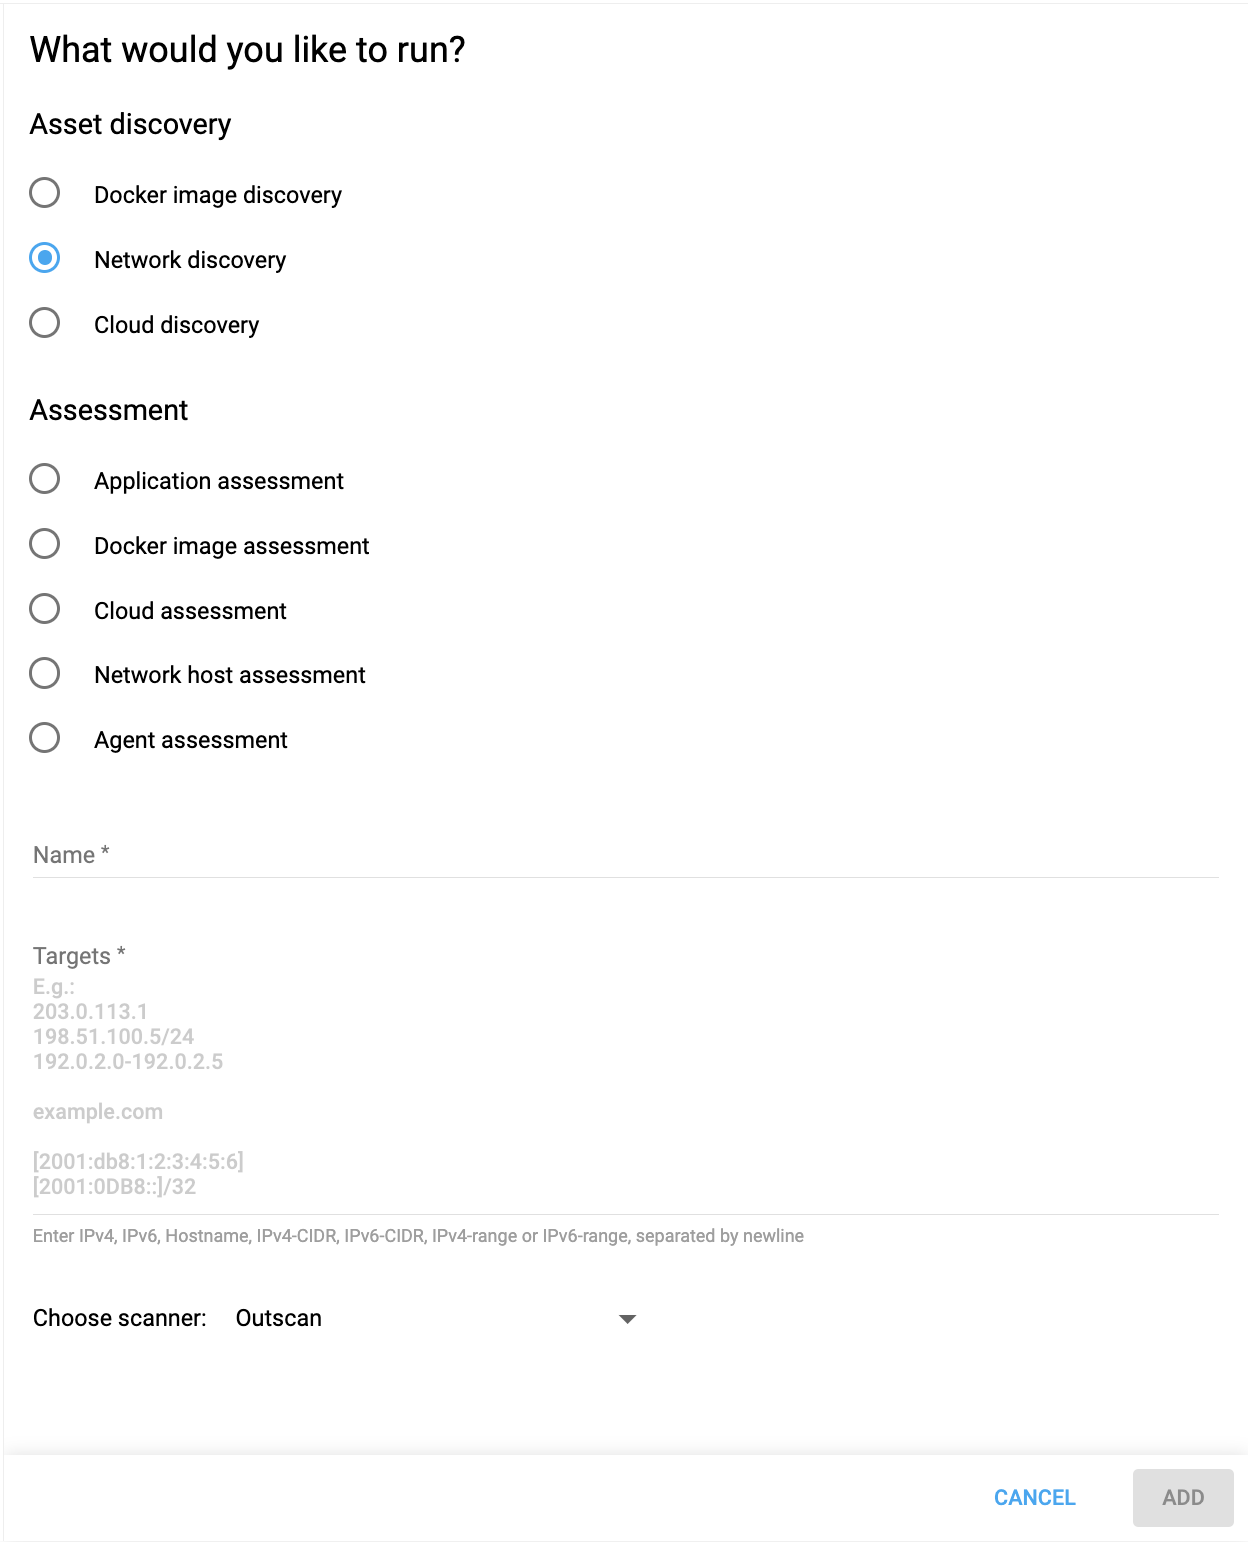
To configure a Network discovery scan:
-
Select the Network discovery radio button.
-
Enter a Name for the configuration.
-
Enter Targets for the configuration. These can be in the format of IPv4, IPv6, Hostname, IPv4-CIDR , IPv4-range, separated by newline.
-
Choose a scanner from the drop-down menu.
-
Click the ADD button to save the configuration.
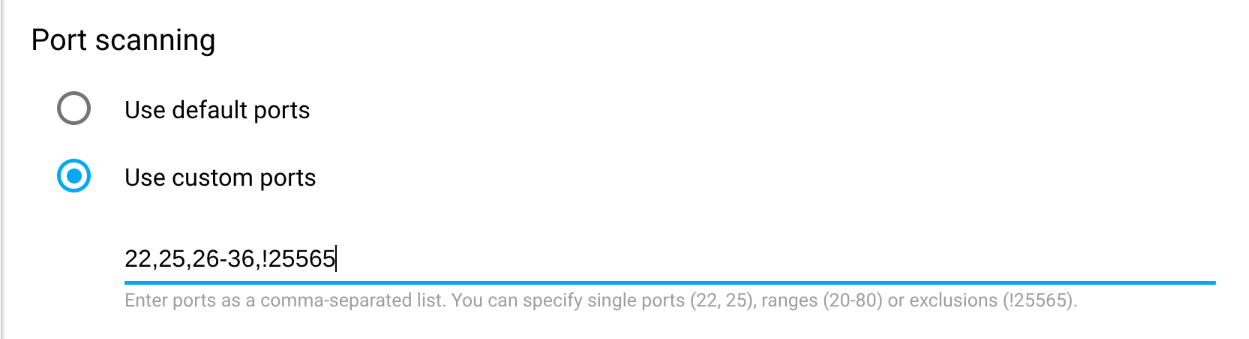
Setting Ports Manually
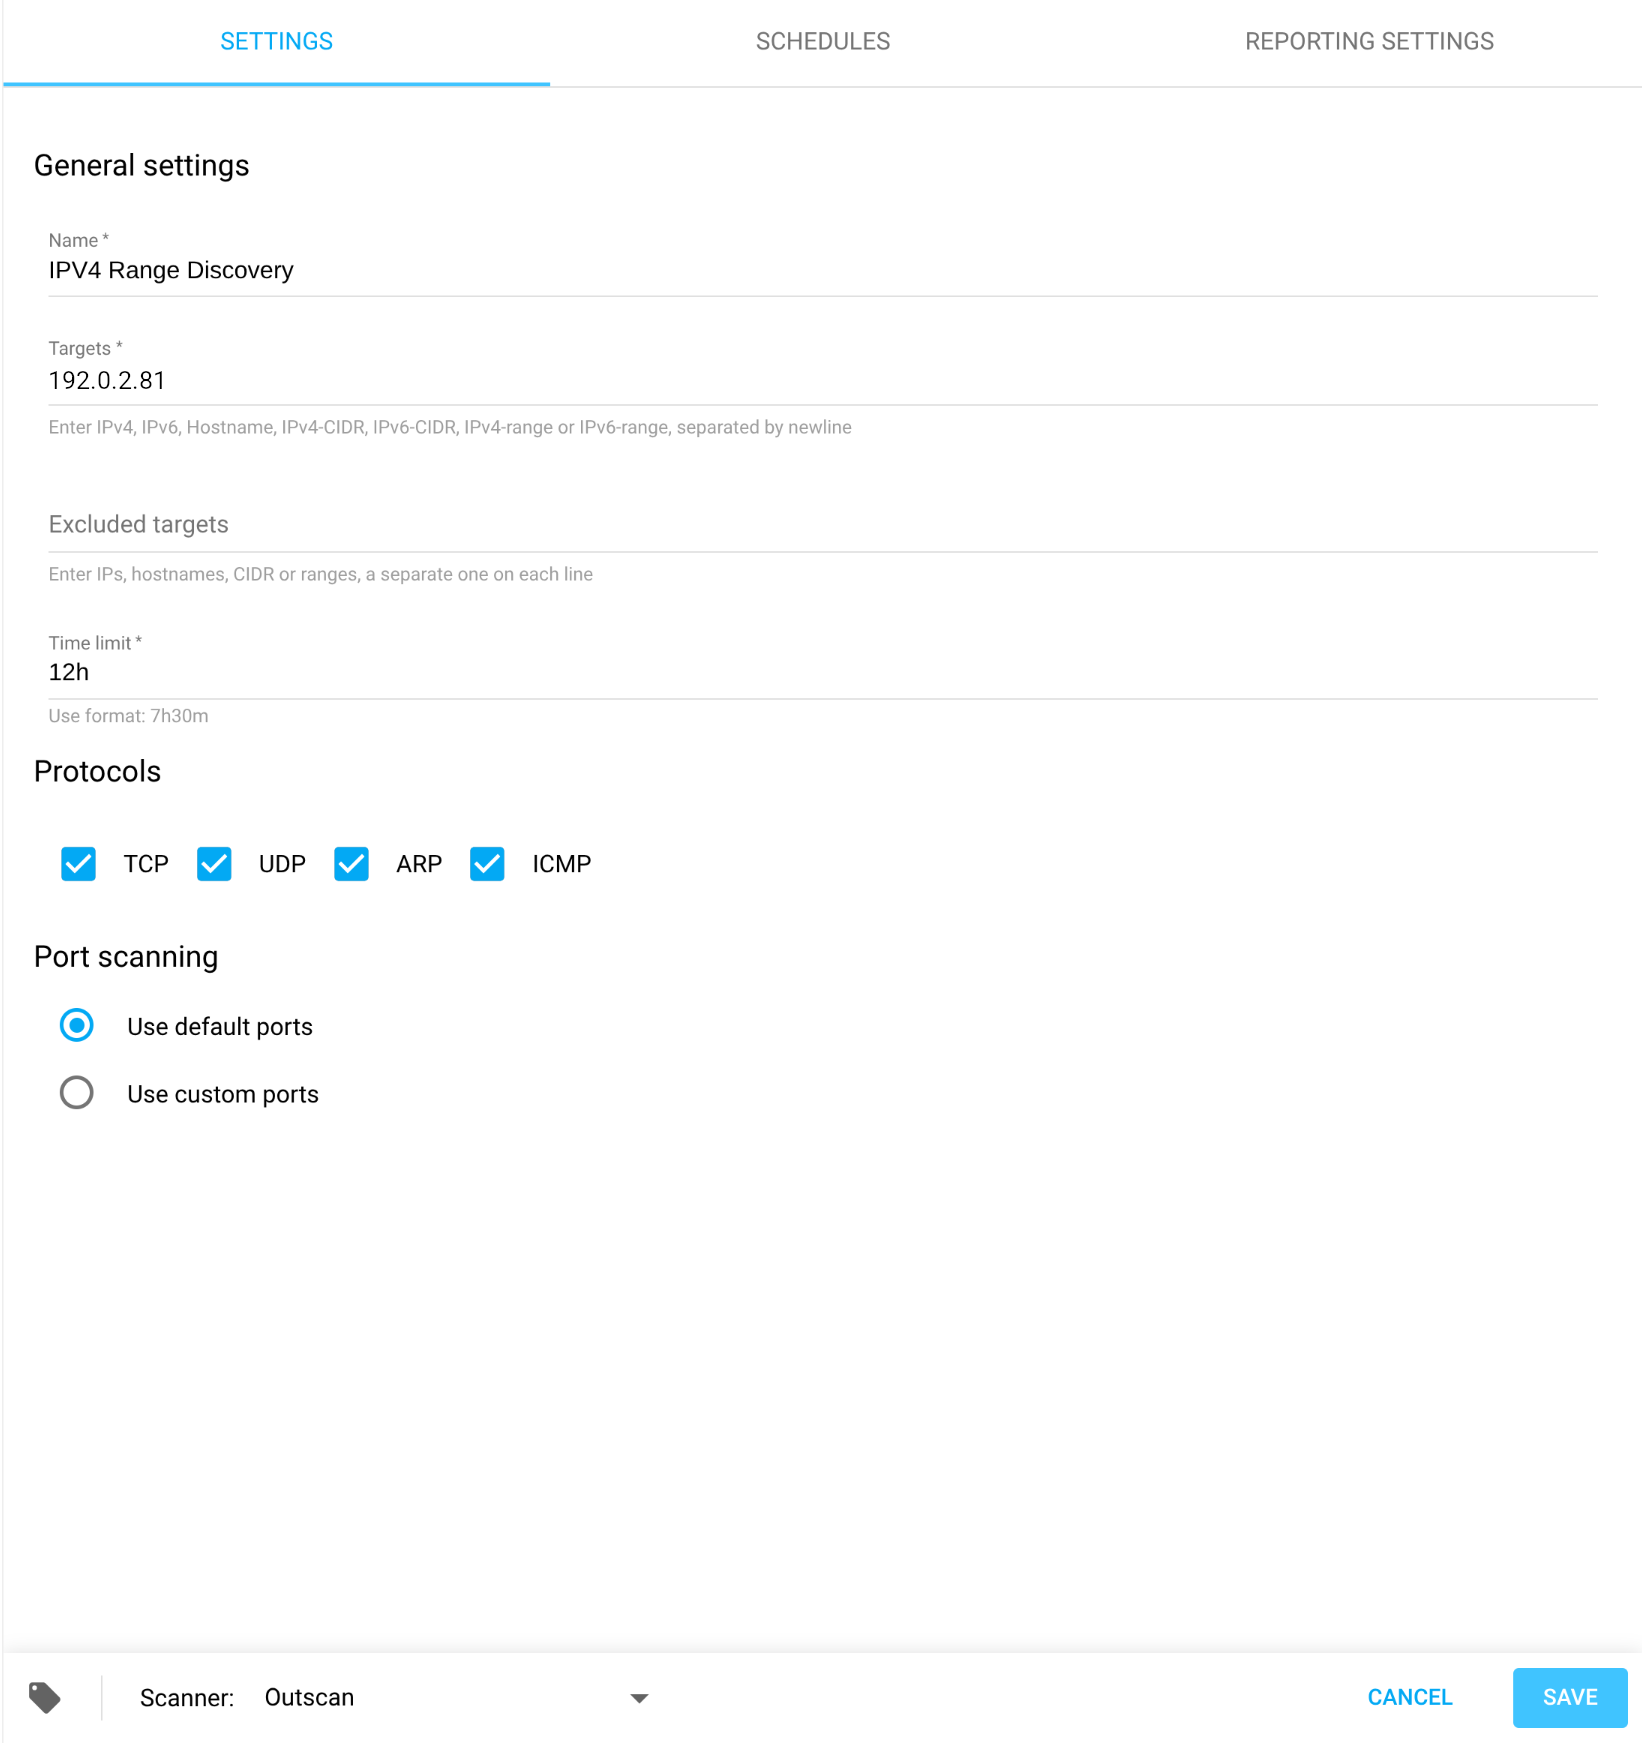
Ports can be manually set to a saved network discovery scan
-
Open a previously saved discovery scan by clicking on it.
-
Go to the Port scanning section at the bottom.
-
Fill in the ports you want to scan. The port range expression format accept comma separated items such as a port (22,25), a range (20-80), an exclusion (!25565), default range (def), or no ports should be scanned (none).
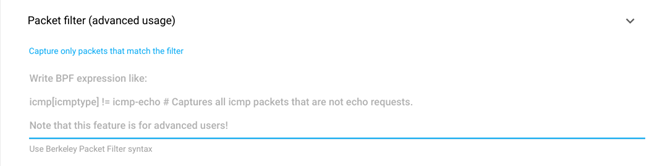
Reporting Settings - Packet filter
In the Discovery Scan Settings UI, you can deselect a specific protocol that you do not want to trigger. However, this only stops explicitly sending requests with those protocols, it does not prevent it from triggering on related traffic. This may lead to seeing targets trigger on protocols that are deselected in the UI.
With the advanced report filtering option, you can perform a discovery scan but ignore traffic matching the filter by adding Berkeley Packet Filter (BPF) expressions.
BPF Expression Syntax
Refer to https://biot.com/capstats/bpf.html [1] for syntax.
Use Cases
Sometimes, even if you do not send an Address Resolution Protocol (ARP) message, you may still get an ARP response which marks the target as alive. By setting a filter to remove the ARP messages, the scanner will not report on ARP responses.
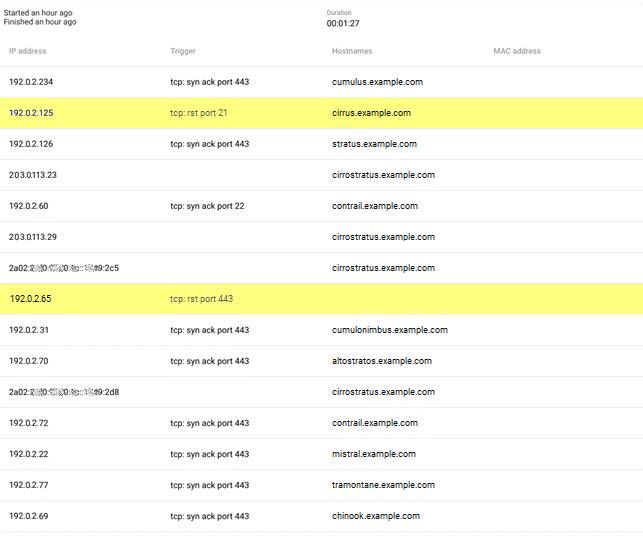
Examples
Example 1
Scan results without packet filter.
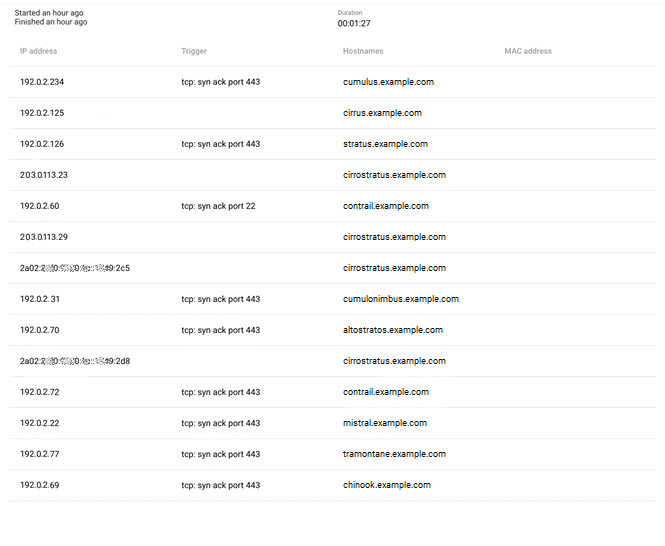
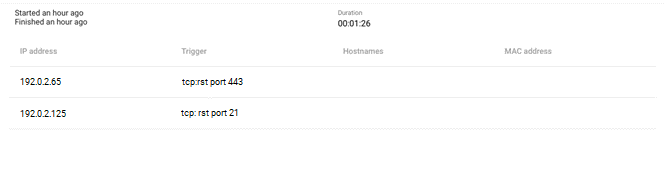
Example 2
Scan results using the packet filter to filter out TCP RST packets “tcp[13] & 0x04 != 0”
Example 3
Scan results using the packet filter to capture TCP RST packets “not (tcp[13] & 0x04 != 0)”
Additional Resources
Cloud Discovery
A Cloud Discovery scan counts the instances in (AWS currently) cloud environments without using network traffic but with provided AWS credentials and querying the AWS REST APIs.
Run the Cloud Discovery Scan
To configure a Cloud discovery scan:
-
Navigate to Configurations > Scan Configurations in the Main Menu.
-
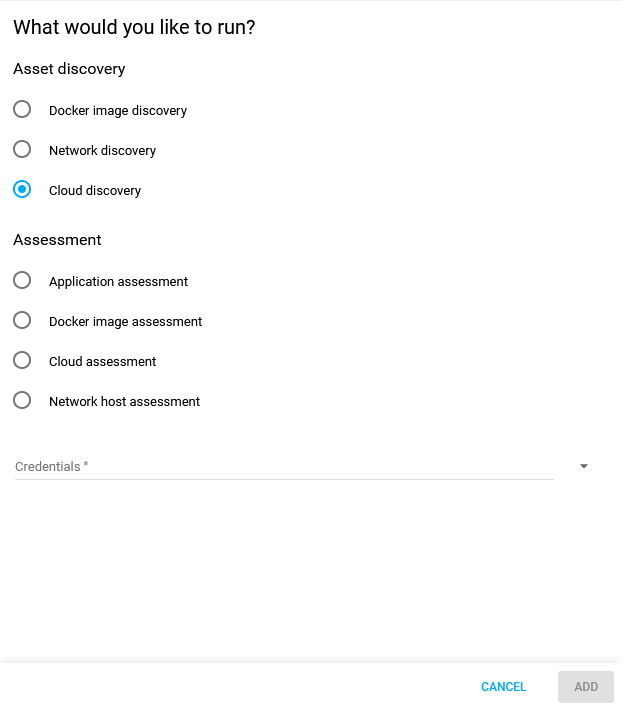
Click on the
-
Select Cloud discovery.
-
Select Credentials from the drop-down menu.
-
Select Regions.
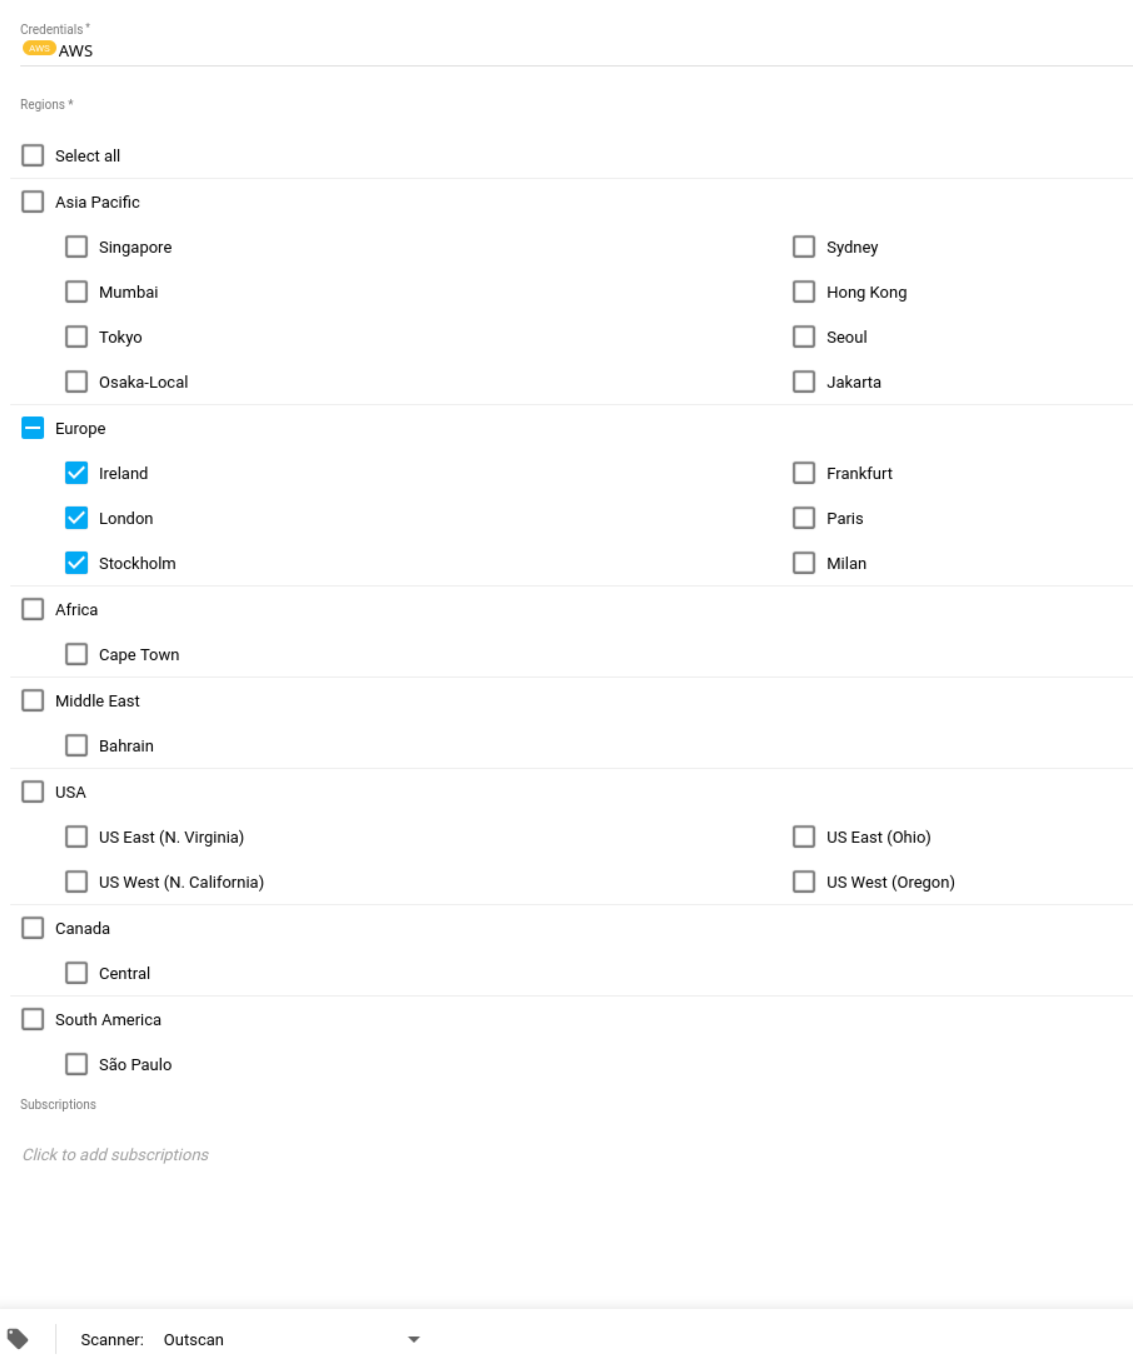
-
Choose a scanner.
-
Click the blue ADD button to save the configuration.
-
Select the Scan configuration and click on the scan now
-
View the scan status under Scans in the Main Menu.

-
View the discovered assets, Docker images under Assets > Assets as the list of assets with the filter 'source' set to Cloudsec and the type set to Docker Image.
.png?cb=89c08acab7205cb8ec344f229bab0039)
Discovery Tagging
When configuring a discovery scan it is possible to set tags that are applied to the found assets, there are two different ways the tags can be applied.
-
The tags given in Add the following tags to discovered assets is added to all discovered assets.
-
The tags given in Set the following tags to only exist on discovered assets is removed from all assets, and added to all assets found by the discovery.

This will remove that tag from all assets you have, so make sure to not do this for tags you want to be using across different configurations.
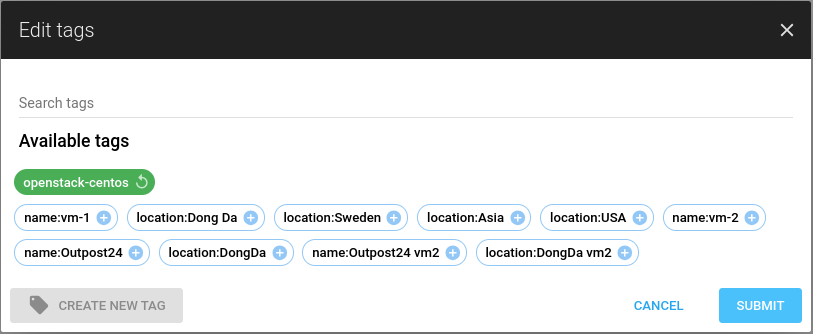
Adding Tags to Assets
Assets can be tagged in the same way as other objects.
To add tags to an asset:
-
Go to Portal > Assets > Assets.
-
Right click at the newly discovered asset, select Edit tags.
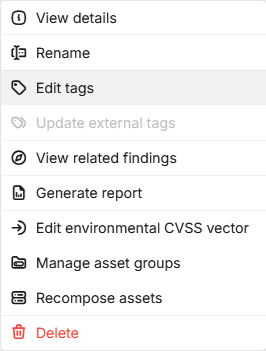
-
Type in a new tag and click Submit.
For more information, see Tags.
Tag Replacement of Target Group Settings
-
If you used to have the Add Found Targets To Target Group checkbox you would add a tag representing that target group to Add the following tags to discovered assets. See Discovery Tagging section.
-
If you used to have the Empty Target Group Before Adding checkbox you would only add the tag representing that target group to Set the following tags to only exist on discovered assets.
Reference
-
BPF Expression Syntax - https://biot.com/capstats/bpf.html
-
Berkeley Packet Filter - https://en.wikipedia.org/wiki/Berkeley_Packet_Filter
Related Articles
- Windows 10/Windows 2019 Server
- General Information about SMB/WinRM Scanning
- Windows 8.1
- Scan Blueprint
- How to Test SMB Authentication
- Docker Image Assessment
- Windows 2016 Server
- How to Scan AWS ECR Images
- Scanning-Less Scanning
- Scan Scheduling Errors
- Network Host Assessment
- Core Installation
- Windows 2008 R2 Server
- Scanning Range
- SMB Authentication from OUTSCAN/HIAB