Last Updated: 2026-04-02
Purpose
This article provides set up information on the CyberArk integration.
Introduction
CyberArk enables organizations to securely store and manage passwords, encryption keys, and other credentials. This helps prevent unauthorized access to sensitive systems and information. This article outlines the setup process for integrating CyberArk, a tool for securely managing passwords and credentials. To add a CyberArk integration a PEM-formatted certificate, a .pem file , is required, which can be generated using OpenSSL.
Add New CyberArk Integration
To add a CyberArk integration:
-
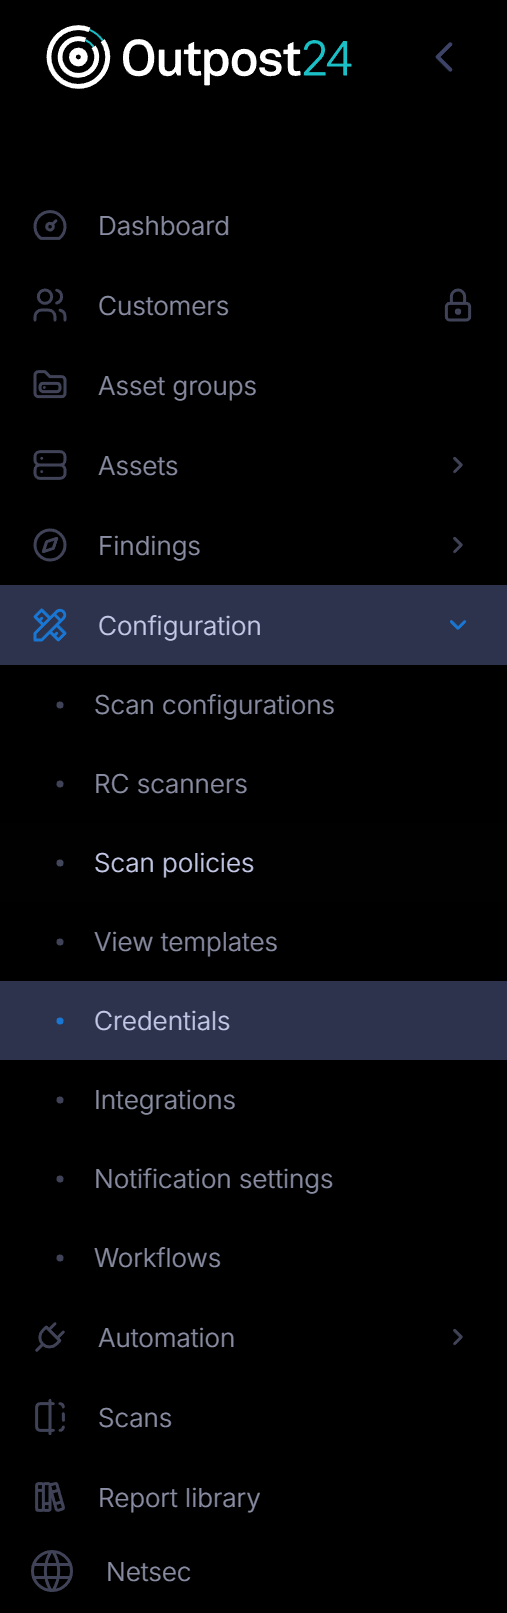
Go to Configuration > Integration in the left hand side menu.
-
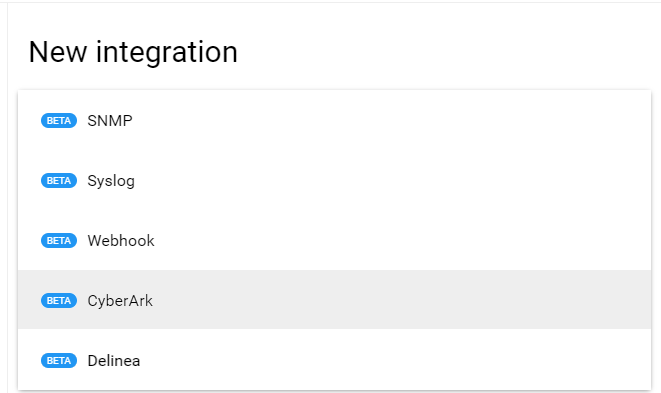
Click the green
-
Select CyberArk in the drop-down menu.
-
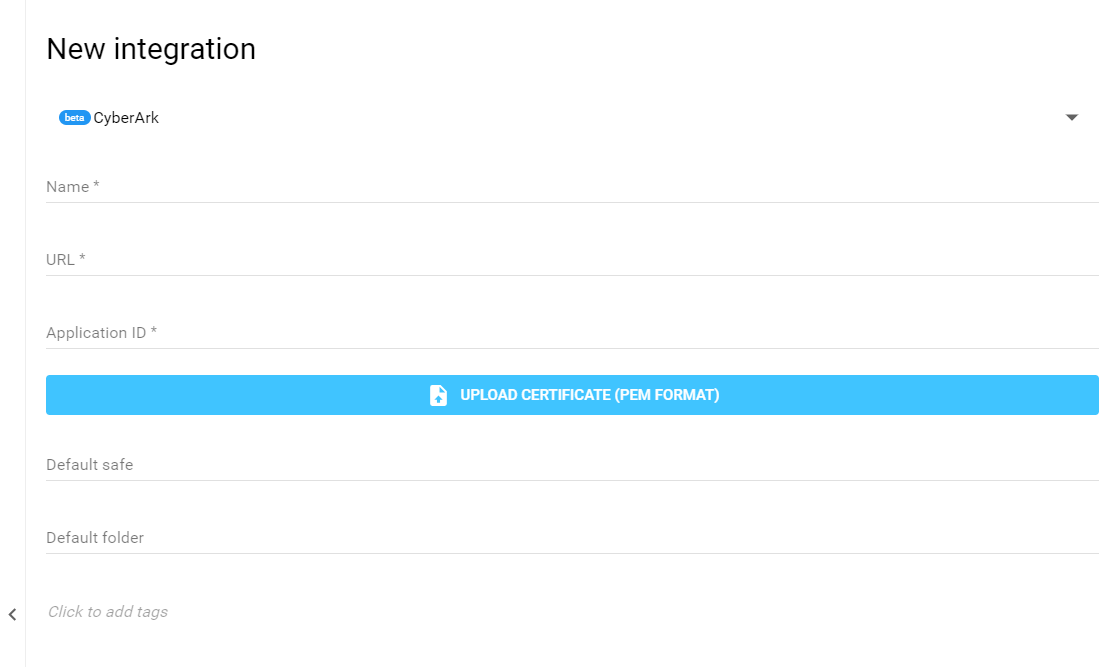
Fill in credentials such as Name, URL, Application ID, Default safe, Default folder.
|
Option |
Description |
|---|---|
|
Name |
Name of the integration. |
|
URL |
URL to the CyberArk integration. |
|
Application ID |
CyberArk token used for authentication. |
|
Default safe |
Default value used for CyberArk safe. If this field is empty in next step (in the credentials) this value is used instead for safe. |
|
Default folder |
Default value used for CyberArk folder. If this field is empty in next step (in the credentials) this value is used instead for folder. |
Only selecting an integration for credentials will not get the values from integration into credentials. You have to add jinja variables in the credentials fields.
For example, if you enter {{Content}} in the field, we will get password value from CyberArk and use that in credential.
-
Click the blue upload button and select a PEM-formatted certificate file. See How to Generate a .pem File with OpenSSL section on how to create a .pem file.
-
Click the blue ADD to save the new integration.
If both Safe and Folder field is empty then CyberArk will search in all safes and folders.
If Safe have value and Folder field is empty then Root will be default folder and Cyberark will only search in Root folder.
If Folder has value it should be the full path, like Root/Groups, Cyberark will not search in subfolders
How to Generate a .pem File with OpenSSL?
Prerequisite
You need to install OpenSSL before performing this step.
Generate the .pem File
Follow these steps to generate a .pem file using OpenSSL:
-
Open a command prompt or terminal.
-
Navigate to the directory where you want to generate the .pem file.
-
Run the following command to generate a private key and CSR (Certificate Signing Request) file:
openssl req -newkey rsa:2048 -nodes -keyout private.key -out csr.csr -
Follow the instructions to enter the necessary information for the CSR.
-
Next, run the following command to create the .pem file:
openssl x509 -req -in csr.csr -signkey private.key -out certificate.pem
OpenSSL will be created in the same directory.
Link a CyberArk Integration to a Credential
To link a CyberArk integration to a credential:
-
In the Portal menu view, click the Configuration → Credential.
-
Click the Create credentials button to open the create credentials form.

-
Select SSH for example in the drop-down menu.
-
Fill in the form and select your Cyberark integration as Credential source.
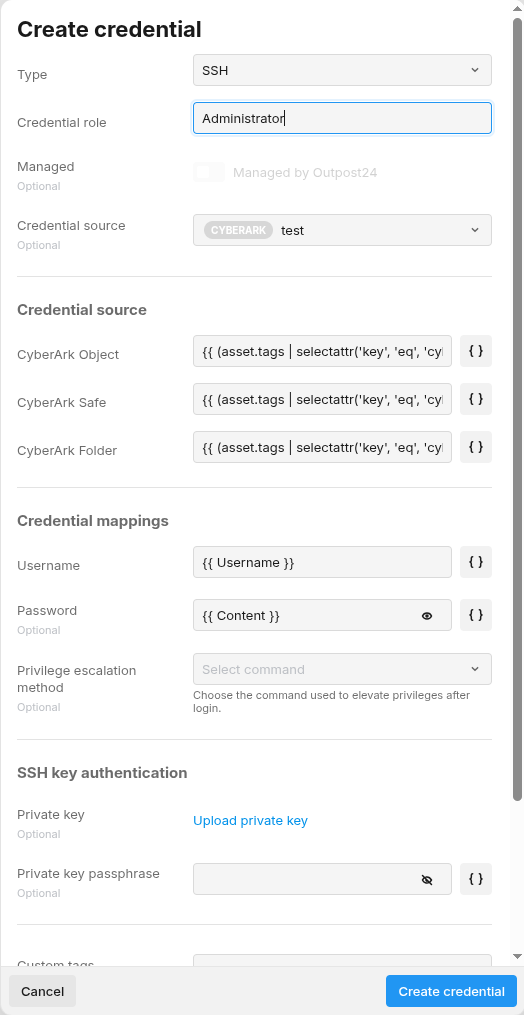
-
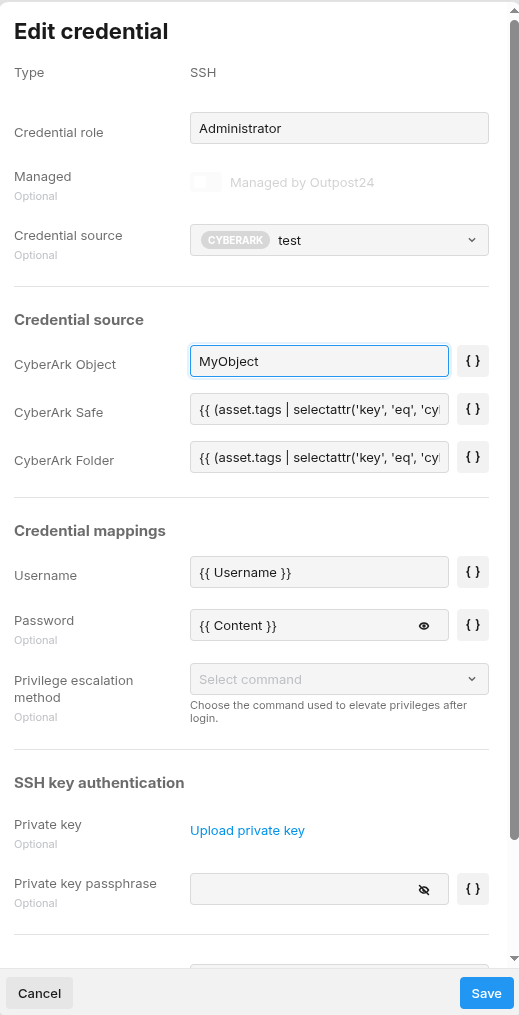
Fill in CyberArk Object, CyberArk Safe, CyberArk Folder. If any of these are empty, the default value in the previous step is used.
Edit Credential
To edit credential’s integration:
-
In the Credential view, right-click on the credential item and select the Edit option from the pop-up menu.

-
Change the credential and click Save.
Troubleshooting
If something goes wrong when using the credentials with integrations when scanning, an error message is displayed in the scan details.

Related Articles
- CyberArk Integration
- Delinea Integration
- General Information about SMB/WinRM Scanning
- Overview
- Portal Integration with ServiceNow Incidents
- SNMP Integration
- Syslog Integration
- Tickets Quick Start Guide
- Webhook Integration
- Webhook Integration with JIRA
- Webhook Integration with Microsoft Teams
- Webhook Integration with OAuth v2