Last Updated: 2025-05-27
Purpose
This article describes how to mark a finding as a false positive in the Portal.
Introduction
A false positive refers to situations where the scanner mistakenly identifies a harmless action or event as a threat or risk. Marking a Finding as False Positive allows analysts to indicate that a flagged vulnerability is not a real threat—due to factors like outdated threat signatures, misconfiguration or overzealous security settings, or inherent limitations in the detection algorithms.
To prevent it from reoccurring in future scans, it can be marked as a False Positive. Once marked, the finding retains visibility but is labeled as false positive, and optionally an encrypted scan blueprint can be submitted to Outpost24’s research team for further evaluation. This capability helps reduce alert fatigue, prevent recurring noise in scan results, and improve the signal-to-noise ratio in your vulnerability management process.
Reporting a False Positive
Prerequisites
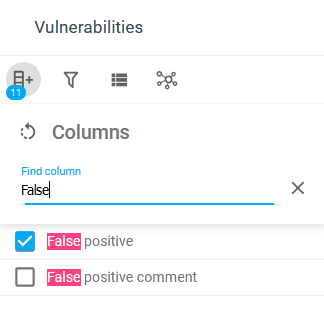
Before you start, verify that the False Positive column is active, to show the status of the findings.
To activate the False Positive column:
-
Login to the portal.
-
Go to Findings > Vulnerabilities.
-
Click on the filter icon and select False positive.
Reporting
To report a false positive:
-
Go to Findings > Vulnerabilities.
-
Open the mark false positive popup. This can be done in two ways:
-
From the Toolbar:
-
Select the checkbox on the vulnerabilities you want to mark as a false positive.
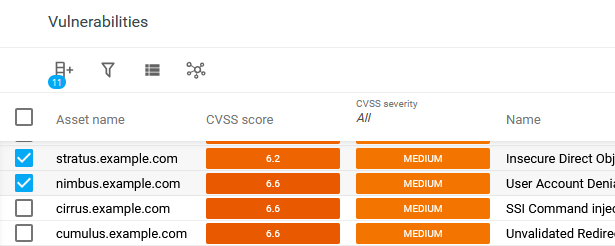
-
Click the Mark as false positive


-
-
From the context menu:
-
Right-click on the vulnerabilities you want to mark as false positive to open the context menu.
-
Select Mark as false positive in the in the menu.
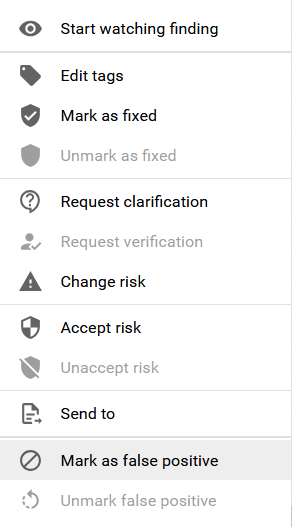
-
-
-
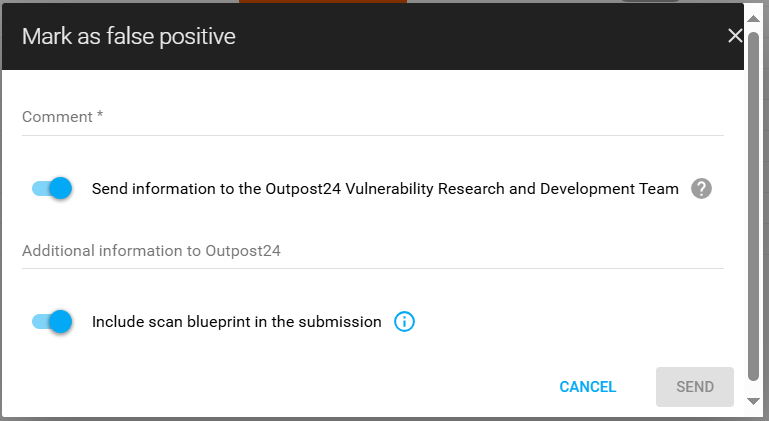
When the Mark as false positive popup is displayed, enter a comment in the comment input.
-
To send additional information to Outpost24, toggle the Send information to the Outpost24 Vulnerability Research and Development Team switch.
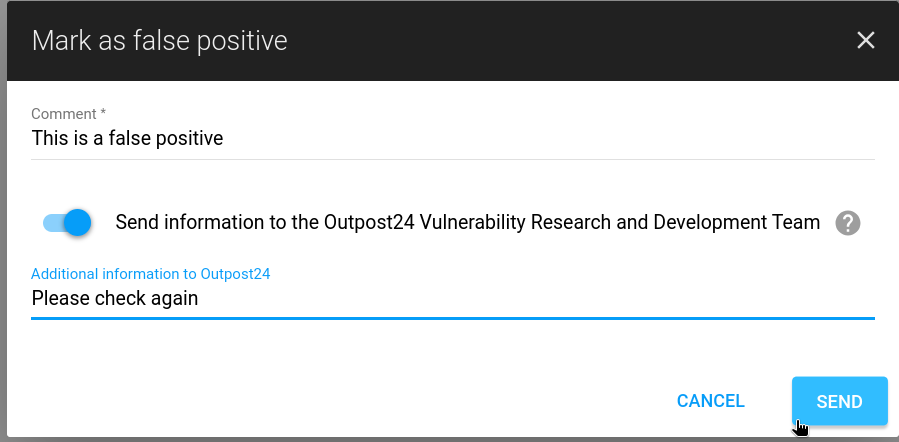
-
Once all of the information is filled out, click the blue SEND button.
A False Positive will still be listed in the results, but with its status changed to false positive.
The vulnerability details, comments and additional information are displayed in the comment tab.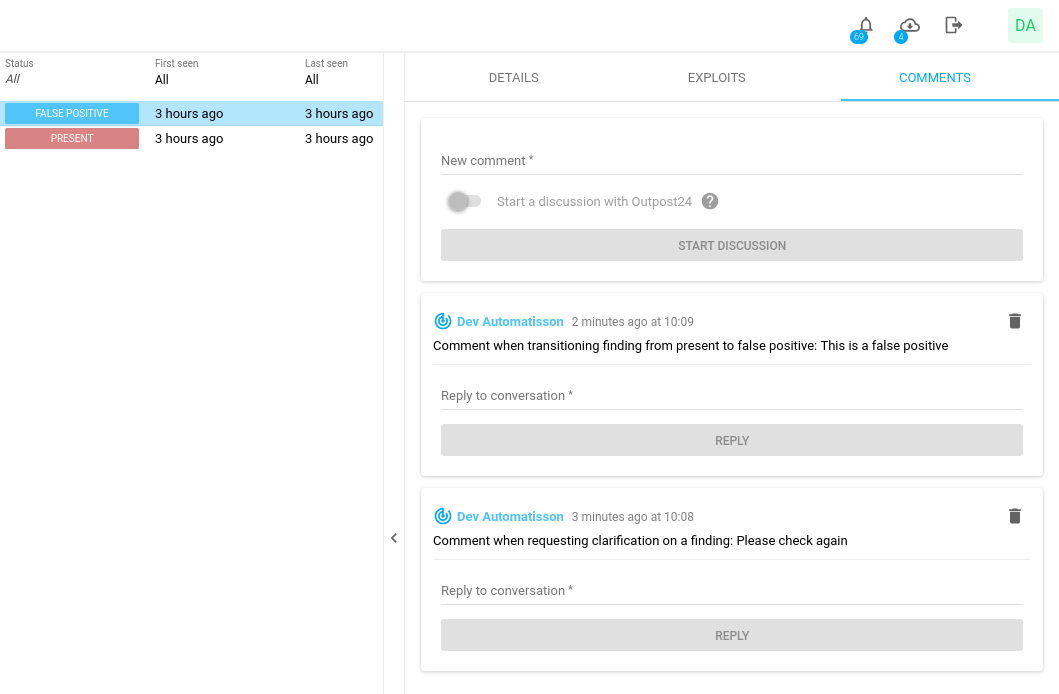
-
For HIAB users, if they choose the Include scan blueprint in the submission option, an encrypted blueprint file is created and uploaded to Outpost24 Support Team.
Unmarking a False Positive
To unmark an entry as a false positive, select Unmark as False Positive in the context menu or the toolbar.
Related Articles