Last updated: 2026-05-22
Purpose
This article provides users with an overview of how to set up and use the Event Notifications module in OUTSCAN and HIAB.
Introduction
In Outpost24, Notification Settings is the module where you define how and when the platform communicates key events to users or external systems. This includes events such as scan failures, updates, or configuration changes. You can choose event triggers, select output channels, and customize message templates using variables. With this feature, you gain a flexible and maintainable way to stay informed about critical system activities and to integrate alerts into your monitoring or incident response pipelines.
To effectively monitor and maintain your security solution, specific events should be defined to track the ongoing progress of the vulnerability management program. This means knowing when the scanner is updated, when modifications are made, and when scans fail. The Event Notification feature supports multiple integrated event types and destinations where notifications can be delivered. Each event type and destination can be specified during configuration, and notifications can be customized using Jinja2 to meet your requirements.
Event Notification
The Notification settings view provides an overview of the created settings and their status. The settings can be enabled and disabled directly from the view.
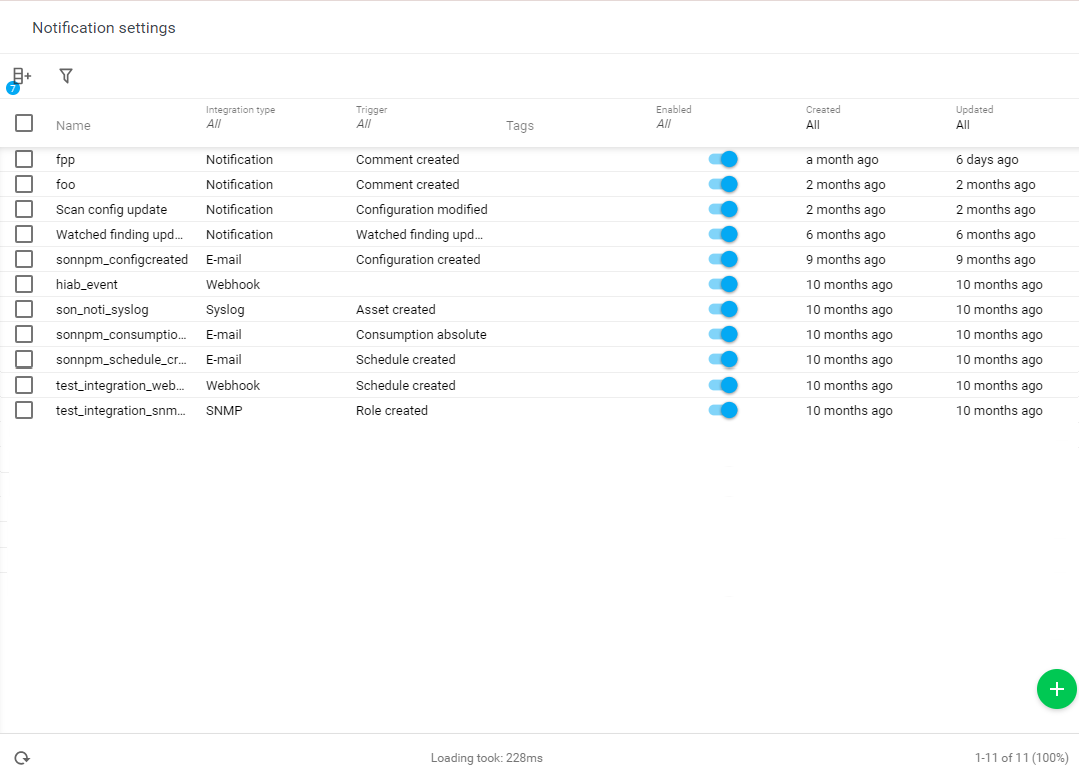
Columns
Columns can be configured as described in Column Configuration, along with the Filters function.
|
Object |
Icon |
Description |
|---|---|---|
|
Created |
|
Shows the creation date of the notification setting. |
|
Created by |
|
Shows the creator of the notification setting. |
|
Enabled |
|
Toggles the notification on or off. Enabled Disabled |
|
ID |
|
The identifier of the notification setting. |
|
Integration ID |
|
The identifier of the connected Integration. See Integrations. |
|
Integration type |
|
The integration types are:
|
|
Name |
|
Shows the name of the notification. |
|
Tags |
|
Tags that are associated to the notification setting. See Tags. |
|
Trigger |
|
The trigger associated with the notification. See the Trigger section. |
|
Updated |
|
Shows the date of the last update to the notification settings. |
|
Updated by |
|
Shows the user who last updated the notification settings. |
|
View template ID |
|
Shows the identifier to a saved View template. See View Templates. |
Configuring the Event Notification
When configuring the Event Notification, several Triggers, Integrations, View Templates, and Variables can be selected to tailor the notification.
Trigger
Triggers are automated instructions that respond to specific events by executing predefined actions, enhancing real-time monitoring, response, and overall security posture. They enable proactive notifications and actions, providing real-time insights and reducing the need for manual intervention. Examples of triggers include:
-
Asset triggers for changes in infrastructure.
-
Configuration triggers for system changes.
-
Finding triggers for vulnerabilities.
-
User event triggers for access control.
Each trigger include a default template that can be customized.
These triggers ensure timely updates and informed decision-making, acting as proactive agents to mitigate potential threats and improve platform resilience.
Integration
Integrations refer to the seamless incorporation of different software systems, tools, or services to work cohesively within a unified environment. Integrations act as bridges that enable the cybersecurity platform to communicate and share information with external applications or services. They play an important role in streamlining communication, enhancing data visibility, and automating workflows.
Email: The Event Notification can send automated email notifications and alerts to inform relevant stakeholders about security events or system changes. This email integration ensures immediate awareness and facilitates a timely response to critical incidents.
Note: Each recipient sees an Email notifications toggle in their My Settings. When the toggle is off, the user is excluded from emails sent by Event Notification subscriptions. The opt-out does not affect invitation emails, password reset emails, or scheduled report emails — these are still sent regardless of the toggle.

Notification: The notifications provide real-time alerts directly within Outscan, informing users instantly about important events. It is configurable on a per-user basis.
SNMP: Simple Network Management Protocol (SNMP) integration allows Outscan to communicate with network devices and management systems, enabling monitoring and management of network components. This is essential for gathering information about the network's health and status, and supporting a comprehensive threat analysis.
Syslog: Syslog integration involves sending event logs and messages to a centralized syslog server, enhancing visibility into system activities and facilitates analysis. It is valuable for auditing, compliance, and forensic purposes, ensuring that a detailed record of security events is maintained.
Webhook: Webhooks enable the Outscan to send real-time data to external systems or services, triggering actions in external applications based on specific events. This integration enhances automation capabilities and supports the use of various third-party tools and services.
For more detailed information on integration, see Event Notification - Integration and Integration Management.
View Templates
View Templates allow users to save and replicate personalized configurations. By storing settings such as column order, sorting criteria, column width, and filters, users can easily switch between different data perspectives without reapplying parameters. This tool ensures consistency and efficiency in data analysis, aligning with specific user needs and saving time for frequently revisited analyses. For more details on how to use this feature, see View Templates.
Available Variables
The variables in Notification Settings are dynamic placeholders for data in templates, automating workflows by inserting real-time data into messages or configurations. This ensures relevant information in changing contexts, enhances customization, reduces manual effort, and minimizes errors.
Keep in mind that the available variables depend on the selected event trigger.
Add Notification Setting
To add a notification setting:
-
Go to Configuration > Notification Settings.
-
Click the green
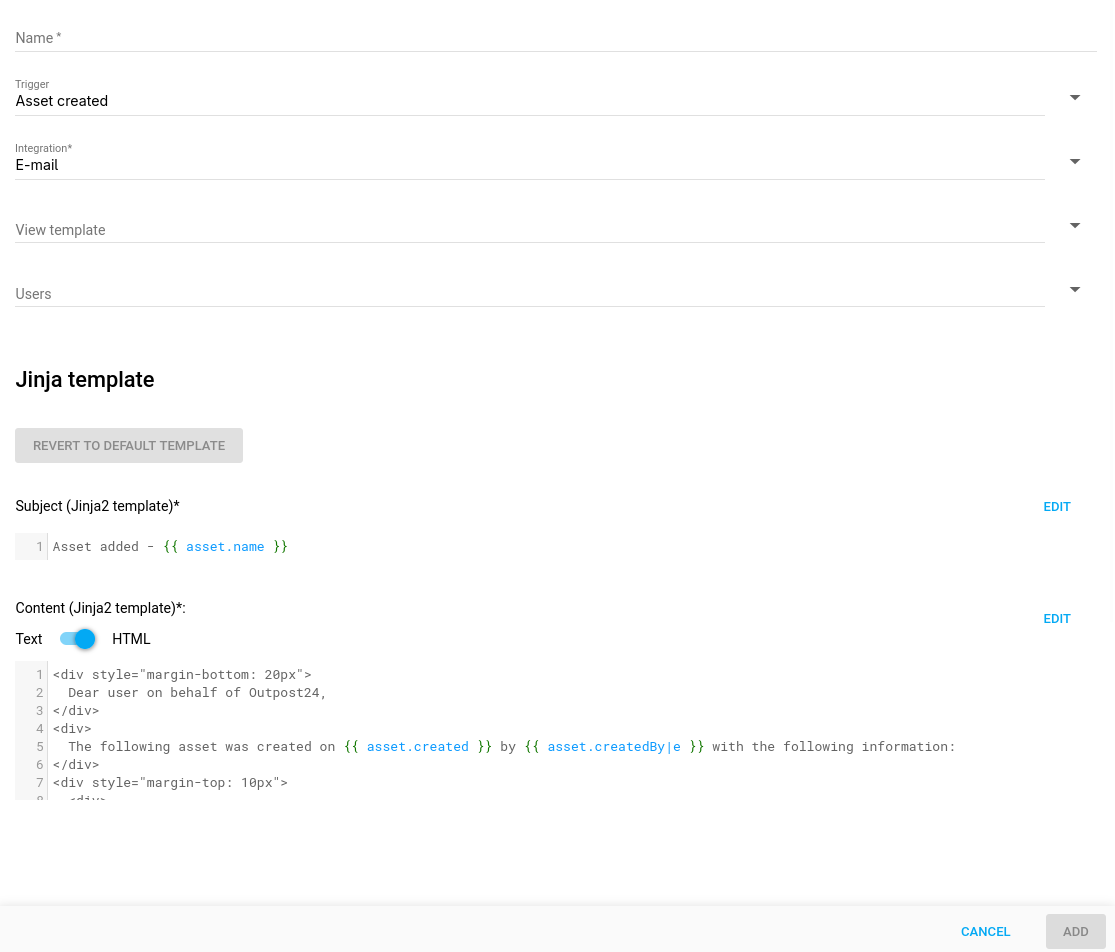
-
Select a Name for the setting.
-
Select a Trigger for the event.
-
Select an Integration for the event. See Event Notification - Integration.
-
Select a View Template. See View Templates.
-
Select Users to receive the notifications.
-
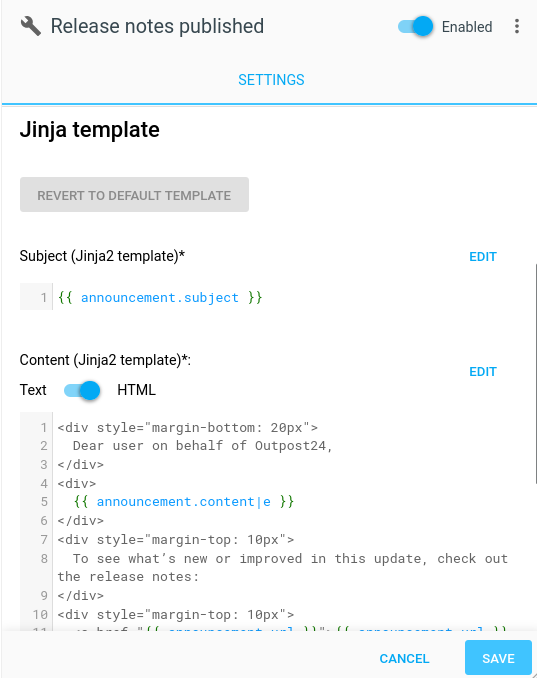
Add a Subject. You can add predefined variables from Available Variables drop down.
When starting to type the curly brackets {{ a list is displayed and filtered automatically while typing for easy access to the predefined variables.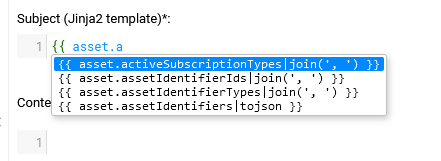
-
The Content contains a default template for the selected trigger. You can customize it and add predefined variables from Available Variables drop down. The Revert to Default Template button restore the template to default removing any customization that has been done.
-
Next the content subject/content, there is a Edit Button. You can preview the content/subject in different format.
-
Click the blue ADD button to save the Notification Setting.
The Users field is only active if E-mail is selected as an integration in step 5. If Notification is selected as an integration, the setting only applies on current user/sub-user.
If the Integration is set to E-mail, the content can be toggled between Text or HTML format.
Edit Notifications Settings
-
Go to Configuration > Notification Settings.
-
Select the notification setting you want to edit.
-
Edit the content of the Notification Setting.
-
Click the blue Save button to save.
Clone Notifications Settings
-
Go to Configuration > Notification Settings.
-
To clone the Notification Setting:
-
Right click the Notification Setting you want to duplicate and click Clone in the context menu.
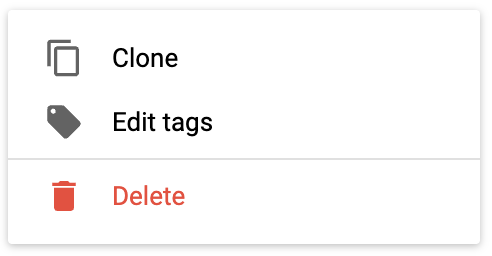
or -
Select the Notification Setting you want to clone by selecting the adjacent check box.
In the toolbar at the bottom, click the Clone

-
-
Adjust cloning options when necessary
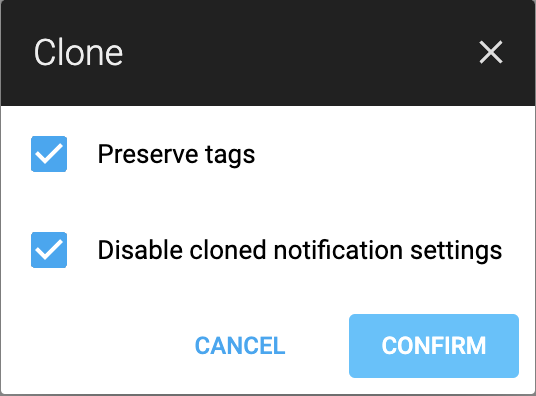
Preserve tags: Keeps the tags from the selected notification settings in the cloned version.
Disable cloned notification settings: Automatically disables the notification settings after being cloned. -
Click Confirm to proceed. Duplicating notification settings may take a few moments, depending on the number of settings selected and whether tags are being preserved.
Remove Notifications Settings
-
Go to Configuration > Notification Settings.
-
To remove the Notification Setting:
-
Right click the setting you want to remove and click Delete in the context menu or,
-
Select the Notification Setting you want to remove by selecting the adjacent check box.
In the toolbar at the bottom, click the bin

-
Notification Examples
The following example is for high-risk findings:
This specific example is for a customer who only has SWAT.
For more information see Event Notification - Use Cases
High Risk Finding
{{ finding.cvssV3Severity }} risk found - {{ finding.assetName }}
<div style="margin-bottom: 20px">
  Dear user on behalf of Outpost24,
</div>
<div>
  The following {{ finding.cvssV3Severity }} risk vulnerabilities were found for {{ finding.assetName|e }} as part of the ongoing {{ finding.source|join(', ') }} service:
</div>
<div style="margin-top: 10px">
  <a href="https://outscan.outpost24.com/portal/en/#/findings/{{ finding.id }}/details"><b>{{ finding.name|e }}</b></a>
</div>
<div style="margin-top: 20px">
  <div>Best Regards,</div>
  <div>Outpost24</div>
</div>
Tagging
For more information on tags, see Tags.
Add Tags
-
Go to Configuration > Notification Settings.
-
Right click the Notification Setting.
-
In the pop-up menu select Edit tags.
-
Search for a tag and select it from the given suggestions.
-
If the tag does not exist, click the Create New Tag button.
-
Click the Submit button to add the tag.
Edit Tags
-
Go to Configuration > Notification Settings.
-
Right click the Notification Setting.
-
In the pop-up menu, select Edit Tags.
Remove Tags
-
Go to Configuration > Notification Settings.
-
Click on the X on the tag you want to remove.
Preview Subject/Content
-
Go to Configuration > Notification Settings.
-
Click
-
Click the Edit button next to the subject or content.
After clicking the Edit button, a dialog is displayed which is divided into four parts:
-
editor section
-
preview section
-
object selector list
-
variable list.
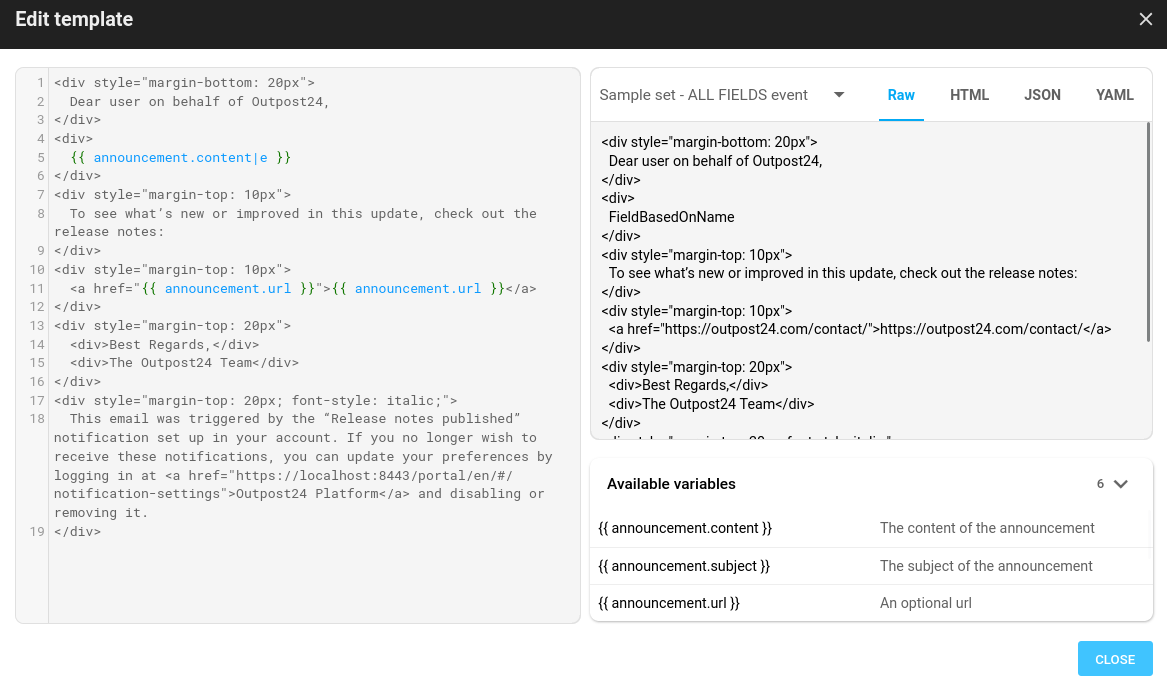
Editor section
When you type the double curly brackets {{, a list of predefined variables will be automatically displayed and filter based on your input, making it easier to insert dynamic values. The compiled results are inserted into the editor displayed on the right side in the Preview section.
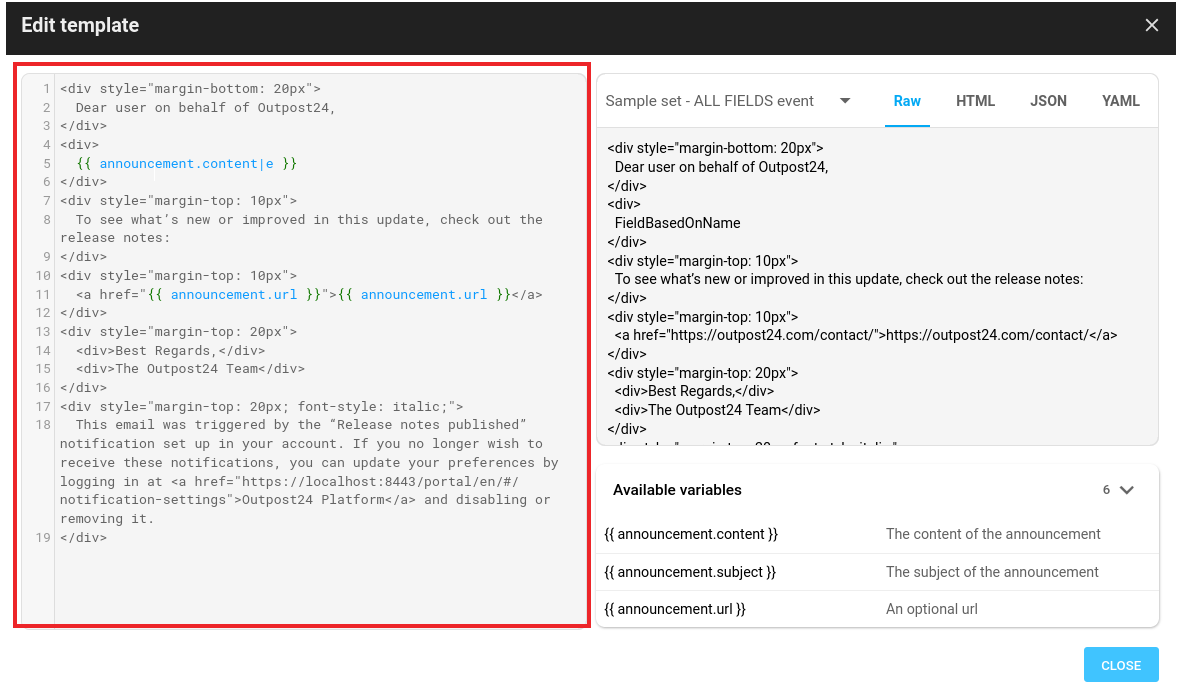
Preview section
This section displays a live preview of what the final results look like by evaluating the Jinja logic.
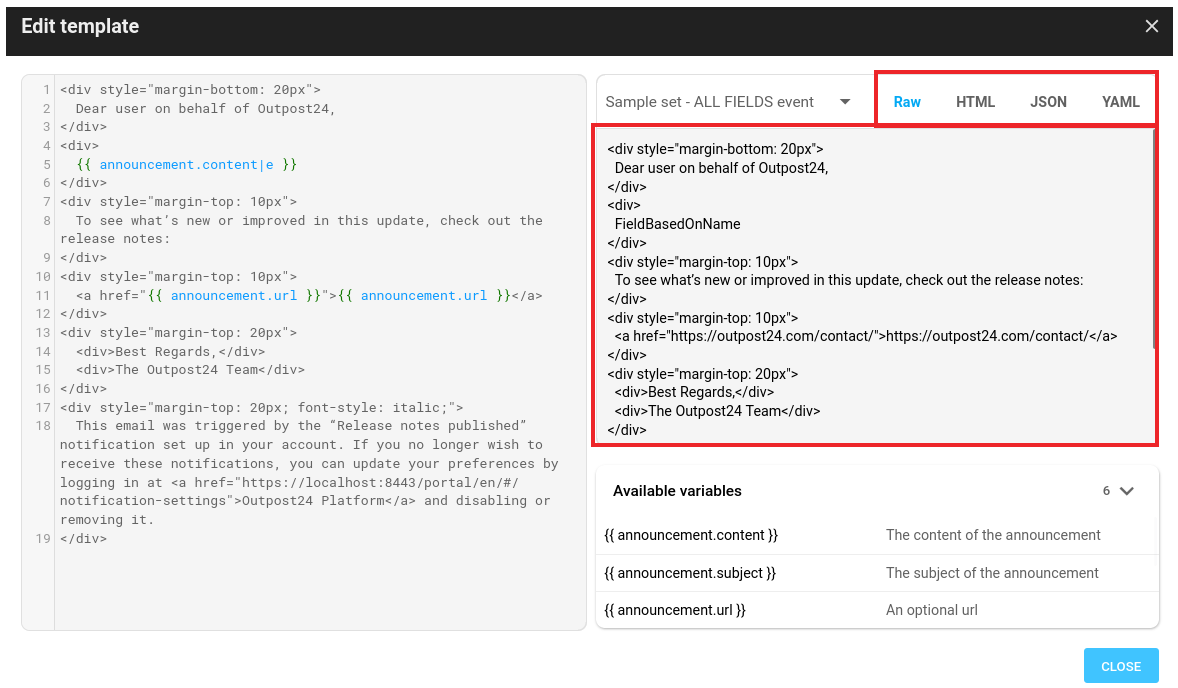
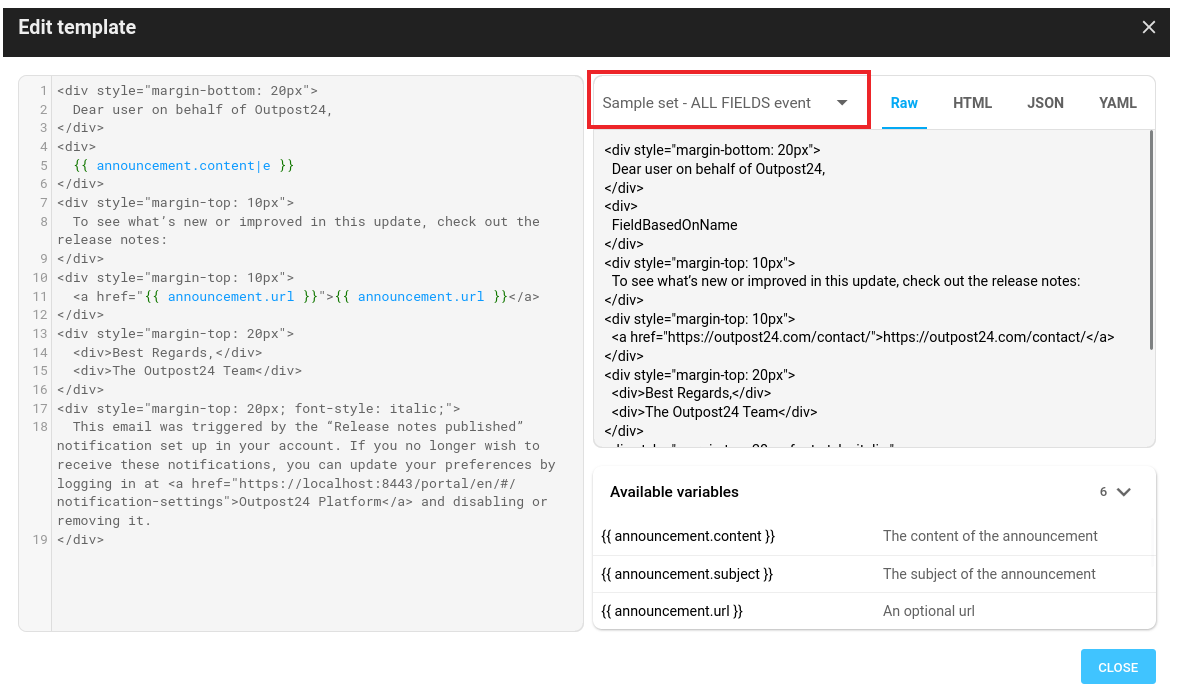
Preview formats
You may select how to preview the output from four format options:
-
Raw
Displays the evaluated content after Jinja variable substitution, but without rendering it as HTML or applying any syntax highlighting. This mode is useful for inspecting the plain output exactly as it would be delivered, especially when formatting is not required or when reviewing any syntax errors in other modes.
-
HTML
Renders the content as it would be displayed in an actual HTML-based email or web notification. This mode lets you verify visual formatting, such as bold text, links, line breaks, or HTML structure.
-
JSON
Presents the content evaluated as a structured JSON data. This is helpful if the notification is being consumed by another system or service expecting JSON format to validate the syntax and appearance.
-
YAML
Presents the content evaluated as structured YAML data. This mode is useful when YAML is expected as output, allowing you to validate both syntax and structure. If the content does not produce valid YAML, an error is displayed.
Sample Selector
Use the drop-down menu to switch between different sample objects. Select the desired object to load its corresponding data and variables. Useful when evaluating and validating conditional output or previewing data and format in the embedded variables.
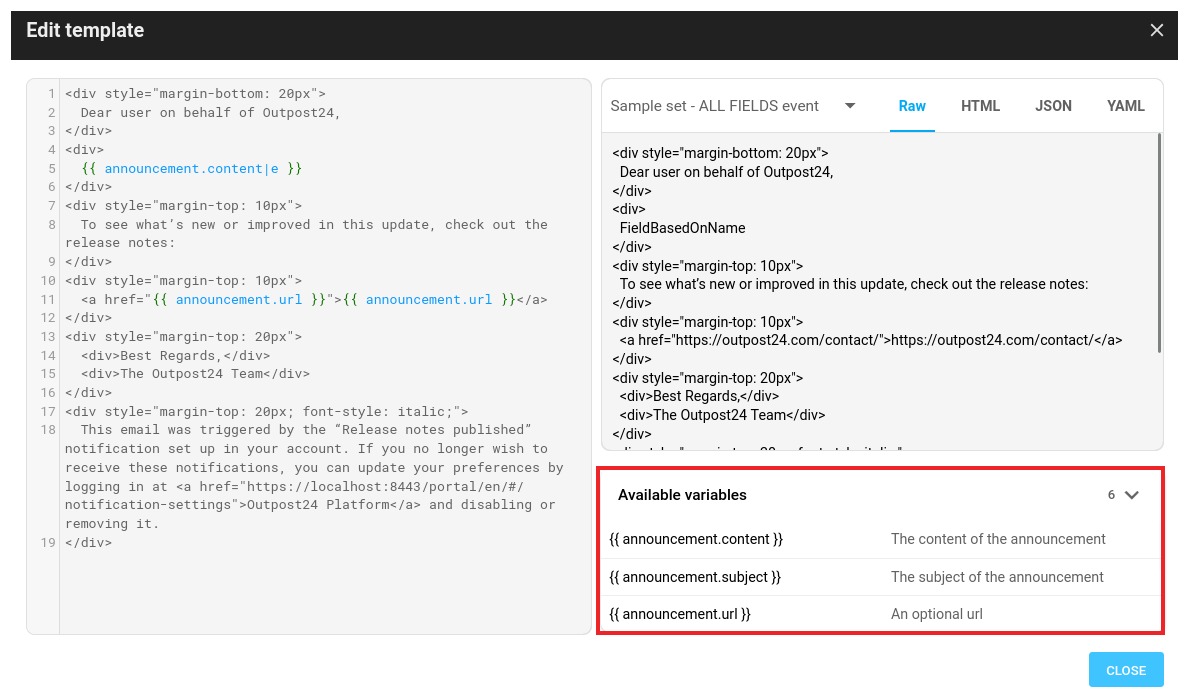
Variable list
Variable list is a section that displays all available variables you can use in the template. It works the same way as the auto-suggest feature when typing {{ in the editor.
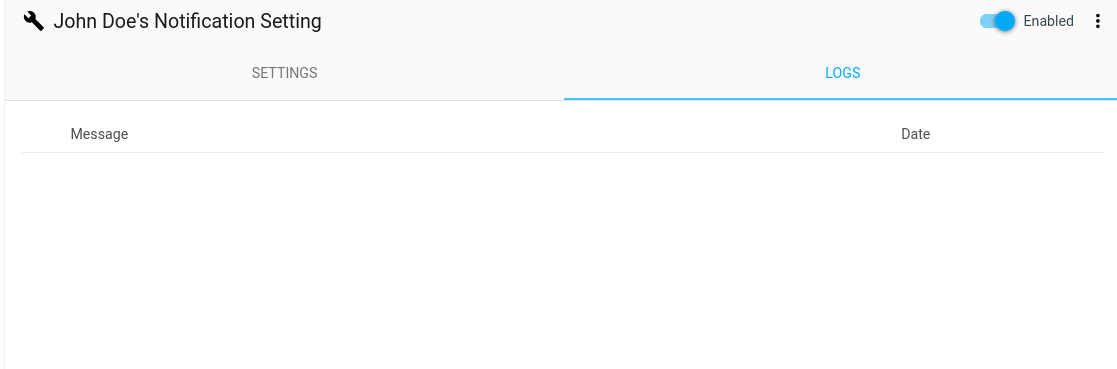
Error logs
In some cases, notifications may fail to send due to processing errors. The five most recent errors that occurred during notification delivery are listed and viewable in the Logs tab.
The log includes Jinja rendering errors for the notification templates.
Related Articles