Purpose
This document provides the steps needed to for setting up Core Installations of Windows for authenticated scanning using SMB.
Introduction
To succeed with authenticated scanning using SMB for Core Installations of Windows, there are five steps that you need to follow.
PSH-commands does not work if one of the following registry keys are set to 1.
HKLM\System\CurrentControlSet\Control\Lsa\FIPSAlgorithmPolicy\Enabled.
HKLM\System\CurrentControlSet\Control\Lsa\FIPSAlgorithmPolicy.
The difference is that the top registry key is available on newer targets, and the bottom on older, see https://support.microsoft.com/en-us/help/811833/system-cryptography-use-fips-compliant-algorithms-for-encryption-hashi for more information.
Step 1 - Enable Remote Registry
Enable Remote Registry (optional, can also be configured within the scanner)
-
Go to Start and enter cmd in the search field to open the Command Prompt.
-
Start the Powershell by enter powershell in Command Prompt.

-
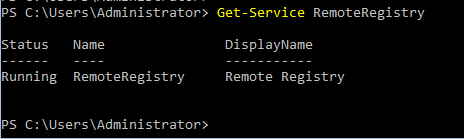
In Powershell, enter Get-Service RemoteRegistry to verify the status of the service.
-
If the service is not running, enter Start-Service -name RemoteRegistry
-
To set the service to run automatically, enter Set-Service RemoteRegistry –startuptype automatic.
-
To view the information and status of all services, enter Get-WmiObject win32_service | Select Name, DisplayName, State, StartMode | Sort Name.

The service should now be running
Step 2 - File and Printer Sharing
To turn on the File and Printer Sharing:
-
Go to Start and enter cmd in the search field to open the Command Prompt.
-
Start the Powershell by enter powershell in Command Prompt.
-
In Powershell, enter netsh advfirewall firewall set rule group= ”File and Printer Sharing” new enable=Yes to turn on File and Printer Sharing.

Step 3 - Administrator Rights
For the authentication to succeed the account in use needs to either be the Built in Administrator or a part of the Administrator Group.
Built in Administrator
To active the built-in administrator account:
-
Go to Start and enter cmd in the search field to open the Command Prompt.
-
In the Command Prompt, run the command: net user administrator /active: yes

Local User
Make sure the local account is included in the Administrators Group:
-
Go to Start and enter cmd in the search field to open the Command Prompt.
-
Start the Powershell by enter powershell in Command Prompt.
-
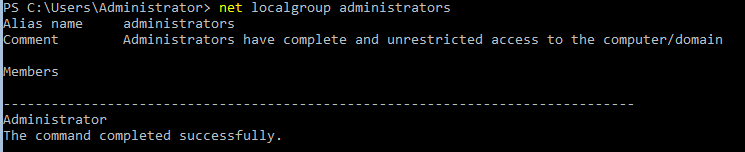
In Powershell, run the command:
net localgroup administratorto list the uses within the administrator group.
-
If the user is not included, run the command:
net localgroup administrators “<username>” /addto add the user.
Step 4 - File and Printer Sharing
To allow Inbound File and Printer Sharing Exception
-
Go to Start and enter cmd in the search field to open the Command Prompt.
-
In Command Prompt run the command:
REG add "HKLM\SOFTWARE\Policies\Microsoft\WindowsFirewall\DomainProfile\Services\FileAndPrint” /v Enabled /t REG_DWORD /d 1 /f
Step 5 - Memory Leak in the Remote Registry
Resolving the Memory Leak in the Remote Registry Service
-
Go to Start and enter cmd in the search field to open the Command Prompt.
-
Start the Powershell by enter powershell in Command Prompt.
-
In Powershell, enter regedit to access the Registry Editor.
-
Locate the following registry sub key: HKEY_LOCAL_MACHINE\SOFTWARE\Microsoft\WindowsNT\CurrentVersion\RemoteRegistry.
-
In the details pane to the right, double-click DisableIdleStop.
-
Change the value to 00000001.
-
Click Ok.
Reference
Authenticated Scanning Using SMB