
Last updated:2026-09-17
Purpose
This article describes how to configure and import assets from a file in the Portal.
Introduction
Assets are added through automated scans or manual creation. The article explains how to import assets from an existing file into the Portal, enabling users to quickly onboard asset inventories from external sources. It covers the supported file formats, the asset import process, validation and error handling, and how imported assets are created and updated within the system. The article also describes how to review import results, identify failed records, and troubleshoot common import issues.
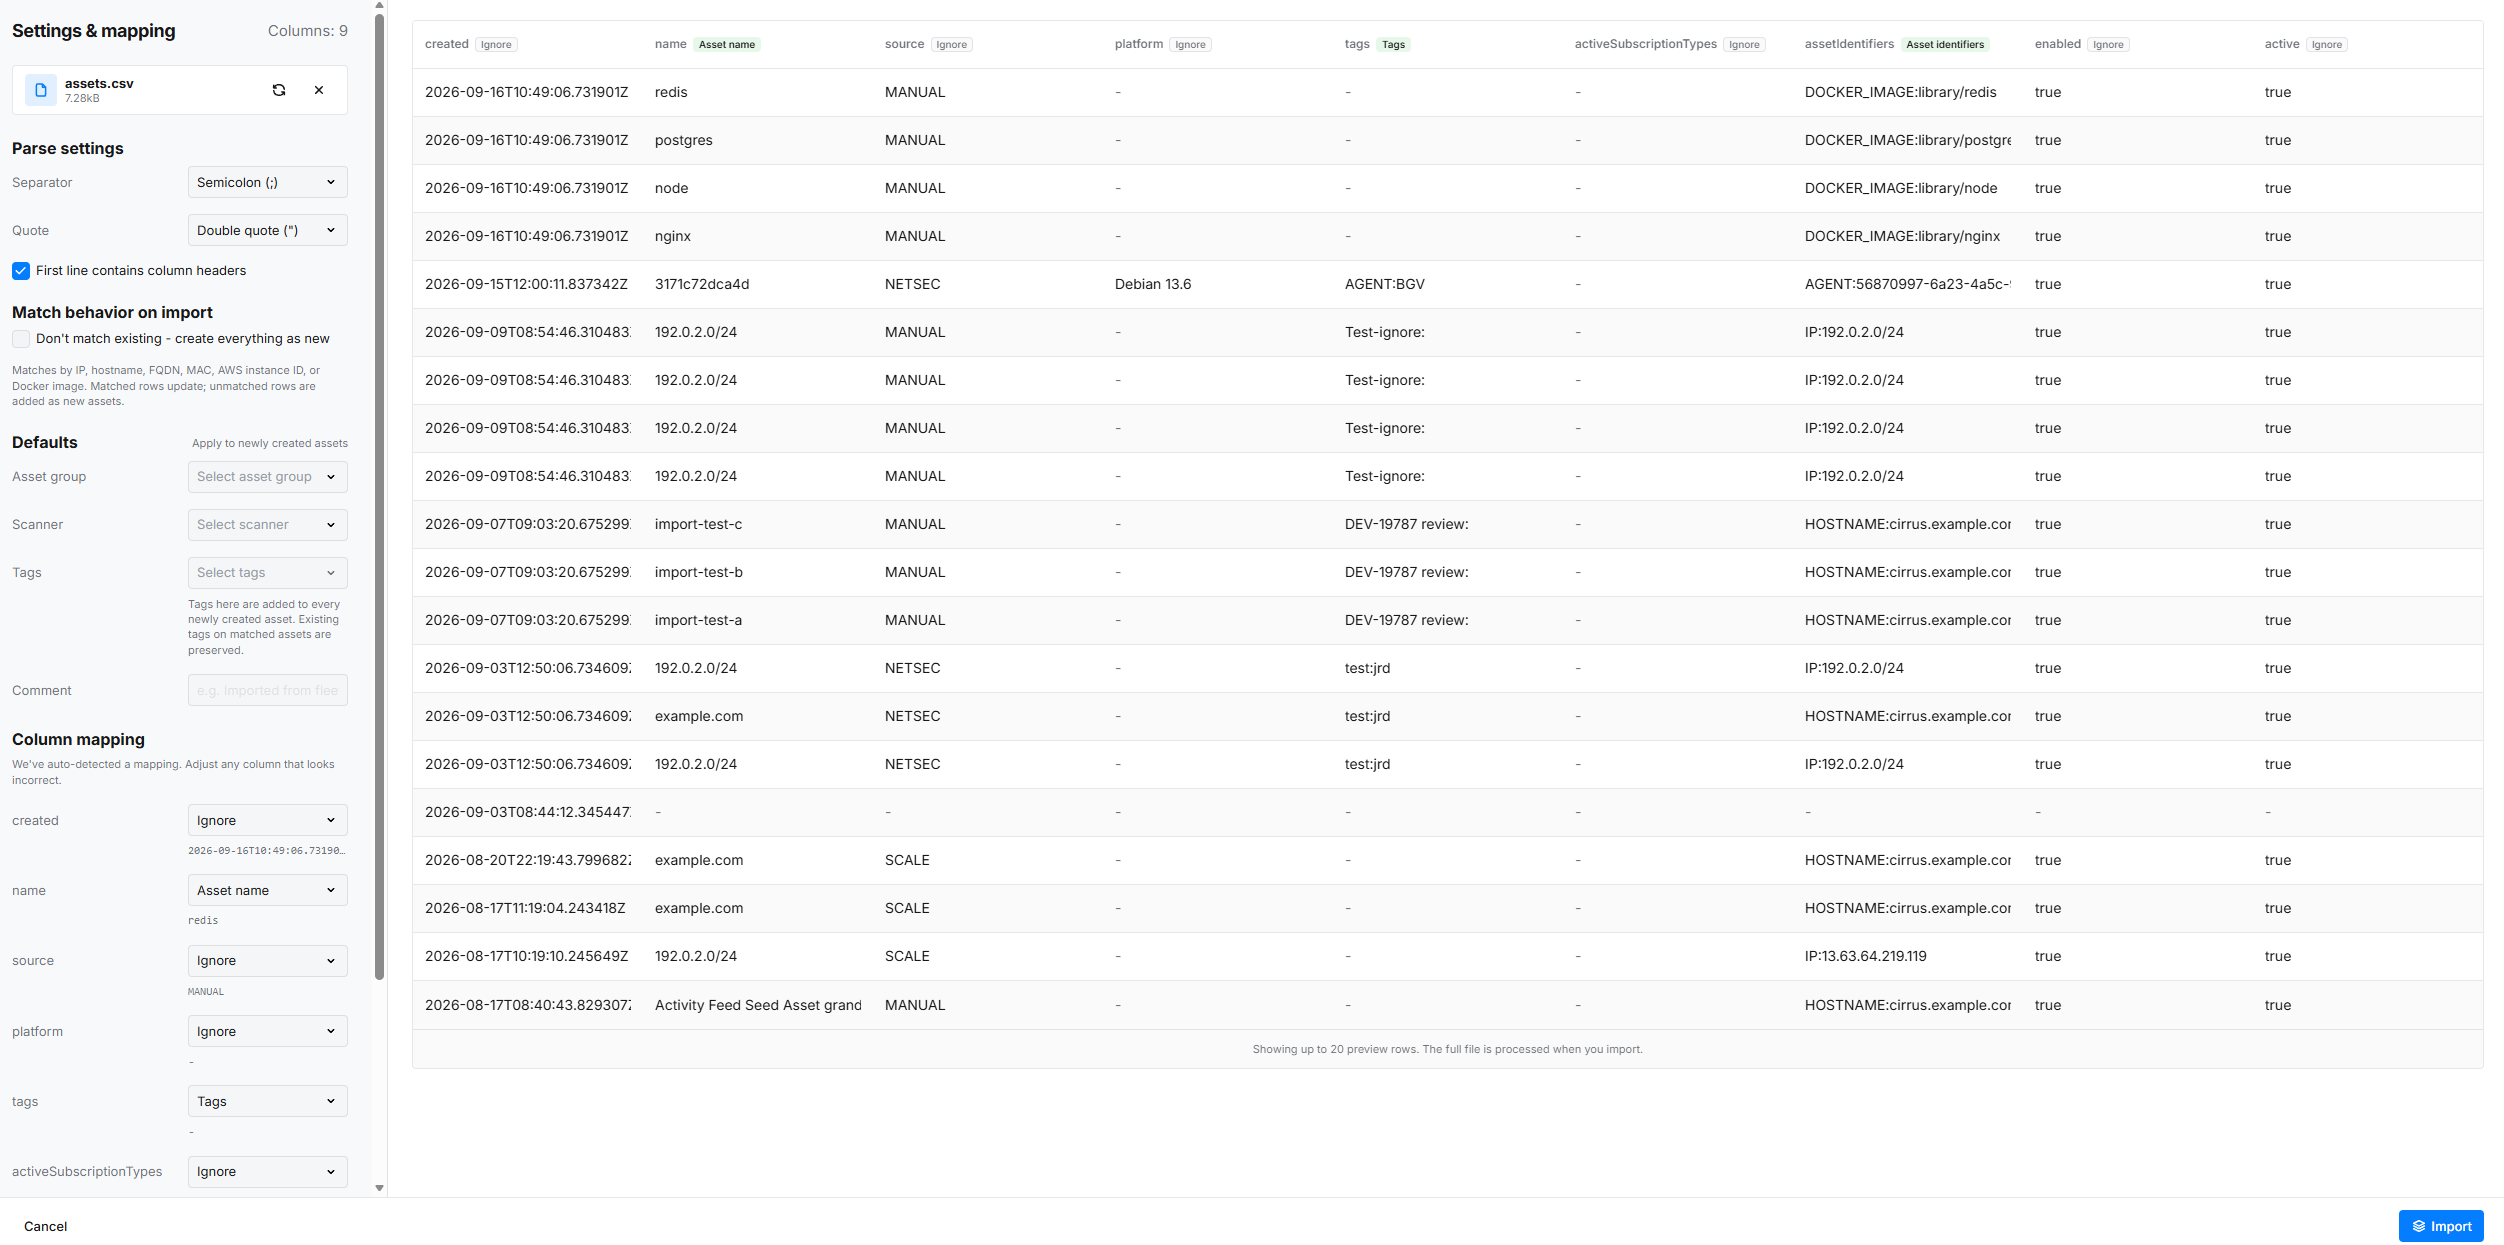
Import Assets from a File
This section explains how to import assets from a CSV file into the Portal. It walks through where to find the import option, how to prepare and upload the file, configure parsing and matching behavior, map columns to asset attributes, submit the import, resolve errors, and follow the resulting import scan.
Availability
-
On the Assets page, open the actions menu by clicking the kebab icon in the upper-right corner of the search bar.
-
Select Import.
This option is not displayed when a customer context is active: on an appliance, or for GhostLabs users.
Prepare the File
-
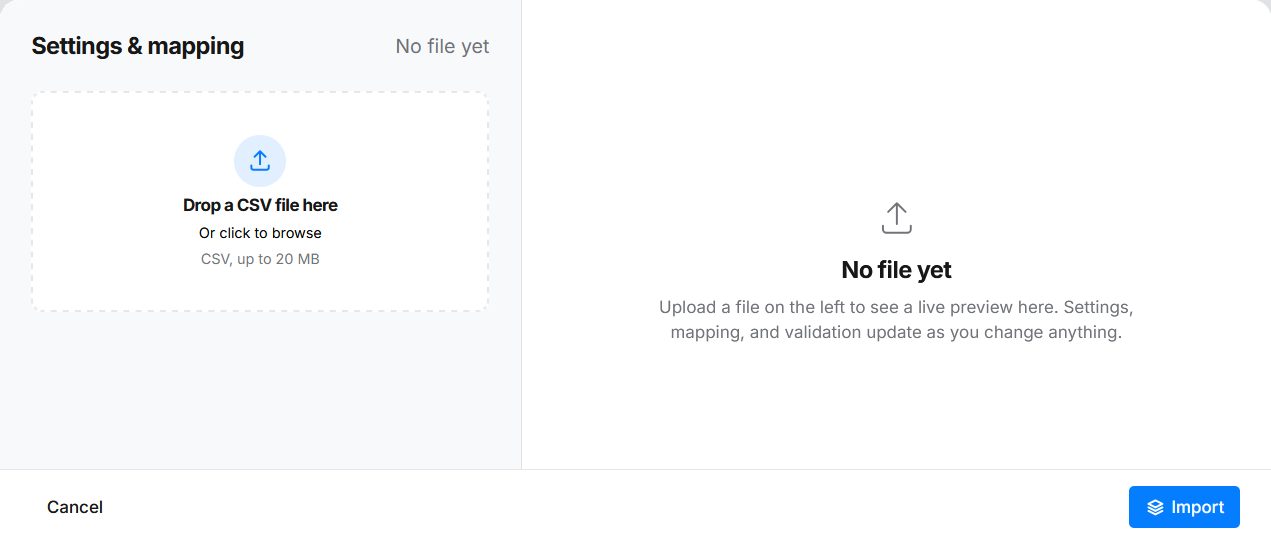
Drag and drop a CSV file or browse to select one.
-
The wizard reads the file locally and shows a preview of up to 20 rows.
-
Select the blue Import button to send the complete file to be processed.
We support only CSV files up to 15,000 rows and 20 MB.
Settings and Mapping
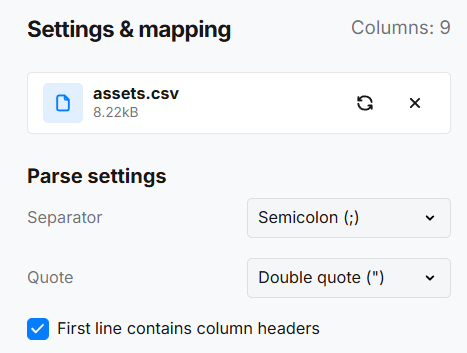
Continue by setting up the separator, quote character, and column header.
-
Set the column Separator to comma, semicolon, tab, or pipe.
-
Set the Quote character to double quote, single quote, or none when values containing separators are quoted.
-
Leave First line contains column headers selected when the first row holds headings. Clear it for files without headings; the wizard then labels columns by number.
-
Review the preview after changing a parsing setting. It checks the file and mappings only; final asset results can differ when existing assets are matched.
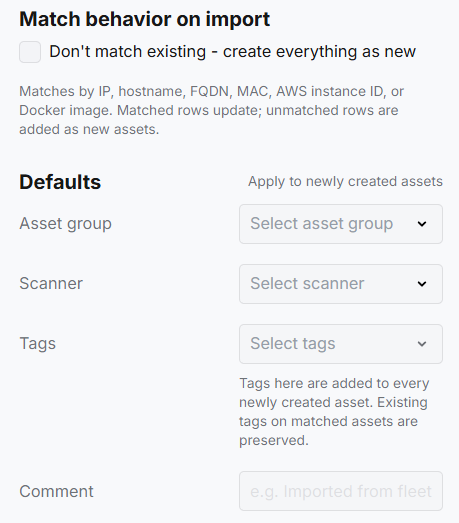
Match Behavior on Import
By default, the import matches rows to existing assets using IP address, hostname or FQDN, MAC address, AWS instance ID, or Docker image.
A matched row updates the already existing asset; an unmatched row creates a new asset.
Select Don't match existing - create everything as new to disable matching, including for rows that would otherwise match an existing asset.
Optional defaults for Asset group, Scanner, Tags, and Comment can be set up by selecting values from the corresponding drop-down menus. They apply to newly created assets. Tags added this way do not remove existing tags from a matched asset.
Column Mapping
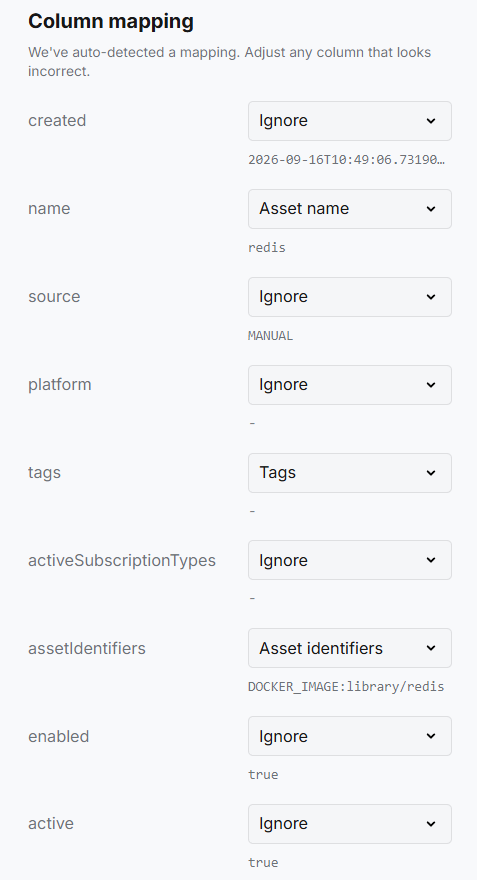
The wizard recognizes column names automatically. Review each mapping and change it if needed. A file must have at least one asset identifier mapping before import.
-
Map columns to asset attributes such as Asset name, CVSS v2 or v3 environmental vector, comment, tags, tag IDs, asset groups, asset group IDs, or scanner ID.
-
Map an identifier column to either the exported
identifiersformat or to a specific identifier type. Supported types include IP address, hostname, MAC, NetBIOS, AWS, GCP, Azure, Docker, and serial identifiers. -
Set unused columns to Ignore.
Submit and Resolve Errors
-
Select Import after the preview and mappings are correct. The button is unavailable while the file is loading, when the file has no importable rows, when no identifier is mapped, or when the wizard detects a file or mapping error. If submission fails, the wizard retains the selected file and settings, displays the error and details, and requires an edit before another submission.
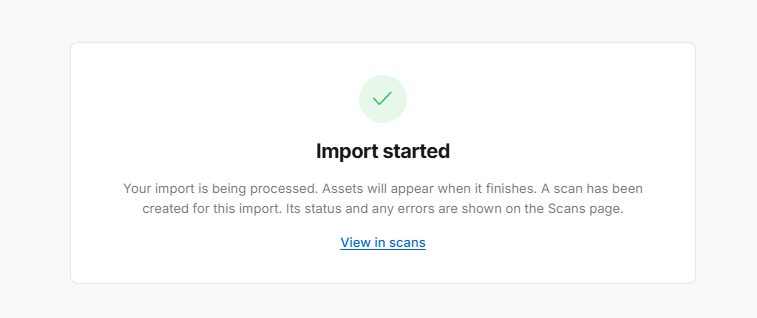
A successful submission means the file and import settings were accepted and anIMPORTscan has started. It does not mean all rows have finished processing. -
Select Close to leave the confirmation screen.
Follow the Import Scan
-
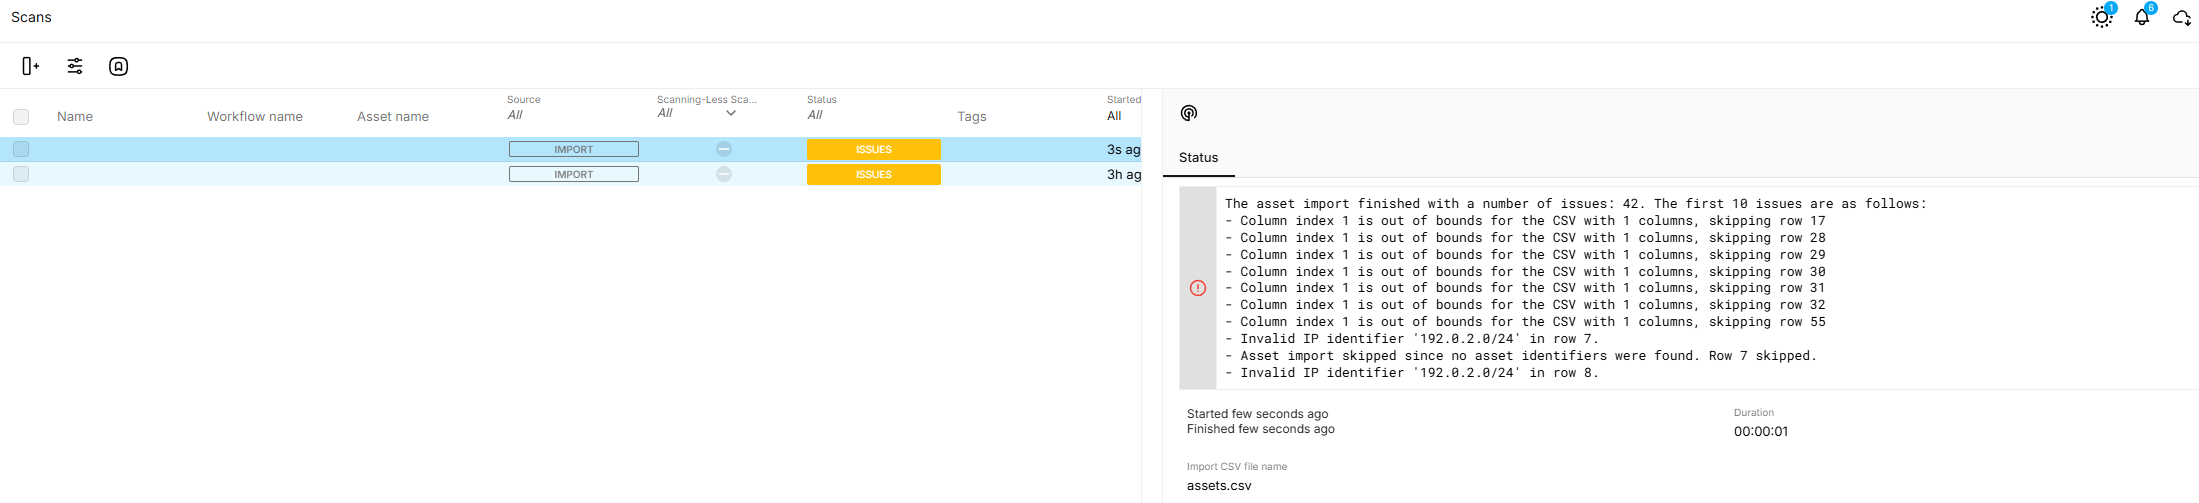
Open the Scans page and find the scan with source or type
IMPORT. Use the scan filters if needed. -
Open the scan to view its details. The import view shows start and end times; duration is Pending until the end time is available.
-
Check the final scan status. Valid rows are ingested, and the Assets view refreshes after a successful or issue-completed import. Rows with ingestion problems—such as invalid identifier values or unresolved references—are reported as scan issues and do not block other valid rows from processing.
Related Articles
- Windows 10/Windows 2019 Server
- General Information about SMB/WinRM Scanning
- Windows 8.1
- Scan Blueprint
- How to Test SMB Authentication
- Docker Image Assessment
- Windows 2016 Server
- How to Scan AWS ECR Images
- PCI Scanning
- Scanning-Less Scanning
- Scan Scheduling Errors
- Network Host Assessment
- Core Installation
- Windows 2008 R2 Server
- Scanning Range