
Last Updated: 2026-09-16
Purpose
This article describes how to manage PCI compliance scanning in the Outpost24 Portal, from creating a PCI environment to completing a scope and downloading the attestation report.
Introduction
Outpost24 is a certified Approved Scanning Vendor (ASV) by the PCI Security Standards Council. The PCI views of the Portal provide the full external vulnerability scanning cycle required for PCI DSS compliance: define the environment that processes cardholder data, discover and review the assets inside it, run the compliance scan, resolve or dispute failing findings, and complete the cycle with a customer attestation and a final ASV report.
The feature is organized around four levels. An environment describes a cardholder data environment and the schedule it is scanned on. Each environment produces scopes, where one scope is one complete scan and attestation cycle. A scope contains the discovered assets, which the user reviews and confirms before scanning. The scan produces findings, which must be compliant, remediated, or resolved through the dispute process before the scope is completed. Completing a scope produces the final report and starts the countdown to the next cycle. For findings and the dispute process, see PCI Findings and Disputes.
Requirements
-
It is assumed that the reader has basic access to the OUTSCAN account to access the Portal. PCI scanning is available on OUTSCAN only; it is not available on HIAB appliances.
-
A PCI subscription is required. The PCI environments entry is displayed in the Main Menu only for accounts with the PCI feature enabled.
-
The user must be assigned a role with the PCI resource set to View to see PCI data, or View and manage to create, edit, confirm, scan, dispute, and complete. For more information, see Role Management.
-
At least one schedule must exist before creating an environment. See Schedules.
-
PCI scans are launched from the Outpost24 OUTSCAN cloud scanning infrastructure. The scanning ranges must be permitted through firewalls, IDS, and IPS for the scan to be valid. For the current ranges, see Scanning Range.
Concepts
|
Term |
Description |
|---|---|
|
Environment |
A named cardholder data environment with one or more scan schedules and the company contact information printed on the ASV report. |
|
Scope |
One scan and attestation cycle of an environment. Scopes are not named; each scope is identified by its creation date. |
|
Asset |
A host discovered inside a scope. Each asset is either in scope or not in scope for the compliance scan. |
|
Finding |
A result from the compliance scan on an in-scope asset. Failing findings block completion until they are remediated or their dispute is accepted. |
PCI DSS requires a passing external scan at least every 90 days. The Portal tracks this as a deadline on each environment, counted from the date the last scope was completed.
Users migrating from the PCI scanning module in the OUTSCAN classic interface will meet the following renamed terms.
|
Classic term |
Portal term |
|---|---|
|
Target |
Asset |
|
Hidden URLs |
Seed URLs |
|
Virtual Host Names |
Virtual Hosts |
|
Acknowledgements |
Attestation |
Accessing PCI Scanning
-
Click PCI environments in the Main Menu.
The Environments view is displayed, listing all PCI environments.
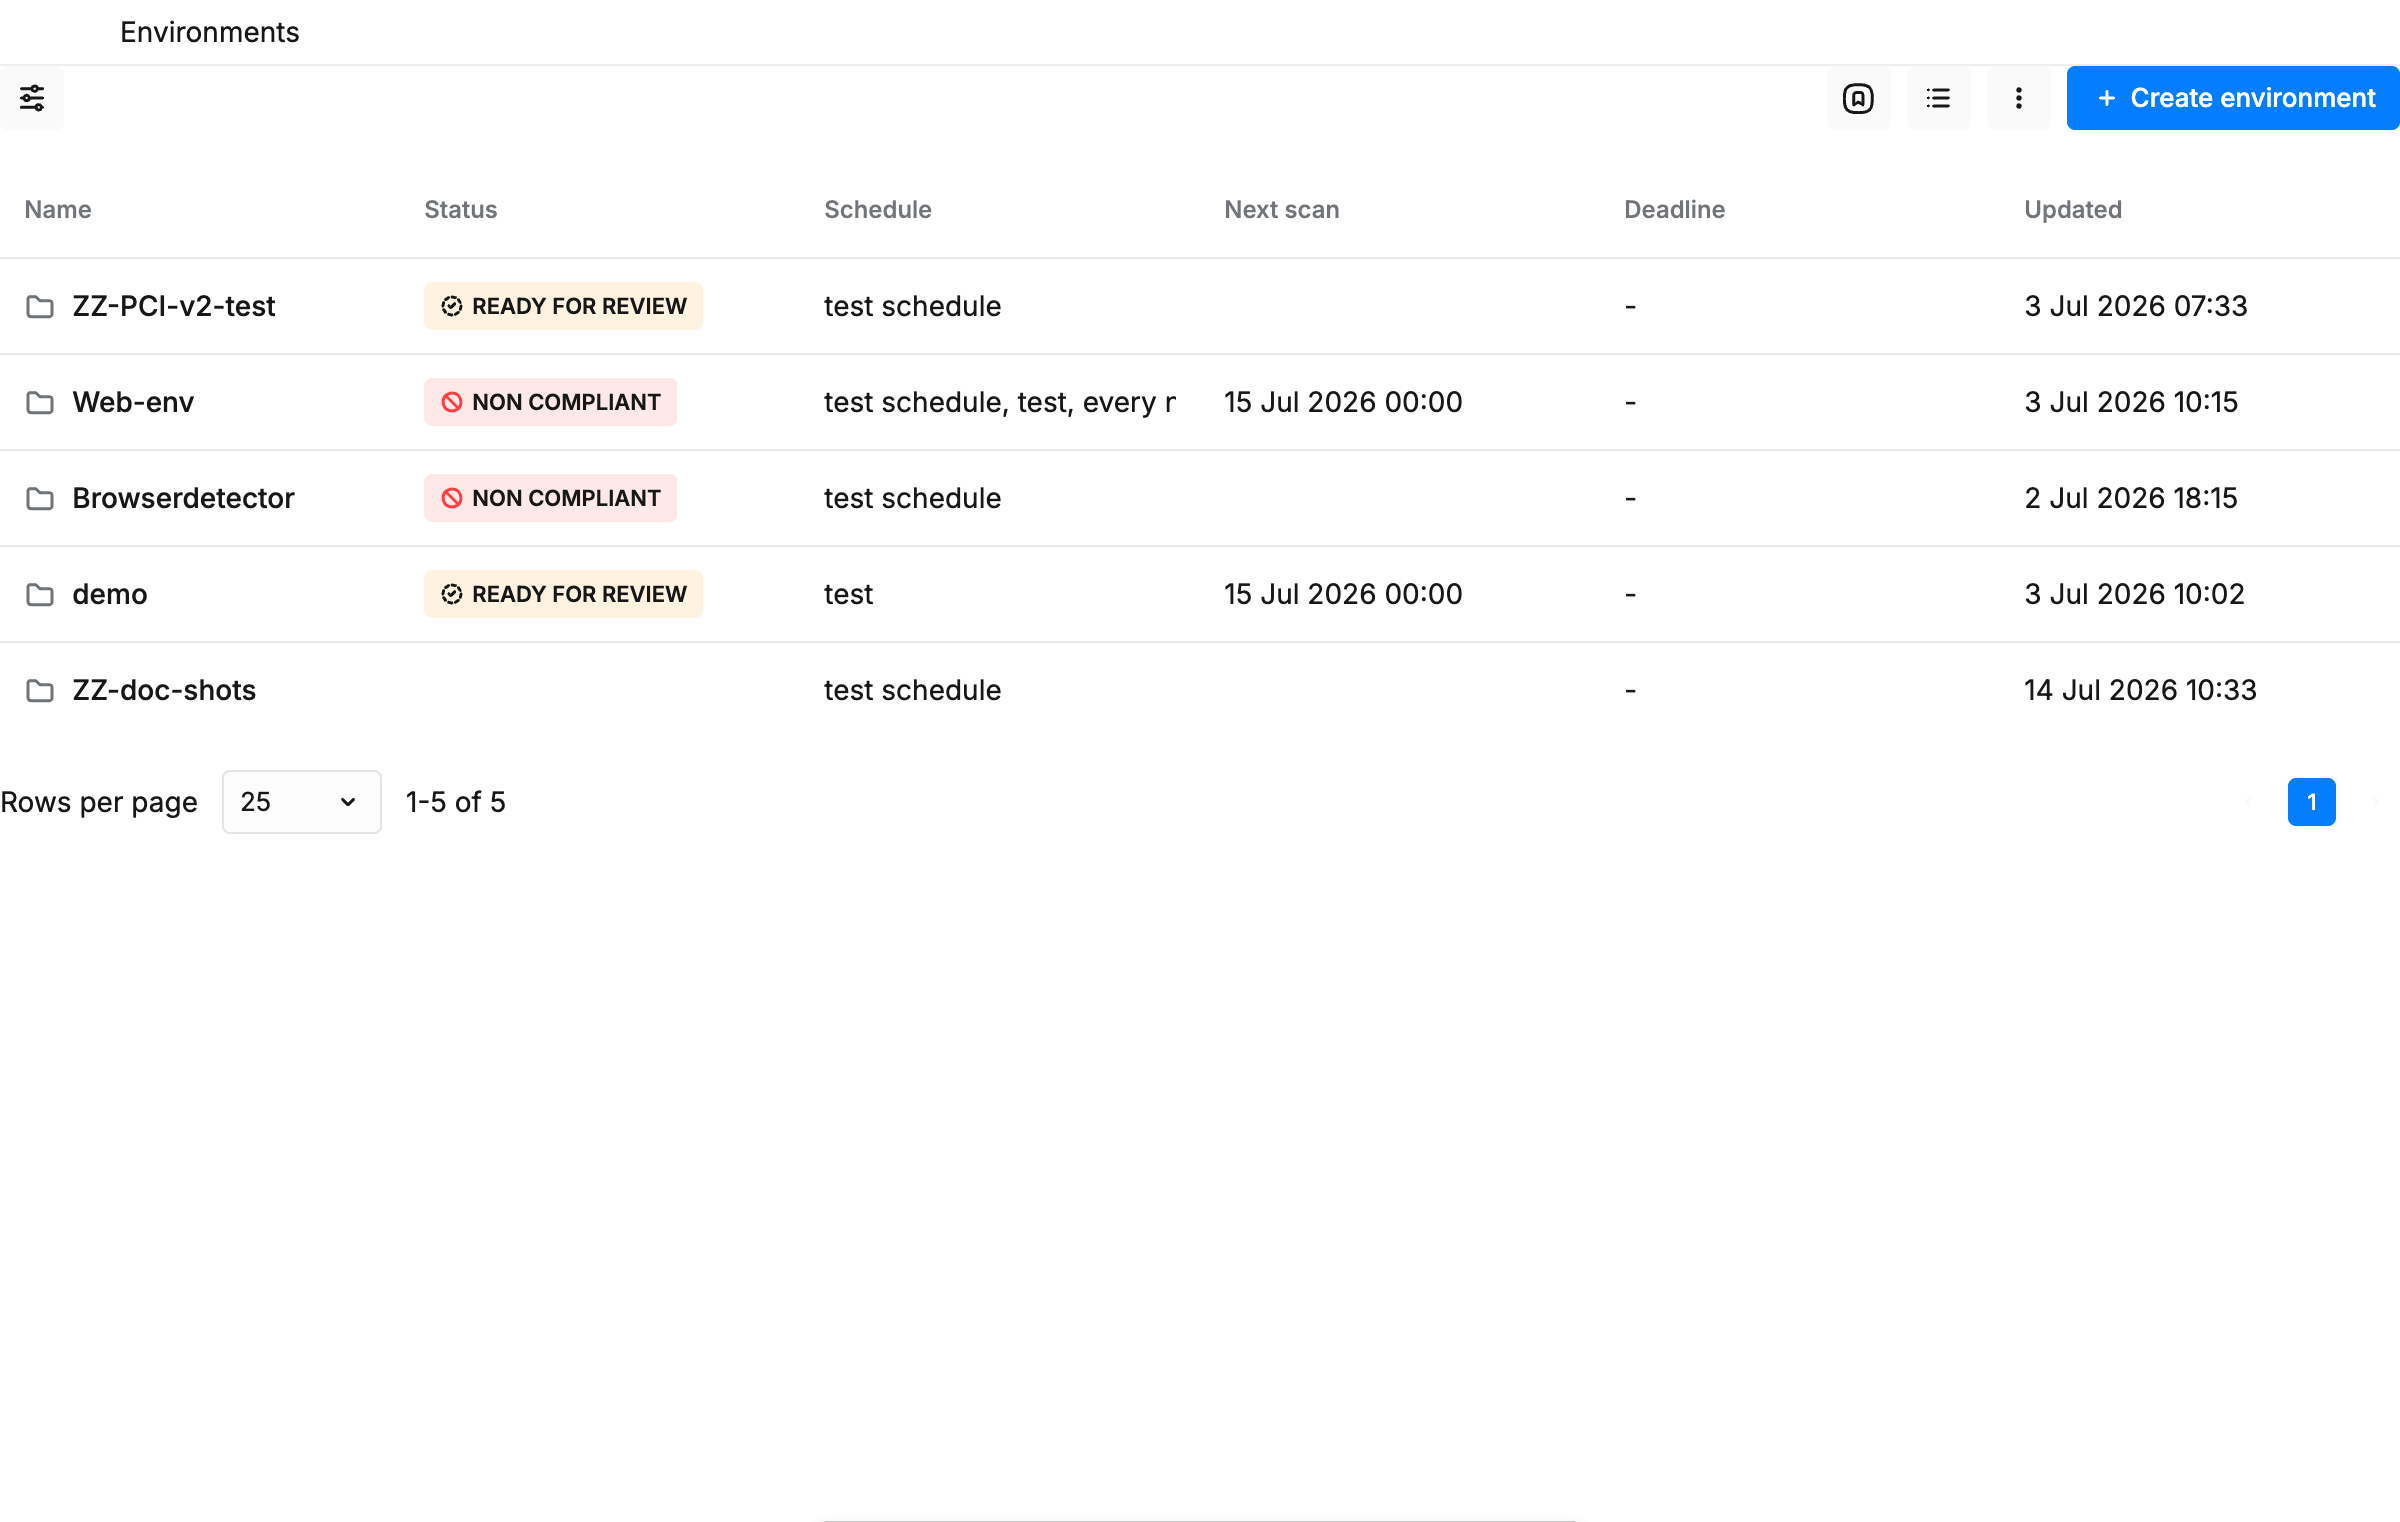
Environments
Table Columns
|
Column |
Description |
|---|---|
|
Name |
The name of the environment. |
|
Status |
The status of the environment's latest scope. When the environment has no scope yet, the status is NEW. See the Scope Statuses section. |
|
Schedule |
The names of the schedules assigned to the environment. |
|
Next scan |
The date and time of the next scheduled scan occurrence. |
|
Deadline |
The number of days remaining in the 90-day compliance window, counted from the completion date of the last completed scope. The value shows as days left or days overdue, with a warning color at 30 days or less and an alert color at 7 days or less. A dash is shown when no scope has been completed yet. |
|
Updated |
When the environment was last modified. |
Clicking an environment row opens its scopes. The table supports saved view templates; see View Templates.
Creating an Environment
To create a PCI environment:
-
Click the Create environment button above the table.
-
Enter a Name for the environment.
-
Select one or more schedules in the Schedules field. The schedule determines when new scan cycles start. To create a schedule without leaving the dialog, click Create new schedule; the new schedule is added and selected automatically.
-
Review the Customer information section. By default the organization details from the account are used. To override them for this environment, uncheck Use organization defaults and fill in the fields: company name, contact name, contact e-mail, phone, address, postal code, city, country, and state or region.
-
Click the Create button.
The environment is displayed in the table.
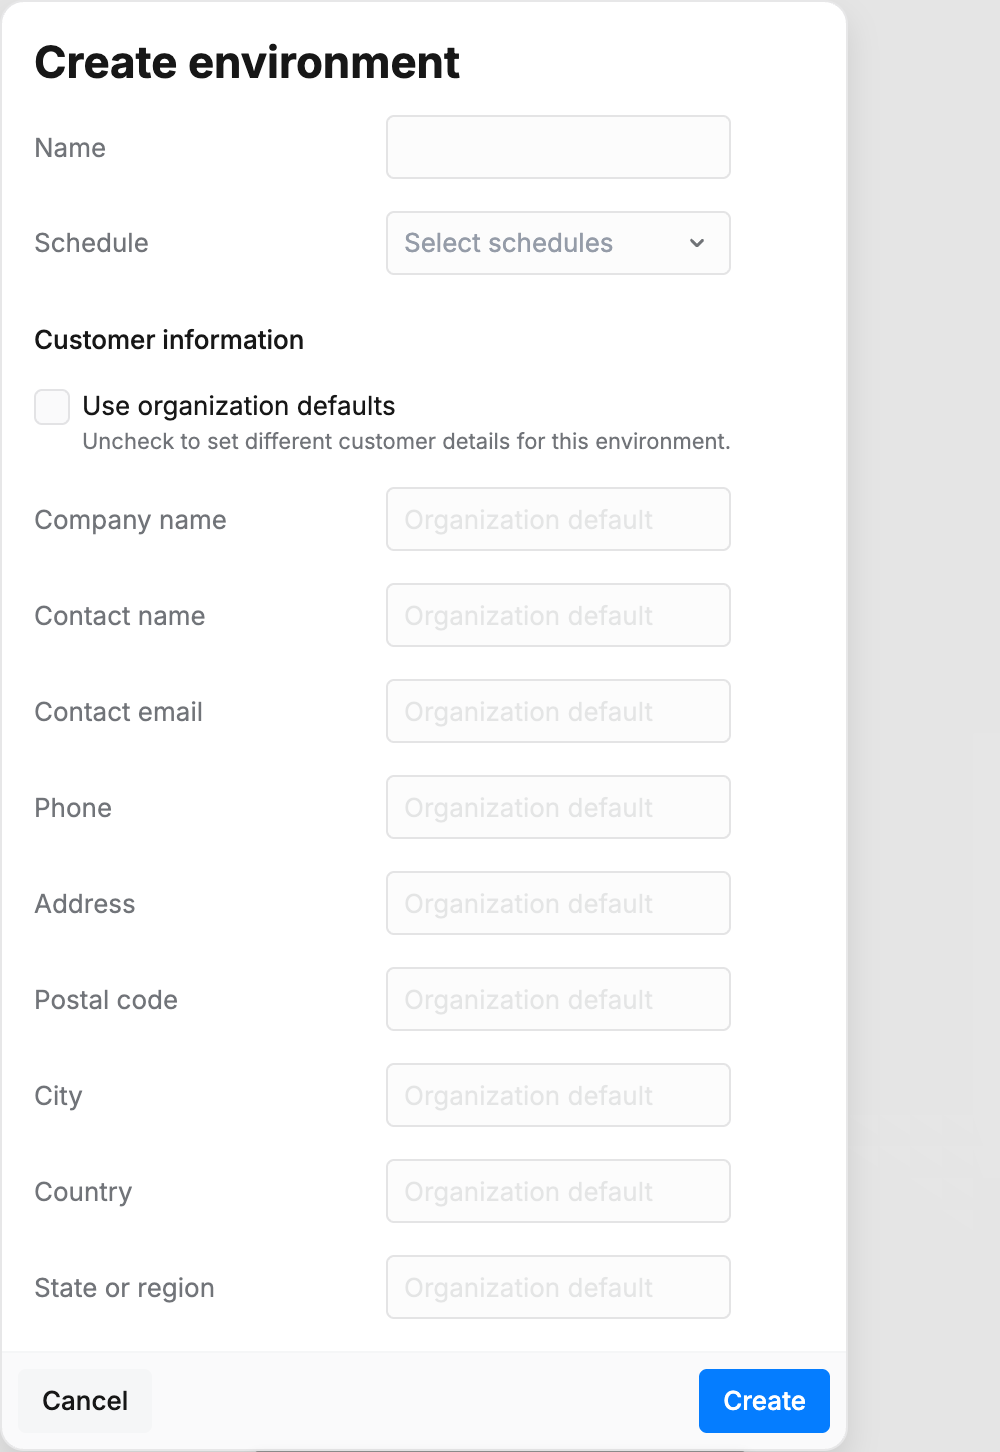
All nine customer information fields are printed in the Scan Customer Information table of the final ASV report, and the company name is also used in the wording of the scan customer attestation and signature block. Only fields that are changed are stored as overrides; cleared fields revert to the organization defaults.
State or region falls back to the organization default only when the account country is the United States or Canada. For any other country, leaving State or region empty leaves the field blank on the report. Enter it explicitly if it must appear.
Editing and Deleting an Environment
To edit an environment, right-click its row and select Edit from the context menu. The same dialog is displayed with the current values.
To delete an environment, right-click its row, select Delete from the context menu, and confirm. An environment that contains a completed scope scanned within the last three years cannot be deleted, because PCI compliance data is retained for three years.
Scopes
Clicking an environment opens its Scopes view. A scope is one scan cycle: it is created, discovers assets, is reviewed and confirmed, is scanned, and is finally completed with an attestation. Scopes have no name; each scope is identified by its creation date, for example 6 Jul 2026.
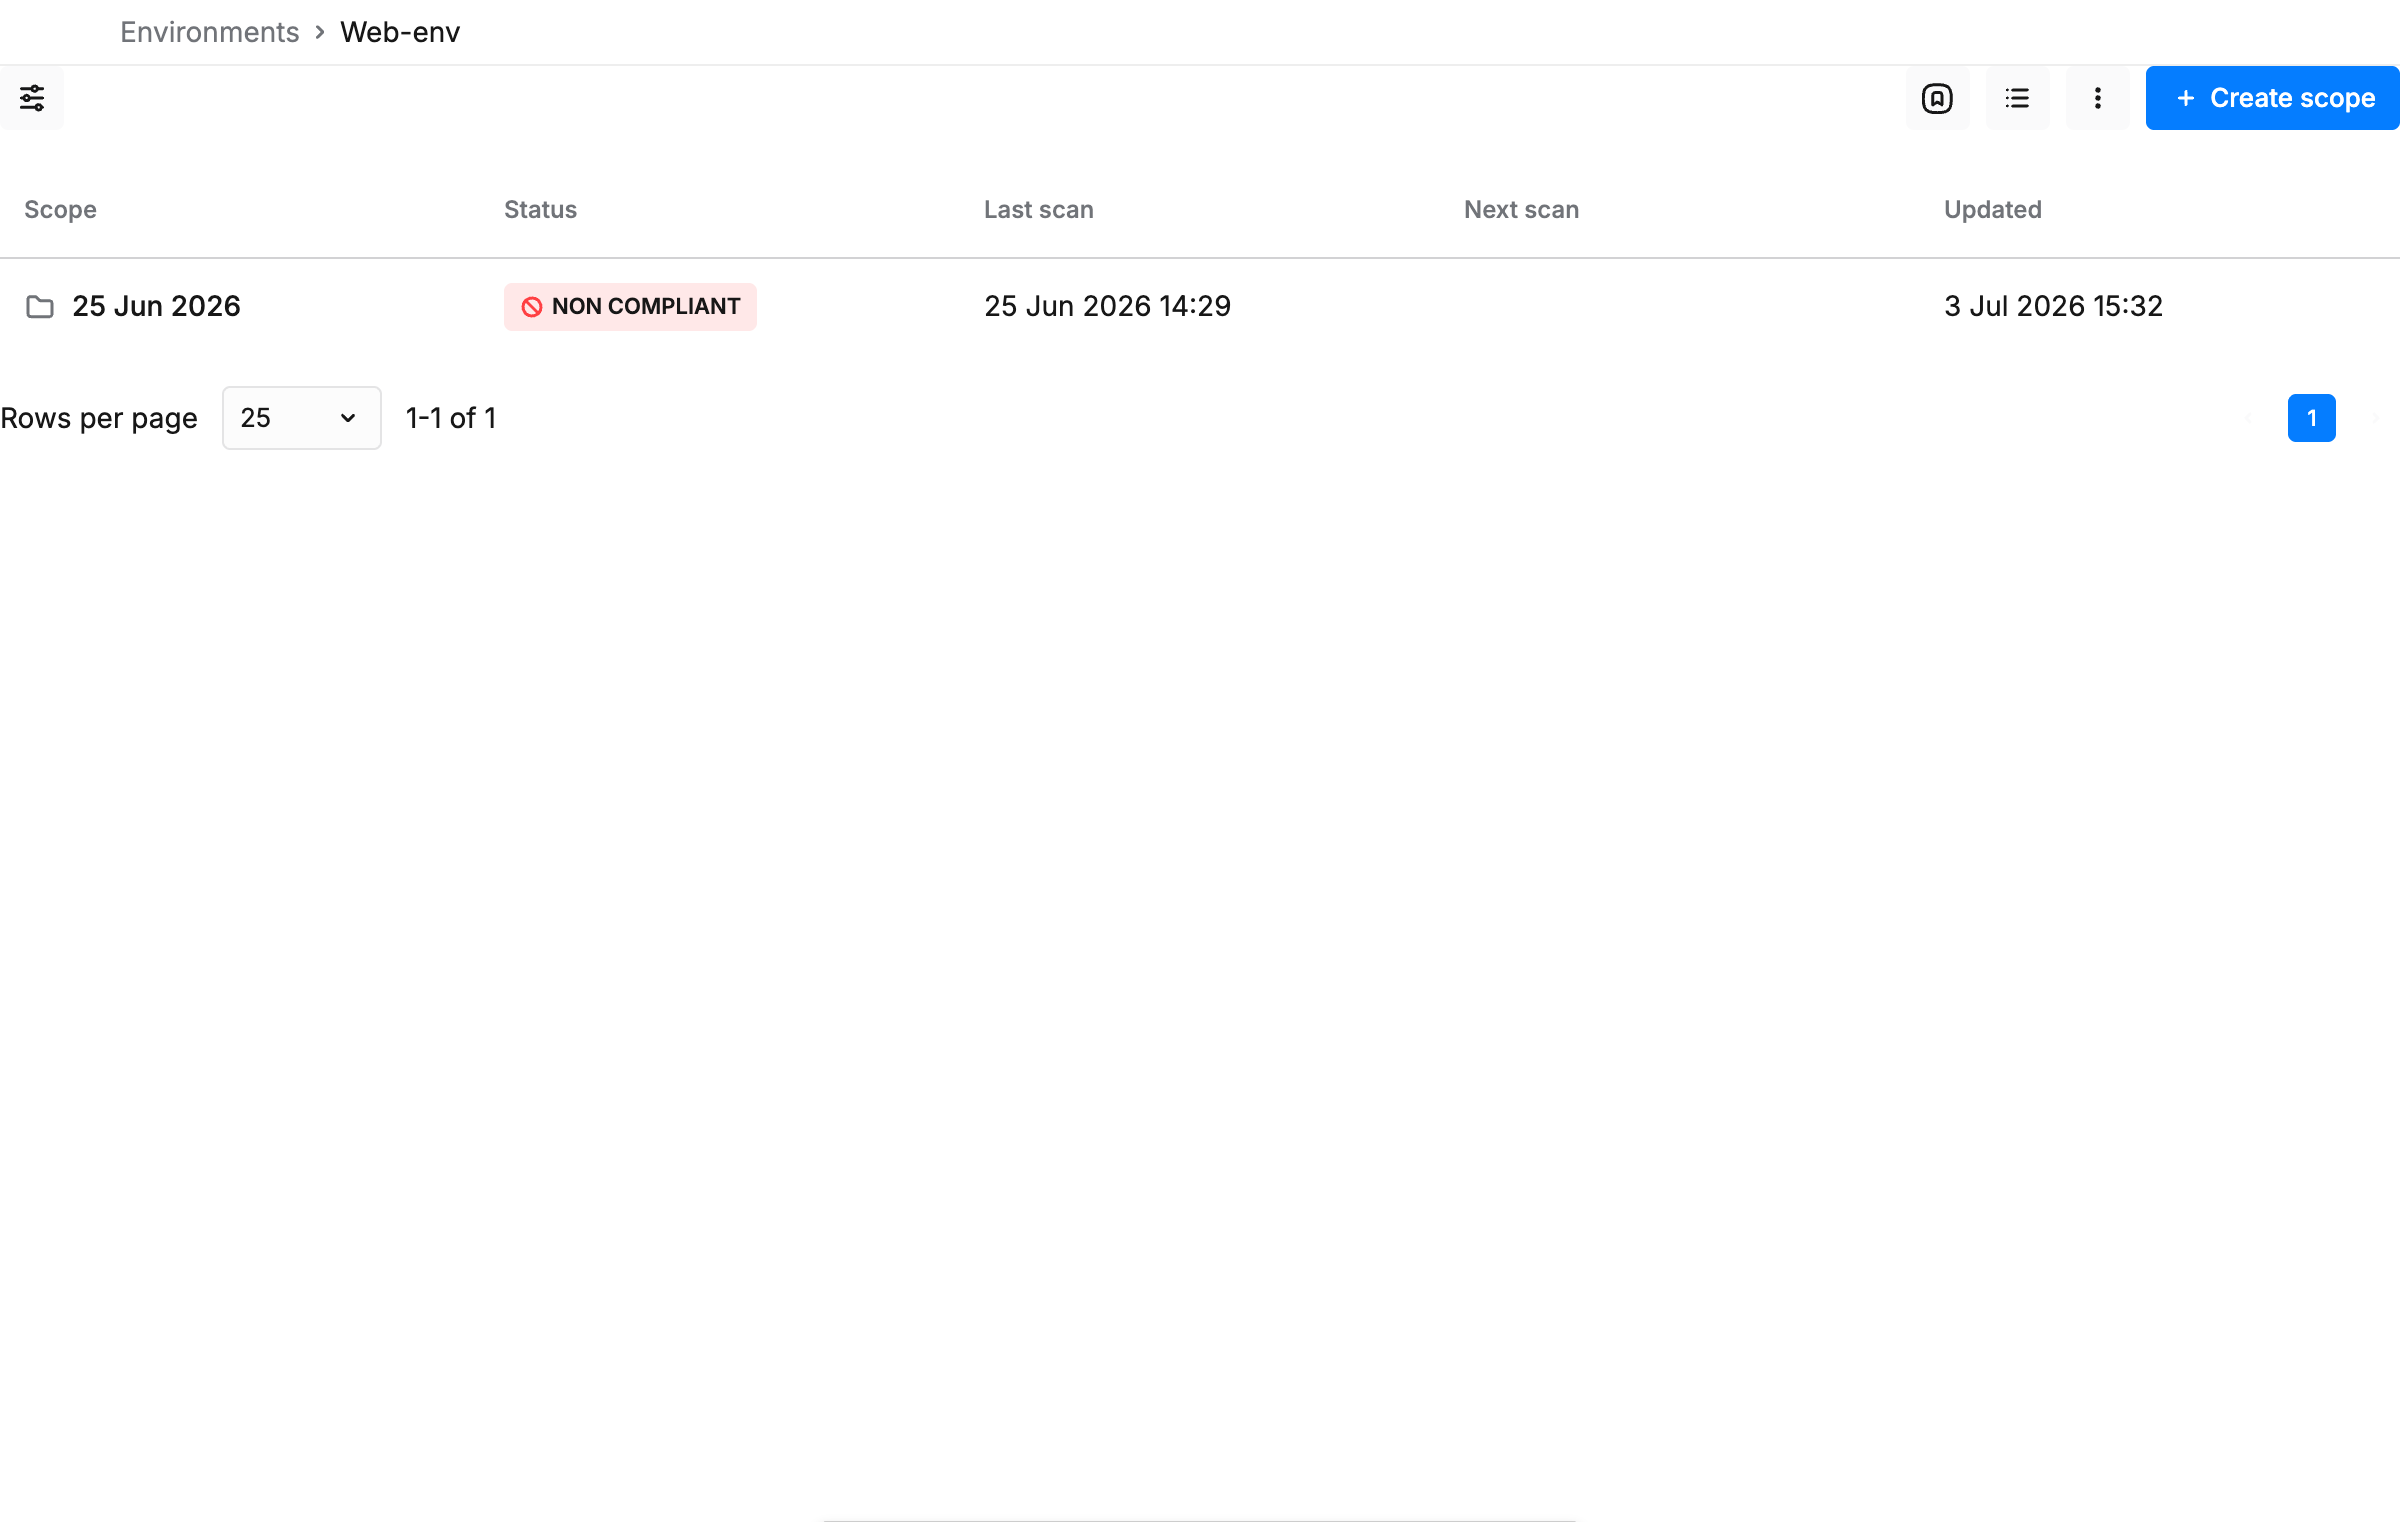
Scope Statuses
Status values are displayed exactly as the system defines them. Clicking a scope row opens the page that matches its current status.
|
Status |
Meaning |
Row click opens |
|---|---|---|
|
DISCOVERING |
Asset discovery is running on the target list. |
The scope overview page with discovery progress. |
|
READY FOR REVIEW |
Discovery is finished; assets await review and scope confirmation. |
The asset review page. |
|
SCHEDULED |
The scope is confirmed and a scan is queued for a set time. |
The scope overview page, where the scheduled scan is shown and it is possible to cancel it. |
|
SCANNING |
The compliance scan is running. |
The scope overview page with scan progress. |
|
NON COMPLIANT |
The scan finished and at least one finding is failing, or a special note still needs a response. |
The findings for the scope. |
|
COMPLIANT |
The scan finished and every finding is compliant or its dispute was accepted, and all special notes are answered. |
The findings for the scope. |
|
COMPLETED |
The scope was completed with a customer attestation. The final report is stored and the scope is locked. |
The findings for the scope, read-only. |
A scope becomes COMPLIANT only when three conditions hold: the latest scan on every in-scope asset finished successfully, every finding is either compliant or has an accepted dispute, and every ASV special note has been answered. See PCI Findings and Disputes.
Creating a Scope
A new scope starts the next scan cycle. New scopes are normally created automatically by the environment's schedule; create one manually to start a cycle immediately.
-
In the Scopes view, click the Create scope button.
-
Enter the scan targets, one target per line: an IP address, a hostname, a CIDR block, an IP range, or a host with virtual hosts.
-
Click the Create button.
Asset discovery starts immediately and the scope status is DISCOVERING.
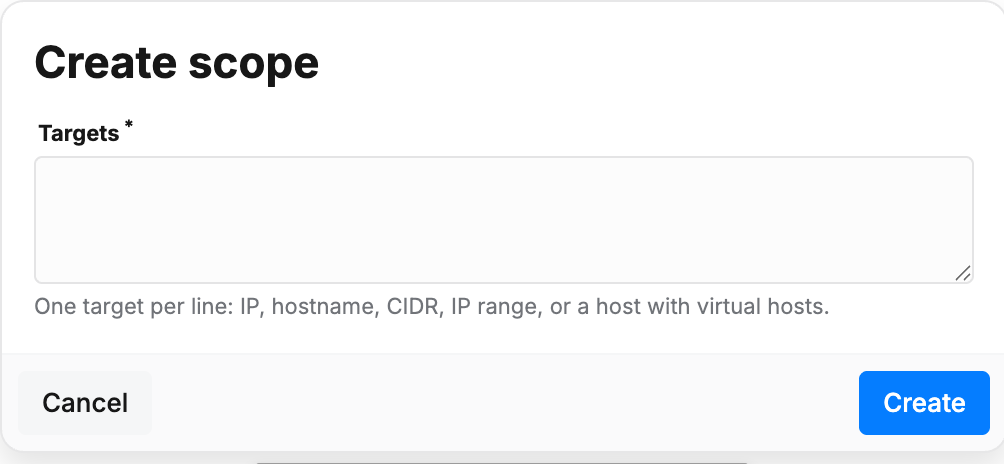
A new scope requires the previous scope to be COMPLETED first. This applies to scheduled cycles as well: the schedule starts the next cycle at its next occurrence only after the current scope has been completed. In-scope assets from the previous scope are carried over into the new one.
Scope Actions
Right-click a scope row to open the context menu. The menu offers actions depending on the scope status. The same actions are available from the overflow menu on the asset review. When Confirm scope, Create report, or Download report applies, that action is also the primary button on the asset review.
|
Action |
Available when |
Description |
|---|---|---|
|
Edit scope |
READY FOR REVIEW |
Change the target list. Saving restarts asset discovery. |
|
Run discovery |
READY FOR REVIEW |
Re-run asset discovery on the current target list. |
|
Start scan |
Confirmed, no scan queued or running |
Start the compliance scan immediately, or schedule it for a date and time within the next two weeks. |
|
Rescan findings |
NON COMPLIANT |
Re-run the compliance scan on the current asset list. See the Rescanning section. |
|
Cancel scheduled scan |
A scan is queued |
Remove the queued scan. The scope returns to the status it had before the scan was scheduled. The in-scope selection stays locked. |
|
Create report |
COMPLIANT or NON COMPLIANT |
Generate a draft report, or finalize the scope. See the Reports and Completing a Scope section. |
|
Download report |
COMPLETED |
Download the stored final ASV report. |
|
Edit tags |
Always |
Assign tags to the scope. |
|
Delete |
Not COMPLETED |
Delete the scope. Completed scopes cannot be deleted. |
Reviewing Assets and Confirming the Scope
When discovery finishes, the scope status is READY FOR REVIEW and clicking the scope opens the asset review page. A banner explains the task: choose which assets to include in the scope, then start the scan.
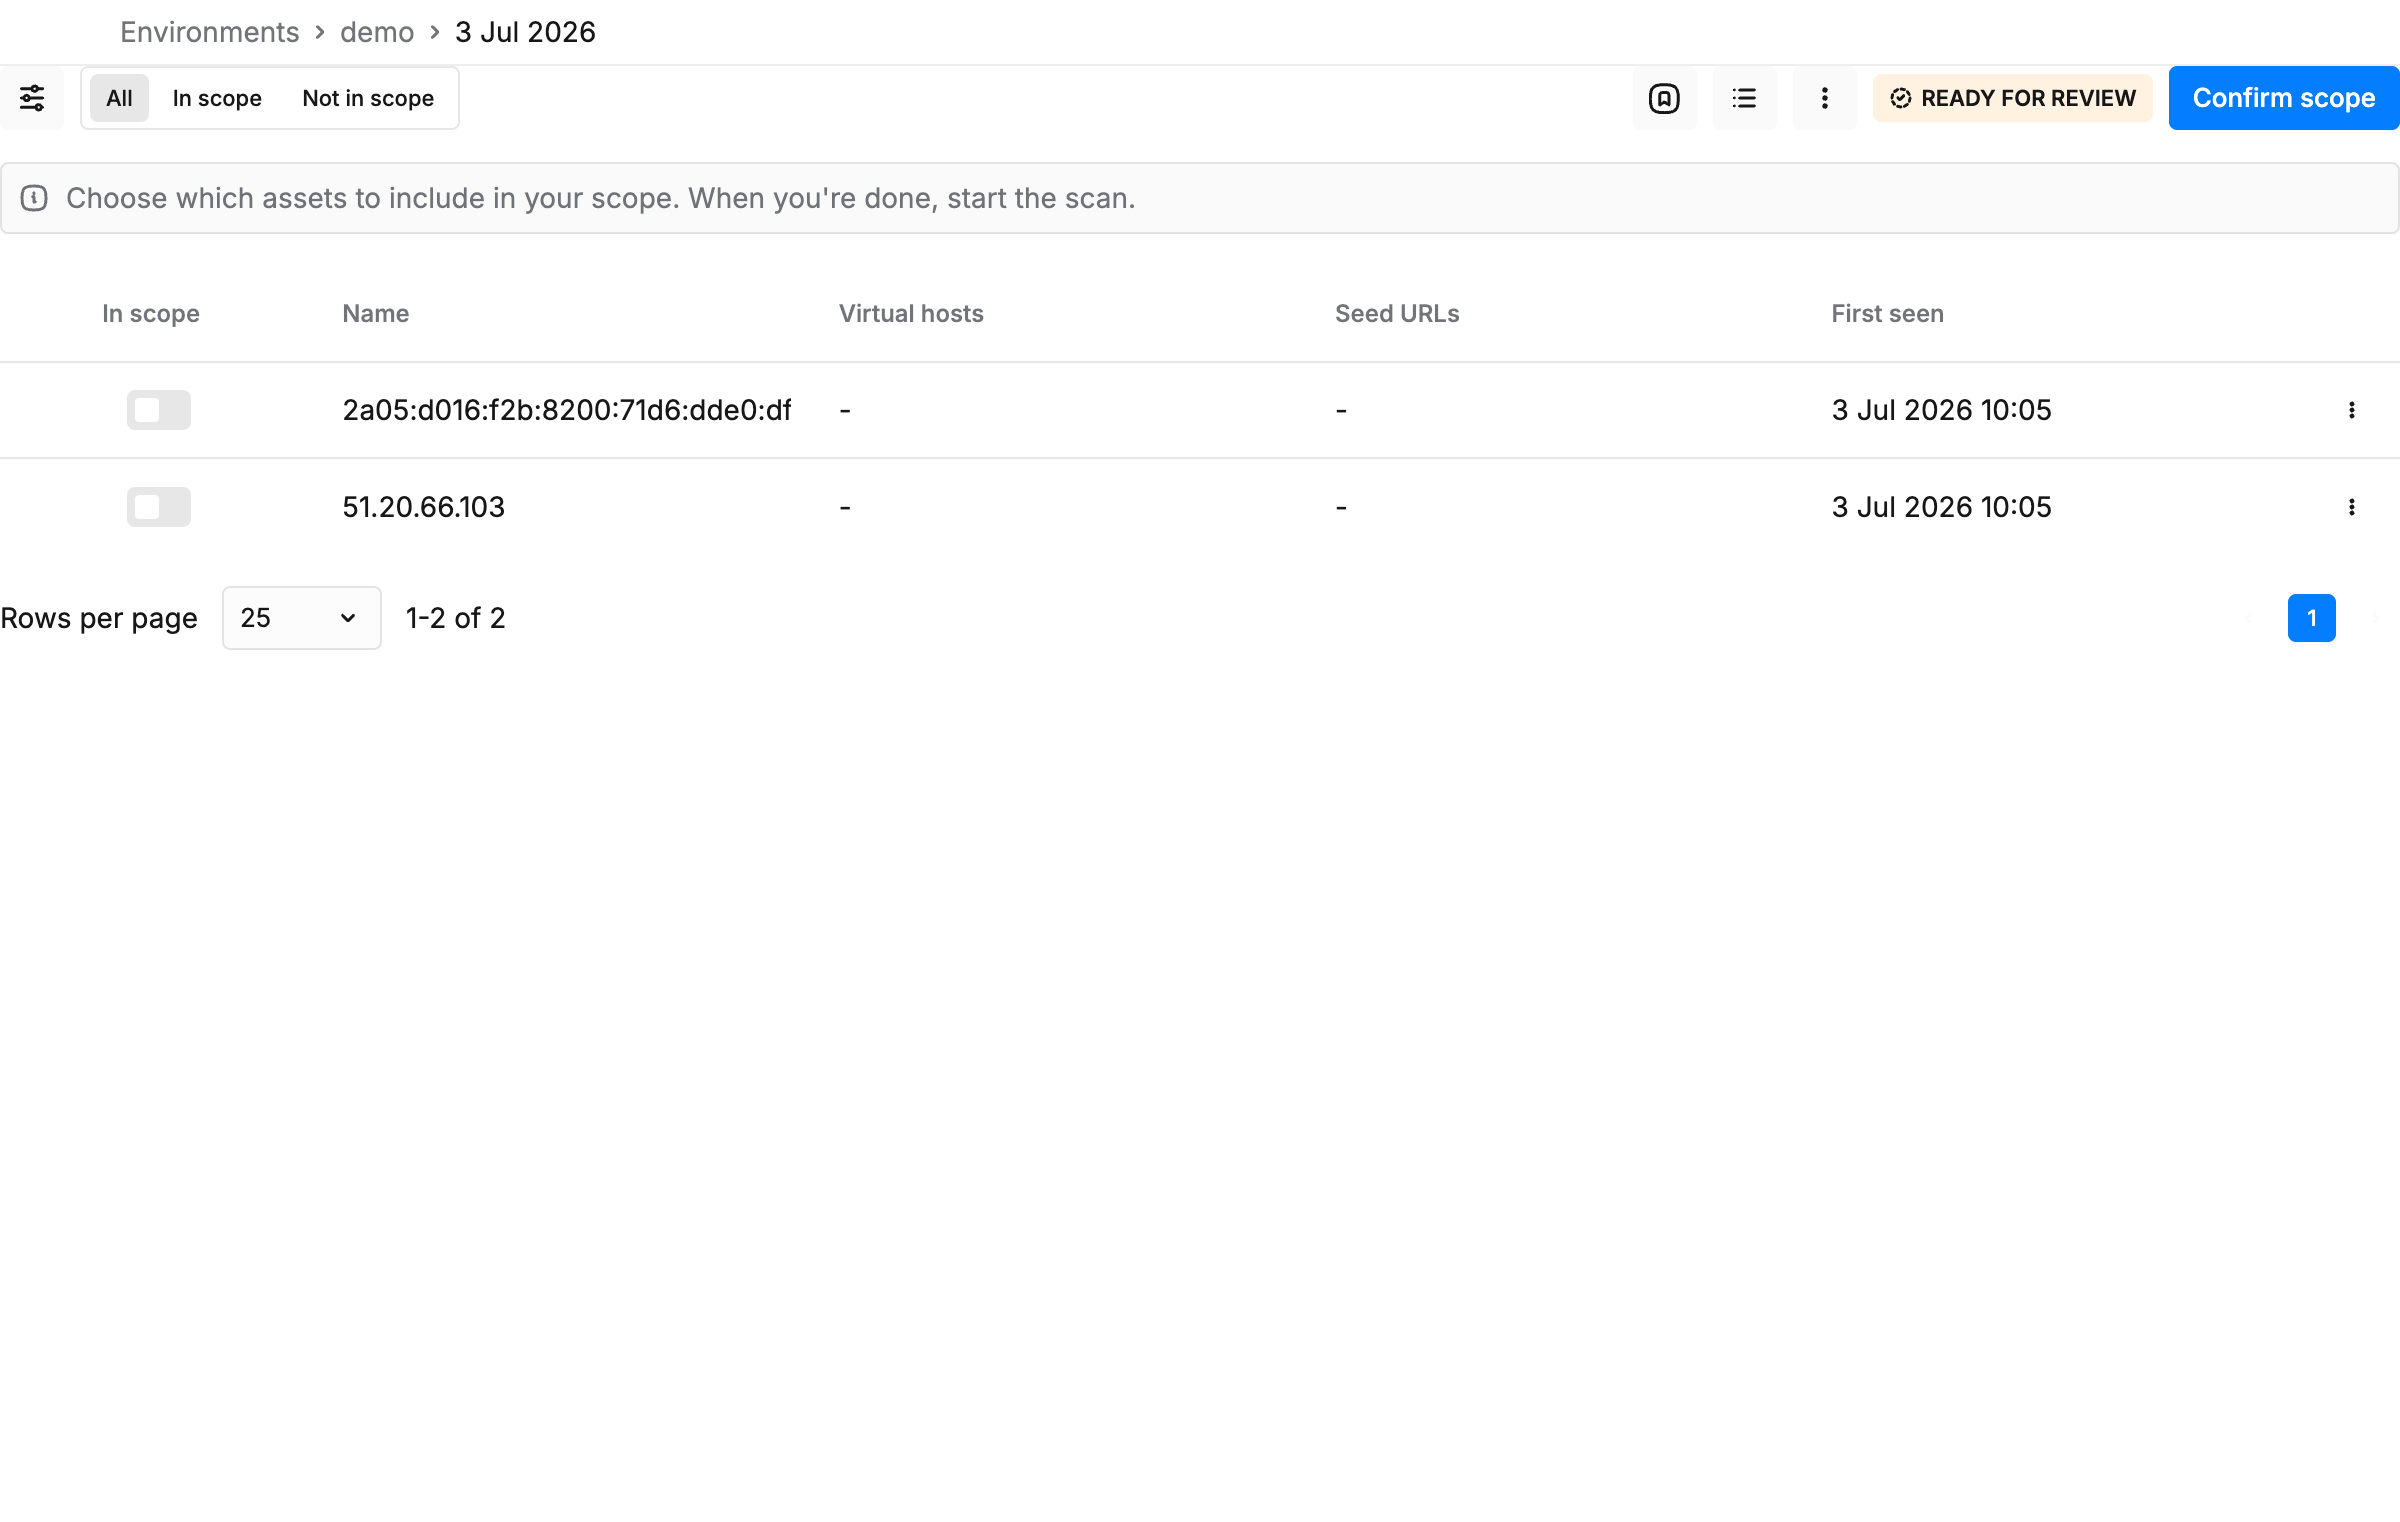
Reviewing Assets
-
The In scope toggle on each row includes or excludes the asset from the compliance scan. Changes are saved immediately.
-
Use the All / In scope / Not in scope filter above the table to review the selection.
-
Clicking a row opens a read-only detail panel with the IP address, first-seen date, scope membership, virtual hosts, and seed URLs.
To edit an asset, right-click its row and select Edit asset from the context menu. The name, the virtual hosts, and the seed URLs are editable; the IP address is read-only. Enter one value per line. Virtual hosts are additional host names served from the same IP address that the scan covers individually. Seed URLs give the scanner known entry points on the asset.
The table and the detail panel list every virtual host on the asset: host names found during discovery, and any extra host names added later. Edit asset changes only the extra host names. Discovery host names stay as the scan found them.
Full PCI DSS compliance requires all publicly reachable parts of the cardholder data environment to be in scope. Excluding an asset means it is not assessed.
Confirming the Scope
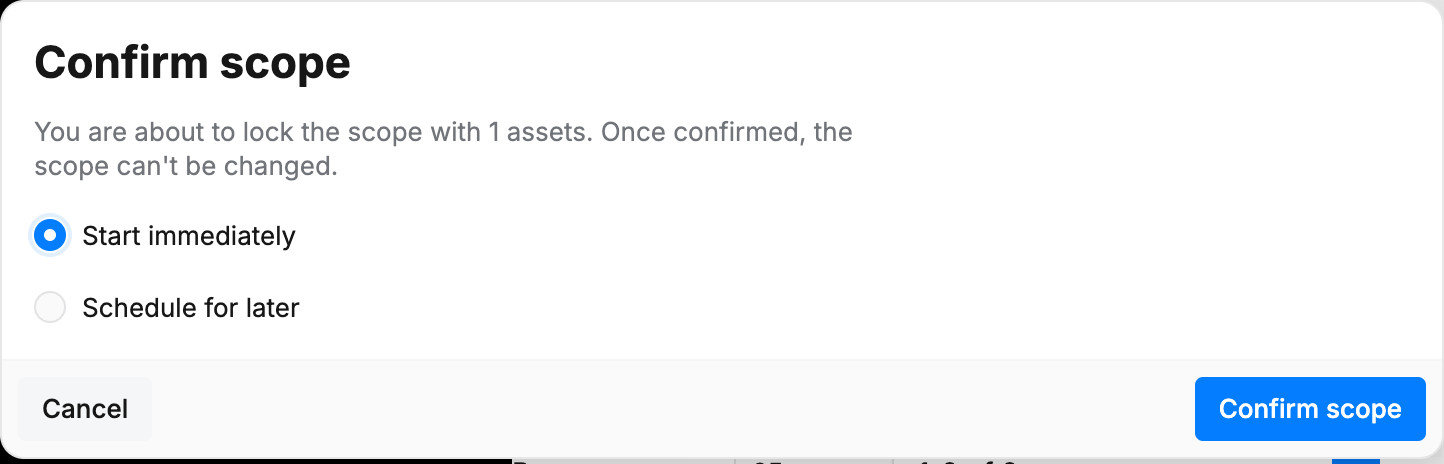
Confirming locks the asset selection and starts, or schedules, the compliance scan.
-
Click the Confirm scope button in the toolbar.
-
The dialog states how many assets are included: "You are about to lock the scope with [N] assets. Once confirmed, the scope can't be changed."
-
Select Start immediately, or select Schedule for later and pick a date and a time. A date in the past is not accepted. The scheduled time must be within two weeks from now.
-
Click the Confirm scope button.
The scan starts or is queued, and the scopes list is displayed again. At least one asset must be in scope to confirm.
After confirmation, the in-scope selection cannot be changed for this scope. Asset names, virtual hosts, and seed URLs remain editable, and individual in-scope assets can be rescanned from the asset's context menu.
While Discovery or a Scan Runs
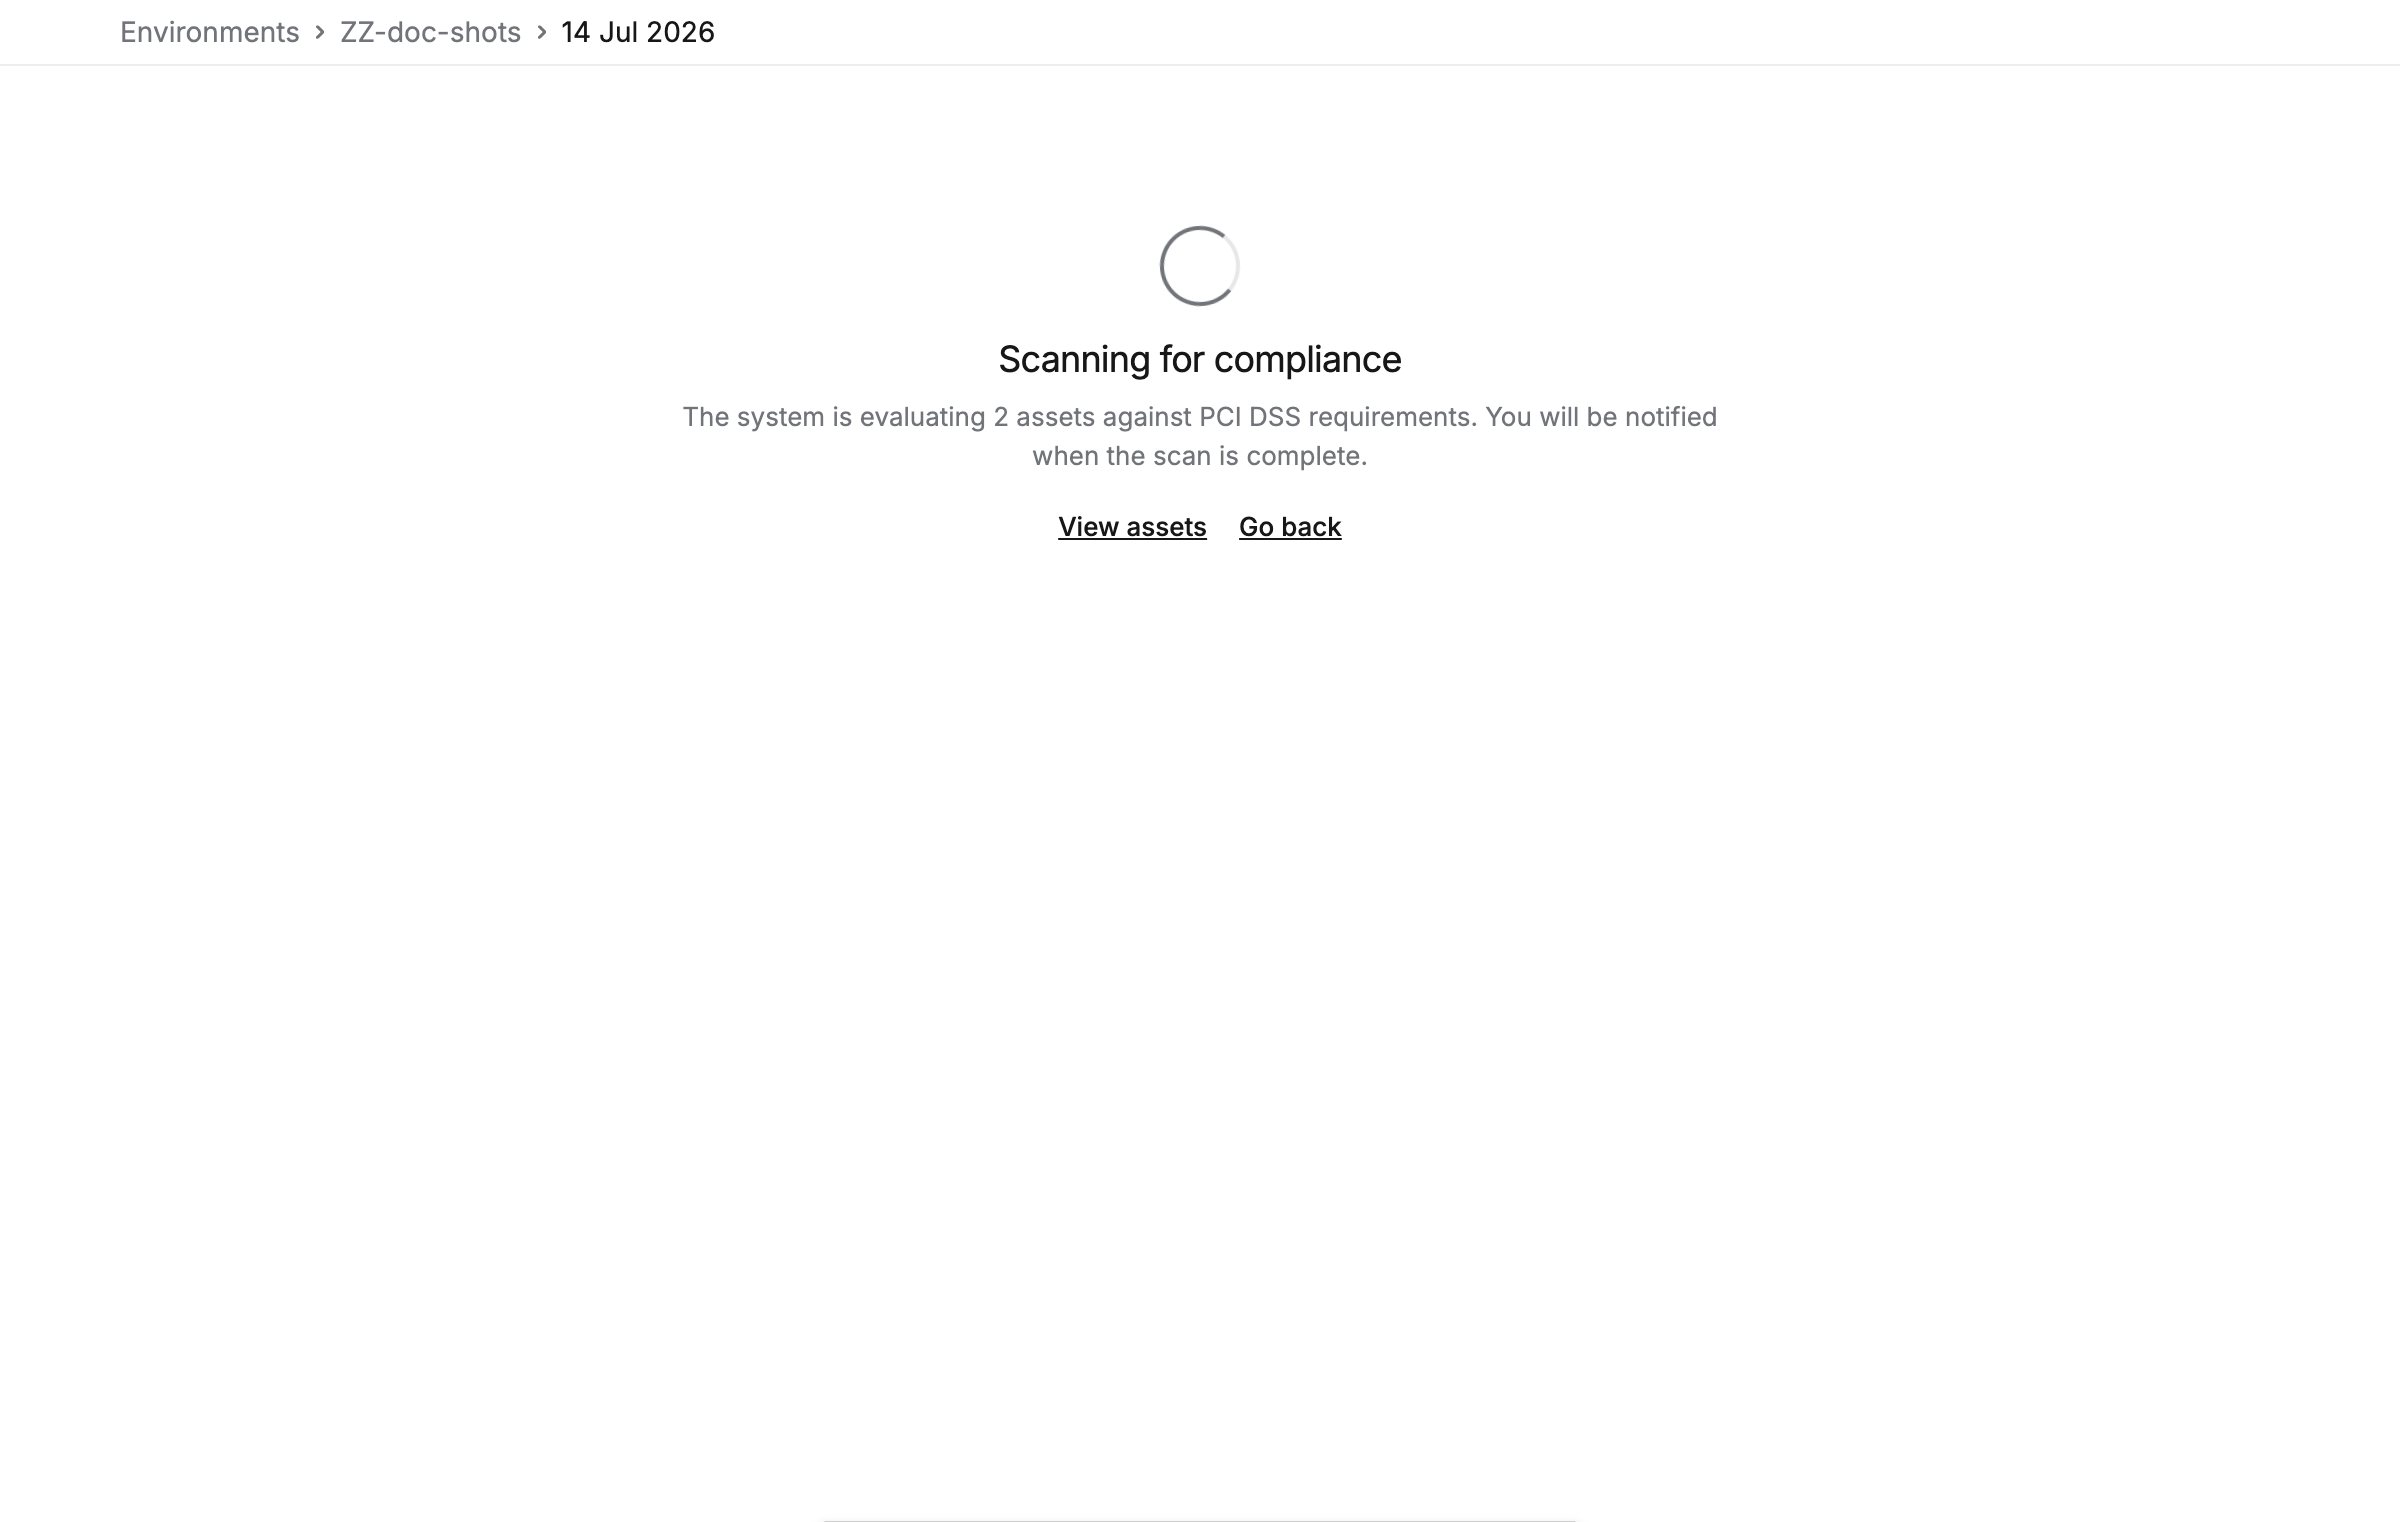
While a scope is DISCOVERING, SCANNING, or SCHEDULED, clicking it opens a status page:
-
Discovering assets - the system is identifying all assets within scope. When discovery completes, the assets are ready for review.
-
Scanning for compliance - the system is evaluating the in-scope assets against PCI DSS requirements. A View assets link shows the asset list in the meantime.
-
Scheduled - a compliance scan is queued, with its start time shown. Click Cancel scheduled scan to remove the queued scan. The scope returns to the status it had before the scan was scheduled. The in-scope selection stays locked.
Rescanning
The Portal offers three ways to scan again. Which one is available depends on the status of the scope.
Rescan Findings
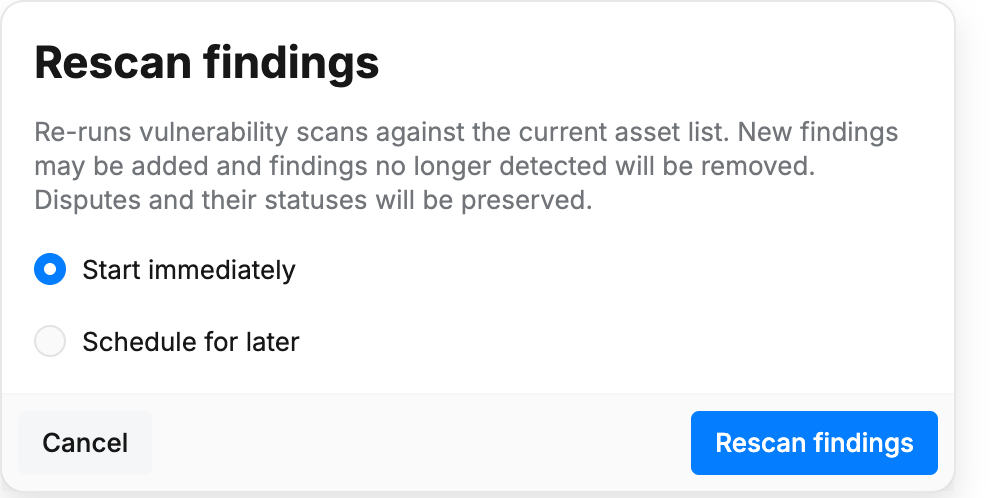
When a scan finishes with failing findings, the scope is NON COMPLIANT. After remediating the findings, right-click the scope and select Rescan findings from the context menu. This action is offered only on a NON COMPLIANT scope.
-
The dialog explains the effect: "Re-runs vulnerability scans against the current asset list. New findings may be added and findings no longer detected will be removed. Disputes and their statuses will be preserved."
-
Select Start immediately, or select Schedule for later and pick a date and a time. A date in the past is not accepted. The scheduled time must be within two weeks from now.
-
Click the Rescan findings button.
An immediate rescan starts the compliance scan. A scheduled rescan sets the scope status to SCHEDULED and shows the start time in the Next scan column until the scan runs or is canceled.
Run Discovery
Asset discovery is a separate action. Right-click the scope and select Run discovery from the context menu to search the target list for assets again and rebuild the asset list. This action is offered only while the scope is READY FOR REVIEW.
Editing the target list has the same effect: select Edit scope, change the targets, and save. Asset discovery restarts automatically. Edit scope is likewise offered only while the scope is READY FOR REVIEW.
Rescan a Single Asset
To scan an individual asset again without rescanning the whole scope, right-click the asset in the asset review and select Rescan asset from the context menu.
The action is available only for an asset that is in scope, in a scope that has been confirmed, that is not COMPLETED, and that has no queued scan. If a scan for the asset is already running, the rescan is refused.
-
Select Start immediately, or select Schedule for later and pick a date and a time. A date in the past is not accepted. The scheduled time must be within two weeks from now.
-
Click the Rescan asset button.
An immediate rescan starts a scan of that asset. A scheduled rescan queues a scan of that asset, sets the scope status to SCHEDULED, and shows the start time in the Next scan column until the scan runs or is canceled. While the scan is queued, Rescan asset is not offered; cancel the queued scan from the scope.
Reports and Completing a Scope
Right-click a COMPLIANT or NON COMPLIANT scope and select Create report from the context menu. The dialog summarizes the scope and its result, and offers two modes:
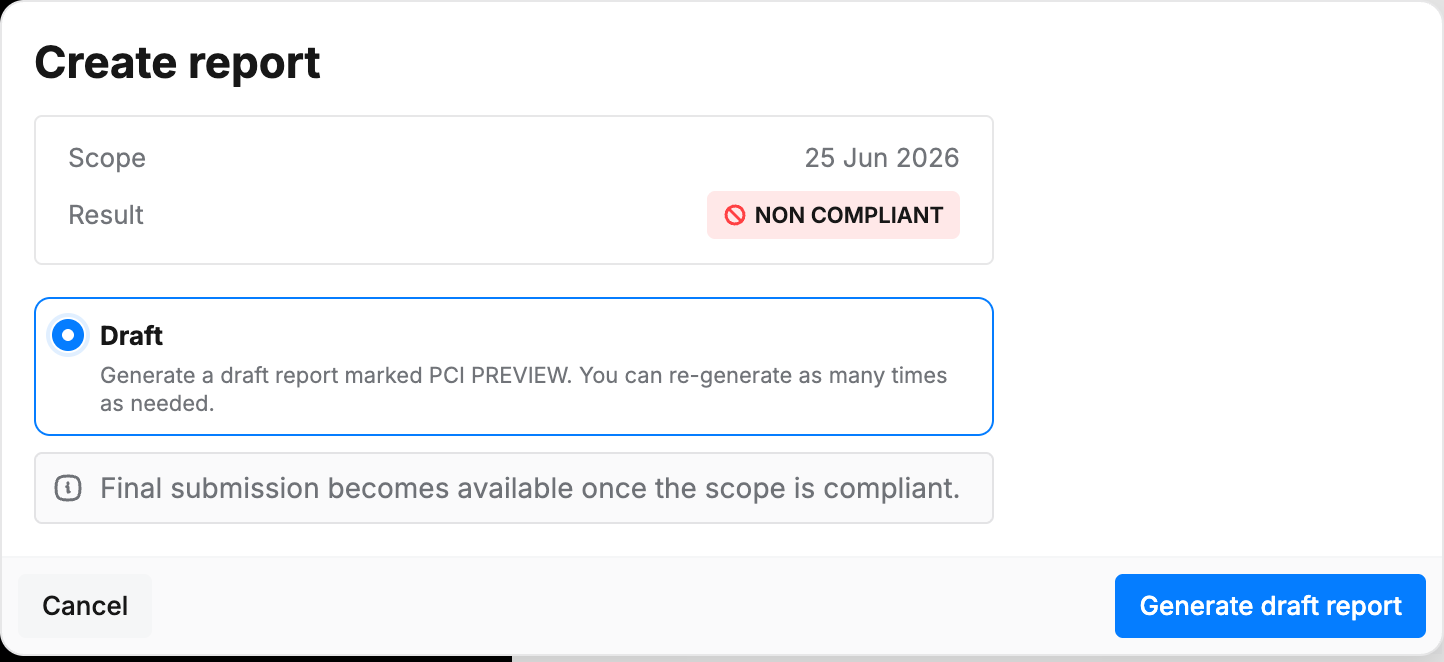
Draft Report
A draft report is generated on demand and marked PCI PREVIEW. It omits the attestation sections and is intended for internal review before finalizing. Drafts can be re-generated as many times as needed.
-
Select Draft.
-
Click the Generate draft report button.
The report is generated in the background and is displayed in the All downloads panel in the top bar when ready.
Final Submission
Final submission completes the scope. It is available only when the scope is COMPLIANT.
-
Select Final submission.
-
Check the confirmation box: "I confirm the scope is complete and the report is ready for final submission." This is the customer attestation that dispute evidence is accurate, all in-scope infrastructure is included, and special notes have been appended.
-
Click the Finalize and submit report button.
The scope status changes to COMPLETED, the attestation is recorded with the confirming user and date, and the final ASV report is generated and stored with the scope. Download it with the scope's Download report action, which downloads the stored file directly.
Finalizing is irreversible. A completed scope is locked: its assets, findings, special notes, and disputes cannot be modified, and no further scans can run in it. The next scan cycle takes place in a new scope.
The final report is generated once, at completion time, and is never regenerated. The stored file is the document of record for the attestation.
After Completion
-
The environment's 90-day deadline restarts from the completion date.
-
The next scope is created automatically at the next schedule occurrence, carrying the in-scope assets forward, or manually with Create scope.
-
PCI compliance data is retained for three years. Completed scopes older than three years are removed automatically; the environment itself remains.
Related Articles