Installing Outpost24 Agents
Purpose
This document describes how to install Outpost24 Agents mobile assets that are rarely office based.
Introduction
The Outpost24 Agent is primarily designed for mobile employees who are rarely office based, but still requires vulnerability scanning of their assets. When working remotely, often via a VPN, it is not possible to run a remote vulnerability scan of these assets as it can have a serious impact on network performance. Using the Outpost24 Agent, makes it possible to get these results, with no impact on network capacity, giving details of missing patches, updates, and hotfixes for both OS and common business software. The Outpost24 Agent can be downloaded based on Operating System from the OUTSCAN UI, under Menu > Support.
It is recommended that the Outpost24 Agent is deployed and updated using your normal software deployment method. Follow the best practices of these software deployment mechanisms to ensure a successful installation. The methods outlined in this document guide you through the steps needed for a successful installation.
When running an Outpost24 Agent, some Anti Virus/Anti-Malware software will trigger on the agent.
To avoid triggering the AV/Malware platform, the path to the agents executable need to be whitelisted.
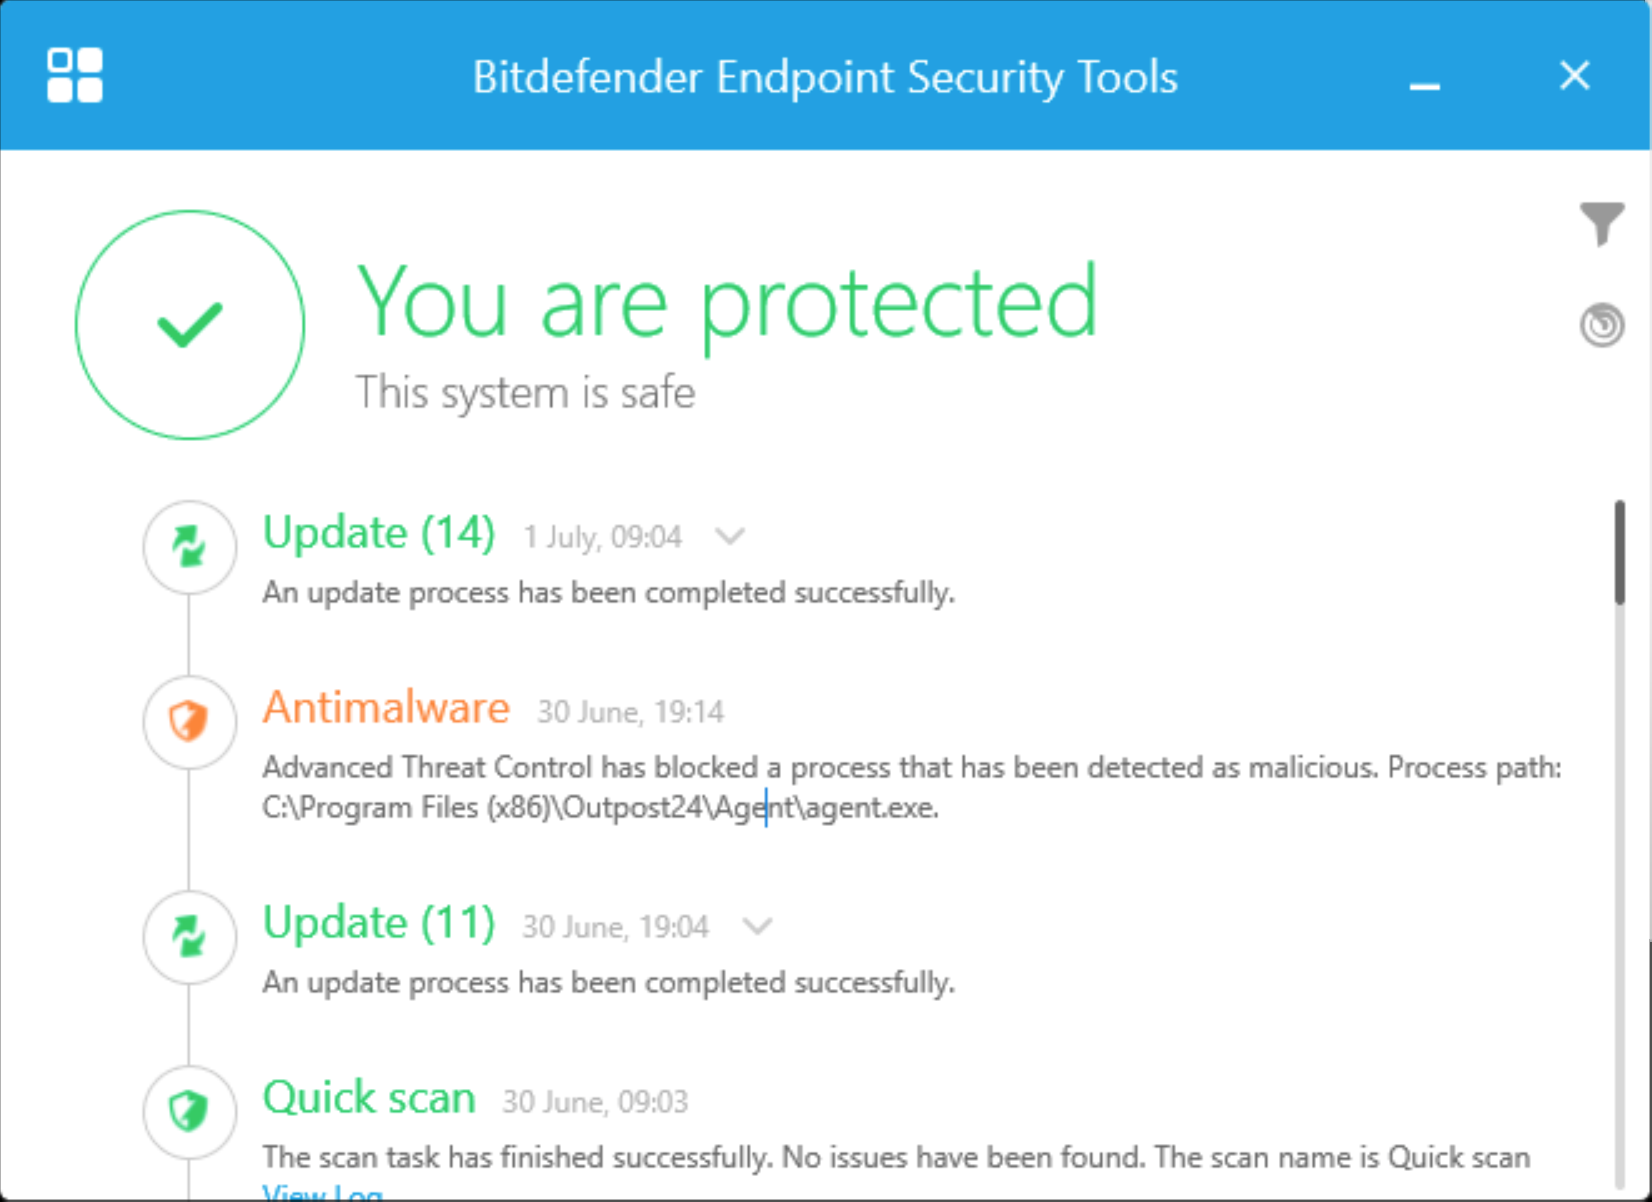
Example from Bitdefender
Requirements
It is required for agents to have full connectivity to both
appliancek8s.outpost24.comandteddysalad.outpost24.com.The Linux Agent comes both in rpm and deb format.
The Windows Agent only support MSI installer.
The MacOS Agent only support x64.
List of operating systems that are officially supported:
Prior to release, the most recent version of the Agent is tested.
The current released version of the Agent can be found in Main Menu > About or Main Menu > Support in the Agent Installer tab.
OS | Version | Build |
|---|---|---|
Windows | 10 and 11 | |
Windows Server | 2016 and higher | 14393 |
RHEL | 8 and higher | |
Centos | 7 and higher | |
Fedora | 39 and higher | |
Ubuntu | 20 and higher | |
Debian | 11 and higher | |
MacOS | MacOS 14 Sonoma and higher |
All the operating systems / versions mentioned above have been thoroughly tested by us. The Outpost24 Agent may work on other Windows, Mac and Linux distributions. However, if you want it is fully supported, please contact our support team.
Before Starting
Check Connectivity to Agent Server
Ensure you can reach Outpost24 Agent server by checking you can reach the following URL from the target where the Agent is installed:
Windows
Run the following command in DOS Command Prompt:
telnet teddysalad.outpost24.com 443Linux
Run the following command:
telnet teddysalad.outpost24.com 443Linux example:

Downloading the Agent
To download the agent:
Open a browser and navigate to
https://outscan.outpost24.com/portal. See the Logging in to the Portal article on different ways to access the Portal.Click the Account button in the upper right corner.
Select the Download card.
Select the Agents tab.
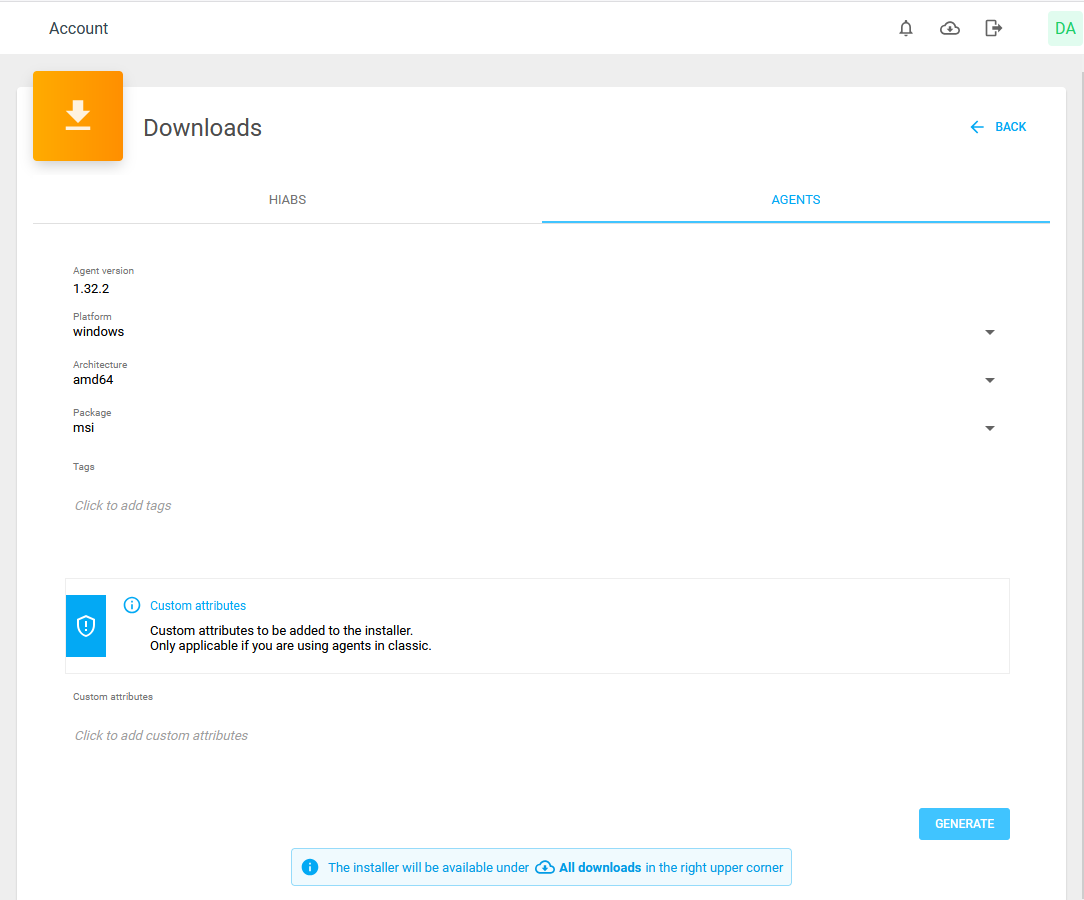
Select Platform, choose between Windows, Linux, or macOS
Select Architecture
Select Package format depending on architecture.
Select existing Tags or create new Tags for the agent. These tags allow assets to be discovered with them. Leaving the field empty results in no tags is added during the discovery scan.
If duplicate keys are provided, the last specified value will be used.
Fill in Custom attributes using the
key:valuesyntax. The attribute is evaluated upon submission against the already existing attributes and must match existing allowed attributes in classic else it will fail and result in an error. For more information about Agent attributes se Adding Agent Attributes.
Example: AssetID:101, AgentLocation:Karlskrona, OtherTargetAttribute:Marketing, Critical:Yes
When all the selection are done, click the blue Generate button to generate the selected package.
Once the package is ready, download the package from the All downloads
 icon located in right upper corner.
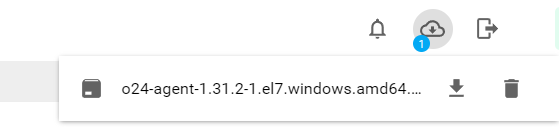
Check your download folder for the installation file. The filename format follows the selection you made like
o24-agent-<version>.<platform>.<architecture>.<package>
For example, for Windows it can look like thiso24-agent-1.31.2-1.el7.windows.amd64.msi.
The current version, platform and architecture is part of the filename.
Installing the Agent
Linux
Log in at the workstation on which you want to install the software.
Ensure that the user can get root privileges using the sudo command.
Fedora
Download and verify the package you wish to install as shown in Downloading the Agent. The package is named o24-agent-<version>.linux.amd64.rpm.
To install the package using the RPM package manager, enter the following command at the prompt:
BASHsudo rpm -ivh o24-agent-<version>.linux.amd64.rpm
You can also use dnf the next upcoming major version of the yum package manager for RPM-based Linux distribution, as follow:
sudo dnf install o24-agent-<version>.linux.amd64.rpmCentOS
Download and verify the package you wish to install as shown in Downloading the Agent. The package is named o24-agent-<version>.linux.amd64.rpm.
To install the package using RPM package manager, enter the following command at the prompt:
BASHsudo rpm -ivh o24-agent-<version>.linux.amd64.rpm
You can also use dnf the next upcoming major version of the yum package manager for RPM-based Linux distribution, as follow:
sudo yum install o24-agent-<version>.linux.amd64.rpmDebian
Download the package you wish to install as shown in Downloading the Agent. The package is named o24-agent-<version>.linux.amd64.deb.
To install the package using Package Manager for Debian, enter the following command at the prompt:
BASHsudo dpkg -i o24-agent-<version>.linux.amd64.deb
You can also use Debian high level command line interface for the package management system provided by apt as follow:
sudoapt /FULL_PATH_TO/o24-agent-<version>.linux.amd64.debWindows
To install an agent:
Run the downloaded o24-agent-1.22.1-1.el7.windows.amd64.msi to start the installation.
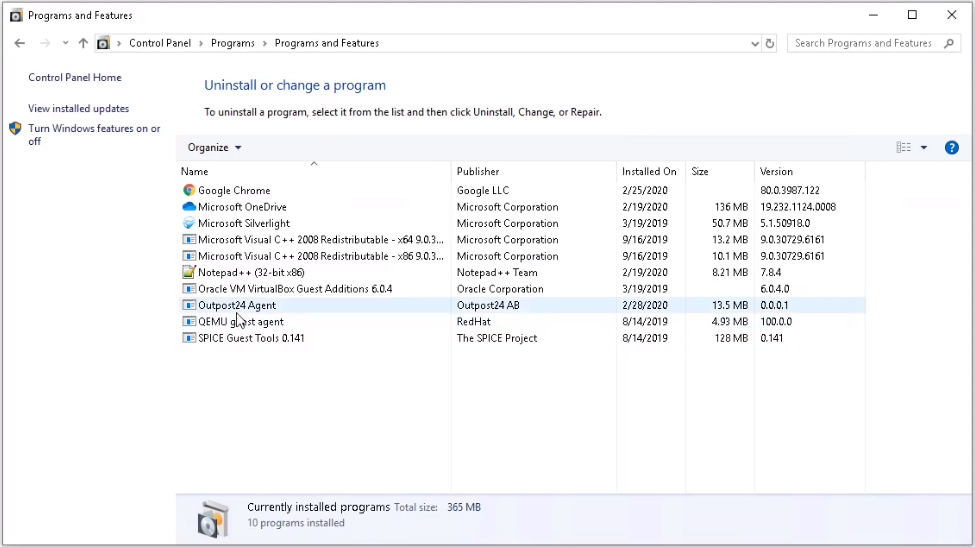
Check to see that the Outpost24 Agent been enrolled properly by checking:
Start > Windows Systems > Control Panel > Programs > Programs and Features.
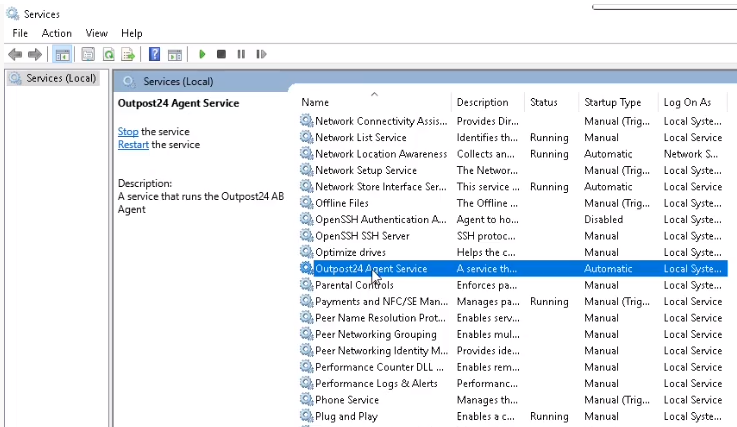
Check that the Outpost24 Agent Service is running in Start > Windows Administrative Tools > Services.
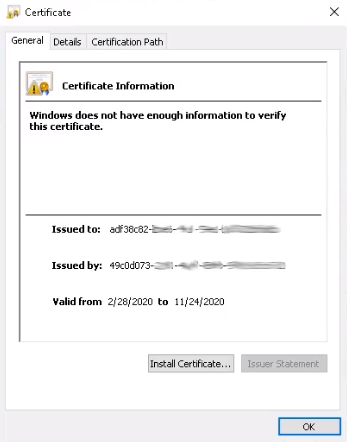
Check This PC > Windows 10(C:) ProgramData > Outpost24 > Agent for a o24agent.crt certificate.
Note that the agents needs to enroll for the first time to get the certificate file. This can take anywhere between 10 minutes up to 4 hours.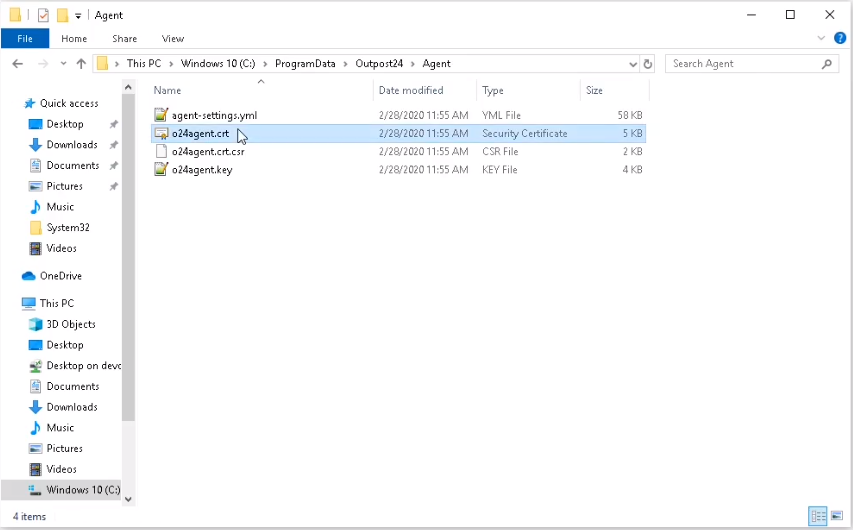
macOS
Overview
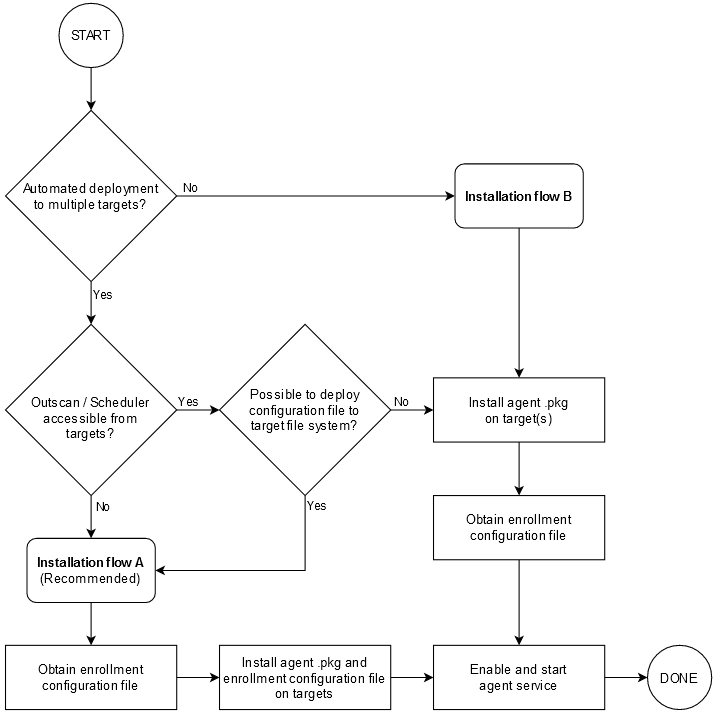
The following flowchart illustrates the two mechanisms through which a macOS Agent may be configured and enrolled.
For automated deployment to a large number of targets we recommend flow A, in which the system administrator first manually obtains an enrollment configuration file which is then deployed to the entire fleet.
In flow B, the agent application is instead provided with a REST API token and retrieves its configuration file from its enrollment host. This flow implies additional network traffic overhead and the potential exposure of a more general credential.
Flow A
This flow reduces the required network communication between the agent and the enrollment host, and also minimizes the exposure of the REST API token needed for enrollment configuration file acquisition.
Obtain enrollment configuration file
The system administrator installs the agent application on a single system, from which the enrollment configuration is bootstrapped.
This configuration file, which contains a long-lived enrollment token, is then deployed to all targets in the subsequent step.
Refer to the Acquiring a JSON Web Token (JWT) for Interfacing with the Outpost24 REST API and Obtaining Enrollment Configuration sections for guidance.Install agent .pkg and enrollment configuration file on targets
The enrollment configuration file is placed in the/etc/o24-agent.conf.d/directory and the agent binary is installed to/usr/local/bin/o24-agent. (see Installing the macOS Agent).
Granted that the configuration file is valid and readable, the agent will be able to enroll on first startup.
The configuration file should be owned by the root user and have its permissions set to 640.
Flow B
In this flow, the agent application retrieves its enrollment configuration file using a REST API token; automated installation on multiple targets using this flow would entail issuing a longer-lived token and distributing it to all installation targets.
Install agent .pkg on target(s)
Refer to the instructions in the Installing the macOS Agent section.Obtain enrollment configuration file
Obtain a REST API token and subsequently the enrollment configuration file as described in Acquiring a JSON Web Token (JWT) for Interfacing with the Outpost24 REST API and Obtaining Enrollment Configuration.
After concluding either flow A or B, see Starting the service for finalization.
Installing the macOS Agent
If you have access to the GUI, double-click the downloaded
.pkgfile and follow the installation wizard instructions.If prompted to choose installation directory, use the default (the volume the OS is installed to).
Otherwise, from the command-line, use the following command:
BASHinstaller -pkg <path-to-agent.pkg> -target /
Retrieve a REST API Token From XMLAPI
It is possible to retrieve a REST API token through the XMLAPI action GETRESTTOKEN by using the XMLAPI apptoken.
This procedure requires a super user account.
Generate an API Token in the OUTSCAN UI Menu Menu > Settings > Security Policy.
With that key, run the API command
CODEhttps://<O24-URL>/opi/XMLAPI?ACTION=GETRESTTOKEN&APPTOKEN=<Key from Step 1><O24-URL>could be eitherhttps://outscan.outpost24.com/or your HIAB IP Address/FQDN.
A token is returned that lasts 10 minutes from the REST API.
Acquiring a JSON Web Token (JWT) for Interfacing with the Outpost24 REST API
An Outpost24 REST API may be acquired by issuing a POST request to the /opi/rest/auth/login endpoint. The endpoint accepts the following request body parameters:
username(mandatory) - Outpost24 sign-in username.password(mandatory) - Outpost24 sign-in password.validUntil(optional) - Timestamp indicating when the token will expire; default lifetime is 10 minutes.code(optional) - Two-factor authentication (2FA) code, required if enabled for the user account.
Example POST request using cURL:
read -p "Username: " USER && \
read -sp "Password: " PASS && echo && \
curl --data-urlencode "username=${USER}" --data-urlencode "password=${PASS}" https://outscan.outpost24.com/opi/rest/auth/login && echo && \
unset USER PASS
Before Getting Enrollment Configuration
Please make sure that the config folder has created properly.
mkdir /etc/o24-agent.conf.dObtaining Enrollment Configuration
The /usr/local/bin/o24-agent binary provides a command fetch-enrollment-config, it retrieves a configuration file and installs it to /etc/o24-agent.conf.d/10-base.yml.
/usr/local/bin/o24-agent fetch-enrollment-config --token "<token>"This command requires the following mandatory arguments:
--url:This should point to the OUTSCAN/Scheduler that you wish to run against; this defaults tohttps://outscan.outpost24.com.--token:This should be a valid, non-expired JWT for the Outpost24 REST API, as outlined above.In order to restrict the token scope, we recommend issuing the JWT for an IAM restricted sub-user.
This command accepts the following optional arguments:
--no-config-install: This skips installing the configuration file to/etc/o24-agent.conf.d/, instead leaving it available in/tmp/.By obtaining the configuration file in this manner you may subsequently incorporate it into a specific deployment workflow, for example automatically placing it in
/etc/o24-agent.conf.d/during installation, Sidestepping the need to expose a valid JWT in the same flow.See the "Enrollment flow overview" for additional information.
--insecure-skip-verify: Skips TLS certificate validation for the given--url.Should only be utilized if required for particular DSAgent deployments.
This command must be invoked as the root user due to the privileged configuration file location.
Starting the Service
After the enrollment configuration file has been obtained, launch the agent service as such:
launchctl load -w /Library/LaunchDaemons/com.outpost24.agent.plistOn first run, the agent is enrolled against the OUTSCAN or Scheduler instance. This operation includes a randomized timeout in order to support large-scale deployments, and may thus require up to an hour to conclude.
Large Scale Deployments
It is recommended using existing infrastructure for large scale deployments such as but not limited to:
Azure AD https://docs.microsoft.com/en-us/microsoft-365/managed-desktop/get-started/deploy-apps?view=o365-worldwide for Windows hosts
Ansible https://docs.ansible.com/ansible/latest/user_guide/index.html for Linux hosts
Setting Up an Agent Using System Proxy
Linux
Edit the /etc/sysconfig/o24-agent file to add a block to specify and HTTPS_PROXY directive.
HTTPS_PROXY="http://<PROXY_IP>:<PROXY_PORT>"
Windows
In the Start menu:
Open Settings.
Go to About.
Click on Advanced System Settings.
Click on Environment Variables.
Under System Variables click New.
Under New System Variable, fill in the new Variable Name and Variable Value.
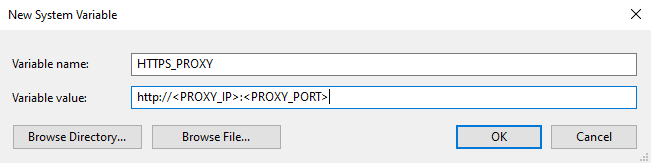
Click OK to add each new variable.
macOS
Edit the /Library/LaunchDaemons/com.outpost24.agent.plist file to add a block to specify and Launch Service Environment key.
<key>LSEnvironment</key>
<dict>
      <key>HTTPS_PROXY</key>
      <string>http://<PROXY-IP>:<PROXY-PORT></string>
</dict>
You can also use standard agent-settings.yml file extracted from another pages which allows you to not make a curl call to get the enrollment configuration.
Setting up the Agent as a Target
Once the agent has been installed, perform a discovery scan for enrolled agents.
Open Main Menu > Netsec > Scan Scheduling.
Click + New button to open a Maintain Scan Schedule.
Add a new name, for example agent discovery.
Select Scan Mode in the drop-down menu: Discovery [Discovery|Discovery/Scan|Scan].
Select the Discovery Settings tab.
Select the Agent Discovery checkbox.
Select the Add Found Targets To Targets Group check box.
Under All Targets tree, select a target.
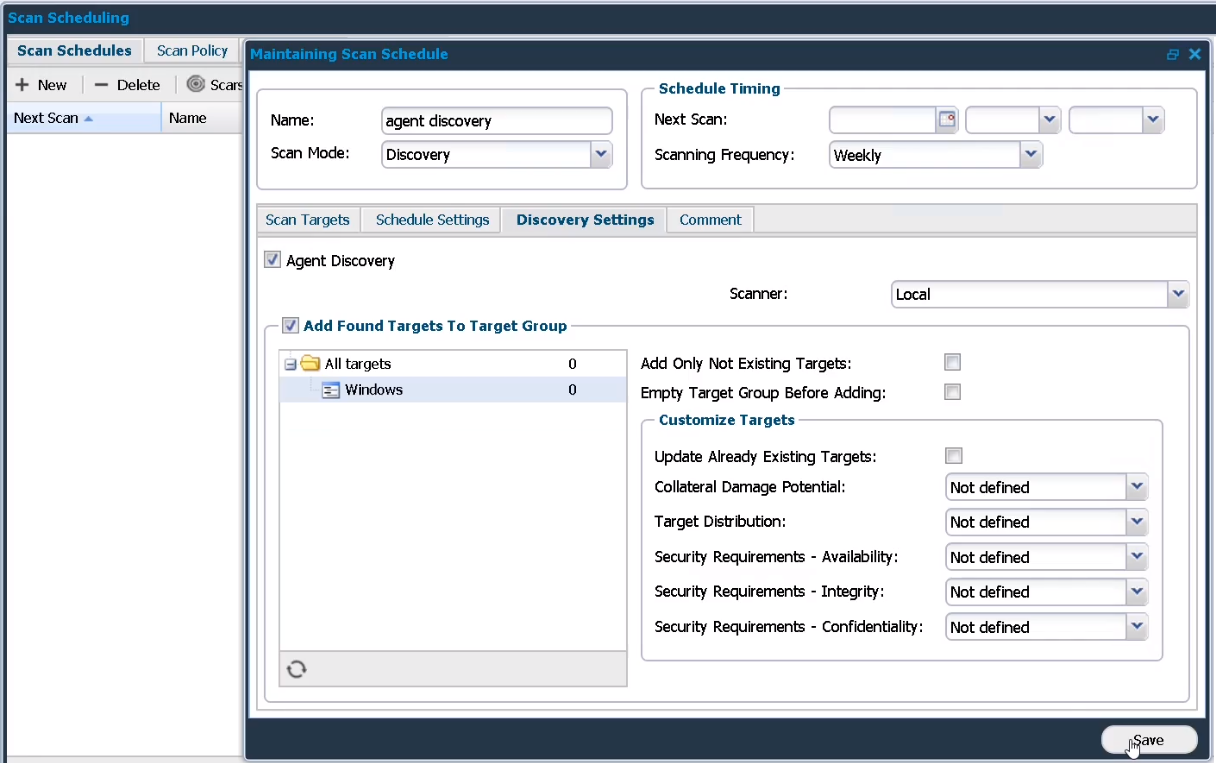
Click the Save button.
Select the new agent schedule listed under the Scan Schedules tab.
Click the Scan now button.
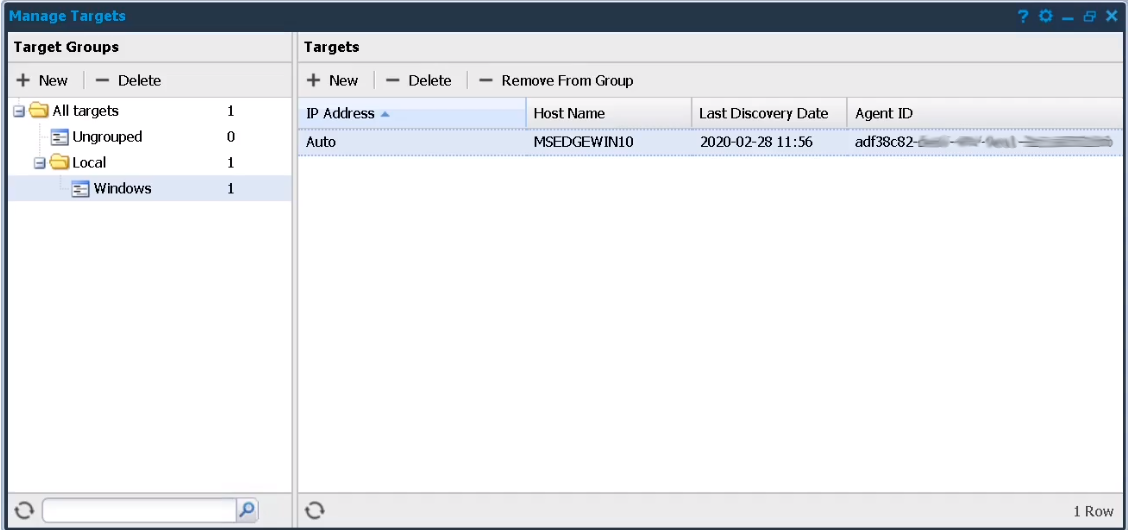
Once the discovery scan has finished the agent is added under Manage Targets and can be handled as any other target in Scan Scheduling.
Reference
Related Articles
Copyright
© 2025 Outpost24® All rights reserved. This document may only be redistributed unedited and unaltered. This document may be cited and referenced only if clearly crediting Outpost24® and this document as the source. Any other reproduction and redistribution in print or electronically is strictly prohibited without explicit permission.
Trademark
Outpost24® and OUTSCAN™ are trademarks of Outpost24® and its affiliated companies. All other brand names, product names or trademarks belong to their respective owners.