Last updated: 2026-03-12
Purpose
This article describe how to reorganize asset identifiers (hostnames, IPs, etc.) are distributed across the assets.
Introduction
The Recompose Assets feature reorganizes how asset identifiers such as hostnames or IP addresses associate with assets in the platform. The feature opens through the assets table or an asset details panel and runs as a guided wizard. Identifiers can be rearranged across selected assets by dragging the identifiers between assets, creating new assets, or removing identifiers. The interface displays identifiers and assets in different panels, allowing bulk selection, search, and highlight functions. Users can also define how vulnerability findings behave during the reorganization. Findings linked to specific identifiers move with the identifier, remain on the original asset, or copy to multiple assets depending on configuration. All changes are staged first and are only applied after final approval and automatically logs the updates in the affected assets.
Use Recompose Assets to correct asset structures created by automated discovery or scanning. Scanners sometimes group identifiers in ways that do not reflect the actual infrastructure, such as combining systems from different applications into a single asset. This feature enables administrators to split assets, merge duplicate assets, or redistribute identifiers across multiple assets. Accurate asset composition improves vulnerability tracking, reporting, and ownership assignment. Controlled staging and review reduce the risk of incorrect asset modifications and maintain reliable asset inventory data.
How to Open It
There are two ways to access the feature:
-
From the assets table — Select one or more assets (up to 10), then choose Recompose assets in either the context menu or the bulk action bar.
-
From the asset details panel — Open an asset's details, and use the context menu that’s accessible in the top right of the side section.
The Wizard: Step by Step
Step 1 — Rearrange Identifiers

A full screen modal opens with two panels:
-
Left panel: Asset Identifiers — This is a list of all identifiers from your selected assets. Each one has a drag handle, a
+button, and a⋮menu. -
Right panel: Assets — This shows your assets with their currently assigned identifiers. Each asset is expandable and shows its identifier count (for example, "3 hostname, 2 IP").
What you can do here:
-
Drag and drop an identifier from the left panel into any asset on the right
-
Use the
+button on an identifier to pick which asset to add it to (opens a searchable menu) -
Create a new asset using the
+ Create assetbutton at the top right — it is displayed with an autogenerated name that you can rename by clicking on it -
Remove an identifier from a specific asset via its
⋮menu → Remove from asset
-
Highlight an identifier across all assets to quickly spot where it appears — click
⋮→ Highlight in assets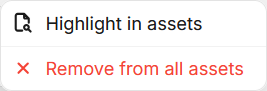
-
Remove an identifier from all assets via its
⋮menu on the left panel → Remove from all assets (confirmation required) -
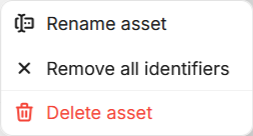
Rename asset
-
Remove all identifiers
-
Delete assets
-
Search in either panel using the search bars (fuzzy search across hostname, scanner, name, etc.)
Bulk operations: Hover over identifiers to reveal checkboxes. Select multiple, then drag them as a group (shown as a visual "stack") or use the + button to add them all to an asset at once.
When you are done arranging, click Continue.
Step 2 — Choose How to Handle Findings
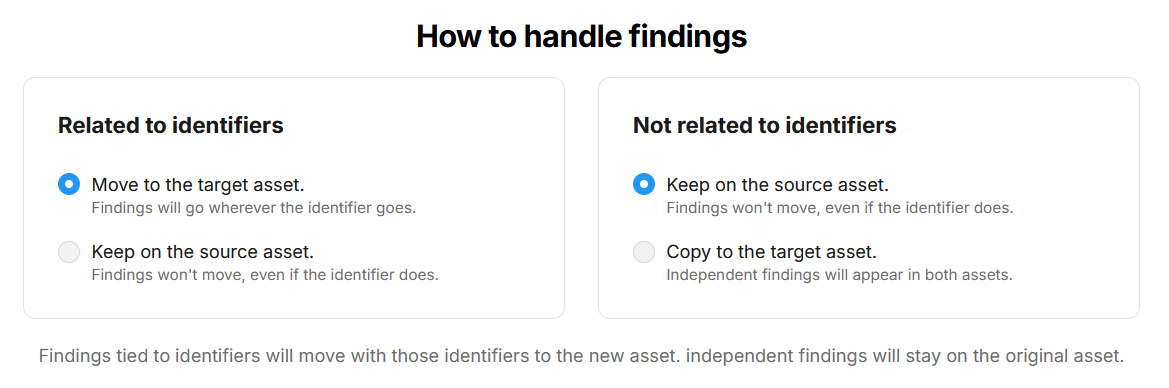
You will be asked how findings should be treated during the reorganization:
-
Findings related to specific identifiers (
withContext: true/false) — If enabled, findings that are semantically linked to a specific identifier will follow that identifier to its new asset. If disabled, they stay on the original asset. -
Findings not related to specific identifiers (
withoutContext: true/false) — If enabled, findings without a specific identifier link will be copied to any asset that ends up containing identifiers from the original asset. If disabled, they stay on the original asset.
An explanation text updates dynamically based on your choices.
Step 3 — Review Changes
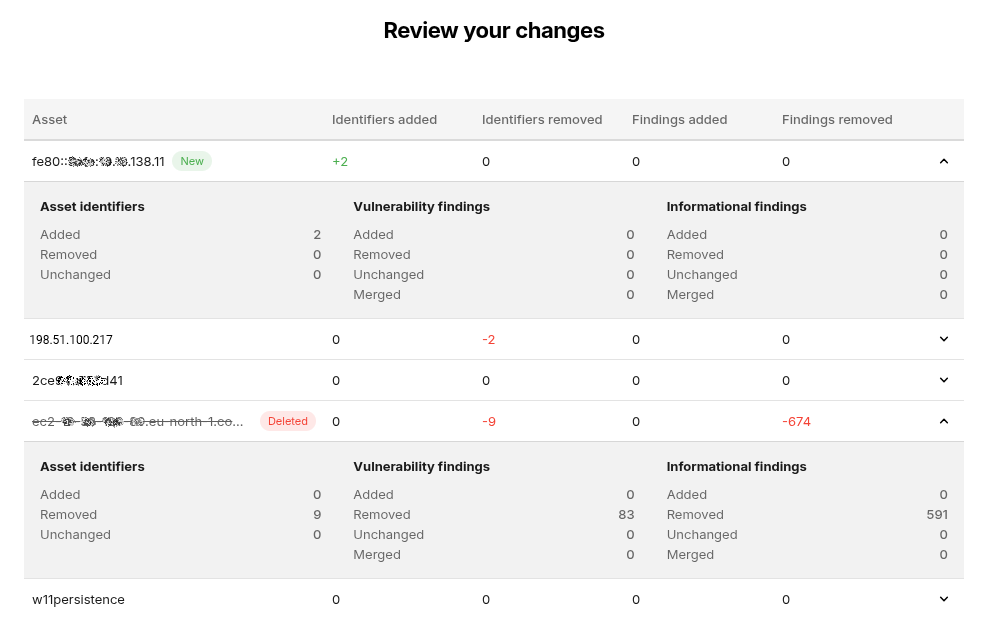
A summary shows exactly what will change for each asset:
-
Identifiers added, removed, and unchanged
-
Findings added, removed, and unchanged (if available)
Nothing has been applied yet. Review carefully, then click the blue Apply changes button in the lower right corner to apply.
Done
The modal autocloses and shows a toast notification confirming success. A system comment is automatically added to each affected asset describing what changed.
Common Use Cases
Splitting an Asset
Scenario: One asset contains identifiers for two different applications (e.g., app1.example.com and app2.example.com) and you want them separate.
-
Select the asset and open "Manage asset identifiers"
-
Click + New asset to create a second asset
-
Drag
app2.example.comfrom the original into the new asset -
Continue → choose finding handling → review → apply
Merging Assets
Scenario: Two assets represent the same server scanned by different scanners, and you want to combine them.
-
Select both assets from the table and open "Manage asset identifiers"
-
Drag all identifiers from the second asset into the first
-
The second asset (now empty) will be automatically deleted
-
Continue → choose finding handling → review → apply
Reshuffling Identifiers
Scenario: Three assets have their identifiers mixed up and you need to reorganize across all of them.
-
Select all three assets and open "Manage asset identifiers"
-
Drag and drop identifiers between assets as needed, or create new assets
-
Continue → choose finding handling → review → apply
Limits and Restrictions
|
Limit |
Value |
|---|---|
|
Maximum assets selected |
10 |
|
Maximum asset identifiers |
100 |
|
Allowed sources (customer) |
NETSEC, SCALE, CLOUDSEC |
|
Allowed sources (managed) |
APPSEC, ASSURE, SNAPSHOT, SWAT, OFFSEC |
Additional rules:
-
You cannot mix CLOUDSEC assets with non-CLOUDSEC assets in the same operation
-
You cannot mix managed and non-managed assets in the same operation
-
Customer users need VIEW_AND_MANAGE permission on all involved assets
-
New identifiers cannot be created — you can only move existing ones
Error Messages
|
Error |
When it appears |
|---|---|
|
"Too many assets selected" |
More than 10 assets selected |
|
"Too many asset identifiers selected" |
More than 100 identifiers involved |
|
"Unsupported source detected" |
Assets include a source that isn't allowed |
API Reference
Recompose Assets
POST /assets/recompose
Rearranges identifiers across the listed assets. Assets with an id are updated; Assets without an id are created. Assets with an empty identifier list are deleted.
{
  "migrateFindings": {
    "withContext": true,
    "withoutContext": false
  },
  "assets": [
    { "id": 1234, "identifiers": [] },
    { "id": 2345, "identifiers": [{ "id": 1 }, { "id": 2 }] },
    { "name": "new asset", "identifiers": [{ "id": 3 }] }
  ]
}
Validate Recomposition (dry run)
POST /assets/validate-recomposition
Same payload as above. Returns a summary of what would change without actually applying it. Used in the review step (Step 3).
{
  "assets": [
    {
      "id": 1234,
      "asset-identifiers": { "added": 2, "unchanged": 3, "removed": 1 },
      "findings": { "added": 34, "unchanged": 12, "removed": 11 }
    }
  ]
}
Deprecated Endpoints
The following endpoints are deprecated and replaced by /assets/recompose:
-
POST /assets/{assetId}/merge -
POST /assets/{assetId}/split
UI Details
Identifier Box States
|
State |
Visual |
|---|---|
|
Default |
Name with |
|
Hover |
Checkbox appears, metadata shown (for example, "Hostname · Local · last seen 2d ago") |
|
Included in asset |
Shown inside an asset on the right panel with |
|
Drag moving |
Blue highlight border |
Cancelling
If you cancel during Step 1 while having unsaved changes, a confirmation dialog is displayed asking if you want to discard changes.