
Last updated: 2026-08-11
Purpose
This article describes how to deploy RC-Scanner as a virtual appliance in Microsoft Hyper-V. It covers virtual machine creation, RC-Scanner ISO configuration, Secure Boot settings, installation, and access to the deployed scanner.
Introduction
This guide walks you through deploying RC-Scanner as a virtual appliance on Microsoft Hyper-V. We supports both Generation 1 (BIOS) and Generation 2 (UEFI) virtual machines. However, we strongly recommend Generation 2.
The deployment process takes approximately 15-20 minutes and consists of three main steps:
-
Creating a Hyper-V virtual machine
-
Booting from the RC-Scanner ISO image
-
Running the bootstrap configuration
Prerequisites
Downloading the RC-Scanner ISO
Refer to Install RC-Scanner Appliance for how to download the RC-Scanner ISO image.
System requirements
Please make sure that your VM in Hyper-V meet the system requirements. For more information, refer to Deploy/Install RC-Scanner Appliance
Creating the VM
Open your Hyper-V Manager, select New → Virtual Machine
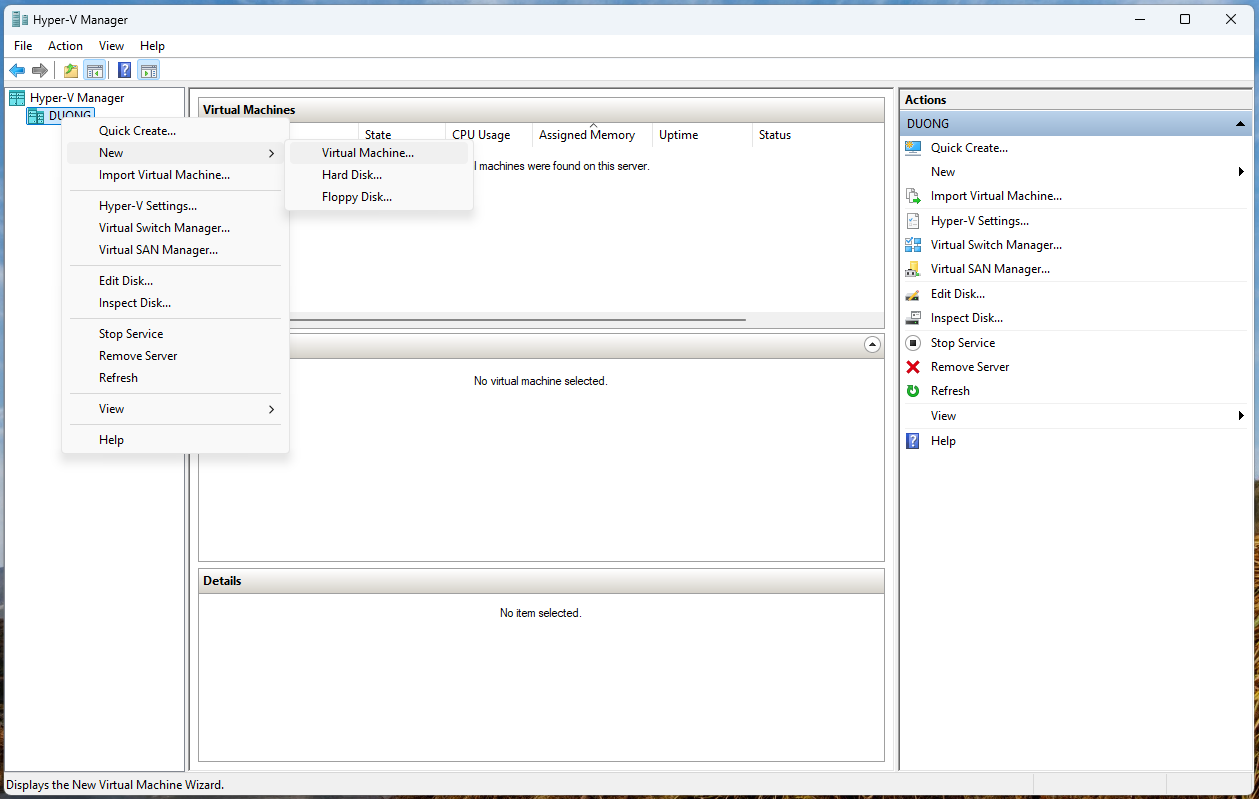
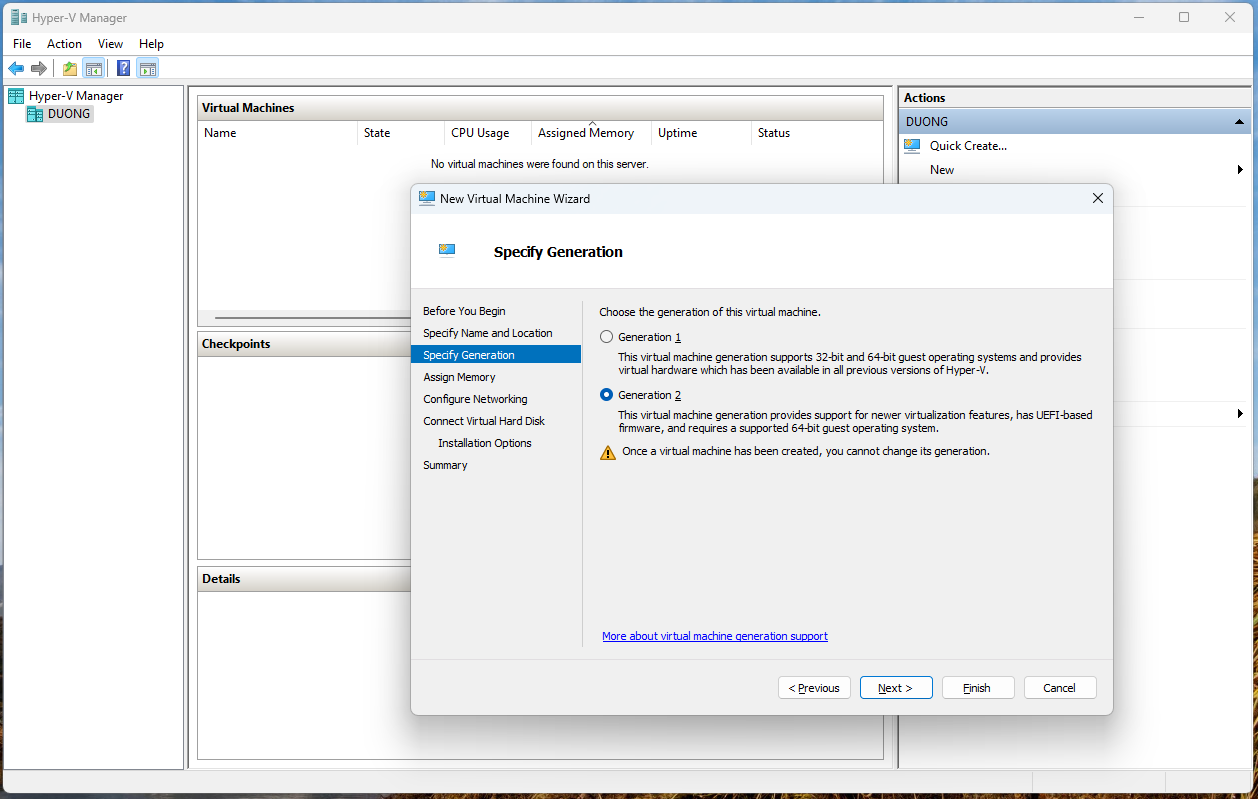
Specify the VM name, and specify Generation 2 for the VM
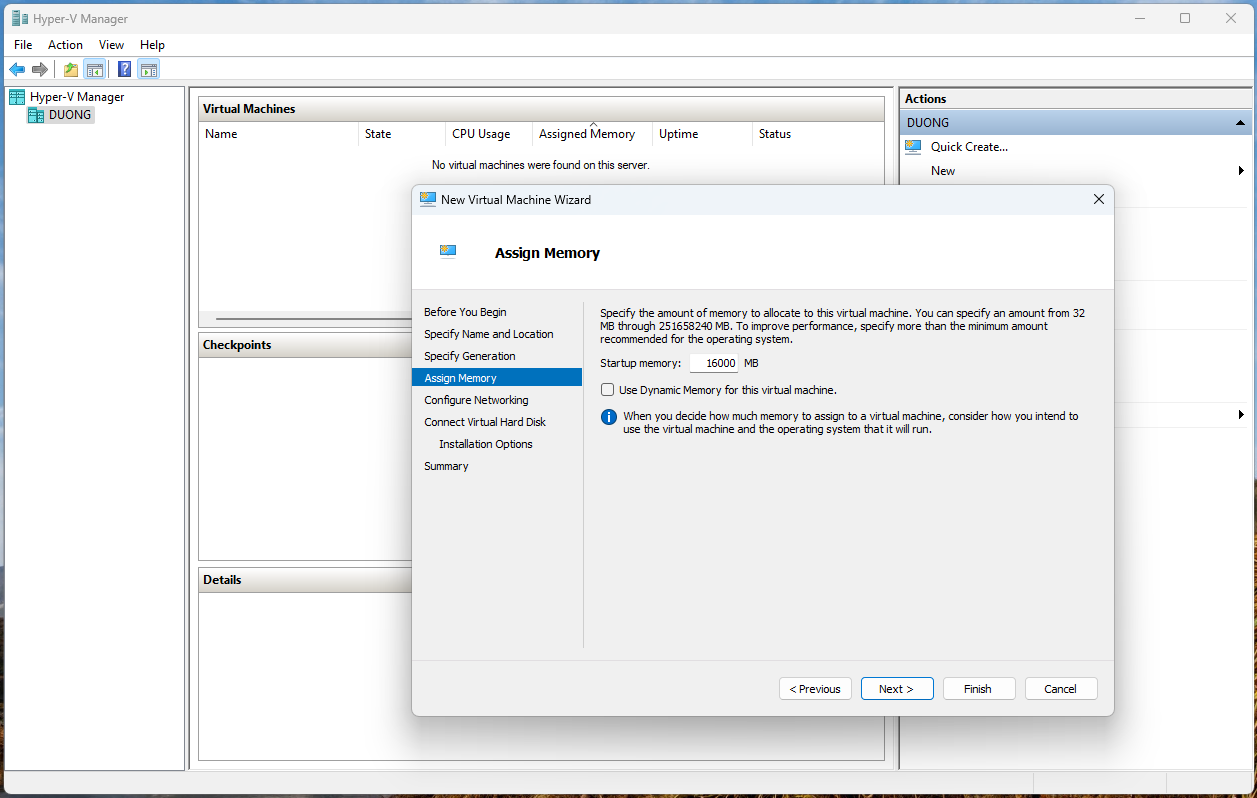
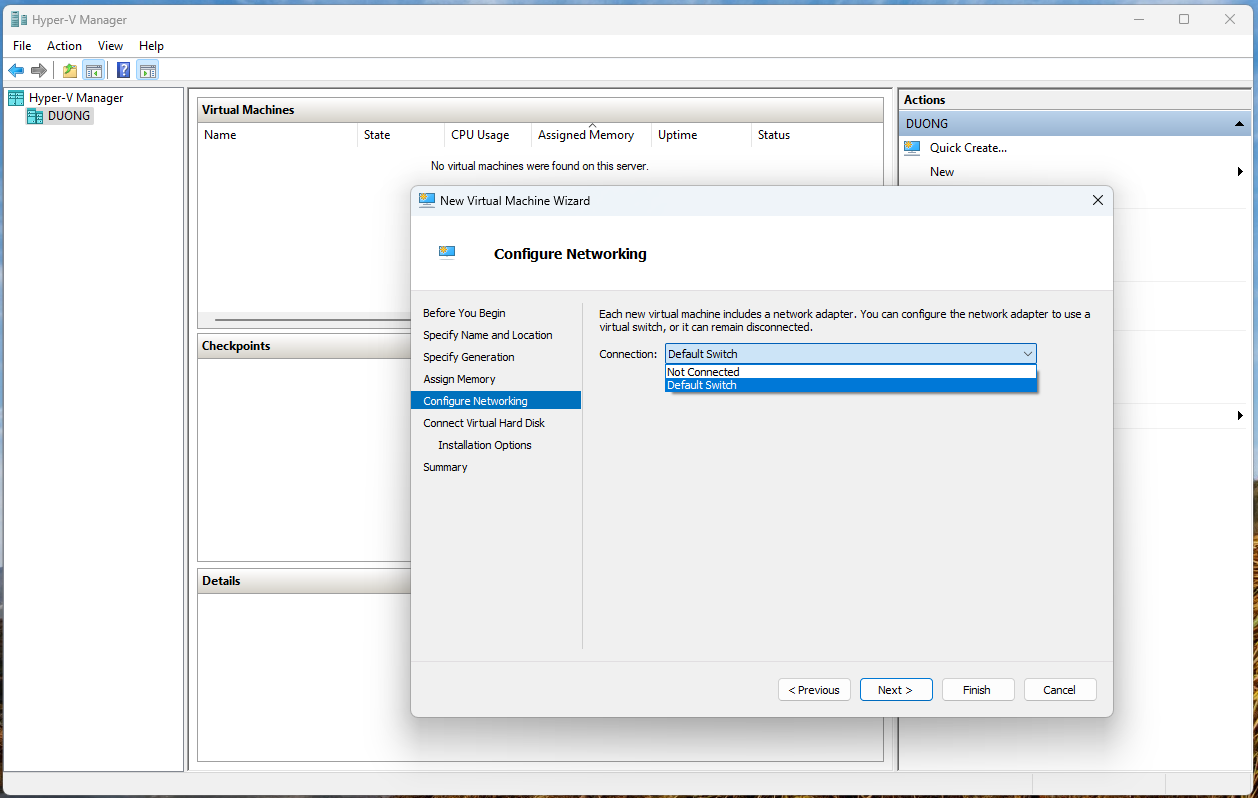
Assign memory and configure networking for the VM
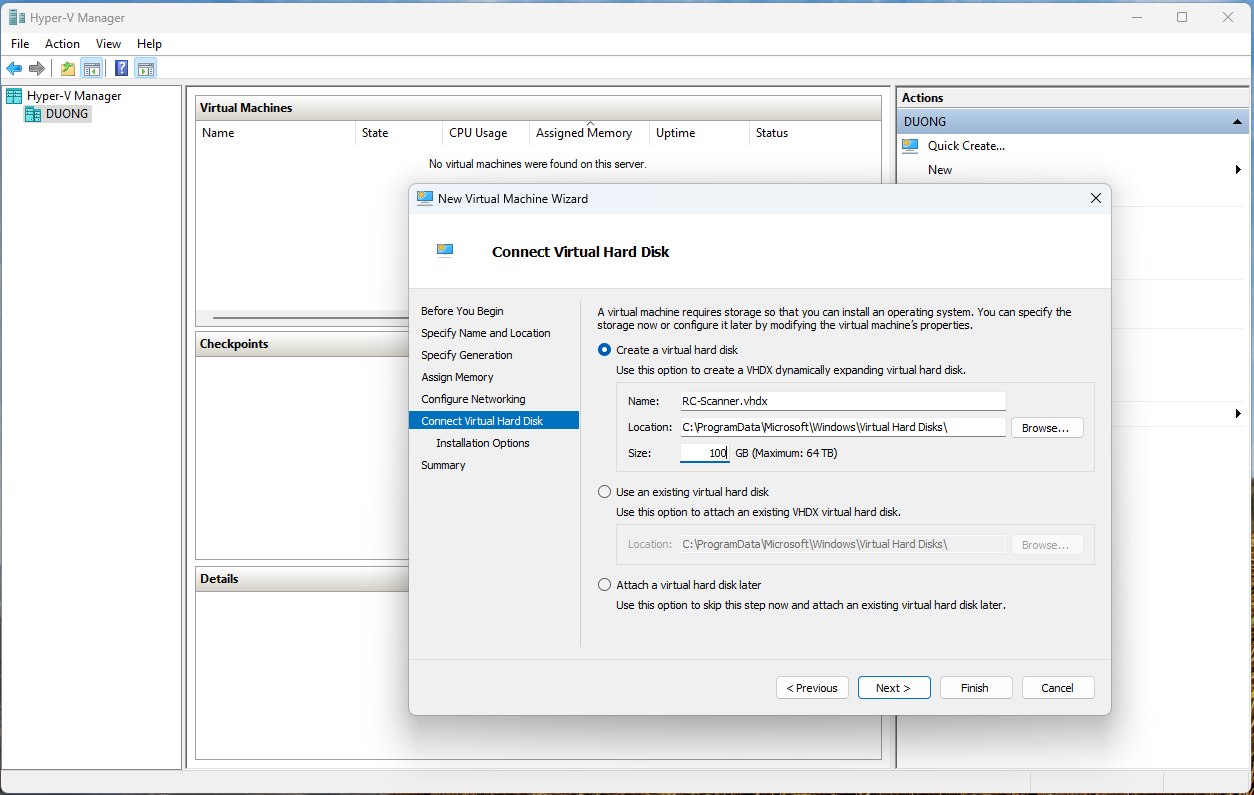
Make sure that the VM has enough disk space
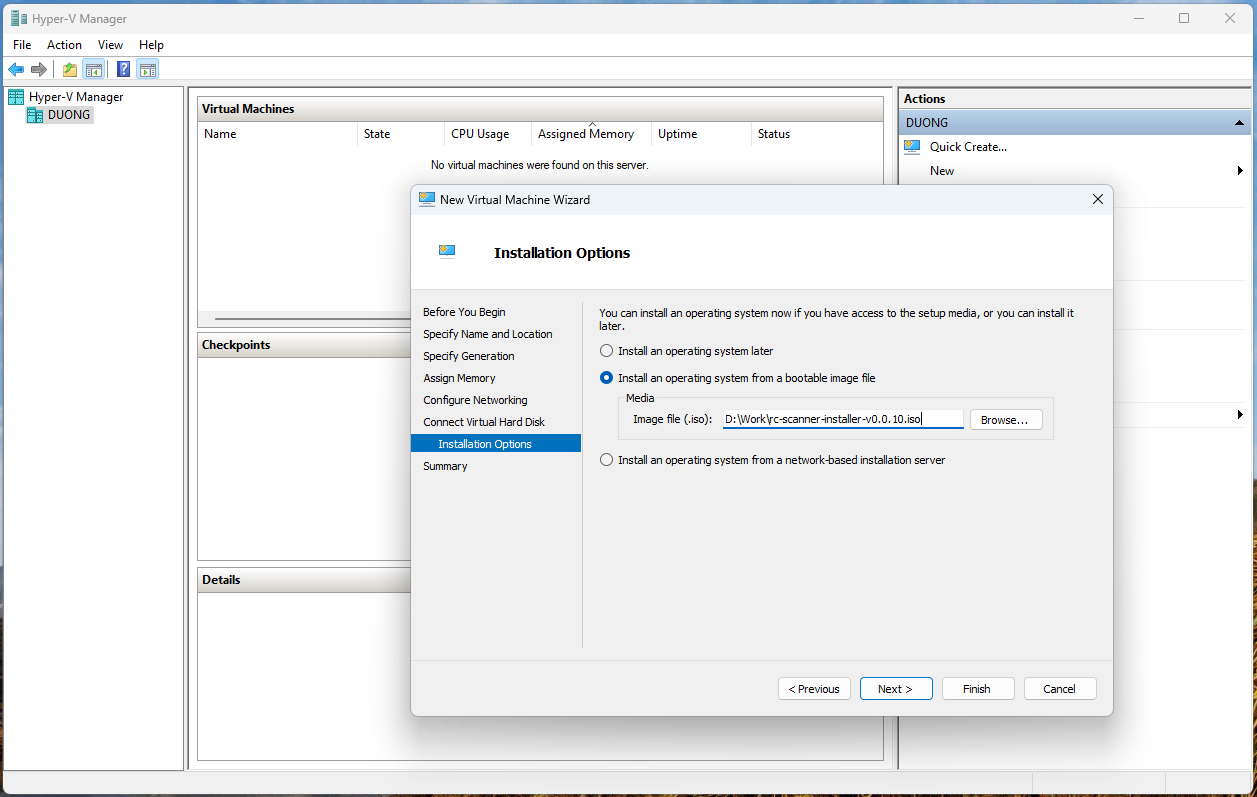
With Installation Options, we select the downloaded ISO image from Portal as the bootable image source
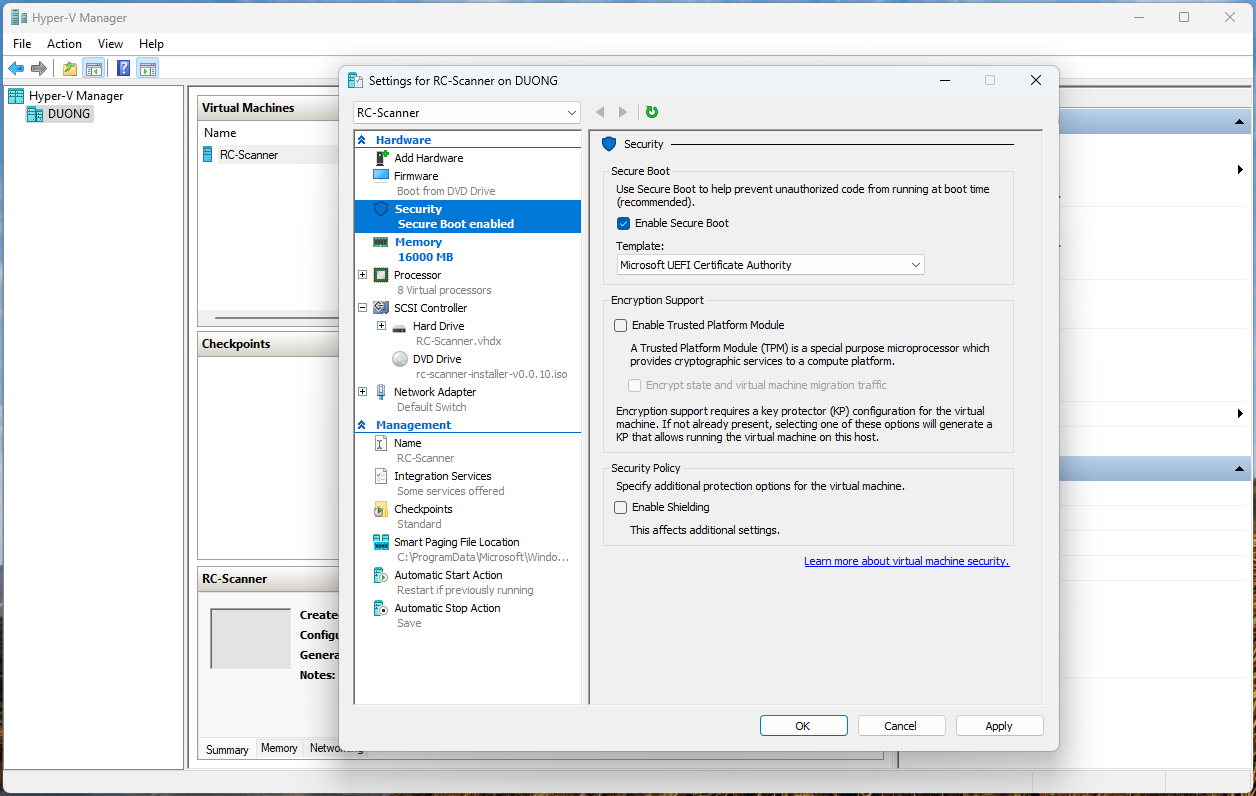
We finish the Wizard, a new VM will be created. However, we still need to configure the secure boot properly, if not we’ll not be able to boot using our ISO image
Press right click to our newly created VM → Settings, then configure the Secure Boot template using Microsoft UEFI Certificate Authority, then press OK
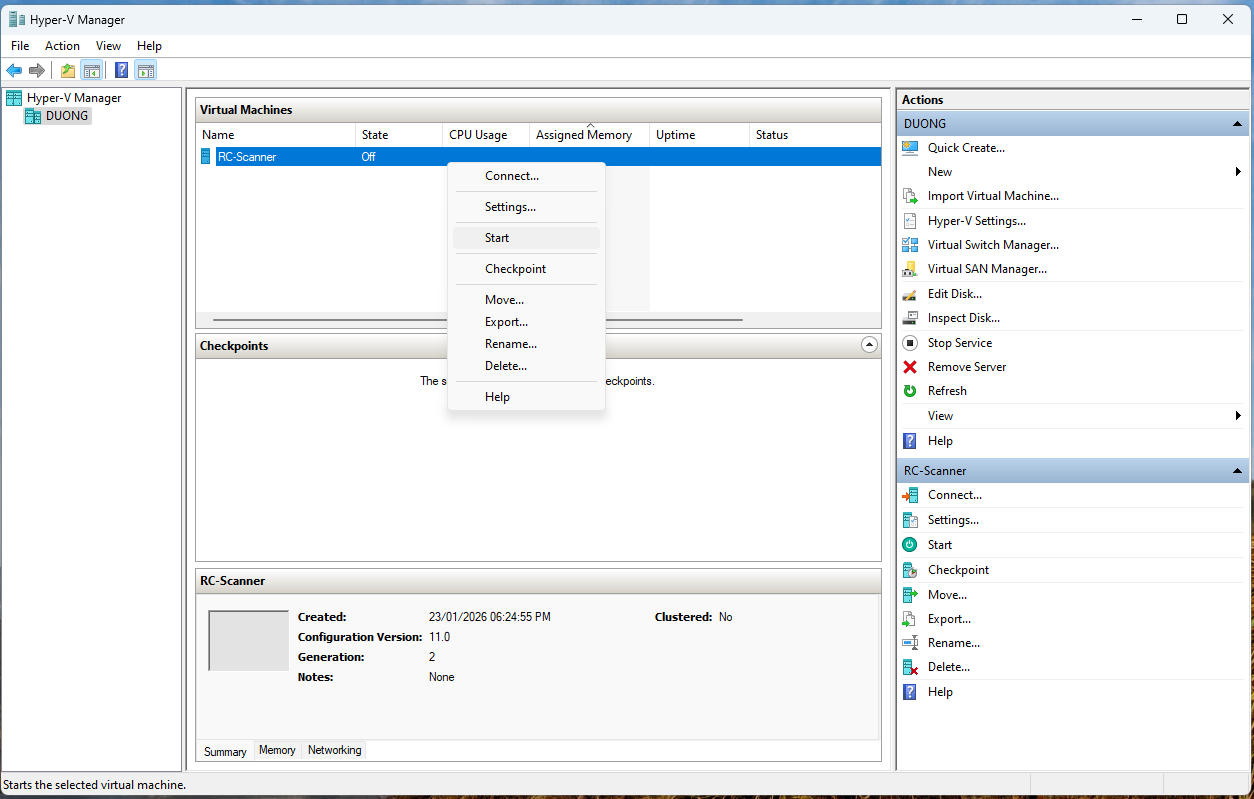
Press Start to boot the VM, then press Connect to open the VM window
The installation process should happens automatically after we started the VM
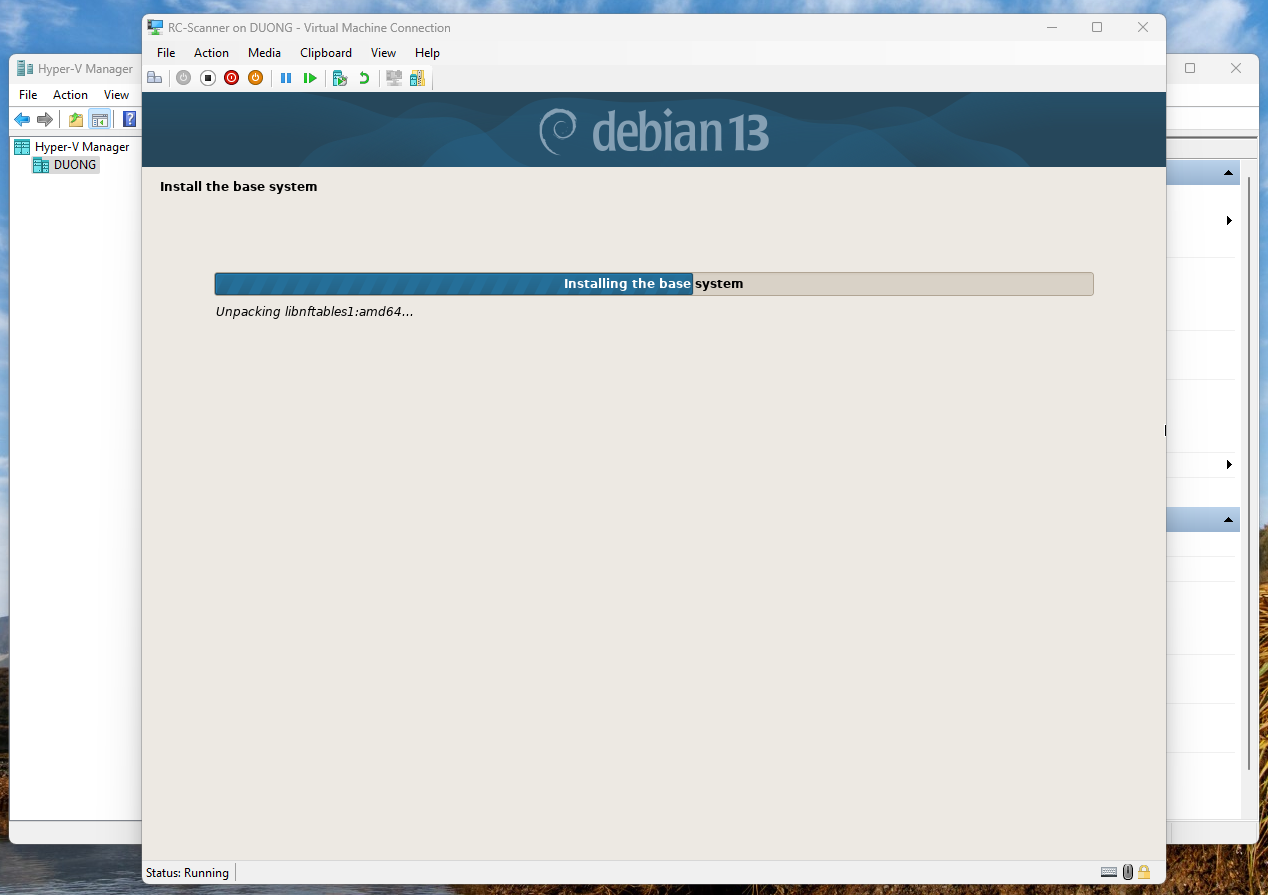
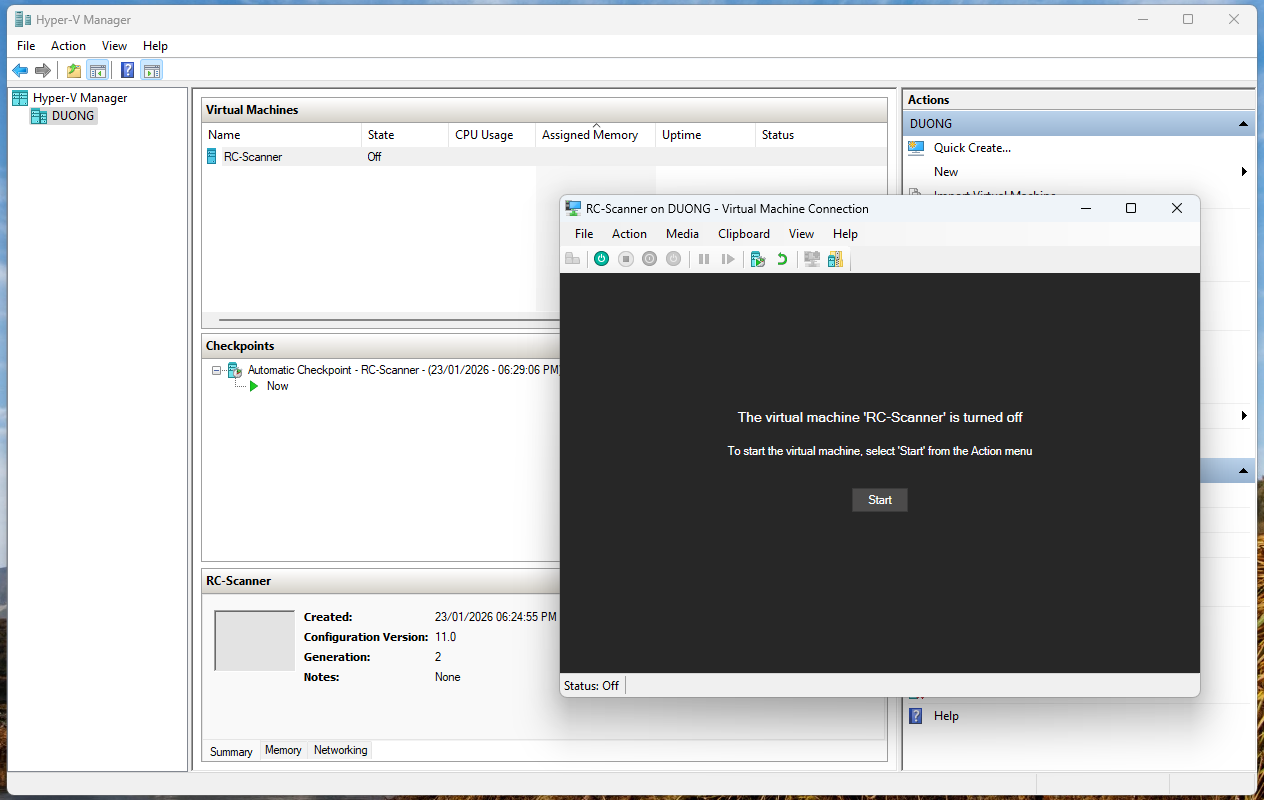
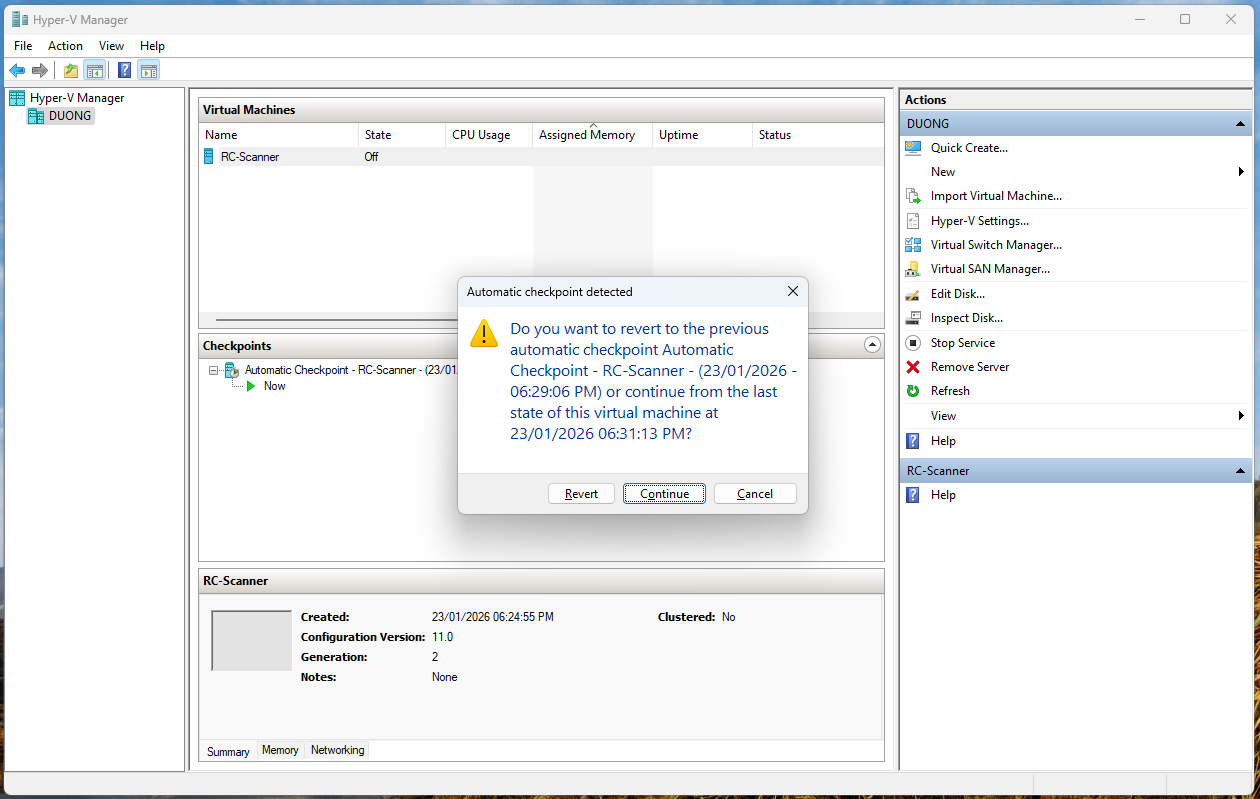
After the installation finished, the VM will shutdown, and we have to press Start, then Connect again.
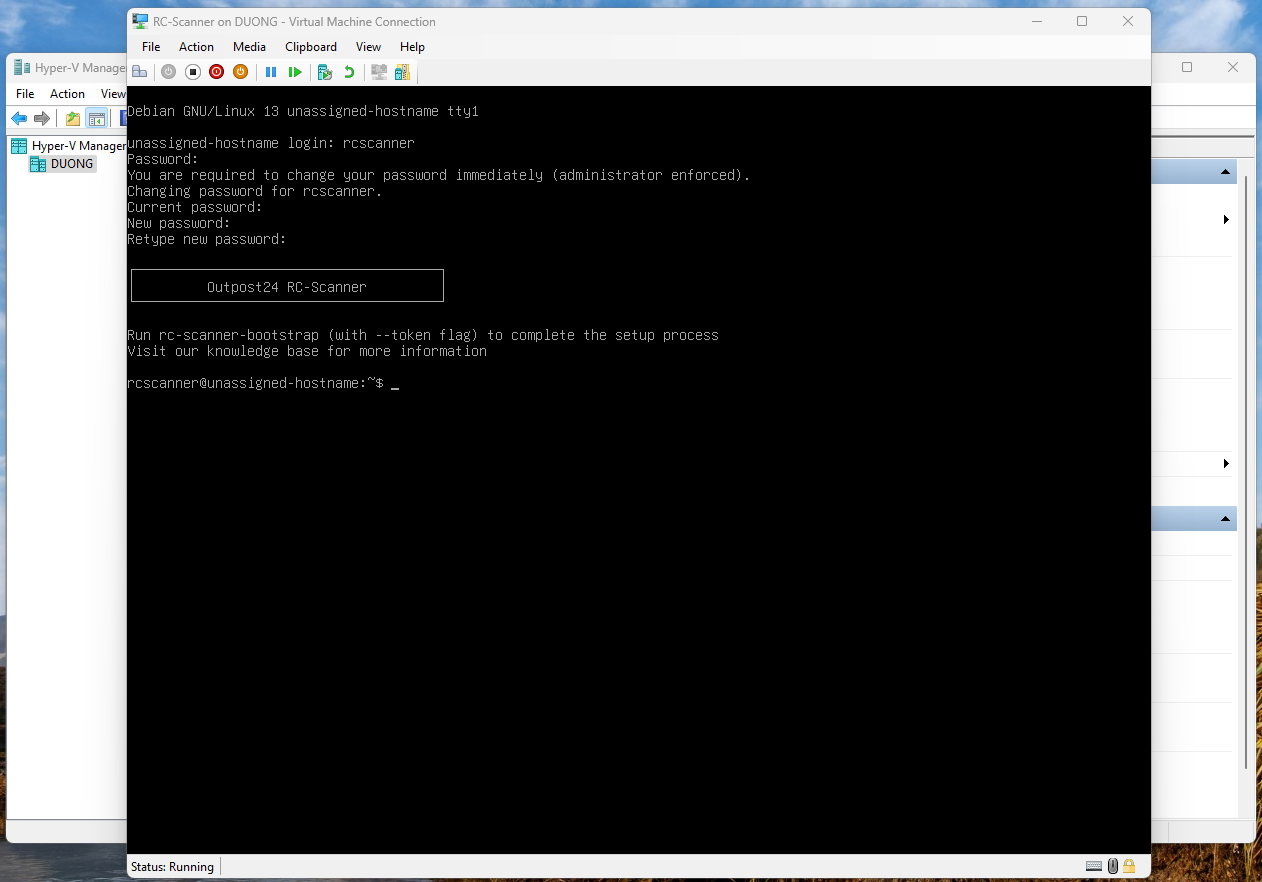
Installation
Refer to Install RC-Scanner Appliance for details about the installation
SSH into the machine
-
First, retrieve the IP of the VM:
Get-VM | Get-VMNetworkAdapter | Select-Object VMName, IPAddresses

Note: You might need to open Powershell as Admin to run the above command
-
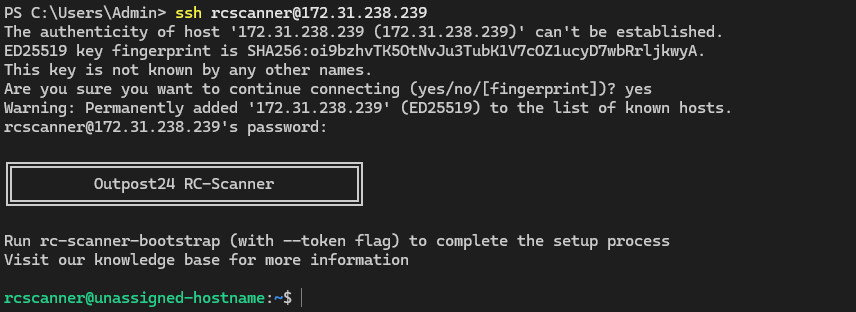
Then SSH into the machine to continue the bootstrap process
Related Articles
- Firewall Rules RC-Scanners
- Install RC-Scanner Appliance
- Deploy RC-Scanner in Hyper-V
- Deploy RC-Scanner on AWS
- Deploy RC-Scanner with KVM/QEMU
- Install RC-Scanner on Hardware
- Deploy/Install RC-Scanner Appliance
- RC-Scanner Behind a Web Proxy
- RC-Scanner Dimensioning Guide
- RC-Scanner FAQ
- Deploy RC-Scanner on Microsoft Azure
- Supported Deployment Platforms for RC-Scanners