
Last Updated: 2026-09-25
Purpose
This article provides the overview for installing the Outscan RC-Scanner appliance. It covers installation procedures, and verification steps for getting your RC-Scanner operational.
Introduction
Deployment methods:
-
ISO: Automated OS installation for bare metal, VMware, VirtualBox, Hyper-V, KVM
Before beginning installation, ensure that you have:
-
Access to Outscan Portal UI with appropriate permissions
-
Target deployment environment (bare metal server or hypervisor)
-
Network connectivity from scanner to Outscan
-
System meeting minimum hardware requirements (see the System requirements section)
Installation
Pre-Installation
Create RC-Scanner from Portal
-
Go to Portal UI → Configuration → RC scanners.
-
Create new RC-Scanner with a name and a description.
-
Copy and save the generated token, as it will be required later during the RC Scanner installation.
Download Installation Media from Portal
When creating a new RC-Scanner, we can get the download link in step 2, the image will be in ISO format
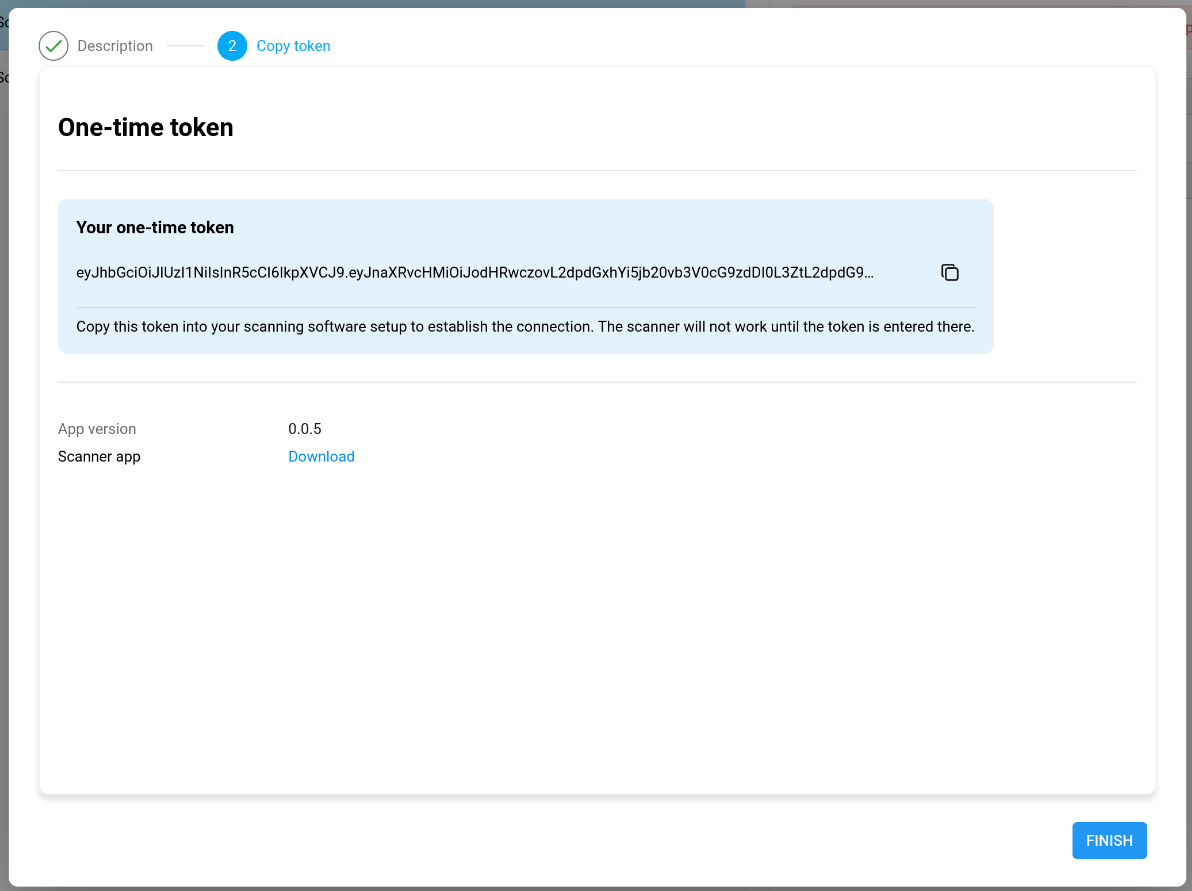
RC-Scanner Installation
-
SSH into the machine with default credentials, user will be prompted to change the password on the first time logging in
-
The default credentials:
Username: rcscanner
Password: outpost24
-
-
After installing the OS, use
rc-scanner-bootstrapCLI to setup the RC-Scanner, with the token from Portal-
Usage:
rc-scanner-bootstrap --token <your-token>
-
-
During the installation, ArgoCD, Argo Workflows and the RC-Scanner appliance will be installed into the machine, on the k3s cluster
Post-installation verification
After the installation, check the scanner status in Portal UI, the status should show “Connected”
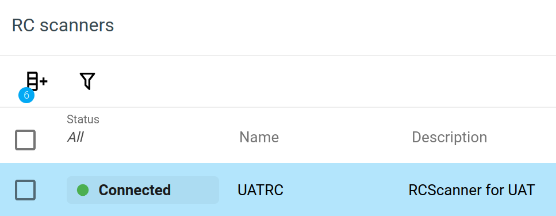
The view can be refreshed using the refresh button in Portal UI.
Troubleshooting
To Troubleshoot Issues with Scans and Deployments
-
Go to ArgoCD UI or Argo Workflows UI
-
Run these 2 commands to get access to RC-Scanner
ArgoWFandArgoCD -
Now you can access RC-Scanner
ArgoCDviahttps://<your-vm-ip>:30080// Get ArgoCD password, the username is admin kubectl -n argocd get secret argocd-initial-admin-secret -o jsonpath="{.data.password}" | base64 -d // Get ArgoWF token kubectl -n vm-scans get secret argo-admin-token -o=jsonpath='{.data.token}' | base64 -d-
With username: admin
-
Password: is in the upper script
-
-
And
ArgoWFviahttp://<your-vm-ip>:32746 -
Enter this to the token section:
Bearer <the-token-you-get-from-the-upper-script>
Broken Scanner
If a scanner is broken it is better to replace the scanner and not repair it. RC-Scanners are designed for replacement rather than repair.
-
All critical data stored in Outscan (scan configurations, scan data, scan logs)
-
Replacement only takes about 15-30 minutes
-
Fresh installation guarantees known-good state
To replace a scanner:
-
Hit the Re-link button on the scanner config on Portal, save the newly generated token.
-
Remove the existing cluster entirely by removing k3s.
k3s-uninstall.sh -
Run
rc-scanner-bootstrapwith the --token flag, using the generated token. -
Deploy RC-Scanner from fresh state.
Related Articles
- Firewall Rules RC-Scanners
- Install RC-Scanner Appliance
- Deploy RC-Scanner in Hyper-V
- Deploy RC-Scanner on AWS
- Deploy RC-Scanner with KVM/QEMU
- Install RC-Scanner on Hardware
- Deploy/Install RC-Scanner Appliance
- RC-Scanner Behind a Web Proxy
- RC-Scanner Dimensioning Guide
- RC-Scanner FAQ
- Deploy RC-Scanner on Microsoft Azure
- Supported Deployment Platforms for RC-Scanners