
Last updated: 2026-10-29
Purpose
This article describes how to deploy On-Premise Scanning as a virtual appliance in Microsoft Hyper-V. It covers virtual machine creation, On-Premise Scanning ISO configuration, Secure Boot settings, installation, and access to the deployed appliance.
Introduction
This guide describes how to deploy On-Premise Scanning as a virtual appliance on Microsoft Hyper-V. On-Premise Scanning supports both Generation 1 (BIOS) and Generation 2 (UEFI) virtual machines. Generation 2 is recommended.
The deployment process takes approximately 15–20 minutes and consists of three main steps:
-
Create a Hyper-V virtual machine.
-
Boot from the On-Premise Scanning ISO image.
-
Run the bootstrap configuration.
Prerequisites
System Requirements
Make sure that the Hyper-V VM meets the system requirements. For more information, refer to On-Premise Scanning Dimensioning Guide.
Download the On-Premise Scanning ISO
For information about how to download the On-Premise Scanning ISO image, refer to Install Online On-Premise Scanning.
Create the VM
To create the VM:
-
Open Hyper-V Manager, then select
New → Virtual Machine.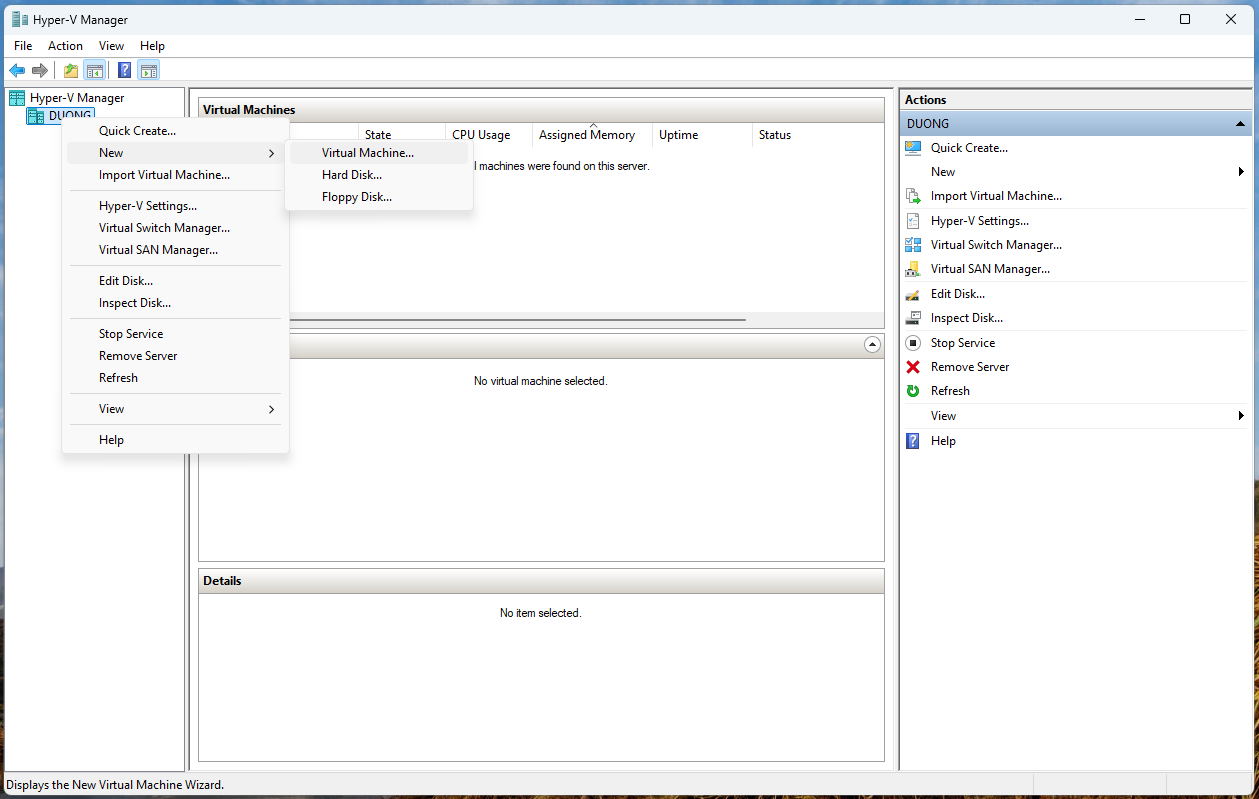
-
Create a new virtual machine in Hyper-V.
-
Specify the VM name and select Generation 2 for the VM.
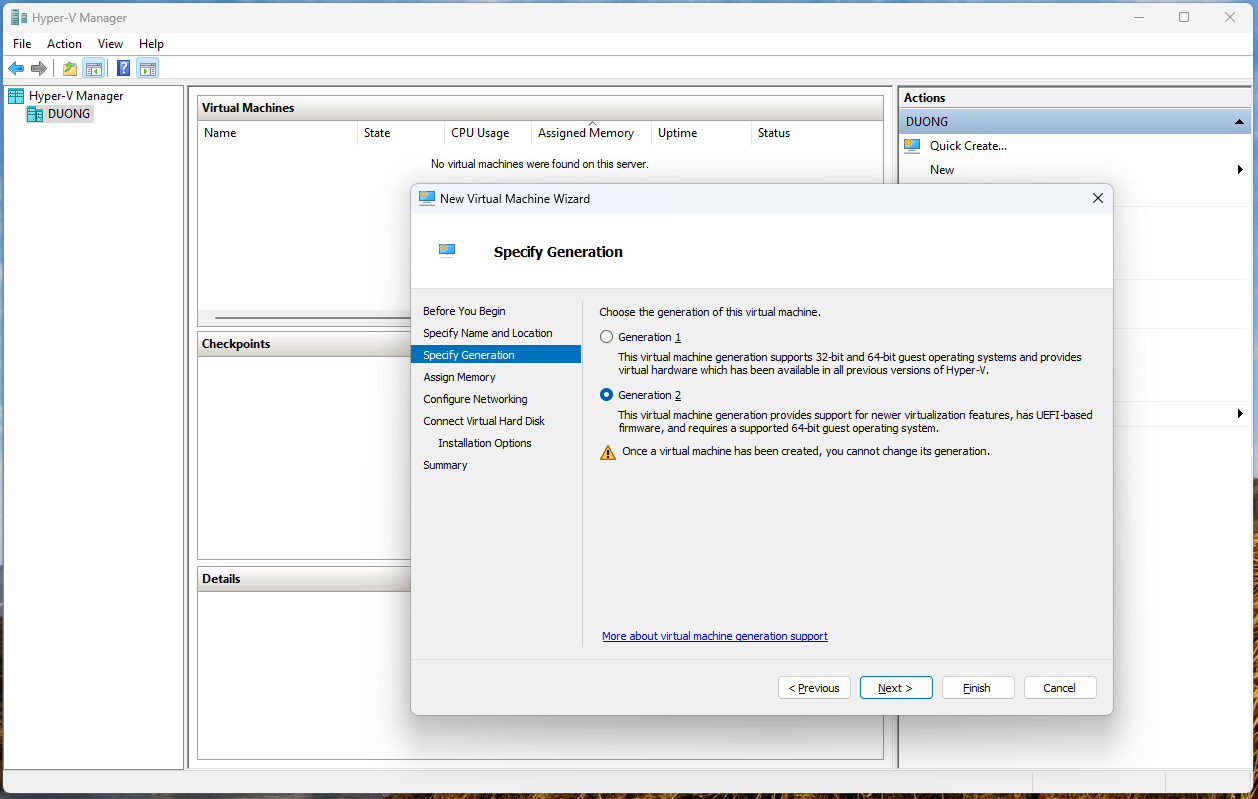
-
Specify Generation 2 for the VM.
-
Assign memory to the VM.
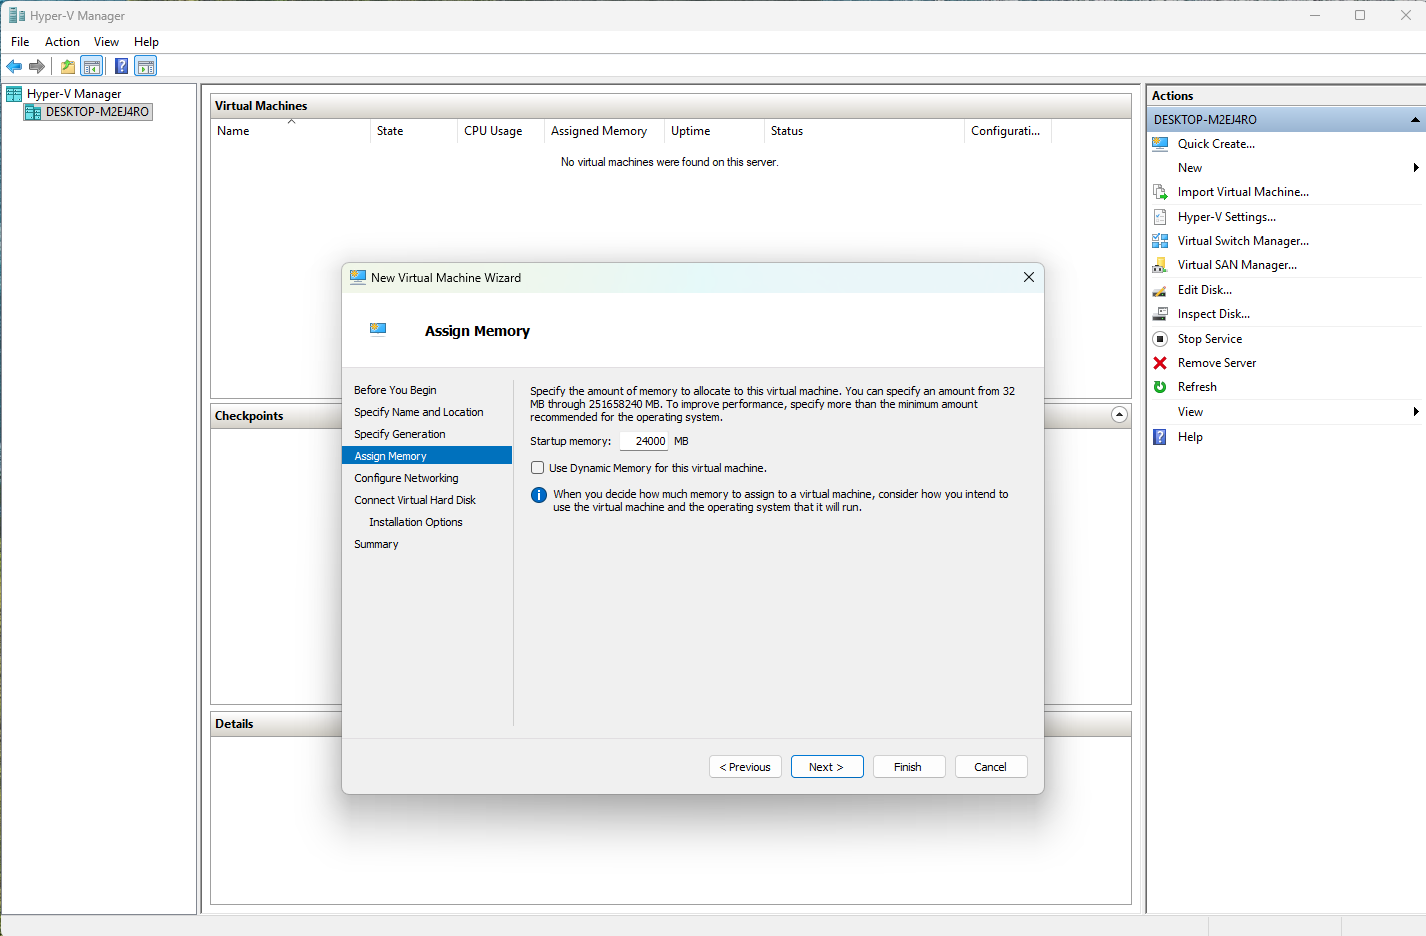
-
Configure networking to the VM.
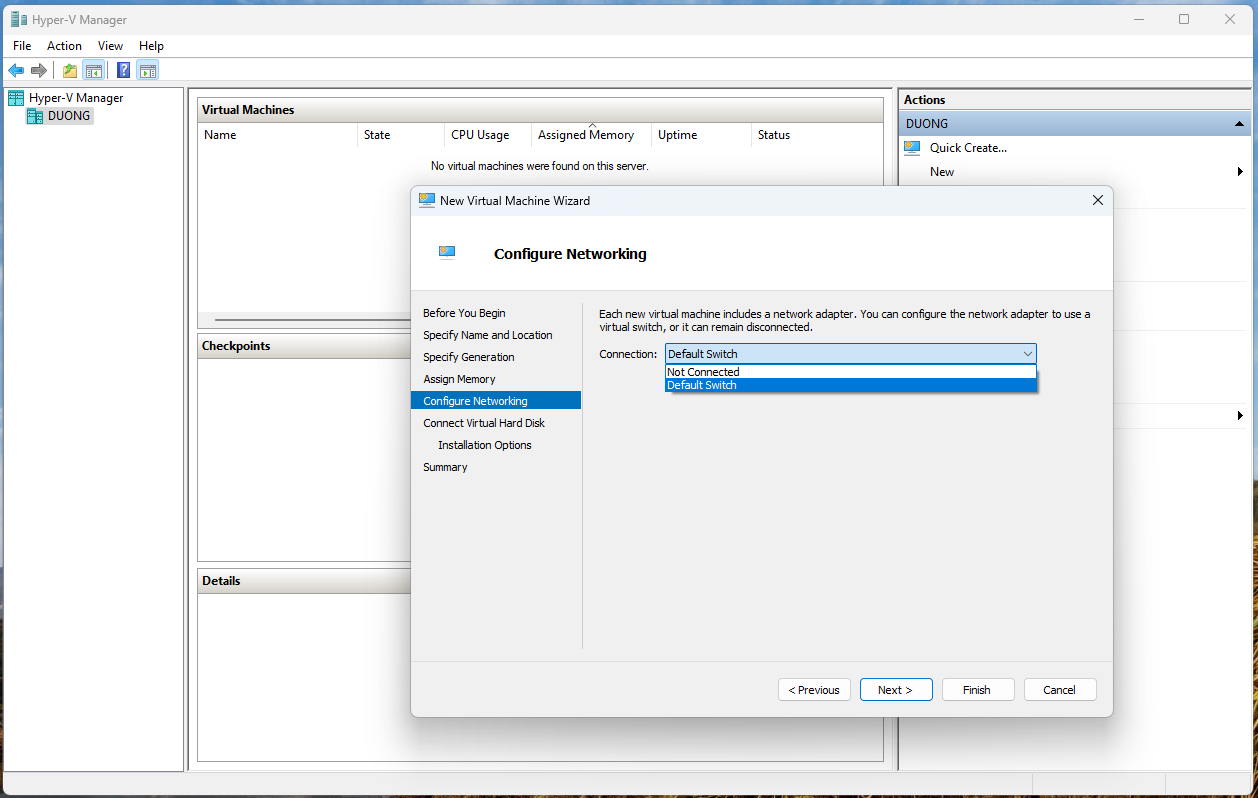
-
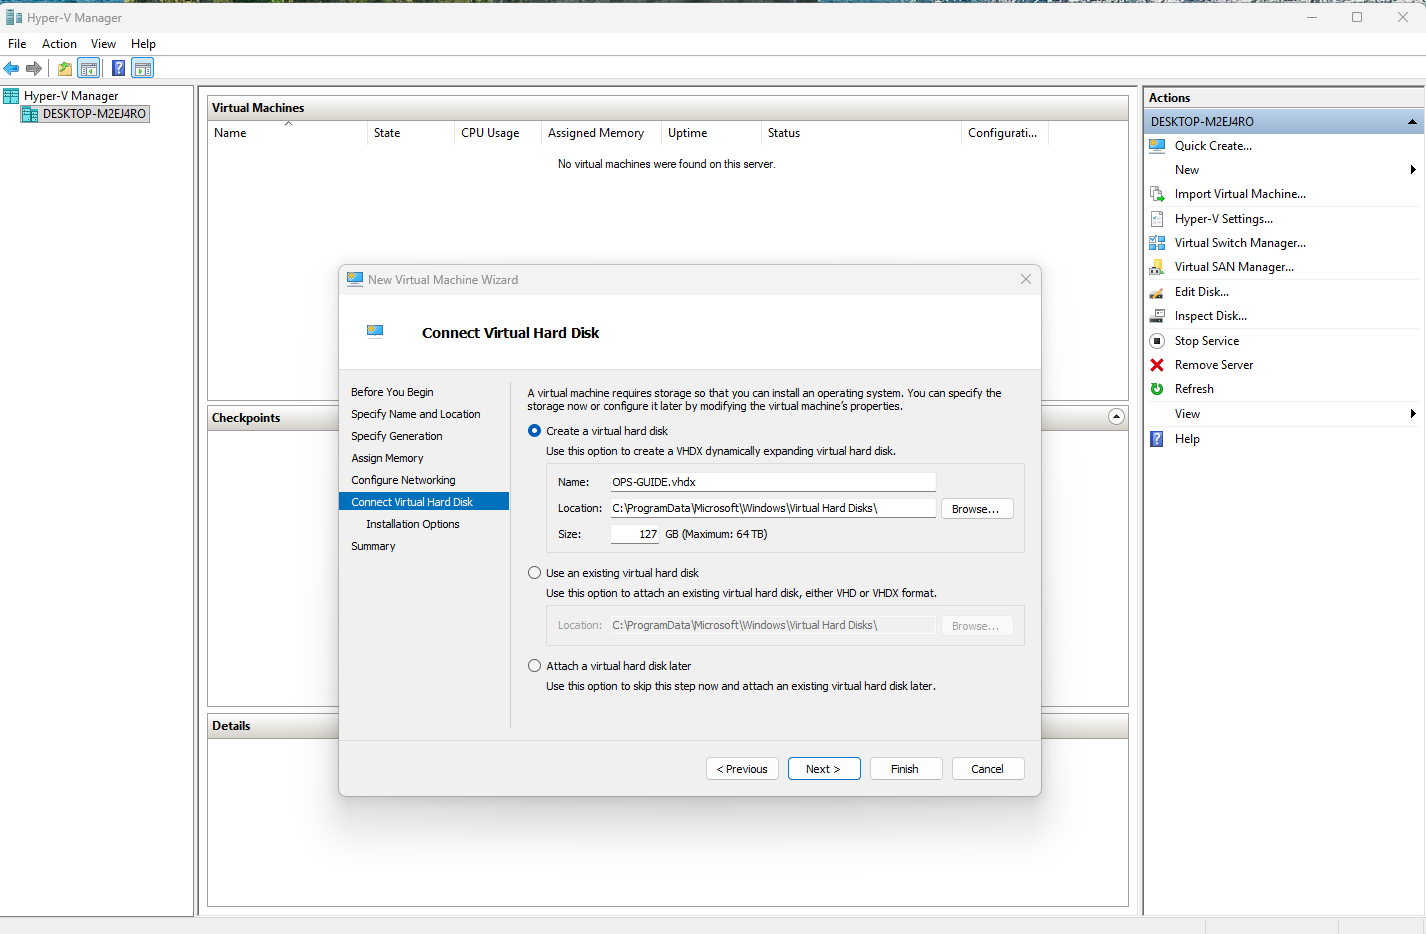
Make sure that the VM has enough disk space.
-
Create the virtual hard disk.
-
In
Installation Options, select the downloaded On-Premise Scanning ISO image from the Portal as the bootable image source.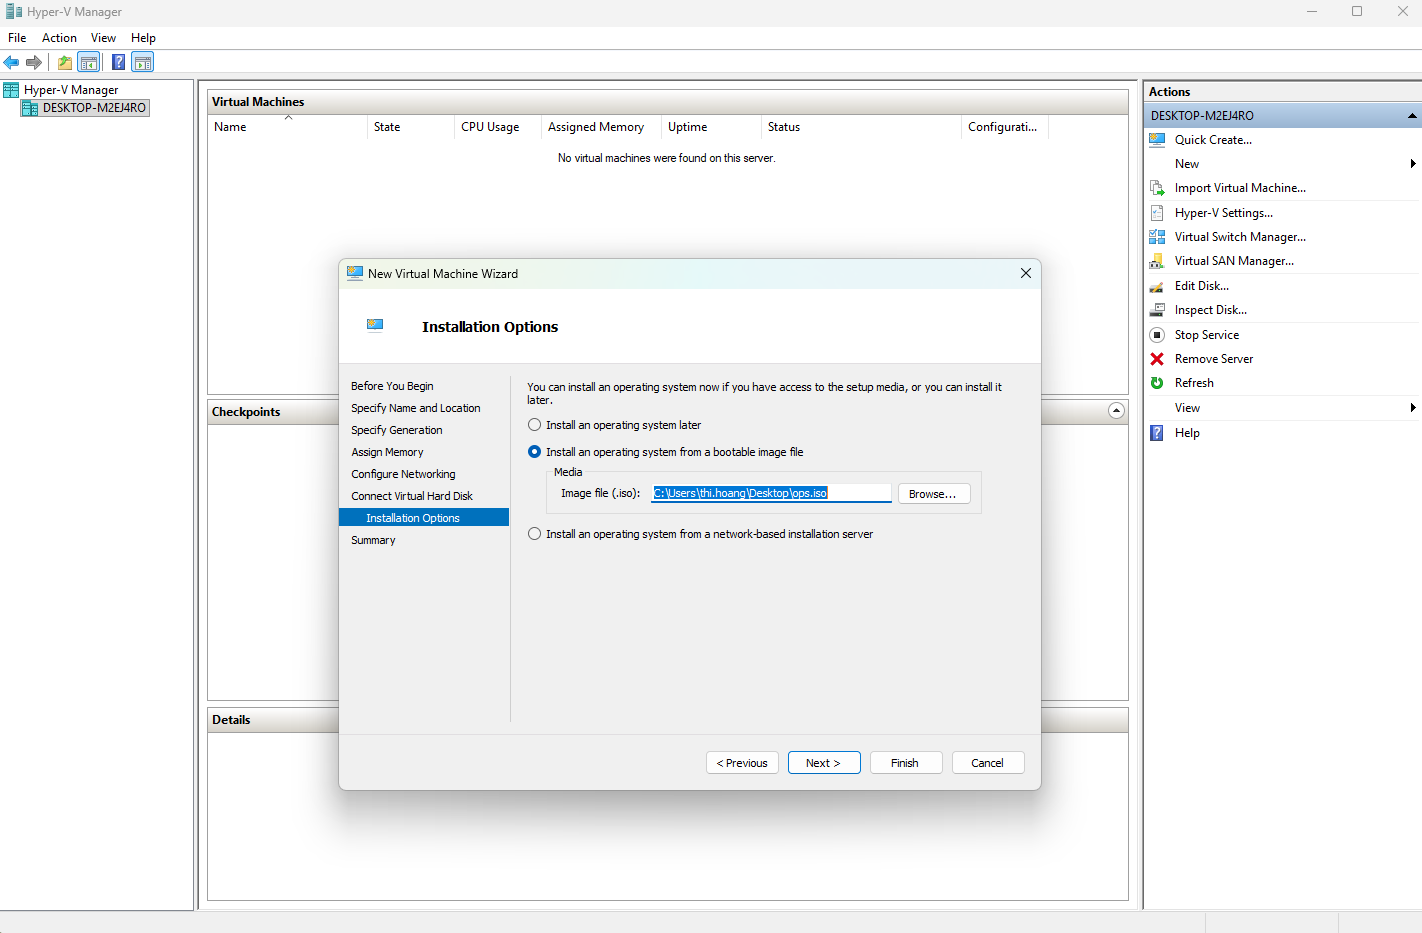
-
Select the On-Premise Scanning ISO image.
-
Finish the wizard to create the VM.
-
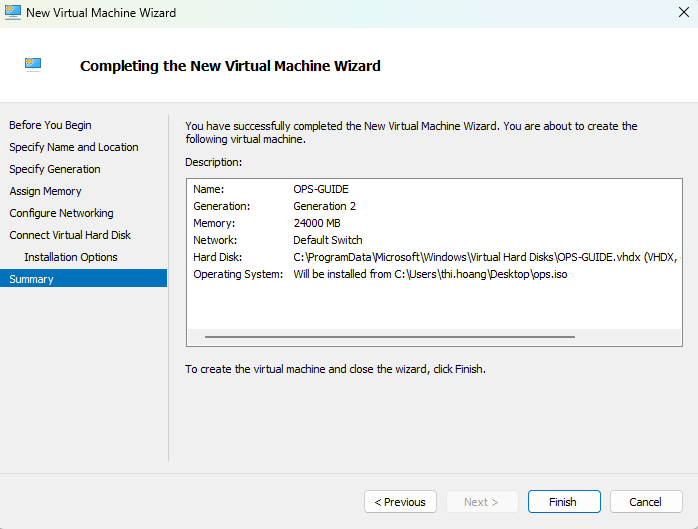
Summary of VM’s info should be like this:
-
Configure Secure Boot before booting from the ISO image.
-
Right-click the newly created VM, select
Settings, configure the Secure Boot template withMicrosoft UEFI Certificate Authority, then selectOK.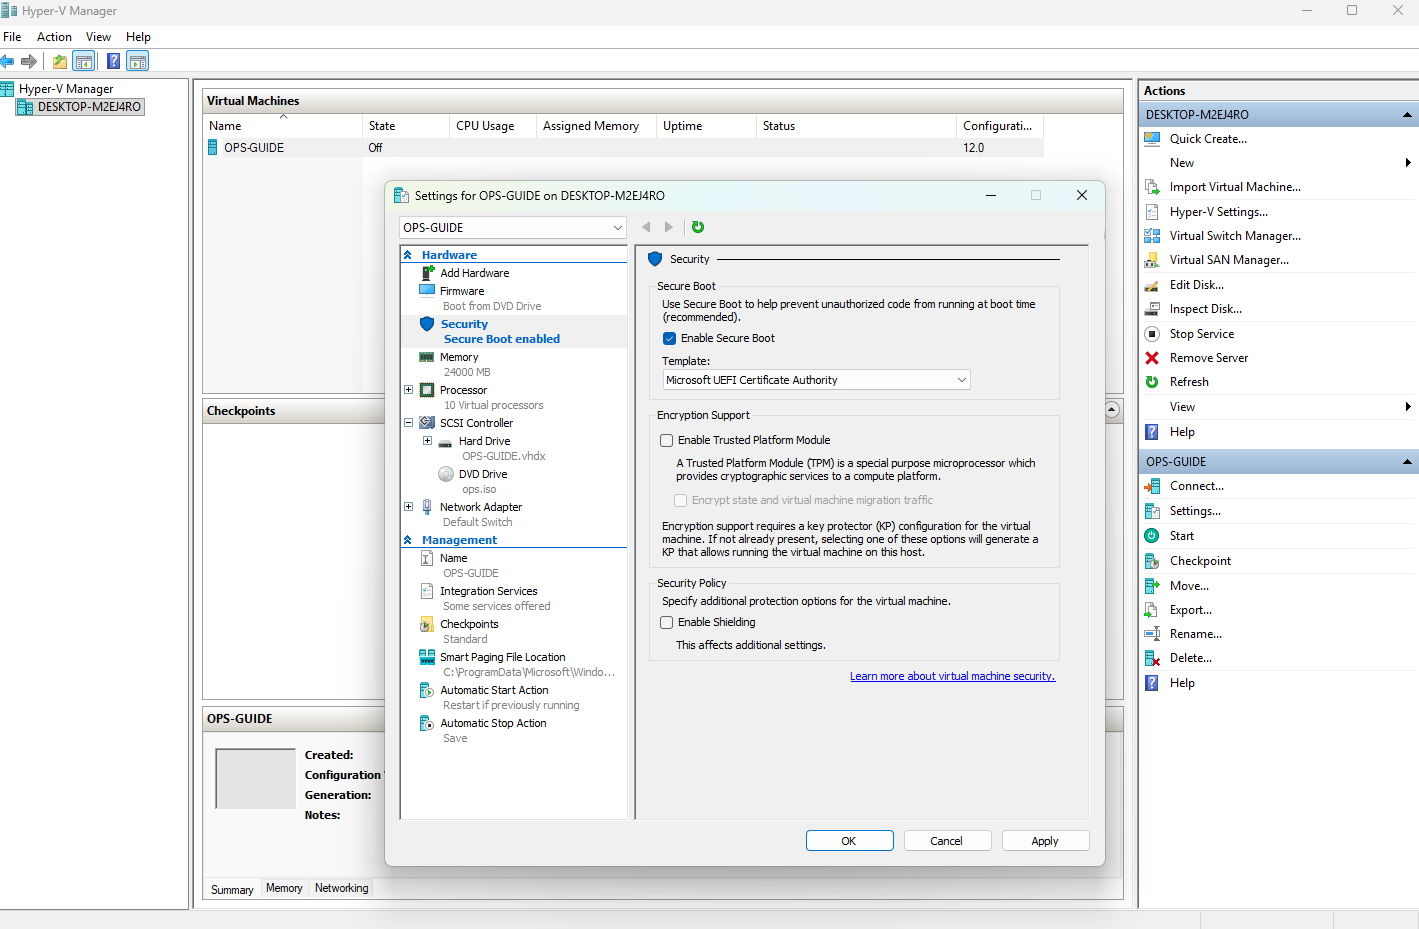
-
Configure Secure Boot.
-
Select
Startto boot the VM, then selectConnectto open the VM window.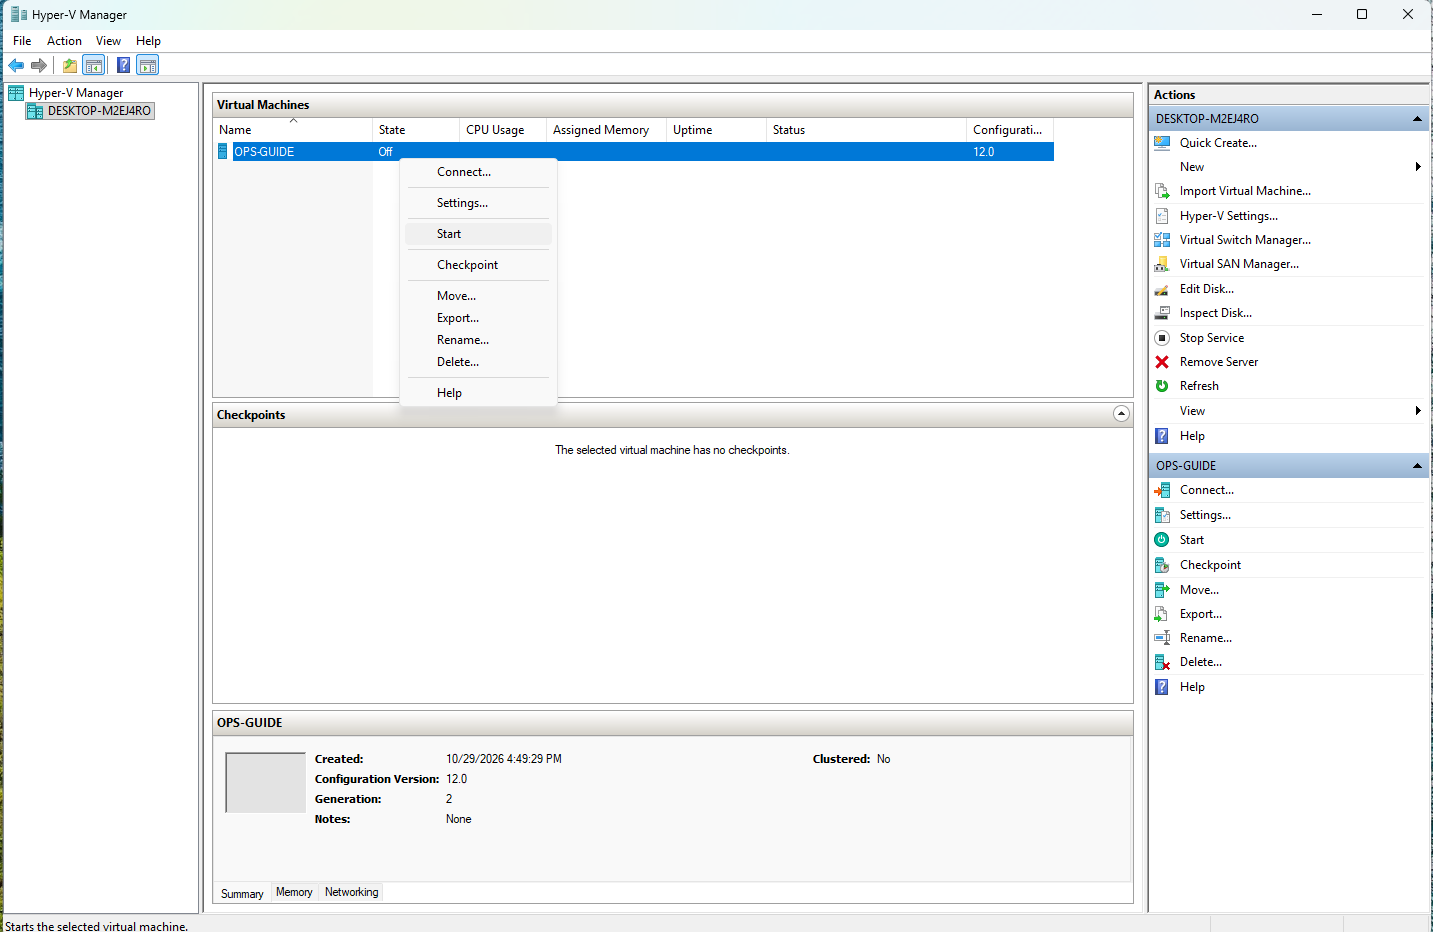
-
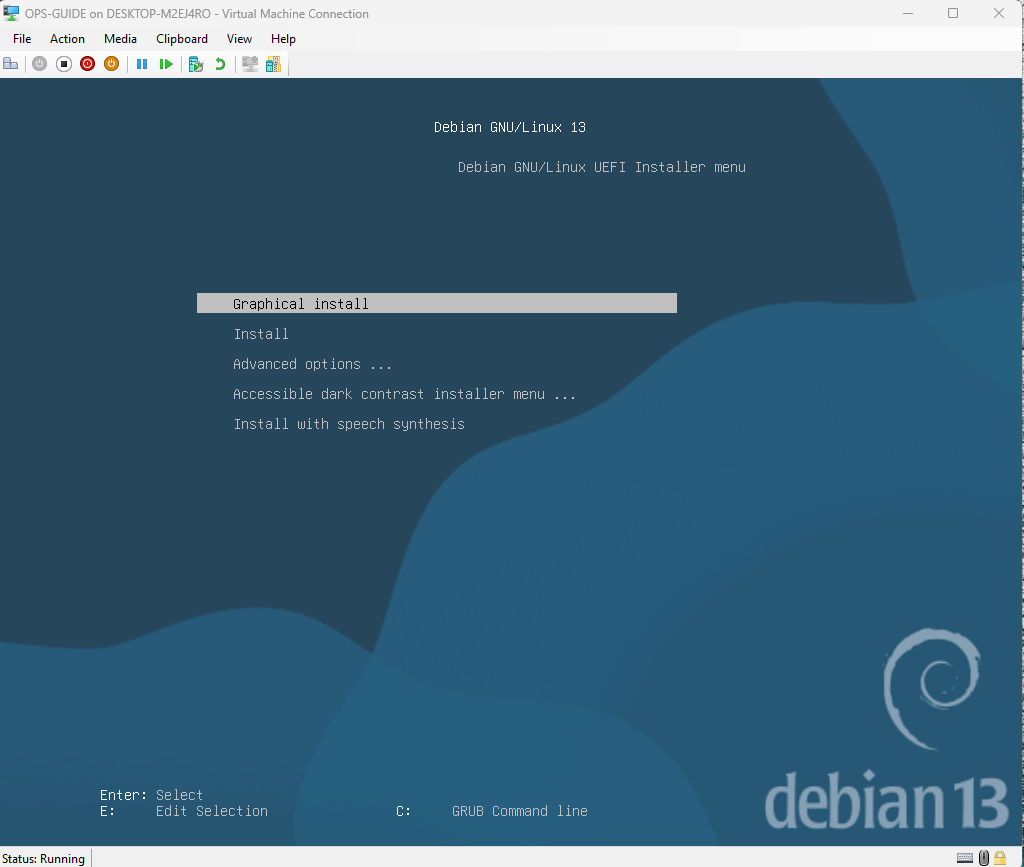
Start the VM, then pick Graphical Install:
Installation Process
-
The installation process starts automatically after the VM starts.
-
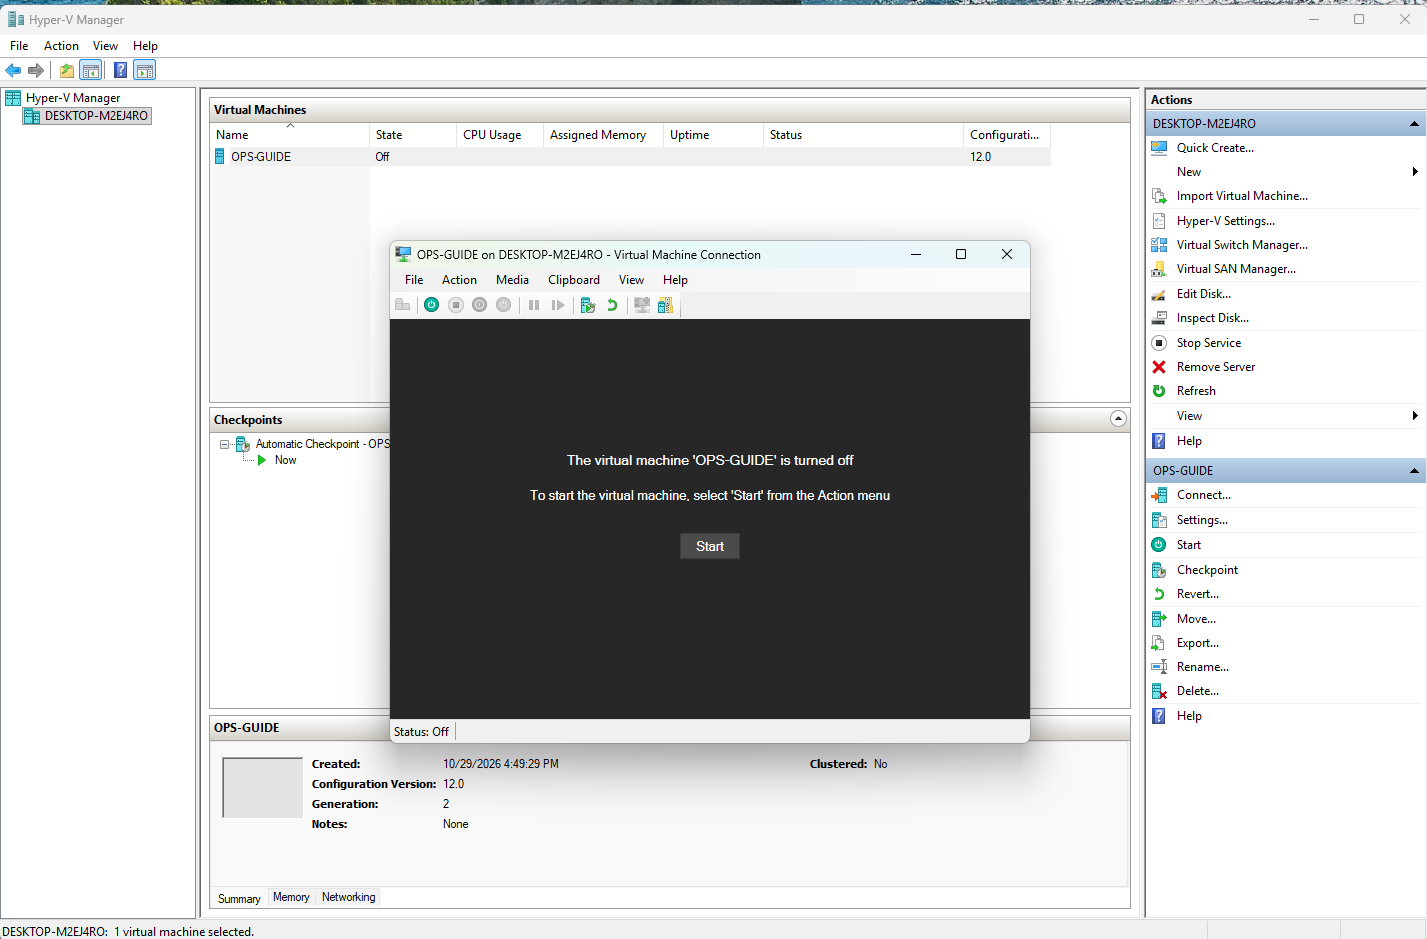
After the installation finishes, the VM shuts down. Select
Start, then selectConnectagain. -
VM shuts down after installation.
-
Start and connect to the VM:
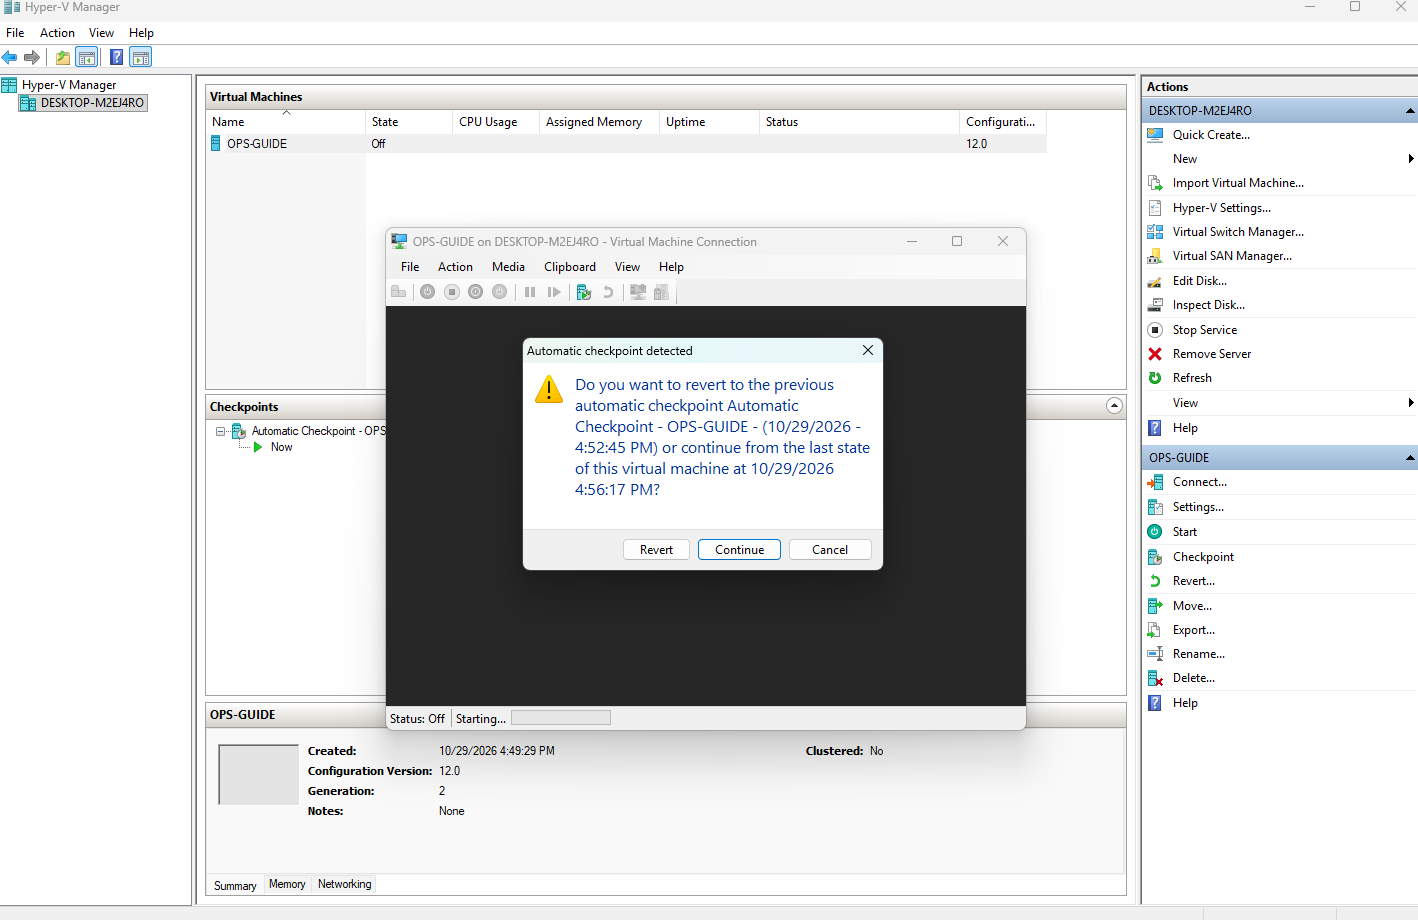
-
Change default password then log in to the VM.
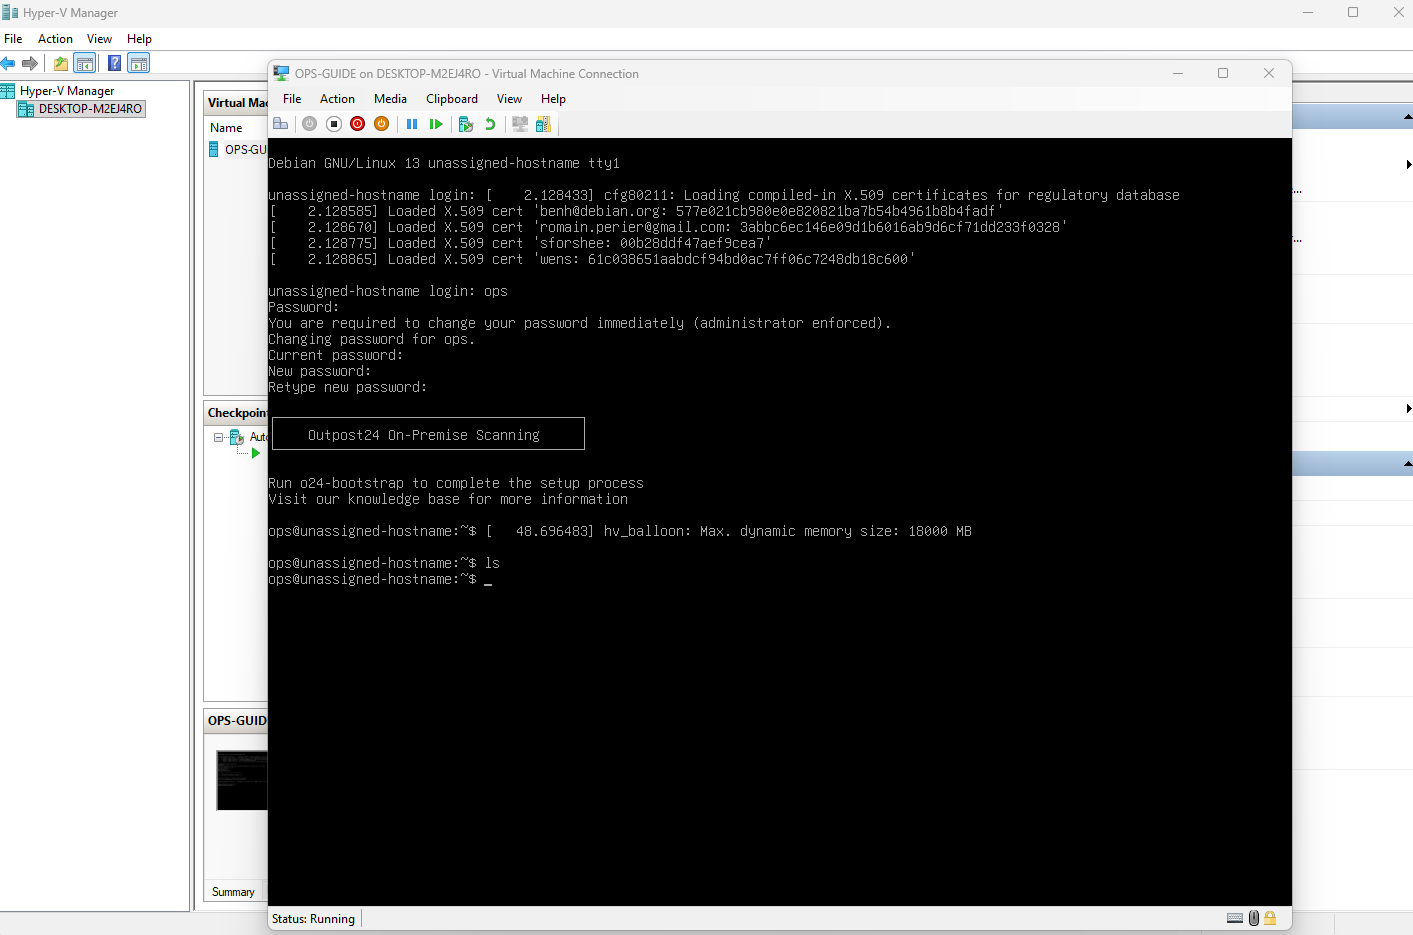
Installation
For details about the installation, refer to Install Online On-Premise Scanning or Install Air-Gapped On-Premise Scanning
SSH into the Machine
-
Retrieve the IP address of the VM:
Get-VM | Get-VMNetworkAdapter | Select-Object VMName, IPAddresses
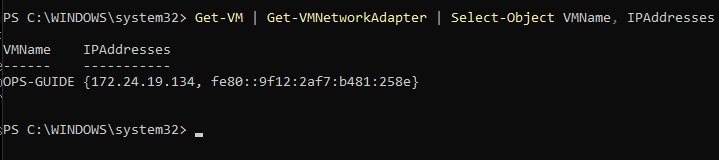
PowerShell might require administrator privileges to run the command.
-
Use SSH to connect to the machine and continue the bootstrap process.
Related Articles
- On-Premise Scanning Introduction
- Install Online On-Premise Scanning
- Supported Deployment Platforms and Three-Tier Model for On-Premise Scanning
- Deploy On-Premise Scanning on Hardware
- Install Air-Gapped On-Premise Scanning
- On-Premise Scanning Dimensioning Guide
- Updating On-Premise Scanning Bootstrap Utility
- Deploy On-Premise Scanning in Hyper-V