CORE Filters
Purpose
This document describes the different Filters in the CORE.
Introduction
Filters helps you to sift through large quantities of results from the scans. By grouping assets into AppStaks with various filters and tags, making it easier to identify vulnerabilities on key systems.
Filters
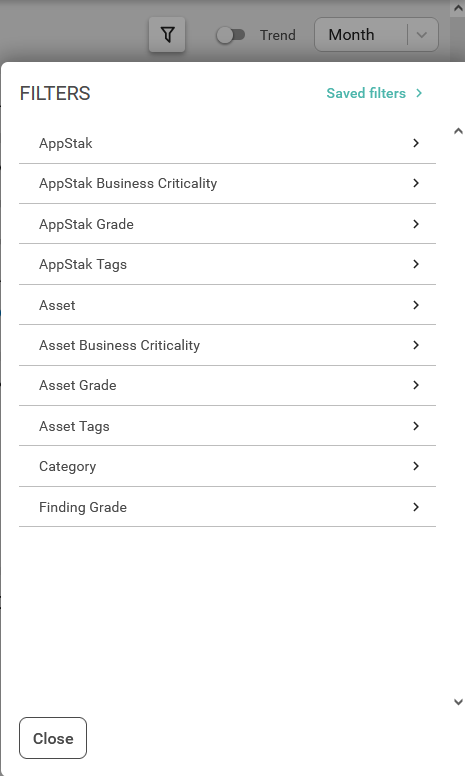
The filter button is located in the upper right corner.

Clicking it displays the various filter terms options that are available for the selections in both the Dashboard and the Explore menu such as AppStak, Assets, Asset Groups, and Findings.
Adding a Filter
To access the filter settings:
- Click the Filter icon in the upper right corner.
- In the menu, select filters you wish to activate and enter the values you want to filter content of the table.
The selection of filters varies between the Dashboard and different Exploring views.
Selected filters are displayed to the left of the filter button.

Clicking on the filter buttons opens the filter settings in the menu for the specific filter.
Removing a Filter
To remove a filter, click the X in the filter button to remove it.
Saving and Restoring Filters
The filter settings can be saved and restored for later use.
The saved filter list is unique per view. For example, the list will be different if the user is in the Findings view vs AppStak view.
Saving a Filter
When the filters have been selected they can be saved for future use.
To save the selected filters:
- Click on Saves filters > on the right hand side in the filters menu.

- Then click + Save filter and add a name.
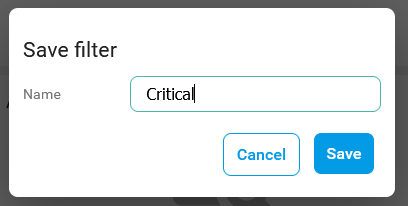
- Click the blue Save button.
Restore a Filter
To restore saved filters
- Click on Saves filters > on the right hand side in the filters menu.
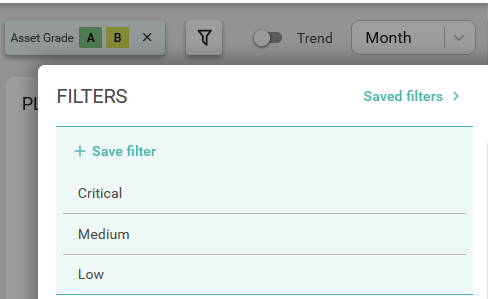
- Select one of the filters in the list.
- The Dashboard now filters according to the saved filters.
Renaming a Filter
To rename a saved filter:
- Click on Saves filters > on the right hand side in the filters menu.

- Select the filter that you want to rename by hover the cursor over it.
- Click on the Edit icon.
- Edit the name.

- Click the blue Save button.
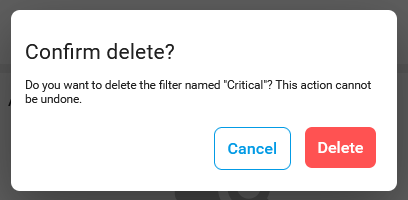
Removing a Saved Filter
- Click on Saves filters > on the right hand side in the filters menu.
- Select the filter that you want to rename by hover the cursor over it.
- Click on the Bin icon.
- Click the red Delete button to confirm the delete.
Combining Different Filters
The filters uses boolean logic when combining filters from several columns.
Example

The example reads as Farsight Score (> 90 ) AND Grade (F) AND Last Seen (2023-01-01 onward ) AND with the Status (PRESENT).
Multiple selections in the same column can be done which then uses an OR function.
Example

If several choices has been made in the same selection the function is an OR. For example Farsight Score (50-60) AND Grade (A OR B OR C).
Filter Types
There are different types values in the filter such as Integer, String, Option, and Date.
| Type | Description |
|---|---|
| String | Standard text such as names. |
| Integer | Number indicating amounts. Supports greater than (>x) or less than (<x) or range (x-y) |
| Option | A list of option where one or more can be selected. |
| Date | Date ranges such as
|
Related Articles
Copyright
© 2024 Outpost24® All rights reserved. This document may only be redistributed unedited and unaltered. This document may be cited and referenced only if clearly crediting Outpost24® and this document as the source. Any other reproduction and redistribution in print or electronically is strictly prohibited without explicit permission.
Trademark
Outpost24® and OUTSCAN™ are trademarks of Outpost24® and its affiliated companies. All other brand names, product names or trademarks belong to their respective owners.