CORE IAM
Purpose
This document describes the Identity and Access Management (IAM) in the CORE.
Introduction
IAM is a service that control access to resources. IAM is used to control who is authenticated (signed in) and authorized (has permissions) to use resources.
Role-Based Access Control
IAM uses Role-Based Access Control (RBAC) to restrict access depending on a user's role within the system. The roles in RBAC refer to the levels of access that users have to resources on the network. RBAC is a method of regulating access to system resources based on the roles of individual users within the organization. Access is granted on a need-to-know basis.
Configure IAM
To navigate to this section,
- Log in to CORE.
- Click the IAM icon in the left hand side menu.
This displays the Identity Access Management page which is divided in three tabs, Users, Roles, and Resource Groups.
Users
The Users view presents a high level overview of the users along with their Tags, Roles, and Resource Groups they have access to.
To add users, refer to Create Users in Vulnerability Management.
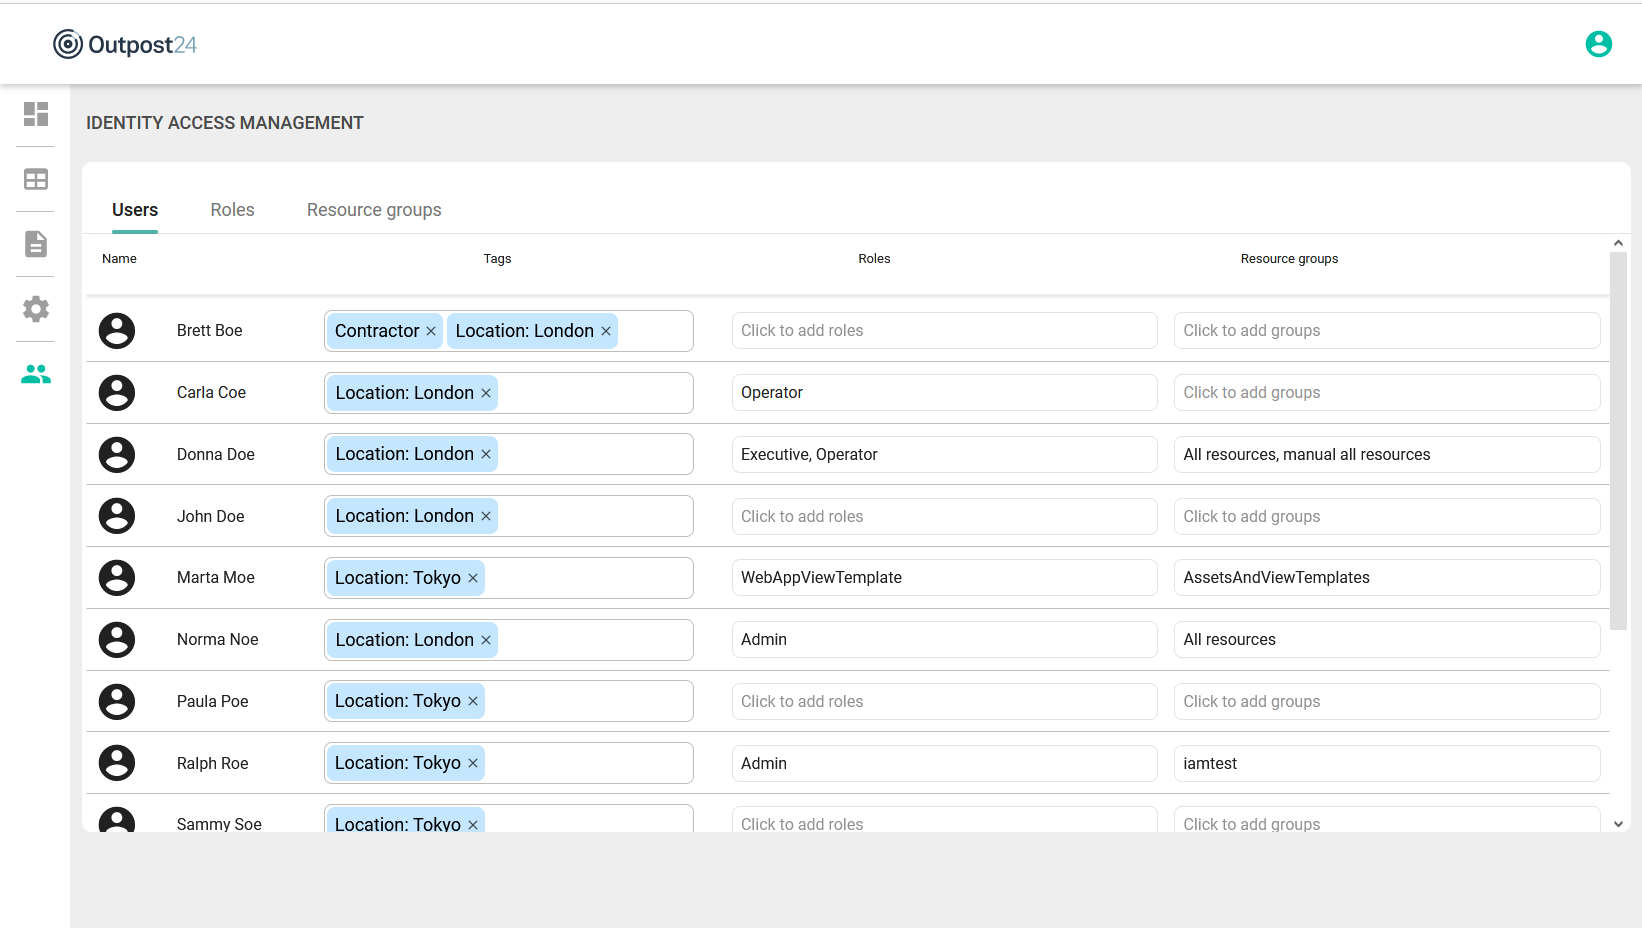
The available details are:
| Option | Description |
|---|---|
| Name | Displays the name of the user. |
| Tags | Displays the tags added to that user. Tags in IAM are used for grouping, and does not affect user's access rights. |
| Roles | Displays the roles assigned to that user. |
| Resource groups | Displays the resource groups assigned to that user. |
Assign Tags to a User
To add a tag to a user:
- Click Click to add tags field.
- Select a tag from the list.

Assign Roles to a User
To assign roles to a user:
- Click Click to add roles field.

- Select roles by checking the boxes.
- Click Assign to save the user configuration
Assign Resource Groups to a User
To assign Resource Groups to a user:
- Click Click to add groups field.

- Select groups by checking the boxes.
- Click Assign to save the user configuration.
Roles
A user role is a role by which the user is able to operate the resources they have been granted access to. Roles consist of one or more permission, for example, the Analyst role would have Findings permission set to View. For multiple roles, the user is given the highest level of capabilities granted to any role to which they are assigned. For example, if a user is assigned to the role Admin which has the most capabilities, and also to a role Operator with a different set of capabilities, the user will have the capabilities of both roles. A user with no roles would not have any access at all.
The Roles function in the CORE IAM does not correspond to roles in Vulnerability View (Netsec).
This view presents the detailed information about the permissions to access different modules for the available roles.
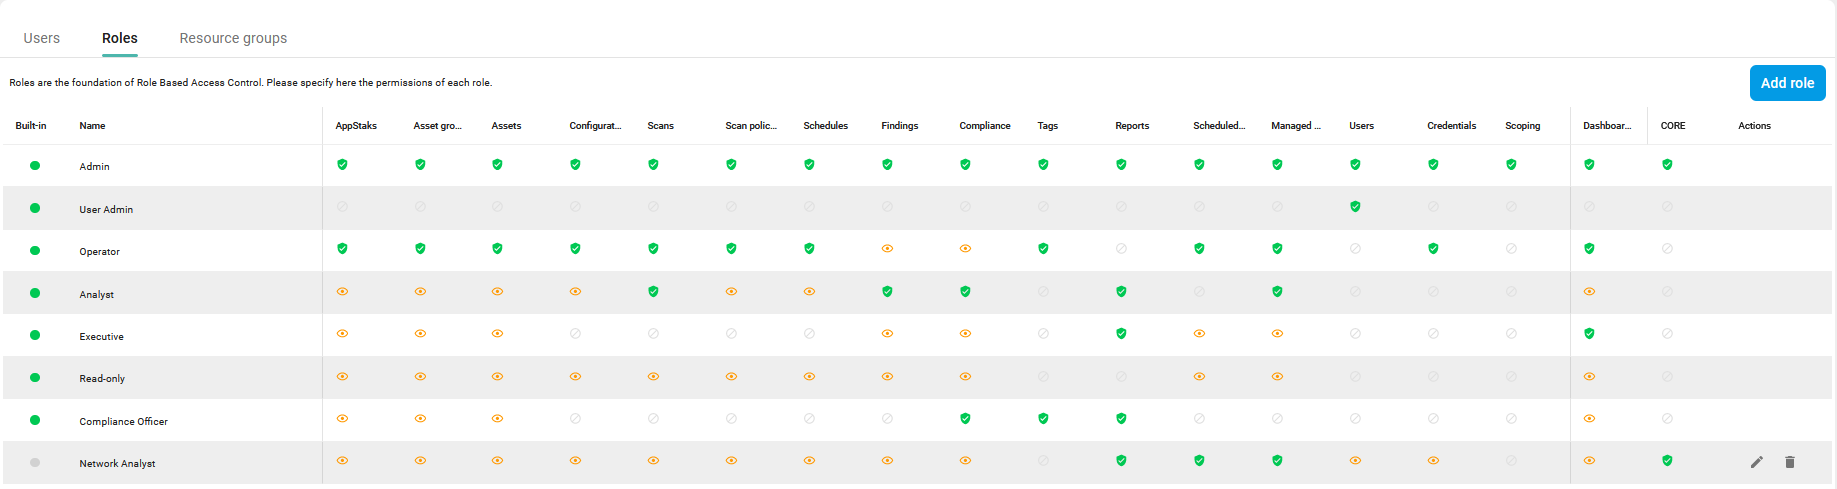
Available Resources
| Available resources | Actions to perform |
|---|---|
| AppStaksTM | Deny, View, View and manage |
| Asset groups | Deny, View, View and manage |
| Assets | Deny, View, View and manage |
Configurations | Deny, View, View and manage |
| Schedules | Deny, View, View and manage |
| Scans | Deny, View, View and manage |
| Scan policies | Deny, View, View and manage |
| Findings | Deny, View, View and manage if View and manage, select the additional actions the users will be able to perform by checking boxes:
|
| Managed reports | Deny, View, View and manage |
| Users | Deny, View, View and manage |
| Credentials | Deny, View, View and manage |
| Scoping | Deny, Submit |
| Dashboard | Deny, View, View and manage |
| CORE | Deny, View |
Add Roles
Users can compose their own roles but there are also a few default roles such as Admin, User Admin, Operator, Analyst Executive, Read-only, and Compliance Officer to choose from.
To add Roles:
- Select the Roles tab.
- Click on the Add Role button in the upper right corner.
- In the Add Role view, name the new role and select the appropriate access rights to the role and press add.

- The new role is now created and can be tied to a user.
Edit an Existing Role
To edit a role:
- Click on the Edit icon on the right hand side of the row of the role you want to edit.
- Make the necessary changes and click Update to save the changes made.

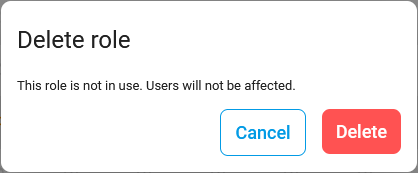
Delete a Role
To remove a role:
- Click on the Bin icon on the right hand side of the row of the role you want to remove.
- Click Delete to confirm removal of that role.
Resource Groups
A Resource Group is a group containing all the relevant tags for an entity and it defines the resources the user can access. The access to the resources (like assets or configurations) is based on a tag system. Tags can be set on resources and form a Resource group. The resource groups assigned to a user determines the users access to the resources with that tag. All resources that can be restricted have settable tags, and each tag can be assigned to one or multiple resource groups. A resource group can be assigned to multiple users, and one user can be assigned to one or more resource groups. A combination of multiple tags is treated as an OR combination, for example if a user has tags location:sydney and cloud:aws, the user will see all assets where any of these two tags is set.
The access to the resources like assets or configurations is based on tags which can form a logical container called a resource group. The resource groups assigned to the user determine the resources the user can access.
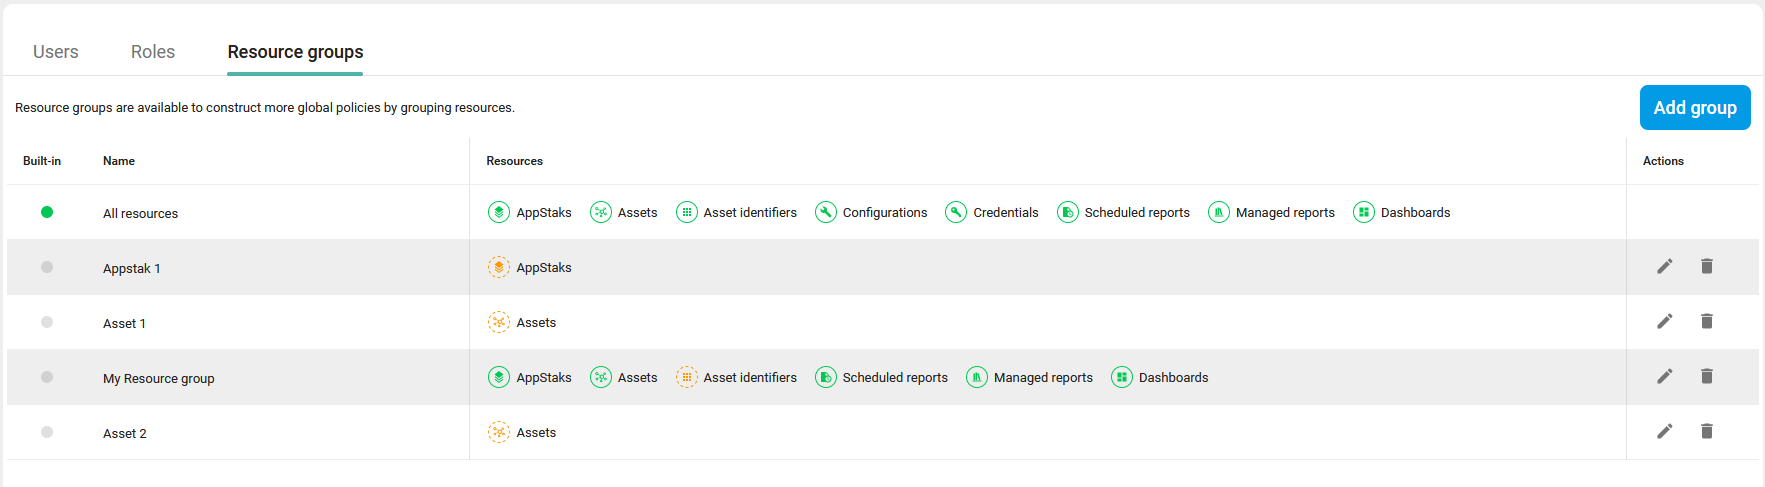
All resources is the built-in resource group that gives access to everything. Edit and Delete actions are not allowed on the built-in resource groups.
The Resource Groups function in the CORE IAM does not correspond to groups in Vulnerability View (Netsec).
Add Resource Groups
To add a resource group:
- Select the Resource Group tab.
- Click on the Add Group button in the upper right corner to open Add resource group view.

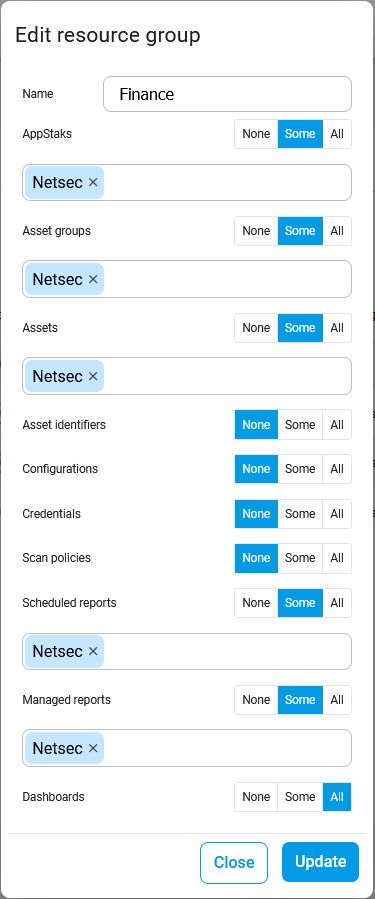
- In the Name field, provide a name for the new group.
Set the appropriate access levels and tags to the group.
For more information about tags, see CORE Tags document.Option Description None Denies access to the respective item. Some Allows the user to access that item based on the tags added.
All Allows the user to access that item based on any tag. - Click the Add button to finish the new group.
The newly added resource group is shown in the Resource Groups tab.
Resource groups added by the user can be customized or deleted.
Edit an Existing Resource Group
To edit a resource group:
- Click on the Edit icon on the right hand side of the row of the resource group you want to edit.
- Make the necessary changes and click Update to save the changes made.
Delete a Resource Group
To remove a resource group:
- Click on the Bin icon on the right hand side of the row of the resource group you want to remove.
- Click Delete to confirm removal of that group.

Related Article
Copyright
© 2024 Outpost24® All rights reserved. This document may only be redistributed unedited and unaltered. This document may be cited and referenced only if clearly crediting Outpost24® and this document as the source. Any other reproduction and redistribution in print or electronically is strictly prohibited without explicit permission.
Trademark
Outpost24® and OUTSCAN™ are trademarks of Outpost24® and its affiliated companies. All other brand names, product names or trademarks belong to their respective owners.