Chapter 14: Remote Sensor Management (Advanced)
Remote Sensor Management (Advanced)
Pulse enables on-demand access from a sensor to a designated receiver system through a reverse SSH connection. Use the technique described in this chapter to remotely establish a command-line session directly with a sensor. Through the remote SSH session, you can run diagnostics, commercial vulnerability scanners, penetration testing tools, or to use the sensor as a "pivot point" into a local network.
Unlike an SSH connection that connects to the target system (sensor) directly, the target system in a reverse SSH session initiates an outbound shell from within its network to a mutually accessible server (the receiver system) on the Internet. Once connected, the sensor opens a local port on the receiving system, which in turn establishes a tunnel back to the sensor.
Through this tunnel (the reverse SSH session), you can SSH onto the receiver and then into the sensor directly without bypassing the network firewall for the sensor’s environment. You can interact with the sensor directly, run the installed penetration testing tools, or use the connection as a tunnel to pivot into the target network.
Important
The SSH receiver system must be running Kali Linux.
Configuring a Reverse SSH Shell
Basic Reverse SSH Connection
To initiate a basic reverse SSH connection:
- On the Sensors tab of the Pulse web application, select the sensor you want to access.
- On the sensor profile page, open the Services tab.
- Select one of the following reverse shell methods for connecting to the egress port for the sensor’s outbound connection.
- Basic Reverse Shell service. using TCP port 22 to connect the sensor to the SSH Receiver system. Port 3333 is the listening port.
- DNS Reverse Shell service, using UDP port 53 to connect the sensor to the SSH Receiver system. Port 3335 is the listening port.
- SSL Reverse Shell service, using TCP port 443 to connect the sensor to the SSH Receiver system. Port 3336 is the listening port.
- In the Service Settings IP field, type the IP address or Fully Qualified Domain Name (FQDN) to use as the SSH receiver system.
- Click Save.
- On the Services tab, click Start to start the service, leaving the sensor profile page open.
With the service started, the sensor immediately tries to establish the reverse SSH connection to the specified IP address.
Connecting to the Reverse SSH Session
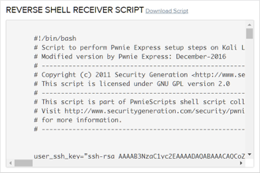
Before the designated SSH Receiver system can receive the incoming connection from the sensor, you must download and run the SSH Receiver script onto a system running Kali Linux that is accessible to the Internet.
Connect to the Reverse SSH Session
To connect to the reverse SSH session:
- On the sensor profile page, open the Settings tab.
- Copy or download the script onto the Kali Linux system designated as the SSH receiver in the preceding procedure.
- On the intended Kali Linux system, open a terminal and navigate to the directory where the SSH receiver script is located.
Make the script executable by running the following command:
# chmod +x ssh_receiver.ssh
Execute the script by running:
# ./ssh_receiver.sh
- At the prompts, press Enter to accept the defaults until the listening connections appear.
After 2-3 minutes, either port 3333, 3335, or 3336 depending on the shell service you enabled, will appear to be listening, which indicates the sensor has successfully established its connection to the SSH Receiver system. - Next, use SSH to connect to the listening Receiver Port displayed to complete the reverse shell. For example, type
ssh pwnie@localhost -p 3333and press Enter assuming port 3333 is the listening Receiver port displayed. - When the login banner is displayed, login to the sensor, then become superuser by typing
sudo suand press Enter to continue.
Note
If port 3333 (or 3335 or 3336 depending on what methods are enabled) does not appear as listening this means the sensor was unable to establish the connection using the method enabled to the SSH Receiver system through that port. In other words, if the Standard Reverse Shell is enabled, which uses port 22 to communicate to the Receiver System, if port 3333 is not being reflected as listening after having run the receiver script, it means the sensor is unable to make a connection to the SSH Receiver using port 22. More than likely this means a firewall is blocking the outgoing connection attempt from the sensor to the Receiver or a firewall is blocking the incoming connection attempt to port 22 to the Receiver system from the sensor (See Troubleshooting SSH later in this chapter).
Accessing the Sensor
To access the sensor
SSH onto the local host as follows:
# ssh pwnie@localhost –p 3333
If necessary, replace 3333 with 3335 or 3336, depending on which method is enabled.Hint
If all three methods are successfully enabled, the preference is to use port 3333 to establish the reverse connection.
- At the prompt, enter the appropriate password for the pwnie user account on the sensor.
A shell on the remote sensor appears. After you log into the sensor through the reverse SSH connection, you can run any of the applications and tools available on the sensor.
Troubleshooting SSH
An issue causing an SSH connection to fail might be one of the following:
- The firewall protecting the network in which the sensor is located might be blocking or prohibiting the sensor from establishing the outbound SSH connection to the receiver system.
- The firewall protecting the local network in which the SSH receiver system is located might be blocking or prohibiting the SSH receiver from receiving the incoming connection from the sensor.
Copyright
© 2025 Outpost24® All rights reserved. This document may only be redistributed unedited and unaltered. This document may be cited and referenced only if clearly crediting Outpost24® and this document as the source. Any other reproduction and redistribution in print or electronically is strictly prohibited without explicit permission.
Trademark
Outpost24® and OUTSCAN™ are trademarks of Outpost24® and its affiliated companies. All other brand names, product names or trademarks belong to their respective owners.